rummels
Forum Replies Created
-
AuthorPosts
-
09/05/2021 at 4:16 pm #57060
Thanks to all for the very good advice and info!
rummels
09/05/2021 at 9:52 am #57059Jeffrey
Because there are so many variables (the type of stone, the stone’s grit, the pressure you apply to the stone when sharpening, the hardness of the steel, how much the edge needs to be reprofiled, etc), you have to use a “results driven” process like those described above. You have to be guided by the changes you are making to the edge and not the number of strokes. This concept applies to all aspects of sharpening, whether you are reprofiling an edge, resetting a previous edge, deburring, stropping, etc.
I usually start with a 400 grit diamond stone, but if I am not happy with the speed with which the stone is effecting the edge, I will drop to a coarser grit. So start on one side and sharpen that side with your 100 grit stones until you have definitely created a burr on the other side of the apex. If you start on the right side of the edge, the burr will be felt on the left side. Then sharpen the left side and continue until a burr can now be felt on the right side of the edge.
If your goal is a 600 grit edge, follow the same process with the 200, 400 and 600 grit stones. After using the 600 grit stones, it’s will be time to remove the second burr you created with the 600 grit stones. Search this and other forums for methods of how to deburr a coarse, toothy edge. There are a number of approaches that will yield good results. Find the one that works best for you.
rummels
-
This reply was modified 3 years, 4 months ago by
rummels.
1 user thanked author for this post.
05/08/2021 at 8:50 am #567101 – This is a good description of the 90-90-90 Rule. If you Google it, you will find discussions of the rule on multiple forums.
https://www.youtube.com/watch?v=aMTVagksvBE
2 – My apologies. I was basing some of my answers on Kraichuk’s book ” Knife Deburring – Science Behind the Lasting Razor Edge By Vadim Kraichuk”. In it he gives several example of how to sharpen various knife steels using Tormek sharpening equipment. With softer steels he often uses a paper wheel with Autosol, a 0.3 micron grit, on the wheel. For example:
3 – I guess it does. But deburring softer steels often requires using a more obtuse angle.
4 – It is, but that last step is intended to only further clean the apex of any damaged/stressed/weakened steel. My experience is that this last step makes a noticeable difference in the sharpness of the edge.
5 – There are definitely many ways to deal with burrs, and I can’t say that one is better than the other. I like Kraichuk’s approach because it has made a huge improvement in my sharpening, and because I don’t have to include stropping in my sharpening progression.
Note that Kraichuk has explained his research and his approach to sharpening on both the Bladeforum (aka wootzblade) and the Australian Blade forum (aka wootz).
Attachments:
You must be logged in to access attached files.
05/06/2021 at 3:01 pm #56701I have read Mr. Kraichuk’s book, and have found it to be very helpful. His multi-step approach to burr removable works much better than anything else I have tried.
I have “adapted” his methods for burr removal to the Wicked Edge, and have been able to sharpen Henckels and Wusthof knives that will push cut the edge of a newspaper ¾ of an inch from where I am holding it using the 90-90-90 rule.
When setting the original bevel, I follow his advice with respect to the grit of the last diamond stone to use, except when he stops at 1000 and then goes to a 10 micron paper wheel. I substitute a 1500 diamond stone for the wheel. And I always skip the autosol step.
I deburr using the three-step approach he recommends using diamond lapping films. First, I do edge-trailing strokes with the 1.5 micron diamond lapping film at the original sharpening angle. Then I do edge-trailing strokes with the 1.5 micron diamond lapping film at an angle that is 1 degree more obtuse that the original sharpening angle, and finally I do edge-trailing strokes with the 0.1 micron diamond lapping film, again at the original sharpening angle.
I hope this helps.
Rummels03/20/2021 at 5:31 pm #56421MarcH’s suggestion about replacement glass platens is a good one. It is really easy to heat the damaged glass platens (I use an old electric skillet) and remove them. The glue strips and replacement platens are inexpensive and pre-cut to fix nicely into the recesses in the handles. The old glue will often pull off the handle as a single, stringy gob (if it breaks apart easily as you pull it off the handle, you probably heated it in the pan/skillet a little too long). I would suggest that a thinner putty knife makes it a little easier to get under the broken platen and pry it away from the handle. If any glue sticks to the handle and won’t pull off (you didn’t heat it long enough), put some vegetable oil from your kitchen on it and let it sit for an hour. The oil will get between the glue and the handle and it will come right off. Just remember to wash the handle thoroughly to remove any remaining oil before installing the glue strip
rummels1 user thanked author for this post.
02/22/2021 at 12:29 pm #56216Geertjan
Early today I sent you a private message regarding how I made my micro adjusters. Pls respond as with your email address and I will send you everything you will need to build the micro adjusters that I use.tcmeyer also has done some really good work in this area.
rummels1 user thanked author for this post.
12/25/2020 at 7:00 am #55524They are just a white nylon washers. They have an ID of 1/4″, an OD of .500″ and are 1/32″ thick. I imagine a 1/16″ thick washer would also work.
I also use them on the guide rods to keep them from loosening.
You should be able to buy them at any hardware store.
1 user thanked author for this post.
12/23/2020 at 7:14 pm #5551308/11/2020 at 6:50 am #54818Let us know how the LAA works out for you. I have the WE130 and I also found it necessary to add the LAA to my accessories. It has worked really well for me.
rummels08/10/2020 at 4:53 pm #54816Because you are using a LAA, you can tighten its jaws just enough to hold the knife in place. Then position the AAG as I suggested, and move the knife forward or backward in the LAA until it is where you want it. This assumes you are protecting your blade with masking tape.
rummels2 users thanked author for this post.
08/10/2020 at 7:07 am #54811John
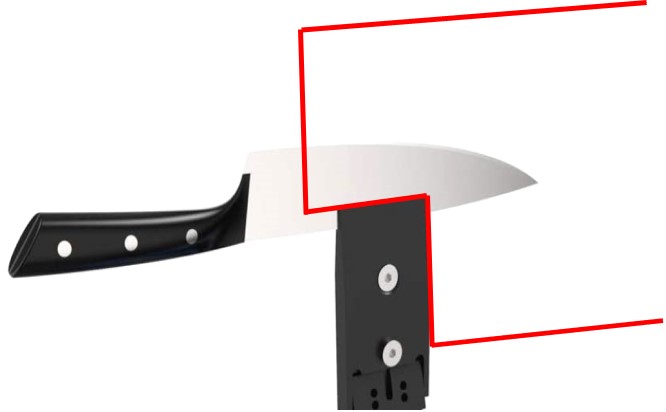
The majority of the knives I have sharpened on my WE130 required the use of the LAA. My solution to this problem was to not use the Depth Key and to align the AAG as shown in the image below. It has worked extremely well for me over the last three years.
rummels-
This reply was modified 4 years, 5 months ago by
rummels.
-
This reply was modified 4 years, 5 months ago by
rummels.
Attachments:
You must be logged in to access attached files.
08/04/2020 at 5:53 pm #54751I am not sure I understand what is being asked for in this thread. Aren’t a “hex head” and a “thumbscrew” two different things?
If this is what the question is asking about, this is what I did to be able to tighten the L-Brackets on the degree bar.
I replaced the thumbscrews on the L-brackets with plastic 9/16” knurled knobs from MSC Industrial Supply (part # 06172308) that come with female metal inserts that are threaded to #10/32, the same threading as the L-brackets. Next I had the heads removed from one inch #10/32 socket-head cap screws, and had points machined onto the ends of the cap screws at 45 degrees to match the points on the original thumbscrews. Finally I screwed the cap screws into the plastic knobs with a little epoxy to make sure they stayed put.
These thumbscrews never loosen up on me.
-
This reply was modified 4 years, 5 months ago by
rummels.
-
This reply was modified 4 years, 5 months ago by
rummels.
-
This reply was modified 4 years, 5 months ago by
rummels.
-
This reply was modified 4 years, 5 months ago by
rummels.
Attachments:
You must be logged in to access attached files.
1 user thanked author for this post.
07/09/2020 at 7:06 am #54513Modernflame
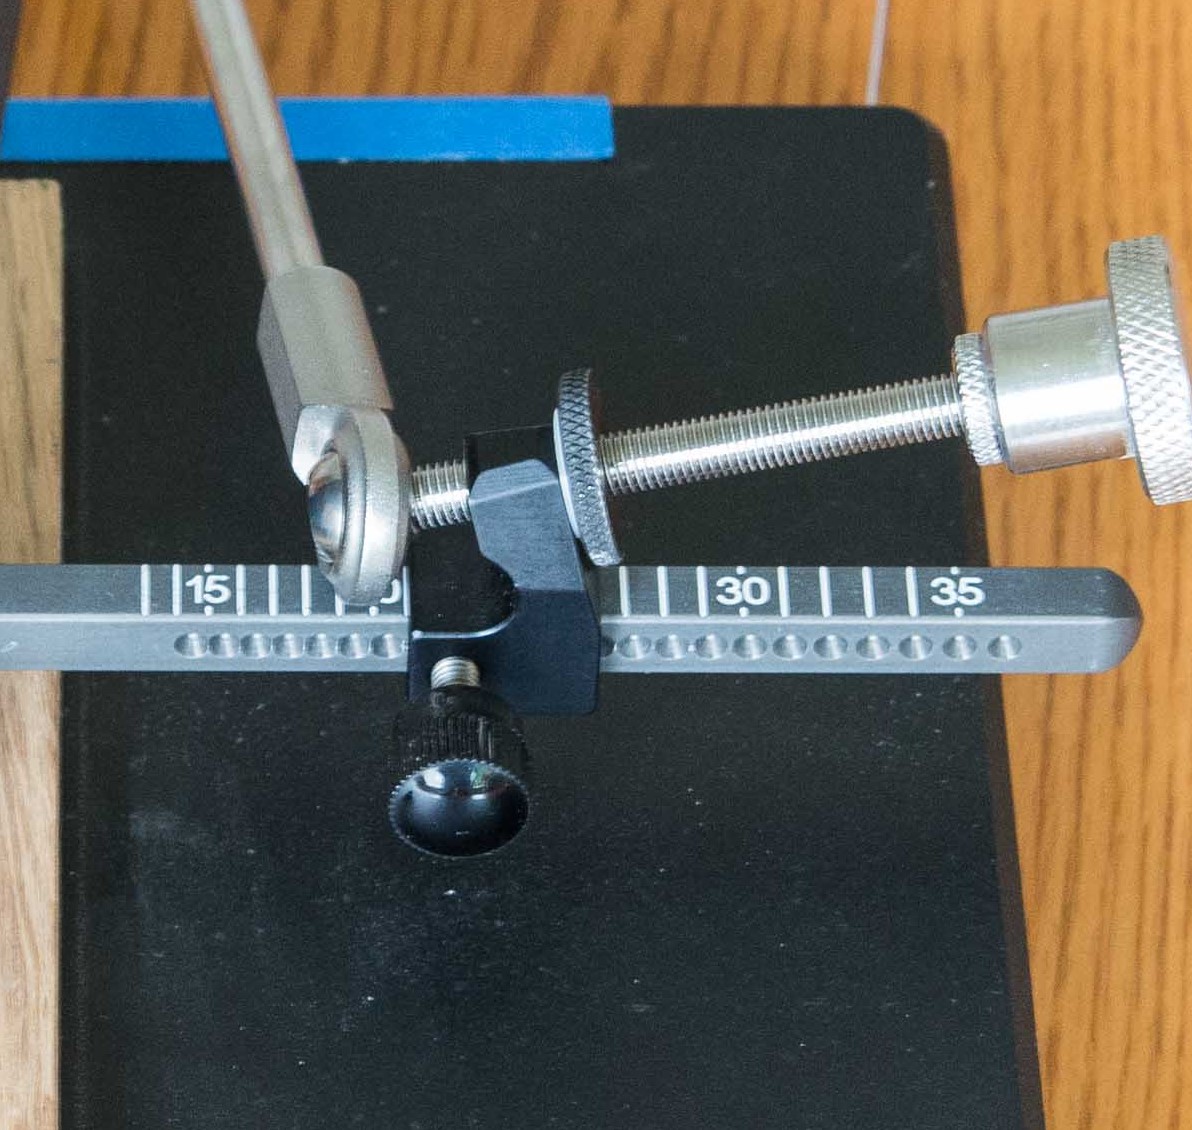
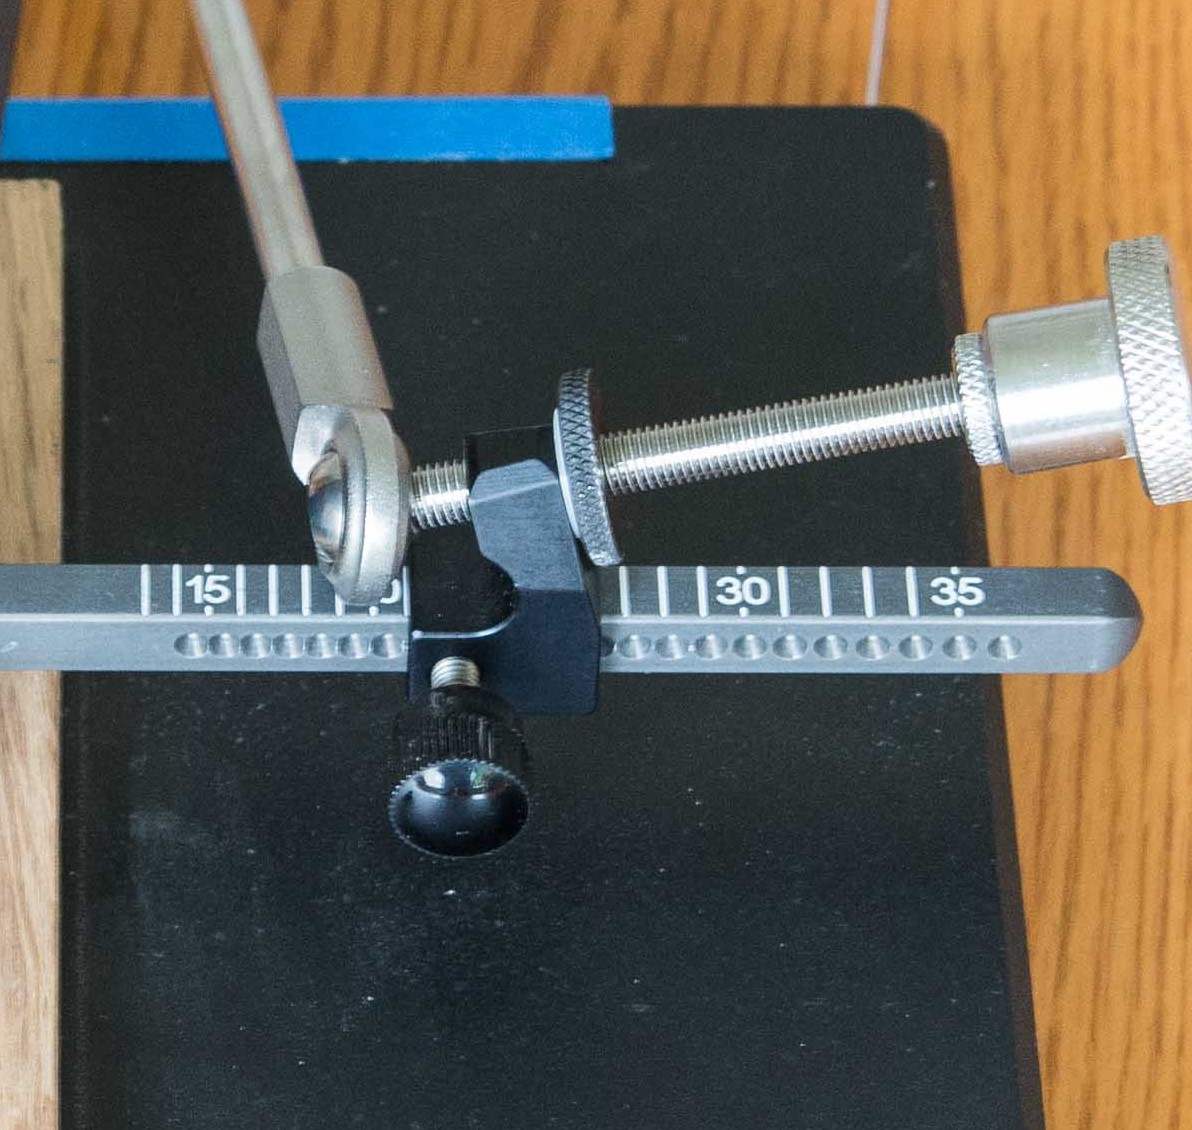
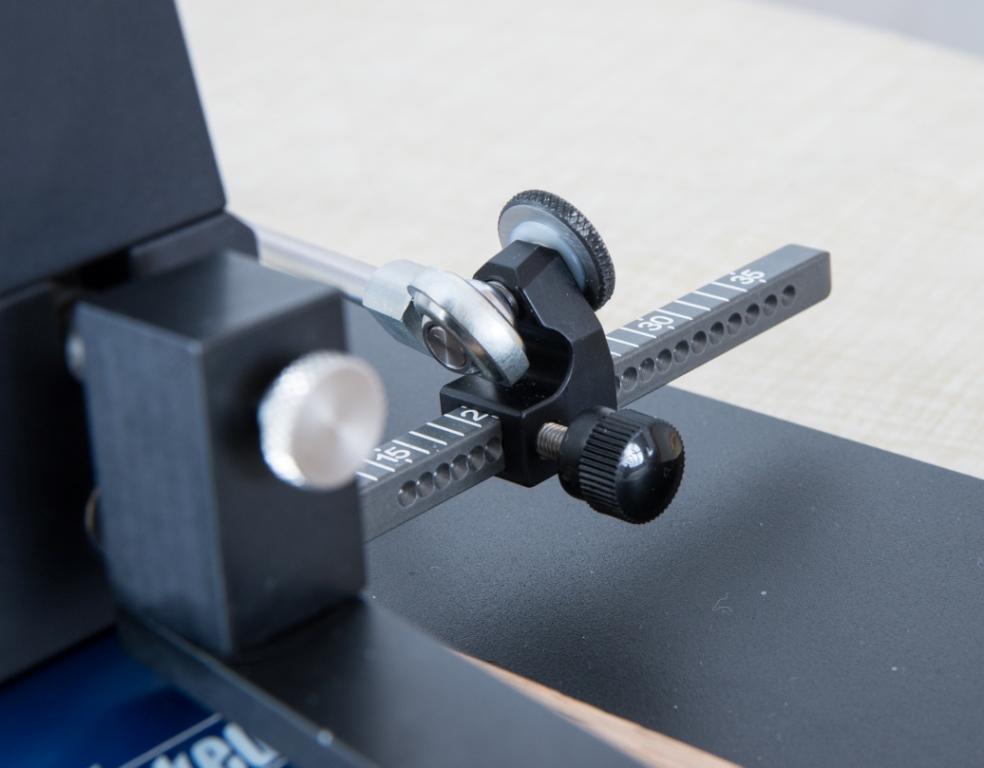
If your micro adjusters are moving, you may want to try the solution that I implemented. I put white nylon washers between the lock nuts on the micro adjusters and the L-brackets. I did this about a year ago, and my micro adjuster lock nuts NEVER loosen up on me. The nylon washer is slightly compressed when you tighten the lock nut, so it pushes back against the lock nut and causes increased friction between the lock nut and the threads on the micro adjuster. This approach doesn’t usually work well with assemblies with a lot of vibration, but it works very well with the micro adjusters.Note also the larger locking nuts that I use. They make it much easier to tighten the micro adjusters to a point where they are less likely to loosen.
rummels-
This reply was modified 4 years, 6 months ago by
rummels.
-
This reply was modified 4 years, 6 months ago by
rummels.
Attachments:
You must be logged in to access attached files.
1 user thanked author for this post.
06/11/2020 at 5:54 am #54369000Robert
It has. I was particularly helpful as I was trying various approaches to burr/wire-edge removal. It allowed me to see what the impact of each approach was on the edge and the scratch pattern.
rummels
-
This reply was modified 4 years, 7 months ago by
rummels.
06/10/2020 at 7:21 pm #54364The Celestron MicroDirect 1080p HD arrived on Monday and since then I’ve used it while sharpening several knives.
The microscope is 6″ long, which is probably larger than most of the microscopes that have been discussed on this forum in the past. And it has two cables that connect the end of the microscope to the display (one is a USB connection and the other is an HDMI connection) instead of the single cable many other microscopes require. But the microscope is very light, and I found it very easy to use.
When using the microscope, I simply placed the end of the microscope on the blade of the knife I was sharpening. I’d attached a couple of short pieces of plastic rod to the sides of the microscope and positioned these pieces of rod so that, when they were placed against the edge of the knife’s blade, the microscope is immediately lined up with the with the apex of the knife. And I found that, once I focused the microscope, I could use the microscope with the rest of the knives I was sharpening with little or no adjustment to the focus.
Note that, when the end of the microscope is placed against the side of the blade, there are depth of field limitations because the microscope’s lens is so close to the knife’s blade. Consequently, when used in this way the microscope will only focus at 50x and 200x magnification. But that definitely wasn’t a problem given how well the microscope worked at 200x magnification.
The microscope also has a slot for a MicroSD card. This allows you to press a button on the side of the microscope and photograph the image that the microscope is showing on the display. To transfer a picture to your PC, you take you simply have to plug the UBS cable into the PC.
Below is one of the images that I took while sharpening on of my knives
rummels
-
This reply was modified 4 years, 7 months ago by
rummels.
-
This reply was modified 4 years, 7 months ago by
rummels.
-
This reply was modified 4 years, 7 months ago by
rummels.
Attachments:
You must be logged in to access attached files.
2 users thanked author for this post.
-
This reply was modified 3 years, 4 months ago by
-
AuthorPosts


