micro bevel to eliminate tear-out -Spyderco Paramilitary CPM-S110V
Recent › Forums › Main Forum › Techniques and Sharpening Strategies › Basic Techniques and Sharpening Strategies › micro bevel to eliminate tear-out -Spyderco Paramilitary CPM-S110V
- This topic has 38 replies, 7 voices, and was last updated 12/06/2022 at 11:08 am by
Lawdog.
-
AuthorPosts
-
12/05/2021 at 3:13 pm #57263
Hello all and thanks for bearing with me through this probable pic-intensive thread.
I’m both sharing a newbie to the WE experience, AND looking for guidance on preventing tear-out of the edge.
I’ve been sharpening knives and woodworking tools for a LONG time on whetstones and a Tormek, so I’m not new to the game, just new to this tool.
I bit the bullet and bought a WE Gen 3 pro. It arrived last week and I broke in all diamonds, mostly, on some beater knives, probably did about a dozen sharpening sessions on cheap, soft steel, but had to reprofile many… just because – and to break in the diamonds. All strokes have been low to very low pressure. Mostly.. I admit I hogged out at medium + pressure with the 100’s because I had a LOT of cheap/soft steel to remove from a “survival” knife. But I digress informing you of the stone break-in process. They’re probably not fully broken in, but very noticeably smother then initially.
So I was itching to move to a “good” knife but am still hesitant to use the set-up on my higher-end kitchen knives so decided to sharpen the Spyderco Paramilitary with CPM-S110V steel.
15 DPS seems the Spyderco standard, and indeed my sample was rather close but not exact. Good start. This knife is fully tapered from spine to edge so clamping it was … a bit of trial and error, but I got it really close to dead centered.
Used the low angle adapter to reach the 15 degrees per side and micro adjusted each arm to 15deg. I Used an angle cube to dial in 15.00 deg. +- .05. I used a sharpie to validate that indeed the 15 dps was “spot on and it was really close so I ran with it. Although I started with 1000, it was WAY to slow to get me going so I decided to back off grit by grit but wound up down at 100 grit diamonds to “re-profile”. Then 200, 400, 600, 800, 1000, 1500, 2200, 3000. Each grit I used a combo of leading and trailing edge strokes, but mostly tried to do edge-leading as I was noticing tear-out on the USB scope.
After the Diamonds I proceeded to to 1200 / 1600 grit ceramics, then the 6, 3, 1 an finally .5 micron Diamond lapping films. Finally I backed off the angle 2 deg. and stropped diamond paste on leather 4,2,1, and .5 micron. The whole arsenal was used!
I started noticing tear-out on the edge from the very beginning, and neither edge-leading nor edge trailing strokes made any improvements.
So – After pondering, I decide to put a 2 deg micro-bevel on the edge using ONLY the ceramics. Eventually, I got to a quite nice, although still not-perfect edge.
One question is: Are Diamonds known to tear-out CPM-S100V? Was my technique wrong? Can anyone offer guidance to eliminate tear-out using only diamonds?
Here are SOME photos of the progress.
Sorry – but I’m new to the forum from my laptop and I think photo insertion is something I need to get better at
Final “happy” blade
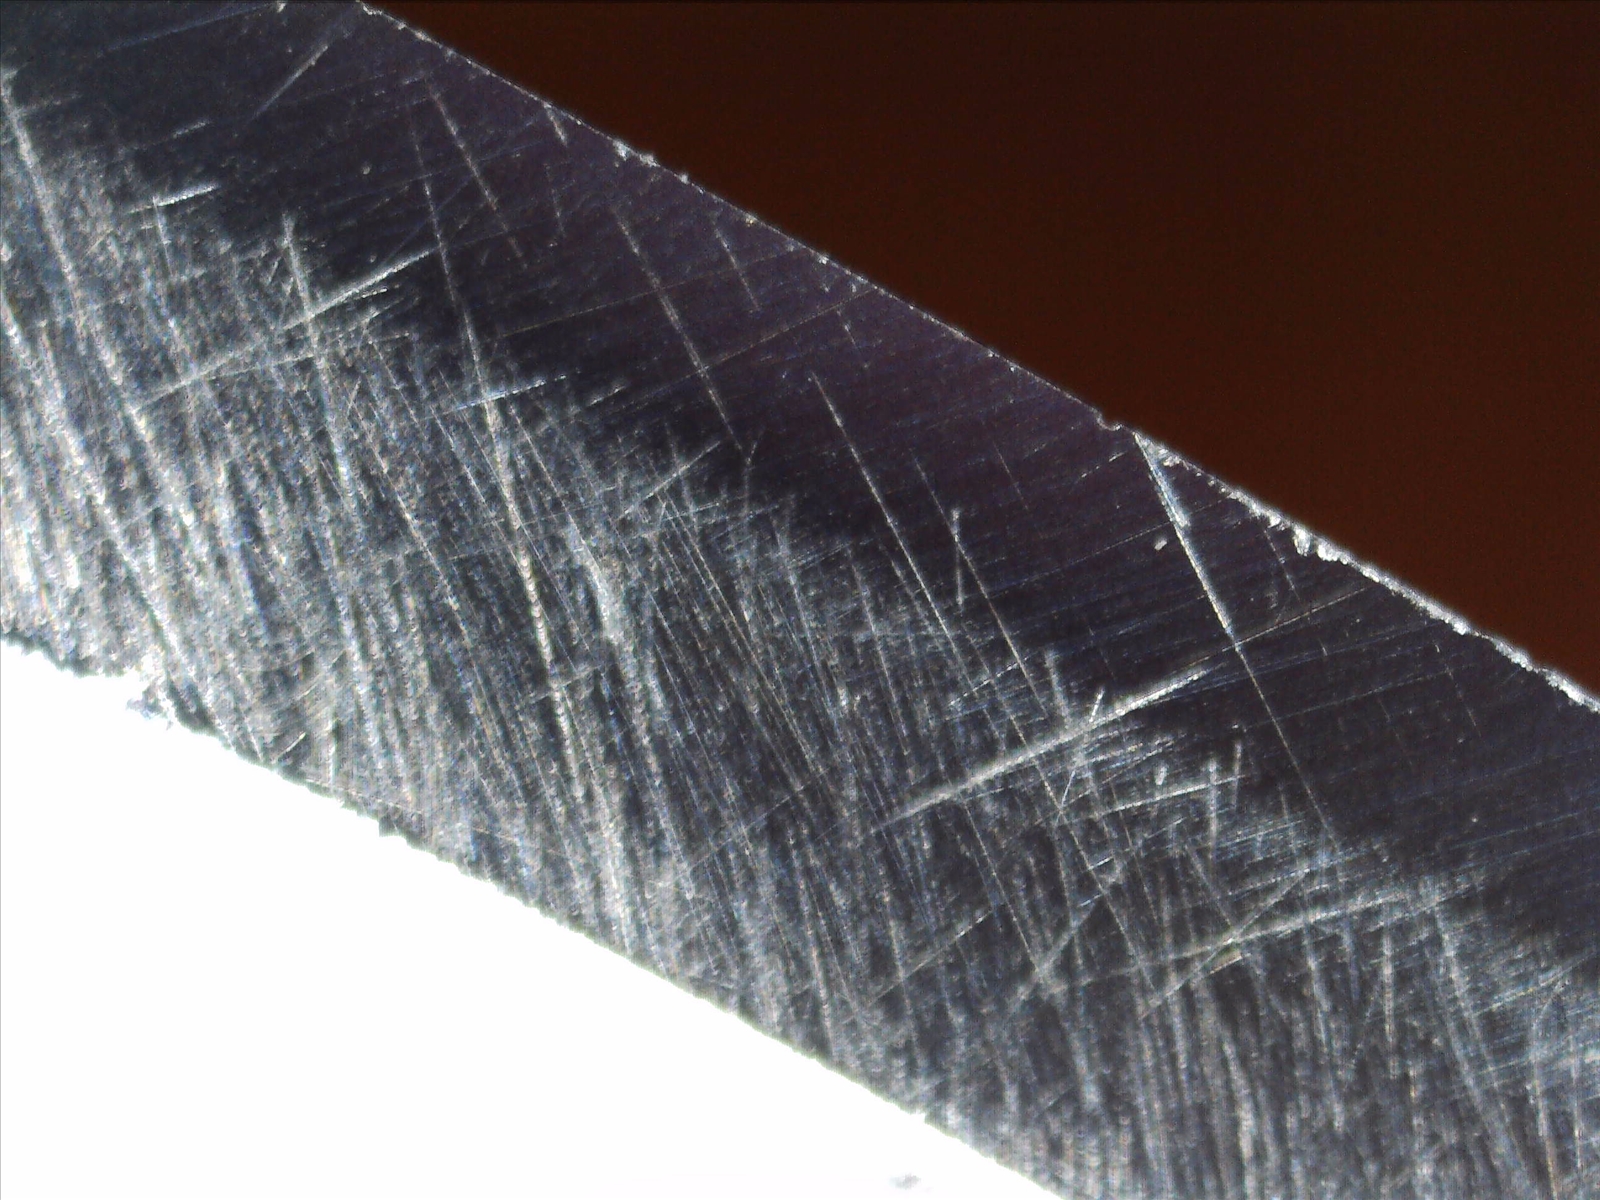
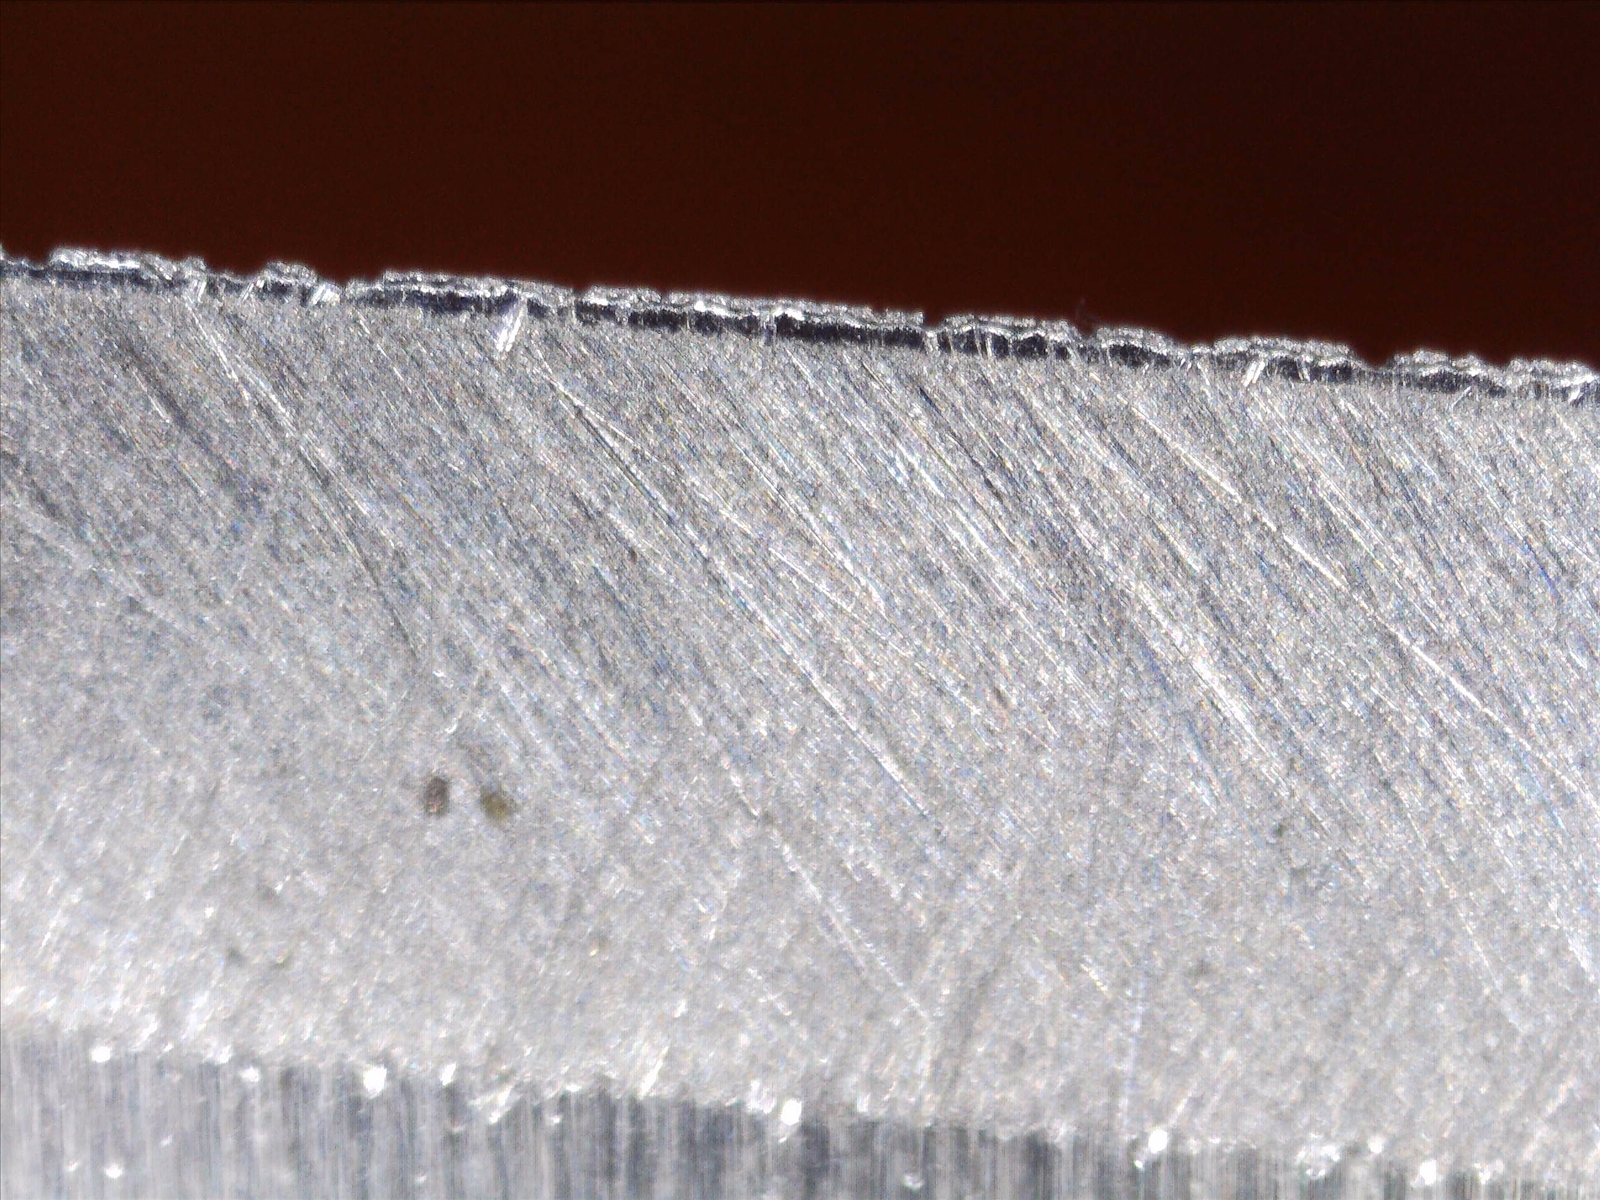
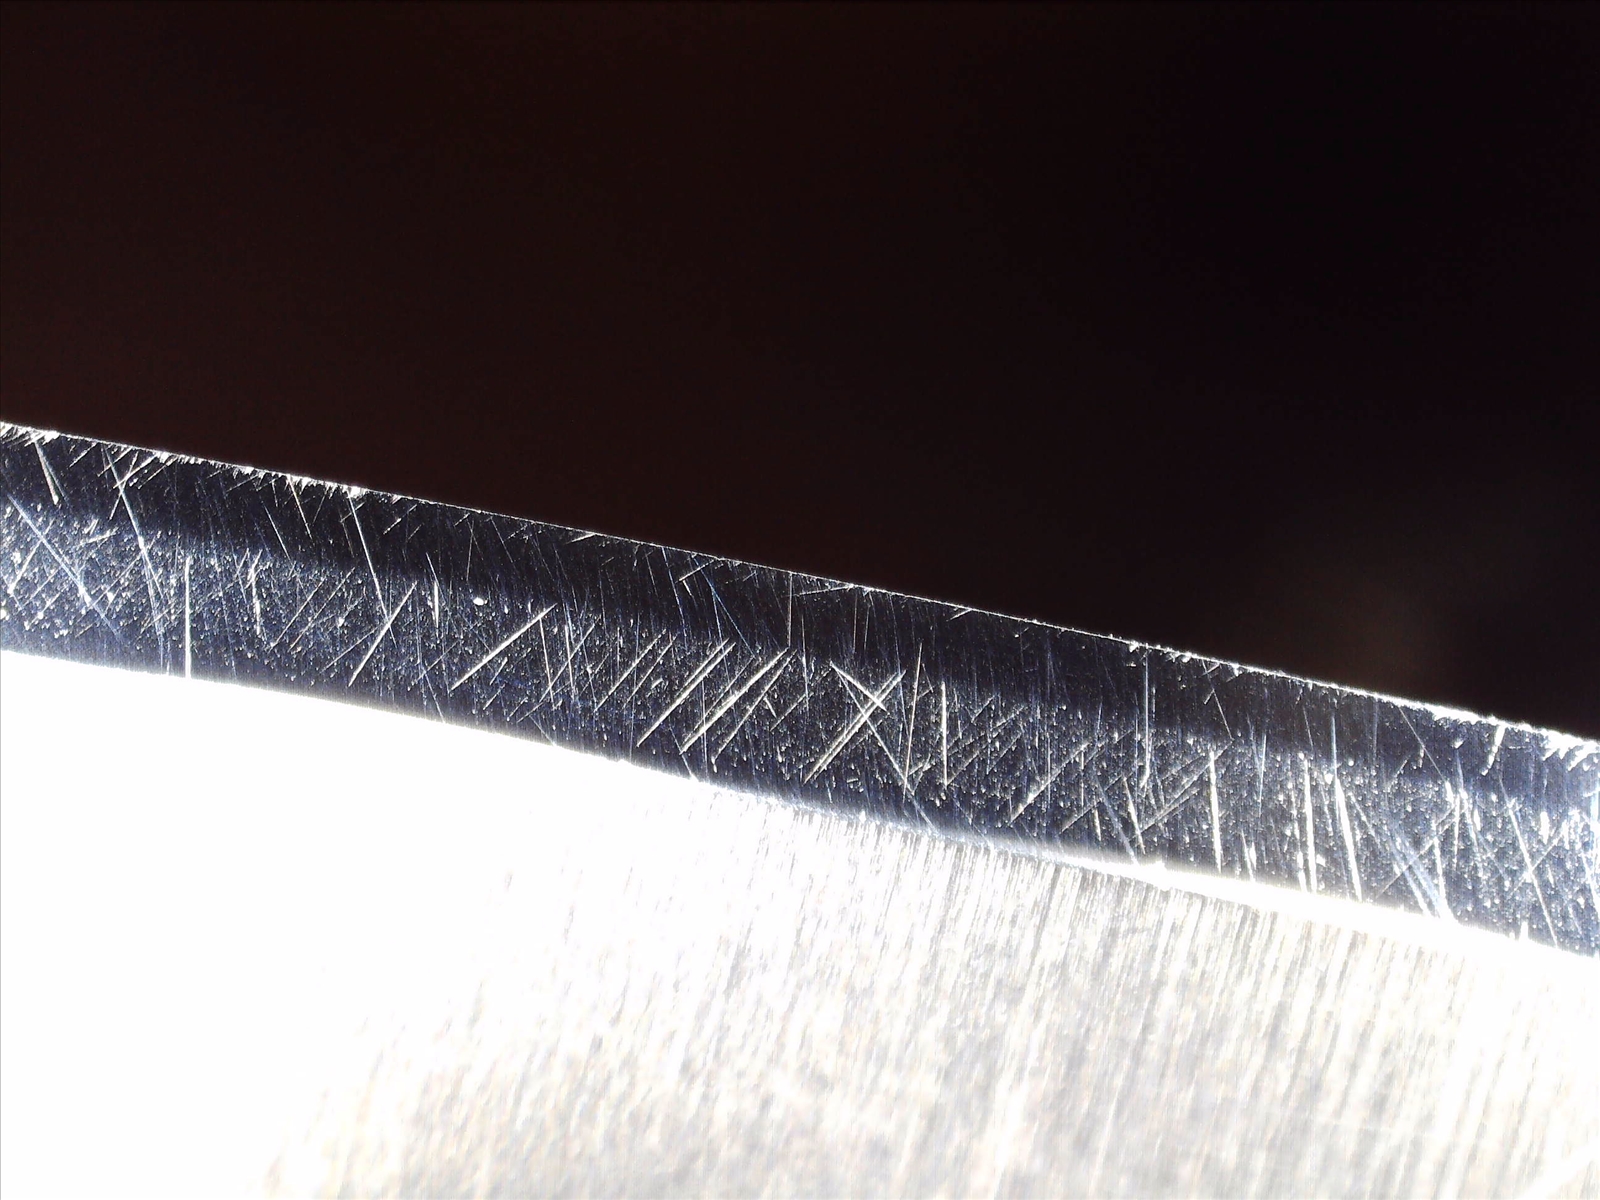
Early hot showing some tear-out at 100 grit.
mid shot (1000 grit) showing tear-out still there

3000 grit – Yup – not a clean edge STILL – Note – VERY light passes on the stone…
I’ll add more files in a second post once I see how these few format.
Attachments:
You must be logged in to access attached files.
12/05/2021 at 3:37 pm #57269So the formatting looked good. Photos came in where and how I expected, so here are a number of sequential photos.
The set-up ( after the final passes of micro beveling and a “happy knife” on a messy kitchen counter.
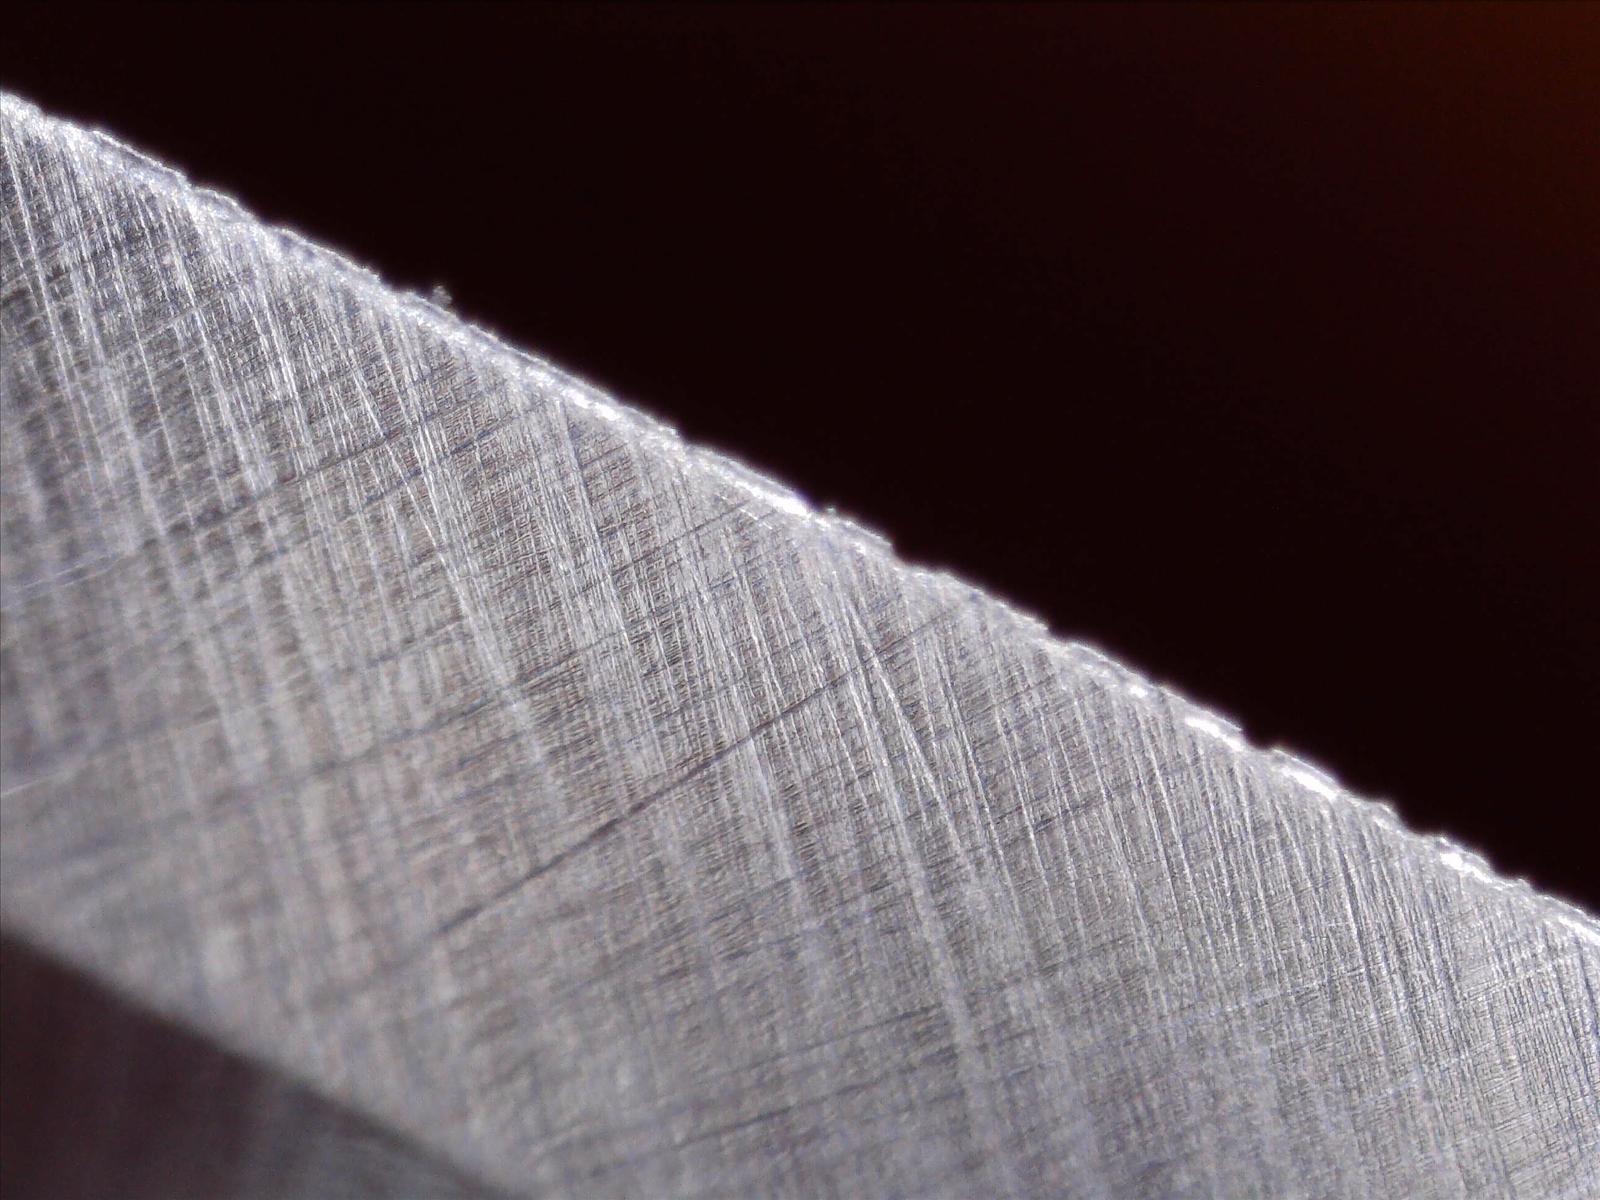
100 grit – starting point

200 grit – not any better tear

Skipping 400 and 600 progression photos – 800 grit is showing nicer scratch patterns, but there is still edge tear-out!!!!
About at 400, I think, I “zoomed” in the USB scope to it’s “second” magnification power ..
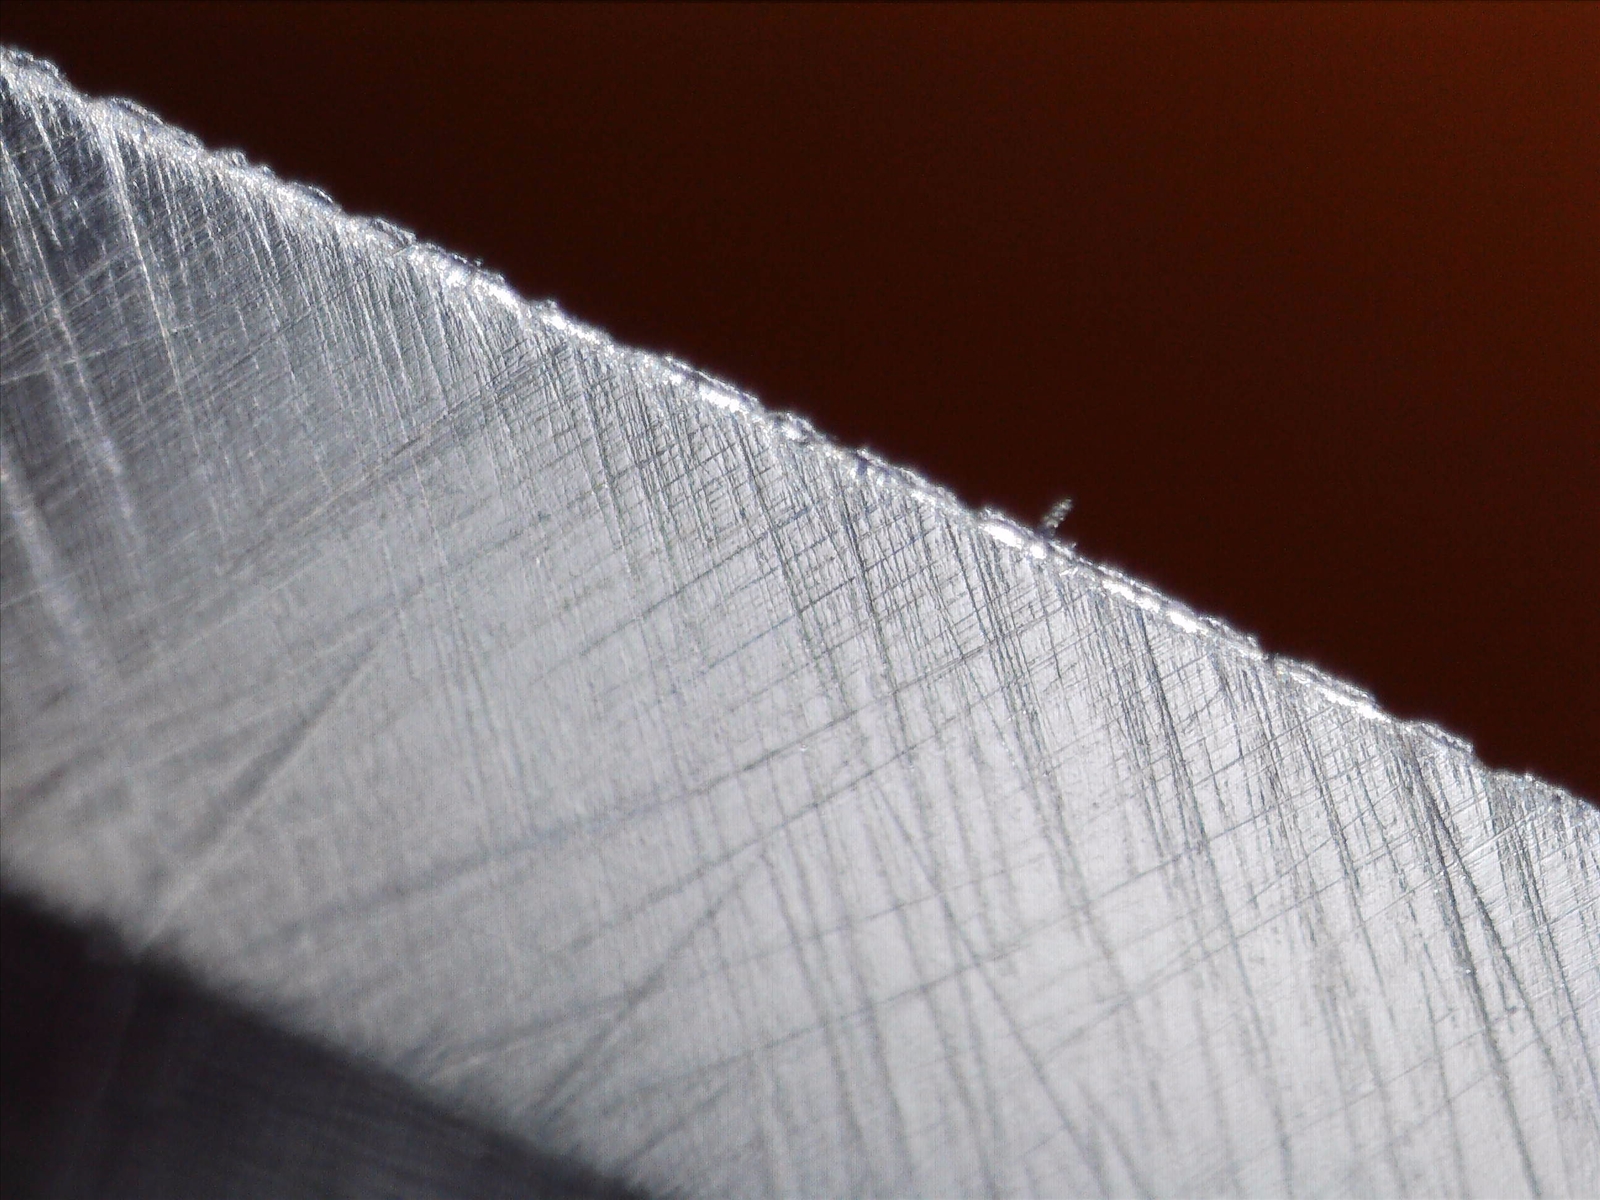
2000 – yup, the tear-out is still there!
To be continued – out of space apparentlyout
Attachments:
You must be logged in to access attached files.
1 user thanked author for this post.
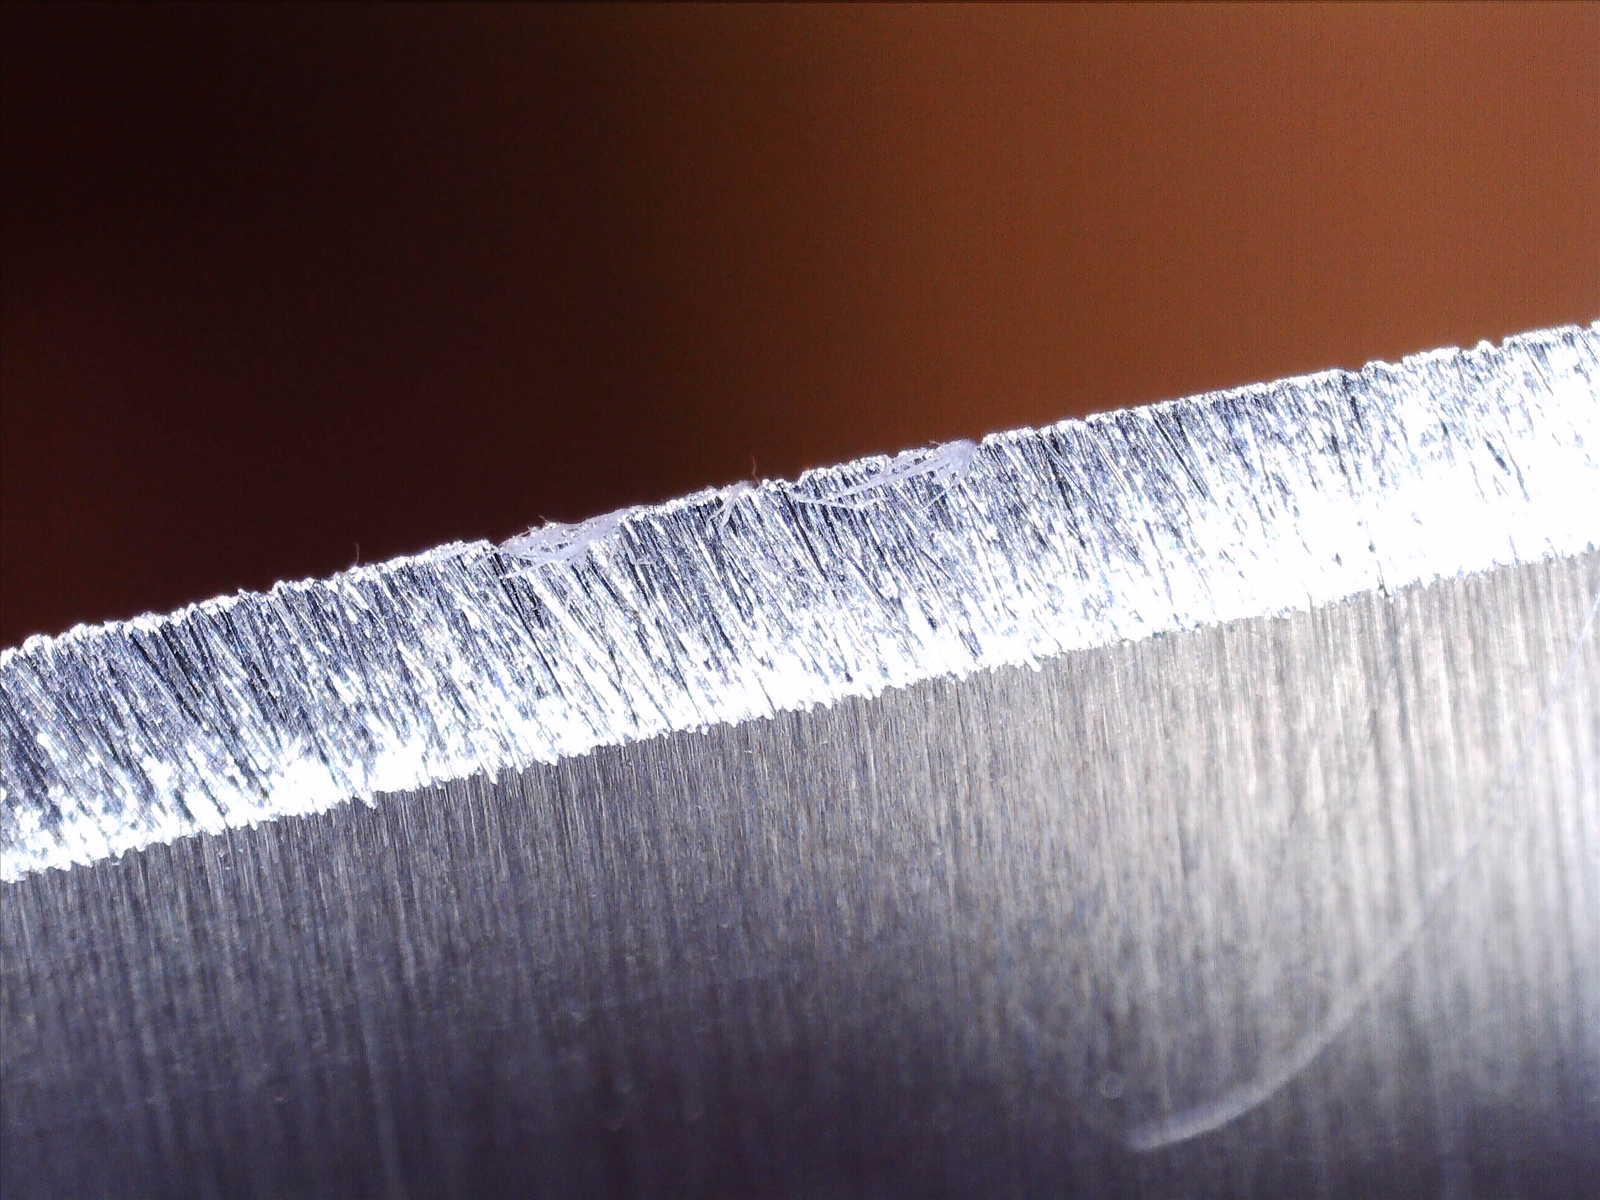
12/05/2021 at 3:47 pm #572753000 – shiny, but the edge still “micro-grabs” when slicing paper – photos
1200 then 1600 ceramics…
Lapped with diamond film (1.5 micron pic shown) – still have tear-out!
Stropping (at 2 deg. less ) still didn’t help … duhhhh
To be continued ( size limitations ???)
Attachments:
You must be logged in to access attached files.
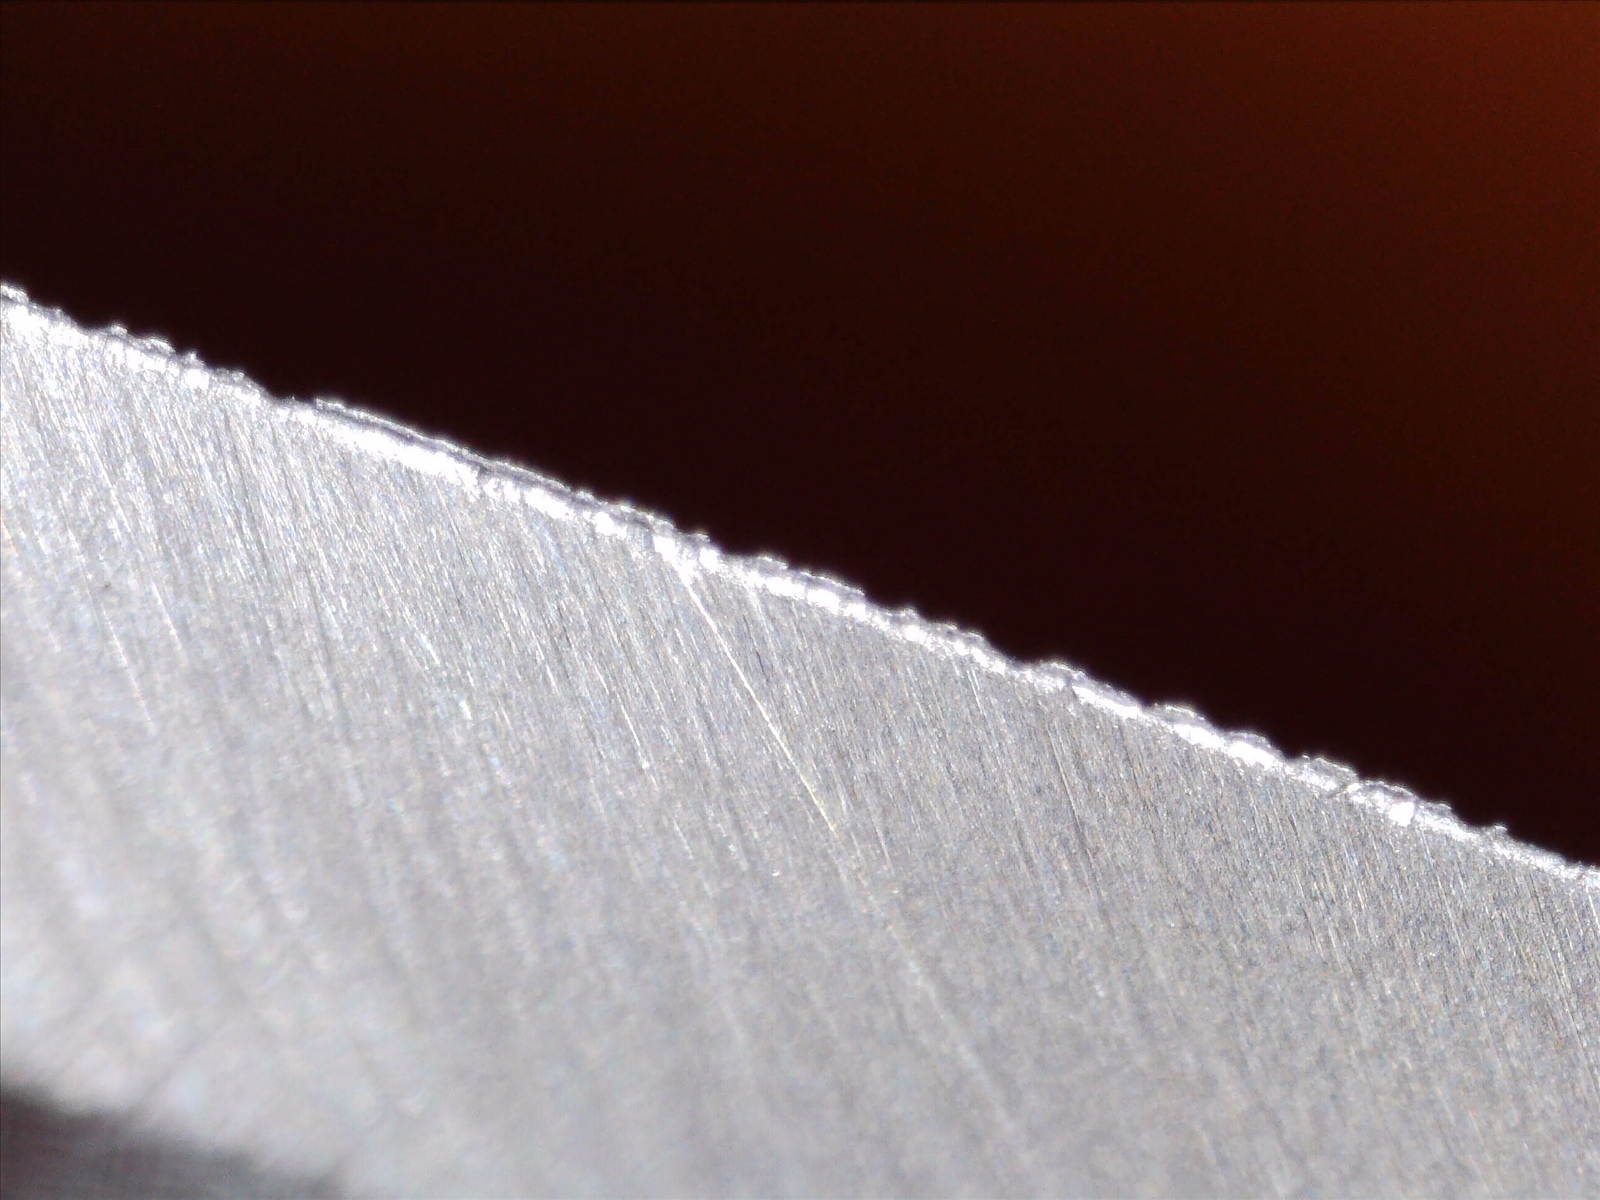
12/05/2021 at 3:57 pm #57280Time to put on a micro-bevel WITH OUT diamonds. Ceramics – films- strop… hummm, will this work???
1600 ceramic – 2 deg mico-bevel .. SUCCESS! But why are the diamonds tearing out the edge?

So I progressed to DLF and stropping (2 deg out from the micro-bevel)
I’m generally pleased with the edge, but want to understand / learn about the edge chipping…
bevel 17 deg – 1600 ceramic-1.5 micron lapping-2.jpg”]
And a final strop.
Attachments:
You must be logged in to access attached files.
12/05/2021 at 9:03 pm #57284Welcome to the forum, Henry. Nice photos!
I don’t like Spyderco knives so I don’t know much about them. And I haven’t sharpened anything with that steel yet. But I hear that most manufacturers use dry belts to profile/sharpen their knives with. That can build up heat and ruin the heat treat to the steel at the edge apex.
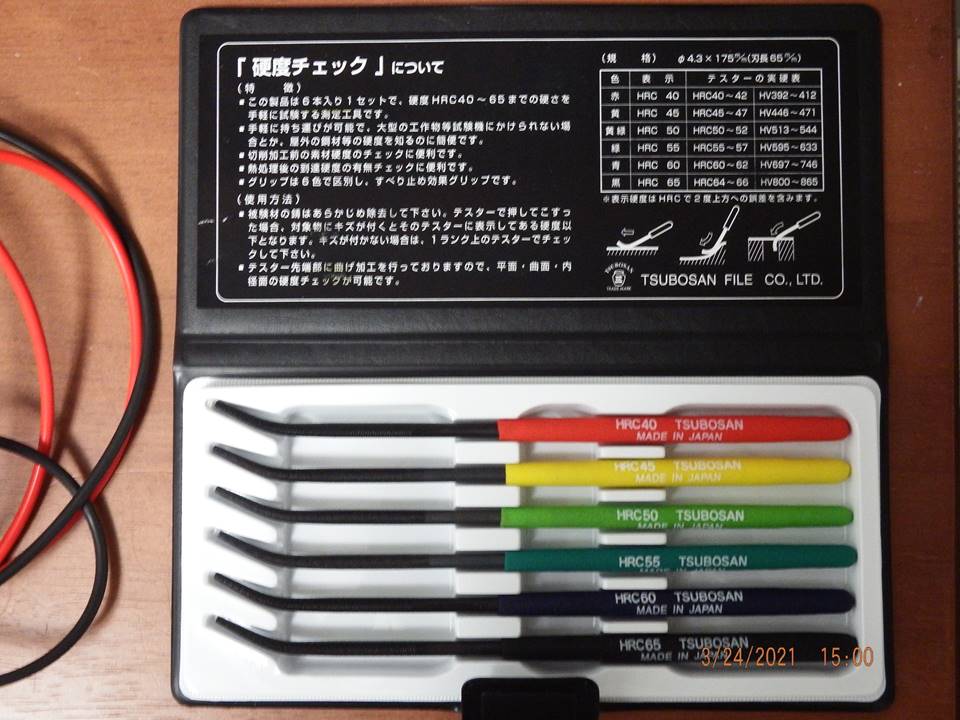
I would sharpen/reprofile the blades until I got down to some good steel. You can also test the steel to see what the hardness of the steel is. I use Tsubosan files to test the steel hardness of my blades. They aren’t exact but they give you a good idea where the RCH of the steel is.
Attachments:
You must be logged in to access attached files.
1 user thanked author for this post.
12/05/2021 at 9:09 pm #57287It’s also possible that you could be putting too much pressure on the diamond stones. Diamond stones only need light pressure. I only use enough pressure to keep the stones against the blade edge, and no more than that – just very light pressure.
12/06/2021 at 5:20 am #57288I have a couple of Spyderco ZDP-189 knives and I’ve learned that the edges will chip if I use any stones lower than 600 grit – and with my Delica 600 will do it too, especially with edge-trailing strokes. ZDP is supposed to be hardened to about HRc-64, according to Spyderco. Rockstead claims to harden it to 67. My experience is limited, but I’ll guess that the chipping is a steel-dependent thing.
I switched to edge-leading only several years ago where I’m touching the apex. For re-profiling, I watch how close I am to the apex, checking with the ‘scope every 20 or 30 strokes. If I can see that I’m clear of the apex, I may use scrubbing strokes to remove material faster.
12/06/2021 at 9:28 am #57289Henry, I believe you have a couple issues going on there…
First, like you said, the diamond stones may not be fully broken-in yet. I think you’ll continue to see further improvement in the resulting scratch patterns with continued use.
Then it appears your technique may need more practice and ultimate improvement. Although it’s a little difficult to follow the submitted photos, as the magnification is not the same ‘high power” for all of these, it appears that your stonework may not be apexing the bevel with every grit you used. Some photos it appears your right where you need to be and others it appears you’re not reaching the apex. Some photos I see a clear burr in place while others it’s not there. (I know there are a lot of factors involved like when and where the photo was taken that may be misleading me).
As “tcmeyer” sometimes points out, there is a slight difference in the diamond stone thicknesses as the grits become finer and finer. Because of this, I’ve learned to double check my set angles and make micro-angle adjustments with each and every grit I use. Working with the precise angles the W.E. allows us to utilize, the angle cubes allow us to adjust for and the visual results of our adjustments the USB scopes allow us to see, it requires a higher degree of attention to detail, on our part, to make use of this precision.
It’s also important to employ the same finger hold position with each and every grit. Depending on how and where you place your fingertips on the stone paddle can affect where the scratch pattern is applied to the knife edge. So, consistency is key.
Don’t fall in the trap looking for something wrong, like steel hardness, to blame or explain unacceptable sharpening results on. Steel hardness is a contributor to our sharpening difficulties. That’s why I employ different sharpening mediums that I have found to be better suited for the steels I’m sharpening. I believe Spyderco does apply a heat-treatment to their steels resulting in a slightly harder HRc rating then others may utilize. This harder steel seems to have a greater tendency to be chip prone when sharpening it. Also, realize you’re inspecting your edges under magnification, so the chips and sharpening defects are not really as bad as they appear they are. What some may call edge “tear out” is simply the normal grit’s scratch pattern following off the apex. I’m not saying the diamond stones can and will give you the results you seek with the CPM-S110V. Just not to jump to conclusions yet. Keep working on your technique and using those stones more.
I, like tcmeyer, also utilize an alternate side, left-right-left-right, edge leading sharpening stroke. For me it’s the final stroke direction with each and every grit. This removes any resulting burrs and wire edges that were applied with edge trailing strokes.
I will finish by saying, look into the technique for applying micro-bevels and the purpose(s) for using them. Of course, it’s your knife, so you’re welcome to it anyway you like.
Marc
(MarcH's Rack-Its)1 user thanked author for this post.
12/06/2021 at 11:39 am #57290Robert, Tc, and Mark,
Thanks for the guidance!
I’ll be the first to admit that user error and a learning curve are likely the root cause of the observed symptoms.
I’ll give the stones more time to break in and see how it goes.
Yes Marc, I need to do a better job taking and posting consistent photos. Heck, I’m happy I was even able to get the pix properly inserted!
I will pay more attention to ensuring each progression, beyond the initial reprofiling using low grits, actually apexes the blade.
Being far from new to sharpening, even with DMT diamonds but mostly whetstones, I “think” I have the light pressure down, but will continue to be cognizant of very light -reassure. I’m thinking that perhaps as I scrubbed with the 100 grit, I may have caused 2 issues?
1. Edge trailing strokes could have caused tear out. The “classic” stroke as demonstrated by many including Clay Allison – the “ bicycle stroke” for lack of a better term, seems to usually show edge-leading… but not always. I will keep this edge leading stroke in mind for sure.
2. I may have put too much pressure on stones, even though I “Tried”… I know I got … a bit agressive..
Robert, I like your idea of testing the steel for hardness… hmmm, another tool to buy at some point. But, I know the Spyderco is hard so…. ‘Does it really matter if I know the actual hardness”?
Finger placement on the stones… yea… after looking in the forums and YouTube, I’ve made a point of trying to grasp the stones near the bottom, one “ tick” up “ feels” right to me; but, I’ll make effort to be 100% consistant.
Regarding abrasive grit side, my hypothesis was that yes, the coarser stones would be a potential cause of tear out, and that’s why I started at 1000…but.. the 1k was just taking forever to make progress… so went down step by step looking for any meaningful progress but fell all the way to my lowest grit of 100 before I perceived any noticeable reprofiling. I sure did not want to spend 20 hours polishing the blade sides and never hitting an apex!
“Patience is a virtue“!!!
I really like the idea of hogging out with the coarser stones till BEFORE I hit the apex, then, as TC states, use nothing less than 600 as I approach and hit the apex using edge-leading strokes. Good advice. Actually, all this is great to get from the three of you who seem very knowledgeable and active! Thank you!
Marc, regarding magnified edges showing what appears to be tear out but may in fact be just scratch lines, I get where you’re going, but in my case, there were clearly tear outs of significant size, well above any grit line.. I think…? I sound so confidant but respect your thought and will noodle on that thought…
oh, FYI, I did occasionally recheck the angle with the cube and as far as I could read, given the accuracy and resolution of the 2 cubes I have ( one is the WE – wixley 300, my other is a
<h1 id=”title” class=”a-size-large a-spacing-none”><span id=”productTitle” class=”a-size-large product-title-word-break” style=”font-weight: normal;”>Momenturn Level Box Miter Gauge </span></h1>
has a claimed resolution of .05 deg., and seems to have the same readings as the wixley so I assume similar accuracy only higher resolution ( hope accuracy too), the point being, to the best of my measurements, the angle didn’t change stone to stone, but I’ll pay particular and detailed attention to this next sharpening session.As a final note, after I wrote this post, I decided to blend the bevels with strops / diamond paste and created a very shiny convex bevel. Yes there are still some deeper scratches left indicating to me, I think, that not enough time was spent on one or many of the progressive grits. But, the blade is beyond shaving sharp, it’s shiny, and I’m thrilled with this first experience.
There is still so much to learn! I’m a newbie and hope through practice and guidance of the community I’ll be able to create any edge il looking for within a few bazillion sharpening sessions! Lol, ok, I hope a dozen and I’ll consider myself competent.
I’ll try and post a photo of the latest blended edge for all’s viewing and constructive critical pleasure and feedback.
Thank you,
-Henry
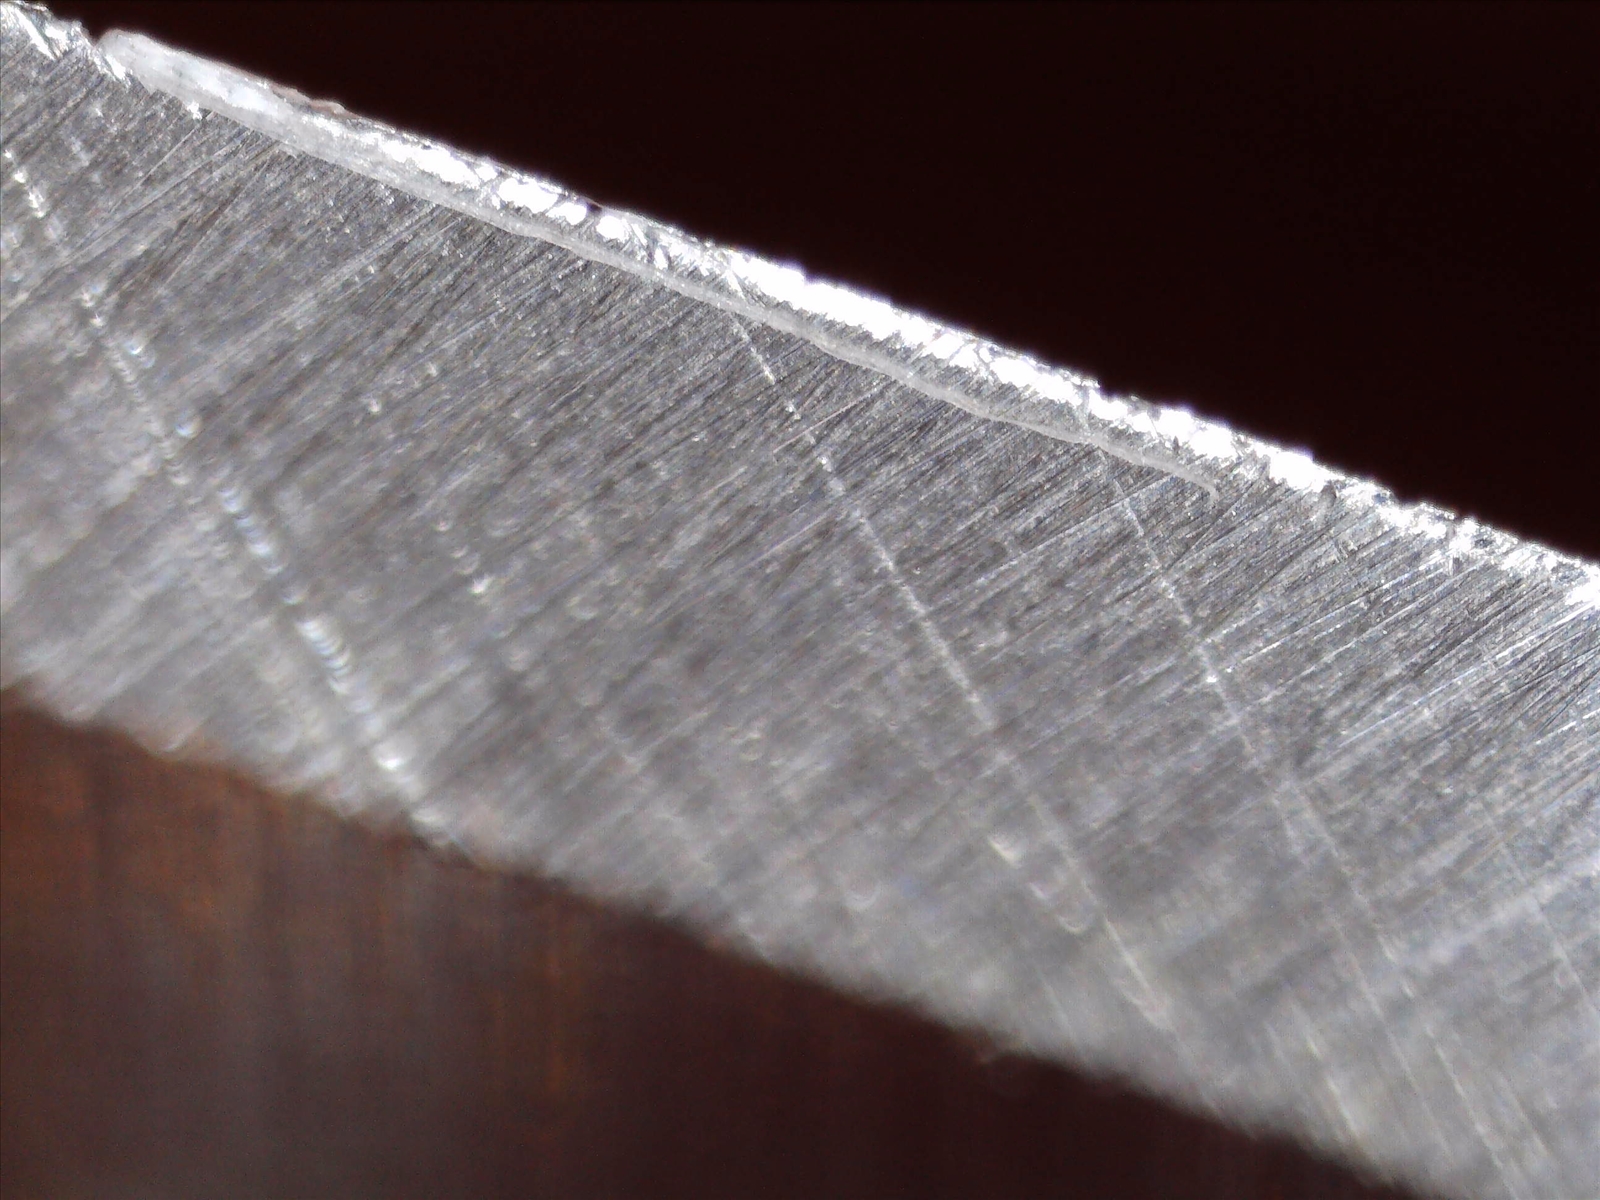
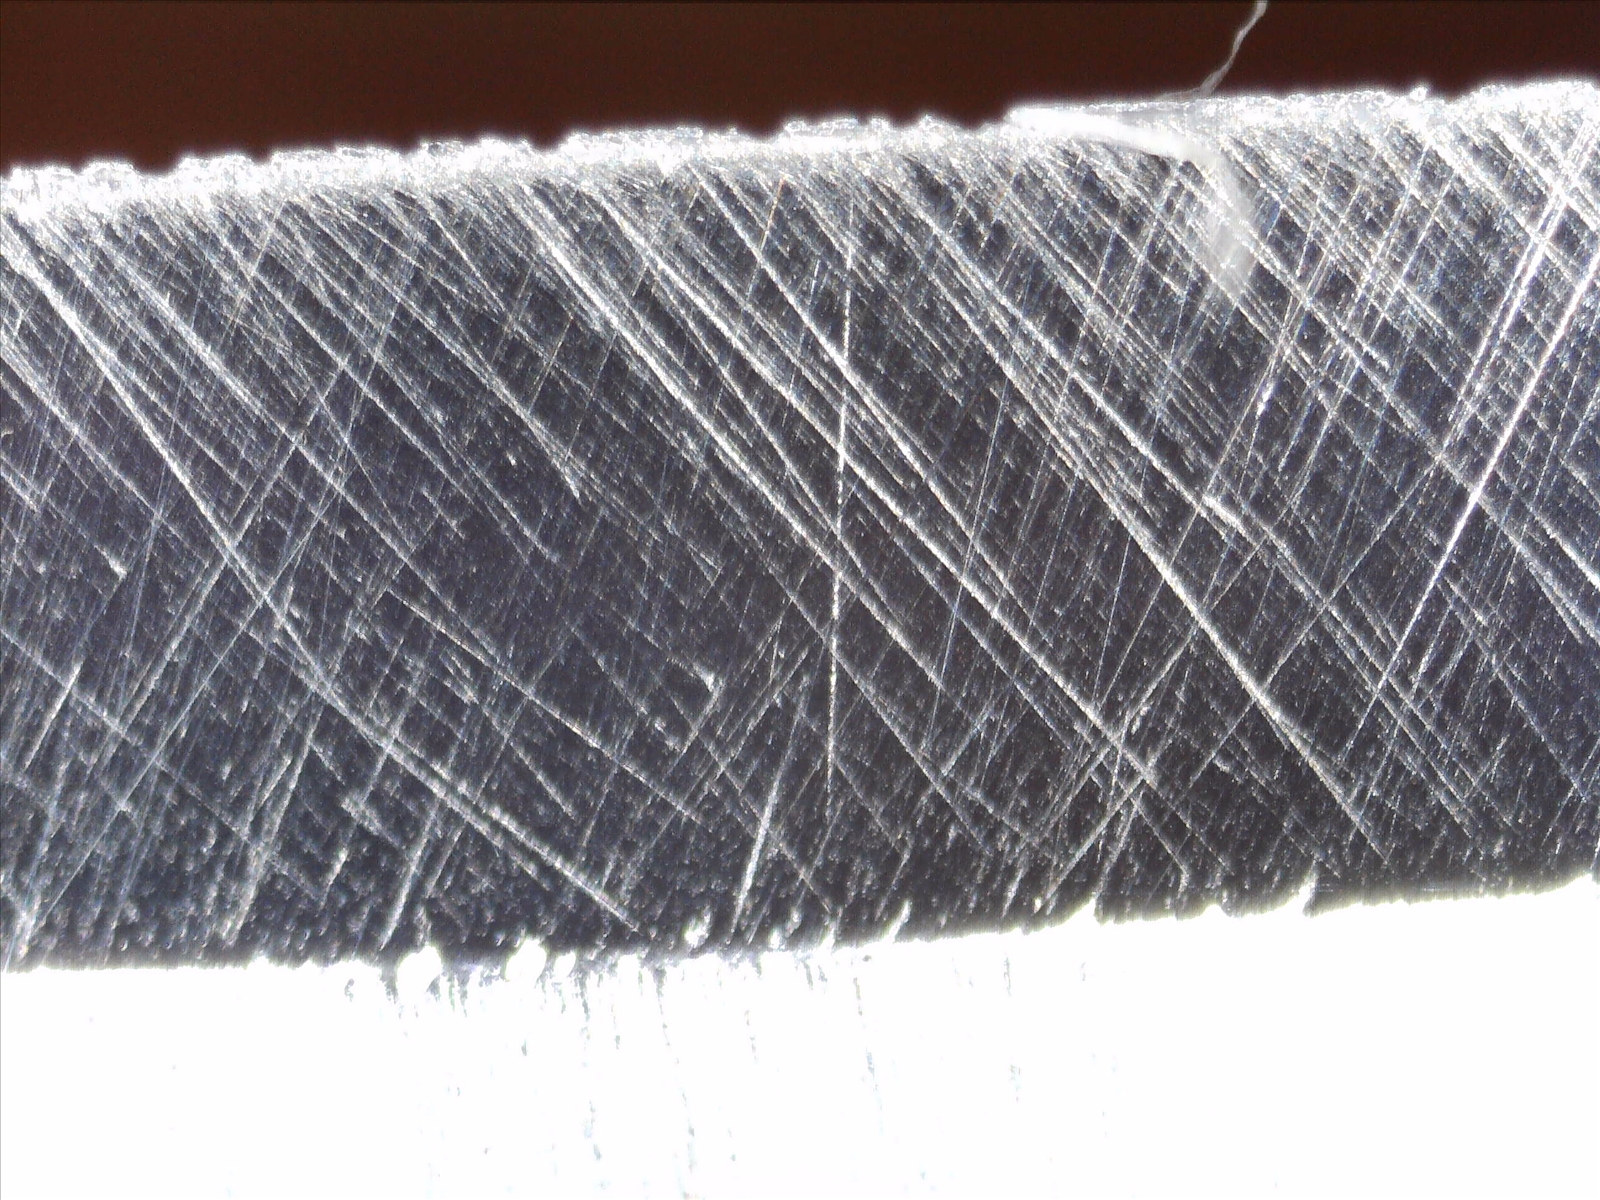
12/06/2021 at 1:21 pm #57292As I promised, here are a few photos of the edge POST blending the microbevel on a series of strops (down to .5 micron). I did a series of about 4 progressive angle increases stopping 2 deg. above the final microbevel angle.
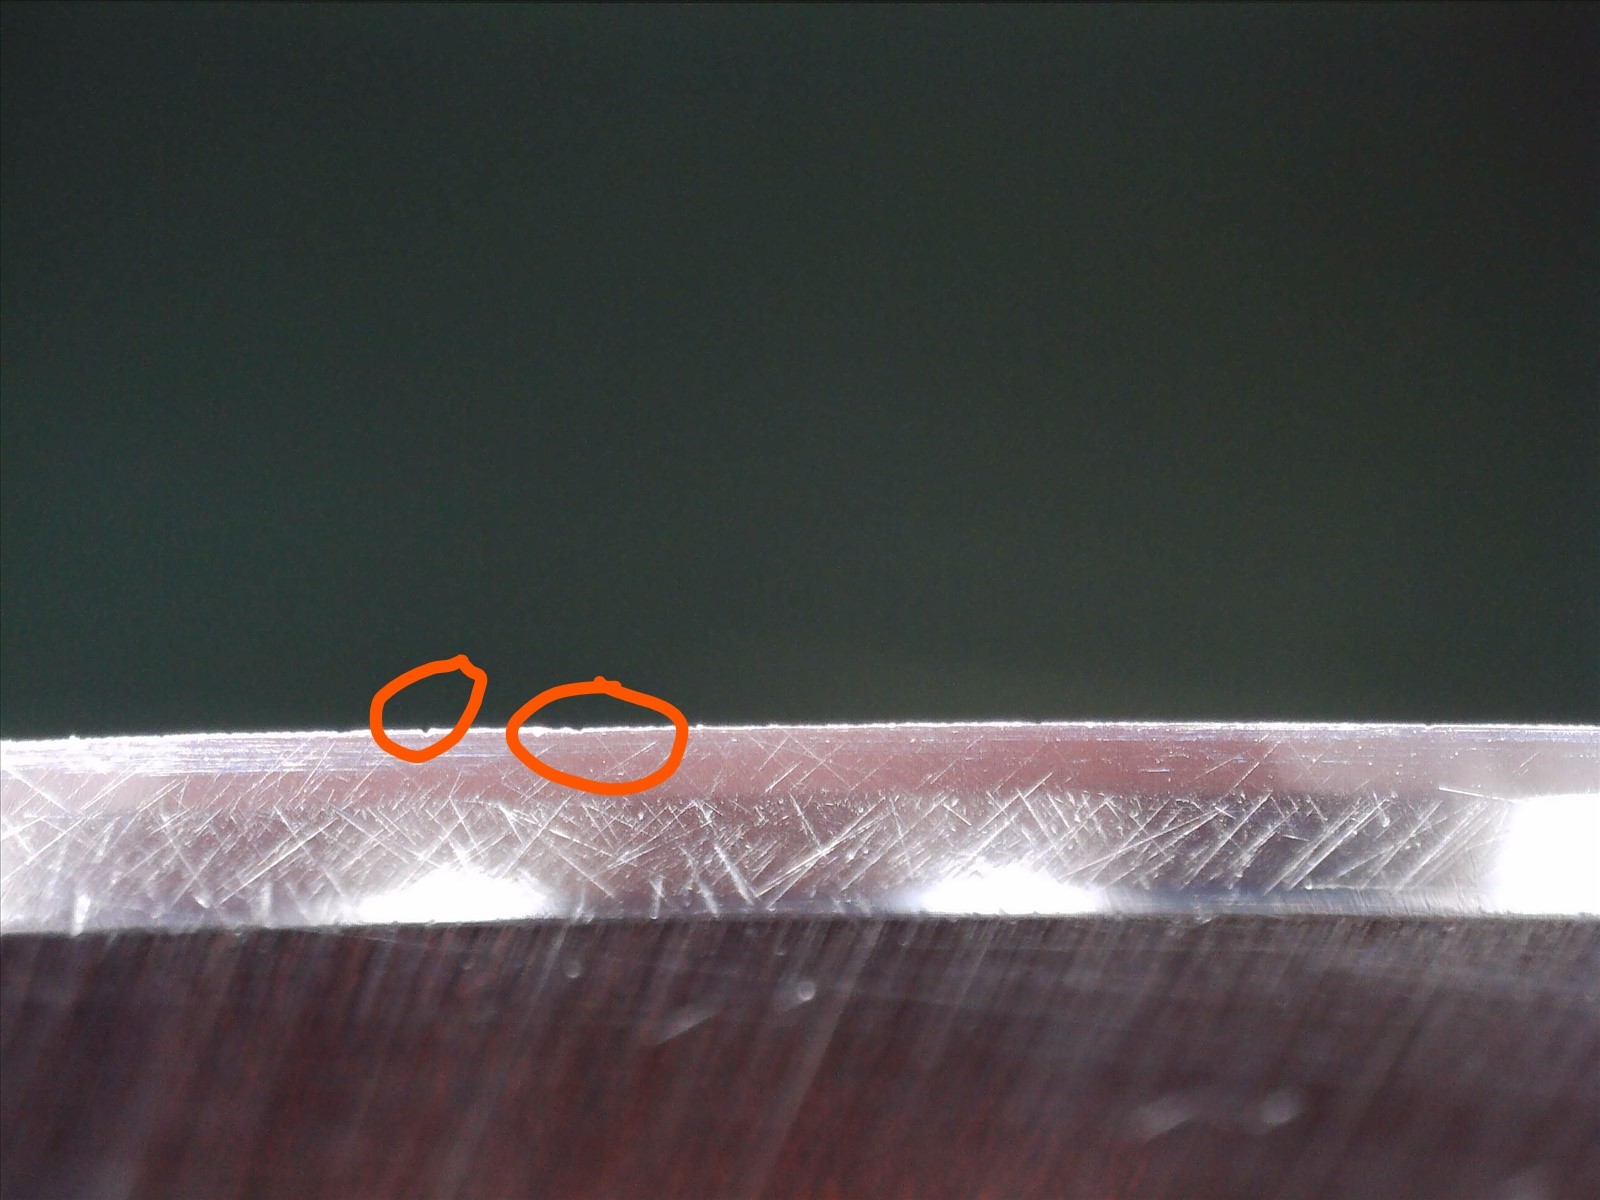
In this one you can see the “rough” scratches that indicate to me anyway a LACK of fully polishing with each and every grit. This clearly is using the USB scope on the “low” power…
Here you can see some of what I am calling tear-out. This is WAY better than initially, cuts like a hot knife through butter, but I am looking for BETTER as my technique (and perhaps the stones break in) improves.
That’s all for now.
I look forward to further constructive criticism and guidance as I continue down this journey.
I think I’ll try and do a different folder next, although I’m tempted to try and redo this one from the ground up.. uggg, the edge really is wicked sharp now. I can’t wait ’till I know what I’m doing and able to get to the next level!
Attachments:
You must be logged in to access attached files.
12/06/2021 at 1:26 pm #57296Thanks, Henry. Marc and TC are more experienced than I am. I just mentioned a couple of common problems that could be happening since you said that you were experienced at sharpening. If you know what the steel hardness should be, then you can test it to make sure that the heat treat at the edge has not been damaged. I test my blades on the edge bevel or as close to the edge bevel as possible.
Also, using too much pressure is a common problem. I even catch myself doing it occasionally. I never use edge-leading strokes anymore except during the up/down phase of reprofiling. I never use them for sharpening because I found that it dulls my edges sometimes. There’s a tiny amount of slop with the stones on the rods and I believe that causes my problems with edge-leading strokes. I suggested to someone months ago that the diameter of the rods should be increased a couple of thousandths of an inch, but I guess they disagree.
I use the same approach in knife sharpening that I learned in electronics repair – to check the simpler things first. No point wasting time on more complex things if a simple thing like a ruined heat treat is the culprit. But as Marc alluded to, no matter how smooth an edge apex is, if you magnify it enough it will look chippy. I don’t worry about because I rarely sharpen a blade more than 1000 grit and sometimes only 800. If the hardness checks good at the edge and it cuts well, that works for me.
12/06/2021 at 1:39 pm #57297Thanks Robert.
It’s funny you mention chasing the simple things firs. My career is precision motion control. Think robotics. I’d say that 85% of all problem we / I’ve seen over the decades is cable related! Chase the simple things first! Yes Sir!
YES to the too much pressure!
Interesting conflict you mention on edge leading vs edge training strokes. In this one post I’m getting conflicts. As Marc has told me before, It’s part science, part are (my words) but this is supporting evidence.
I will learn this voodoo slowly but methodically! Hopefully supported by as much data as feasible / possible.
And, I have no intention of making every blade a showpiece. Most of my case-use will be kitchen knives which I may polish to some extent but keep a 1000 grit or so micro-bevel edge to practical purposes.
We shall see. Perhaps there may be a lot of shiny knives in my arsenal, and friends, just because I can! 🙂
Finally, the hardness test file on Amazon is $80/ set. Yikes. It’s not out of control but my budget is blown .. for now. I think I’ll stick with assuming the knife maker has produced a product “close enough” to their target spec.
THANK YOU!!!!
12/06/2021 at 2:29 pm #57298I hear that most manufacturers use dry belts. But the ruined heat treat should not be very deep. By the time you reprofile the edges or sharpen them a couple of times, you should be down to some good steel. I love my Tsubosan files because they remove the guesswork. I can see if the claimed steel hardness is close to accurate.
My old Buck 301 has 425M steel. It is so hard that my whetstones won’t even scratch it. I have to use diamonds on it. After I bought my files, I checked the steel and my 65RCH file skates across the blades. So, I know that the steel is harder than 65RCH.
12/09/2021 at 3:57 am #57322I bought a set of the same files and got confusing results with them. I have four skinning knives I made from D2. I hardened two of them using MAP gas torches and air hardened them. The other two were hardened using a propane forge and quenched between two 1″ thick aluminum plates flushed with a compressed air nozzle. The files skated across all four blades, even though I can get a standard Nicolson file to bite at least a little bit. I wouldn’t think D2 would reach HRC65 under the best of conditions.
12/09/2021 at 11:00 am #57323Hmm. I wonder what the problem is? Mine work great.
-
AuthorPosts
- You must be logged in to reply to this topic.