Creating a burr
Recent › Forums › Main Forum › Techniques and Sharpening Strategies › Basic Techniques and Sharpening Strategies › Creating a burr
- This topic has 21 replies, 8 voices, and was last updated 01/17/2020 at 9:46 pm by
Readheads.
-
AuthorPosts
-
11/30/2019 at 3:20 pm #52633
It is taking me quite a long time to develop a burr on several of the knives that I have sharpened. I wonder if I am doing something incorrectly. I use a 100 grit stone to find the burr thanks
11/30/2019 at 3:31 pm #52634Welcome to the Wicked Edge Forum Howard. If you are re-profiling the bevel, that is changing the bevel angle from what it was originally, this may require a lot of steel removal till the new bevel is ground from the shoulder to the knife edge. This is the issue especially when lowering the bevel angle on the new profile. Depending on how much a change you’re making from the original angle to the new profile angle it may take a long time and require a lot of effort. That situation may call for an even coarser grit stone such as the 50 grit/80 grit.
If you have the knife clamped securely how you want/need it positioned and the guide rod angles are set where you want them, then keep at it. A magnified visual aid like a lighted loupe or a USB microscope will help you to see where your efforts are being applied and allow you to see the progress you’re making. Then it won’t seem so hard because you’re no longer working blind and guessing when the burr will come around.
Marc
(MarcH's Rack-Its)2 users thanked author for this post.
11/30/2019 at 3:43 pm #52635Thanks for the information. That is exactly the case that’s occurring with my sharpening. I am taking a new knife and lowering the angle with a new profile to make it a better slicer. When I finally get the burr on both sides and progress through my stones, etc,, I end up with a razor sharp edge and continuing on, I get a mirror polish with no scratches with a magnifier. I just ordered the 50/80 grit stones
12/01/2019 at 8:49 am #52638It is taking me quite a long time to develop a burr on several of the knives that I have sharpened. I wonder if I am doing something incorrectly. I use a 100 grit stone to find the burr thanks
You may need to get used to feeling it. Essentially, if you run your finger toward the edge from the spine and as your finger gets to the edge of the opposite side you were running the stone on and you feel your finger sort-of catch on something, it is likely a burr and you are there.
Also, remember, you only need to apex the edge with your primary bevel if you plan to not put on a micro bevel.
12/04/2019 at 8:44 pm #52662Also, remember, you only need to apex the edge with your primary bevel if you plan to not put on a micro bevel.
Can you explain the thinking behind getting the apex only on the primary bevel?
12/17/2019 at 4:21 pm #52734When creating a micro-bevel, there is a secondary bevel that will create the apex. (Rather than the primary angle)
12/17/2019 at 4:28 pm #52735After re-reading your question I am not sure if my answer was complete. I can only describe the benefits as I know, with regards to a secondary bevel and the advantages of using micro bevels. One example, you can achieve a mirror primary bevel and use a micro bevel to create a more microscopically serrated apex edge. The touch-up of a micro bevel is simpler than having to sharpen the entire primary bevel as maintenance. The microscopically “rough” apex would cut much differently than say a 17 DPS microscopically flat apex (comparatively). The rougher apex would do better on items like cardboard, etc. With that said, each edge has its benefits and drawbacks. I will have to yield to the more experienced people here to answer in more depth. I hope this answers some of your questions.
-
This reply was modified 4 years, 7 months ago by
prongATO.
-
This reply was modified 4 years, 7 months ago by
1 user thanked author for this post.
12/18/2019 at 9:04 pm #52744I’m pretty new to the WE, but wonder how you know you are maintaining the apex if you aren’t creating a burr with each stone progression. Shouldn’t the primary apex be maintained through the sharpening progression? Someone please explain primary bevel/apex vs. a micro bevel and advantages or disadvantages of each.
1 user thanked author for this post.
12/18/2019 at 10:12 pm #52745The primary bevel is the angle the knife edge has been, or, is being sharpened to. This bevel is from the knife blade’s bottom or shoulder up to the knife edge or apex. A burr formed while sharpening is a telltale indicator that your sharpening efforts have been thorough, correct, effective and you’re reaching or apexing the knife edge.
It’s is said by some sharpeners that it’s only necessary to create or draw this burr with the very first grit in your sharpening progression. I agree that it is absolutely necessary to draw or create a burr with your first grit in order to set the stage and insure your effectiveness for the subsequent grits. After that first burr, I don’t know how to sharpen effectively and correctly with out a burr forming. For me it just happens as a result of employing good effective sharpening technique. It’s not something I can avoid, it just happens when I sharpen knives, correctly, with each and every grit.
A micro bevel is a second smaller or tiny bevel, applied to just the very apex of the knife edge. It’s usual done at 2° to 3° wider angle then the primary bevel angle. The microbevel can be applied with very like pressure strokes. I prefer with edge leading , down and on, strokes. The microbevel is often done with a coarser grit to add some toothy character along with the slightly wider angled micro-bevel angle. When applied properly a micro-bevel may be almost unnoticeable. This mini or microbevel is intended to give the original thinner, finer, sharpened, knife edge, more durability or added longevity and a little more bite or toothiness while still having the qualities and properties of the original primary bevel edge.
The application of a microbevel like sharpening the primary bevel can be a very personal thing and individualized. Some prefer a very coarse grit for micro-bevels. Others use a moderately or slightly coarse grit. Some users even strop the micro-bevel the same way they would appropriately strop a knife edge sharpened as though it had been sharpened at the micro-bevel’s angle. Some sharpeners always like to add a microbevel, to every sharpened knife edge. Some never use them, at all.
A micro-bevel is sometimes used as a rescue edge, or a quick and simple method to apply a new edge to a worn or wearing knife edge. It should give added improved cutting character to an otherwise worn edge prolonging the need to perform a touch up or full sharpening.
Marc
(MarcH's Rack-Its)-
This reply was modified 4 years, 7 months ago by
 Marc H.
-
This reply was modified 4 years, 7 months ago by Marc H.
7 users thanked author for this post.
12/19/2019 at 5:31 am #5274812/20/2019 at 3:46 am #52750In my experience, a microbevel doesn’t add much durability where the angle difference is only 2 or 3 degrees, unless the blade is quite hard. My Spyderco Delica in ZDP-189 (RC64 or so) tends to chip at 17 dps, but much less at 20 dps. I don’t see that in my other EDC’s, or in my kitchen knives, where dulling or denting are the main form of wear and tear. Maybe more abusive uses will show a great improvement with the higher angles.
My theory is that true microbevels, which are barely visible, are too narrow to provide much resistance to damage. A double bevel, or secondary bevel will provide that level of protection and still add the advantage of easy re-sharpening. This is not to say that microbevels don’t provide an advantage, because they do, in the form of a toothy edge.
Regarding burrs… I sharpened a 1-inch wide woodworking chisel yesterday, using my wide platens and DLF film. After a re-grind on my bench grinder, I started out with 45 micron film and quickly produced a nice burr, which I fully expect, because I normally polish the backside afterwards to remove any burr. I checked with my microscope every other grit or so and watched the burr as it seemed to hang on the edge. Somewhere during the last few grits (my progression is 45, 30, 15, 9, 6, 3, 1) the burr disappeared, leaving a very nice edge.
To be clear, chisel sharpening is one-sided polishing only. With 2-sided sharpening, the burr is flipped back and forth with each left-right swipe of the stones. My experience is that the burr is thrown off quickly by the back and forth motion and that producing a new burr with each grit requires a lot of effort. It’s commendable effort, certainly, as it does tend to produce a more highly refined edge. The finer the grit, though, the more difficult it will be to detect a burr. Maybe more sensitive fingers than I have.
4 users thanked author for this post.
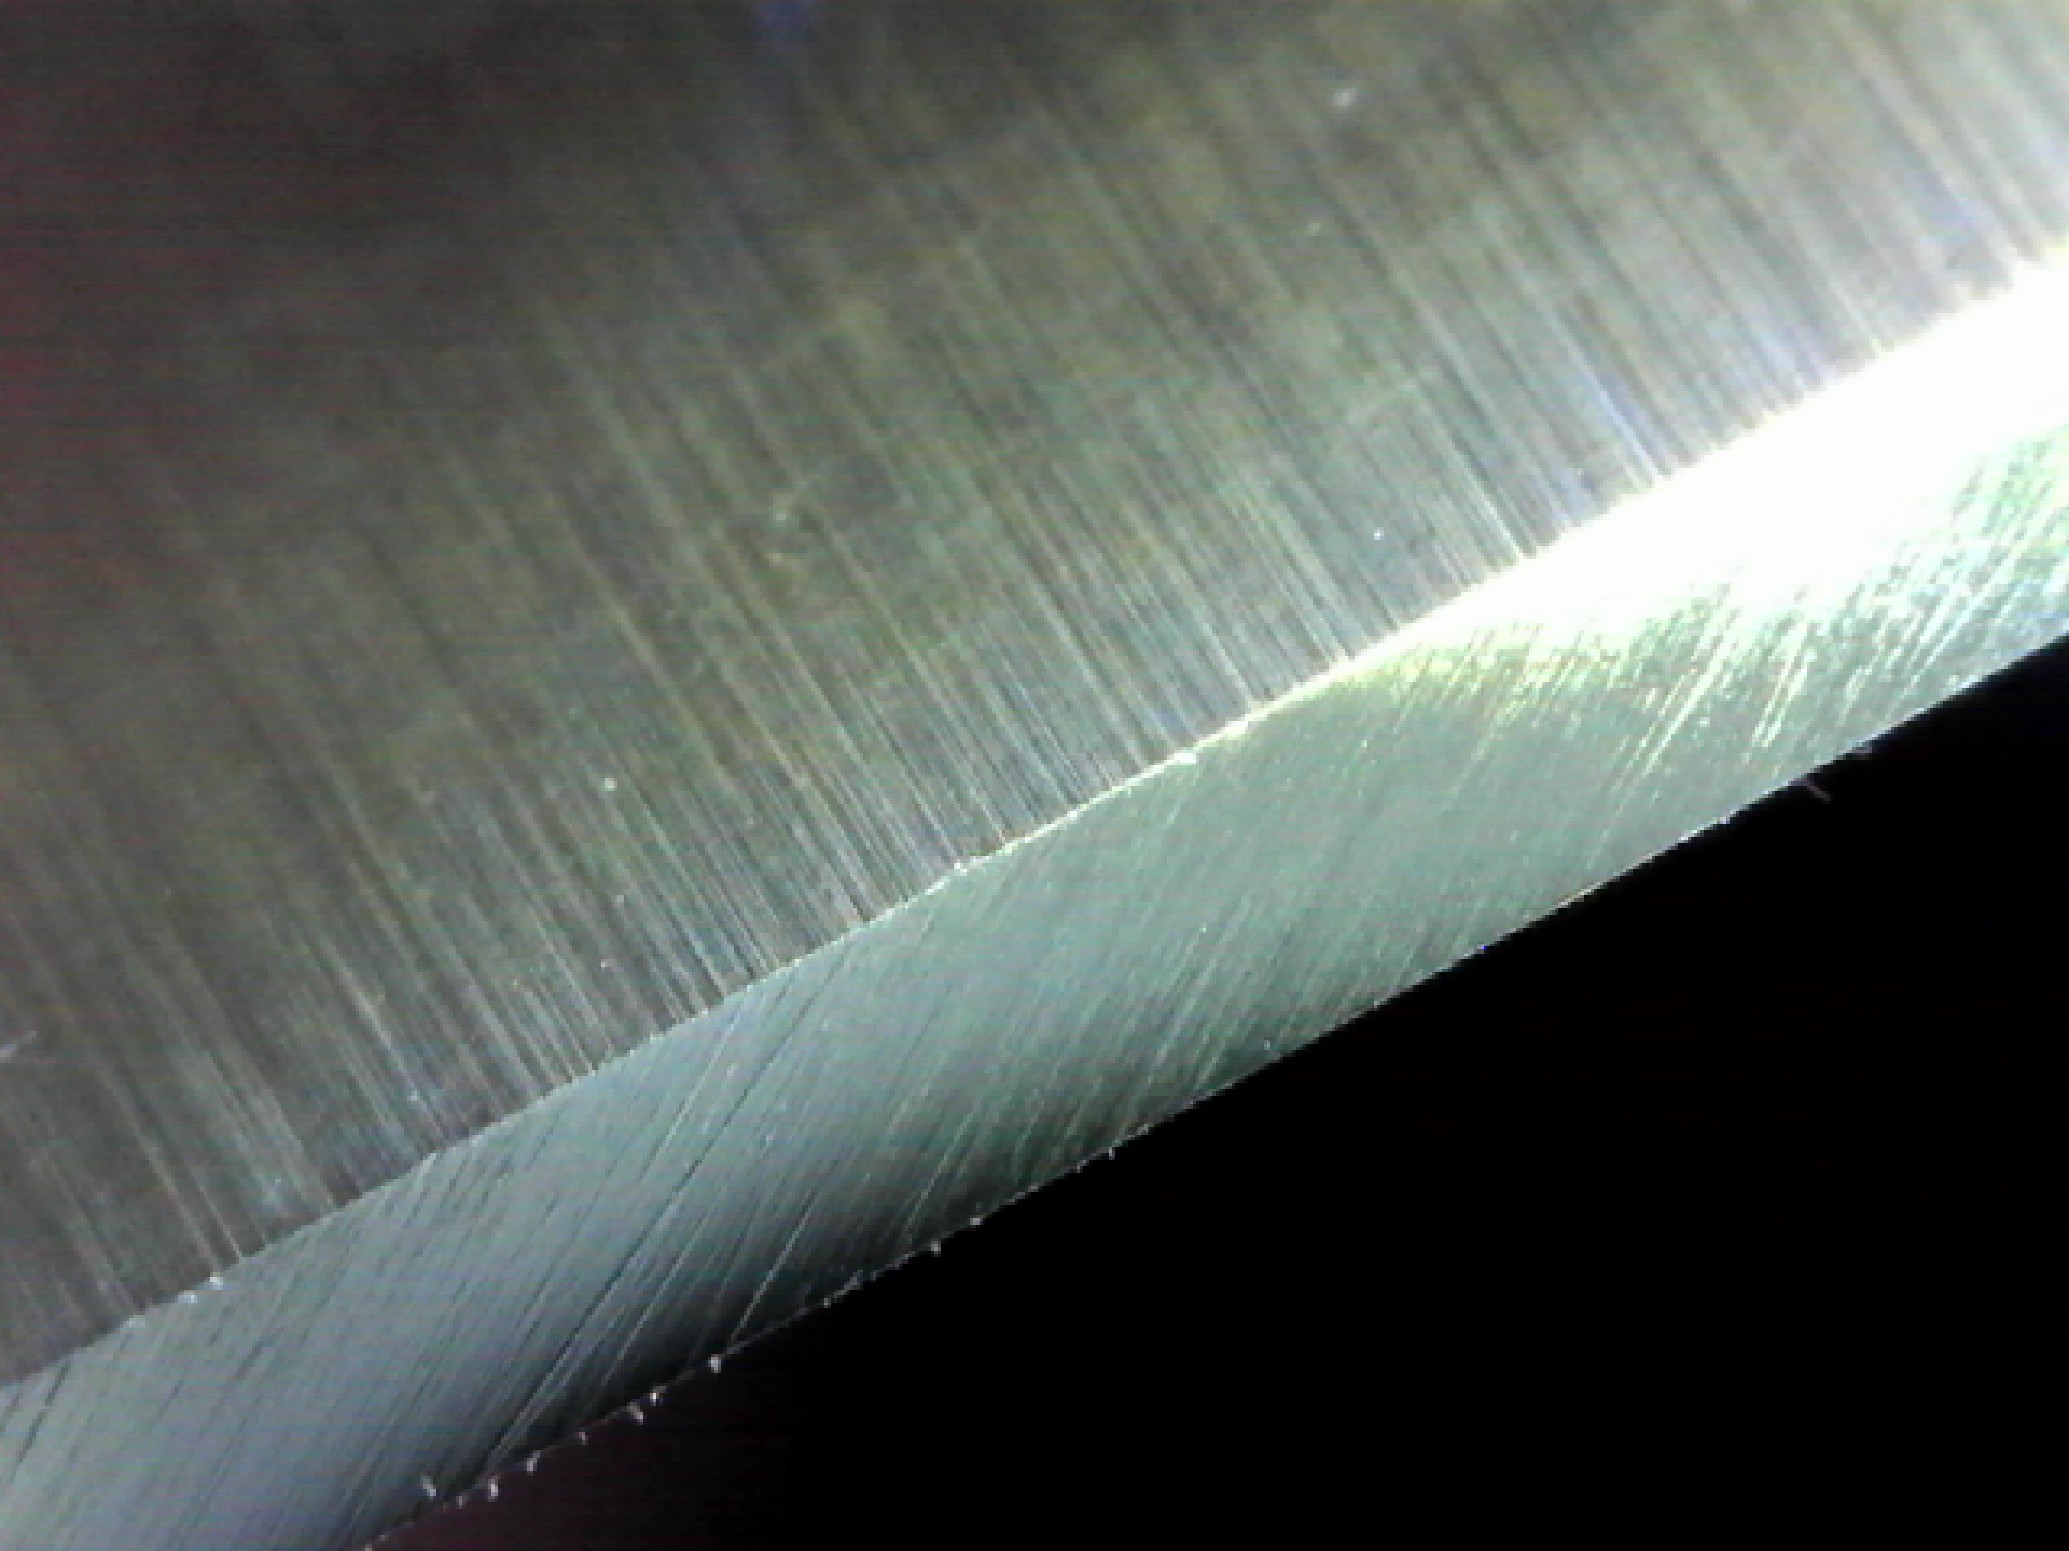
12/24/2019 at 8:55 am #52782I try to keep it simple in order to spend 30 mins max on a knife new to WEPS and 10 mins max on a redo (in the same position as originally done). I raise a full burr with the first grit feeling it with vertical (up) finger swipes. I find that a single, consistent, very light, leading edge pass with the next grit on the bent burr side removes the full burr. At least I can not feel it at all after this pass. I then move on rather quickly with 25 passes per side thru all the grits trusting that the WEPS is keeping close to perfect contact with the established bevel. I finish with leather using the lightest touch possible (I do not change the angle). Occassionally I will take a photo with my USB scope to show a friend what his new edge looks like. Here is a before and after on a Cutco santuko I did as a barter with my dentist. It will now cut scallops out of shiny magazine paper.
Before:
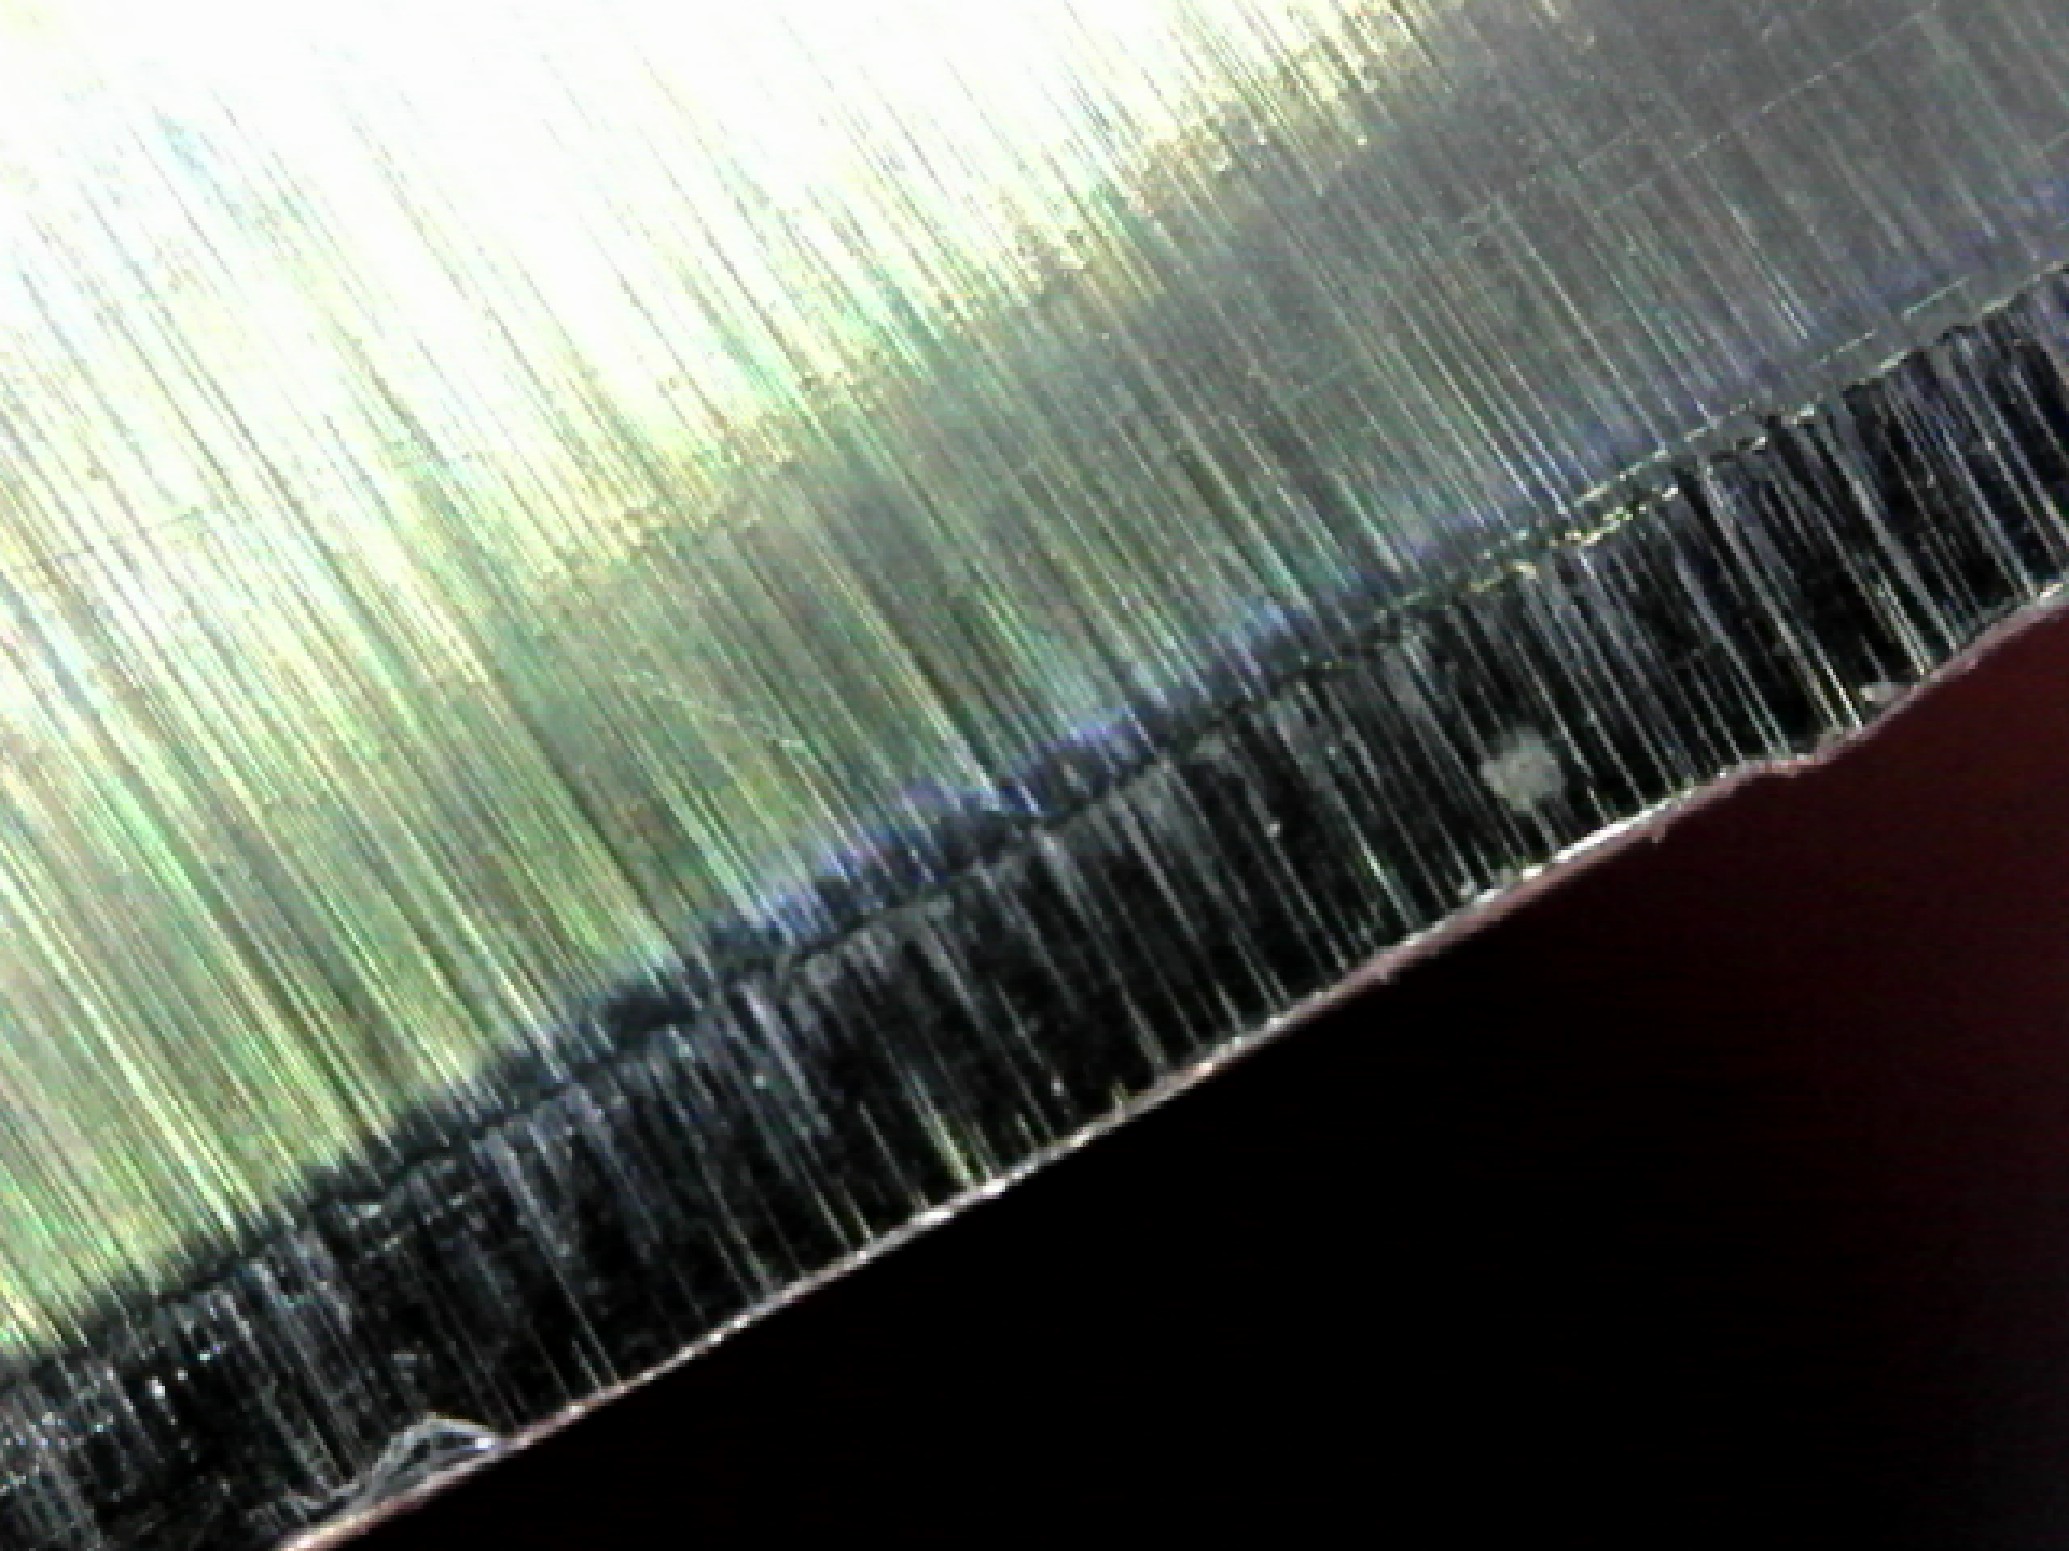
After:
Attachments:
You must be logged in to access attached files.
12/24/2019 at 10:56 am #52786You did a beautiful job on that one Readheads. I’ll bet your dentist was impressed.
12/24/2019 at 3:50 pm #52793It seems two threads in the W.E. forum are converging in subject matter.
Knife sharpening with the Wicked Edge sharpeners is a consistency driven process. Success is based on doing the repetitive process, over and over again, consistently.
At the outset, there’s no way of knowing how long I may need to spend to sharpen a knife to achieve the results I look for. Sharpening, for me, is based on the results, not on the time it’ll take. I sharpen until I’m finished despite how long it may turn out to take.
To maintain the consistency I feel comfortable working with, it’s a simple process and exercise to double check the guide rods bevel angle settings with each and every grit I employ. The very small micro-angle adjustments I make with each grit may be well within the margins of error we’re working with.
Using high powered USB microscopes and high resolution dual axis digital protractors, allow users to determine, adjust and inspect these very fine angle differences. If I can see and measure these angles I choose to adjust my settings to take advantage of my abilities to use these fine differences accordingly.
Marc
(MarcH's Rack-Its)12/29/2019 at 3:04 pm #52836You did a beautiful job on that one Readheads. I’ll bet your dentist was impressed.
Totally agree. I wanted to point out also that as you look the second photo of the finished product, there should be no reflection of any light along that edge. If there is any, you’ve got more work ahead of you. In this example, there is none.
-
This reply was modified 4 years, 7 months ago by
-
AuthorPosts
- You must be logged in to reply to this topic.