Daniel Nash
Forum Replies Created
-
AuthorPosts
-
01/13/2016 at 6:02 pm #30624
Glad to hear the advanced alignment guide is nearing production, Clay. I will definitely be buying one.
Unhelpfully, I don’t have any real feedback regarding the overall dimensions. Your proposed dimensions would fit all knives I have sharpened to date, so they seem reasonable to me.
Thanks!
~Dan
08/04/2015 at 9:38 pm #26159Check the thumbscrews to see if they are nylon tipped. If not, you’ll want to have something soft between the tip and the fine adjustment screw’s threads to prevent marring. I would call for a set of nylon screws.
Having said all that, on the Gen 3 system, I’m not sure I’ll actually use the fine adjustment screws much as there are several detents between most of the angles anyway. If I can get within half a degree of what I want to be at, without moving the fine adjustment screws, that’s good enough for me. I just want the nylon screws to lock the fine adjustments in place and prevent movement.
~Dan
08/04/2015 at 7:45 pm #26157Thanks, Clay.
I had called a few days ago and spoke with Kyle, I think, and he had indicated he would ship out some smaller diameter nylon balls to try, but I assume the thumbscrews will be sent instead. I’ll make a quick call to follow up.
Thanks again!
~Dan
07/28/2015 at 8:58 pm #26092Sorry for not responding sooner. Had an all-nighter at work.
They fit in the hole, but fill it so much you can’t start any threads of the thumb screw into the hole.
Going to call WE now and see what they say.
~Dan
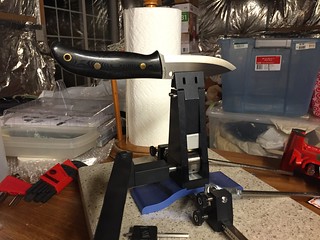
04/10/2015 at 6:09 am #25150Arrived home from work today to find Josh’s package with the Gen III vise waiting for me! After getting the kids to bed, I was able to mount it up, sharpen a knife, and try mounting a few others. Planning to do more tomorrow with more convex ground blades (more below), but very pleased and will sum it up to say that I will be buying a Gen III system (sans stones) for the convenience of the vise and the quick angle changes.
Click on any picture below to see other view options.
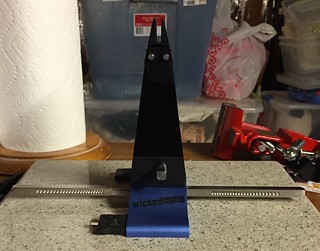
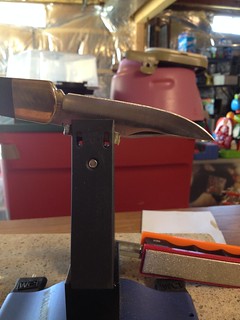
So, here is my Gen II before the change:

I decided to mount the Gen III vise without the riser since others had done it with the riser, IIRC. Putting the two side by side (Gen II with riser block):
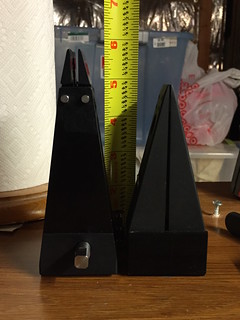
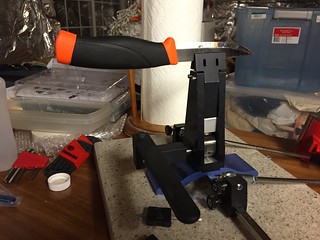
My wife has been asking me to sharpen up a few knives for her for a week or two (which I’d normally jump on, but work has been nuts), but this gave me an excuse to make time for it. Here is a cheap paring knife she wanted done:
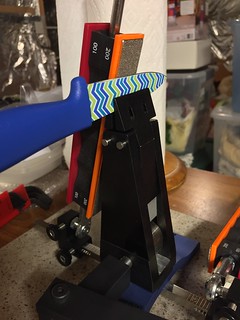
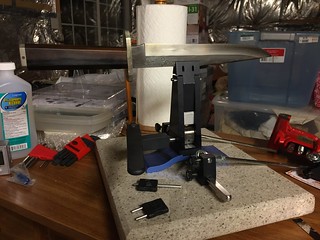
Since the vise is taller, the knife rests further up on the stone at rest. I’m thinking longer arms would be better with any system using this vise. I sharpened this one at 18 degrees and could tell I didn’t have much room to go lower, but I had used the upper mounting holes with the depth key. If just mounted the knife further up and ignored the depth key, then lower would of course be possible. Just thought I’d see what a beginning user might try and what the results would be. The knife sharpened up beautifully of course.
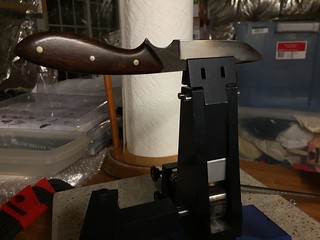
Next I tried mounting a few other knives. Most others seemed to be showing pocket knives, so I mainly gave the fixed blades some love, though the first was an Opinel folder:
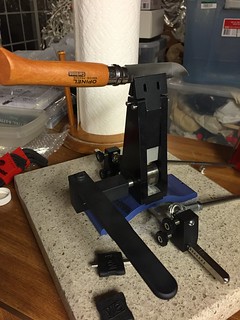
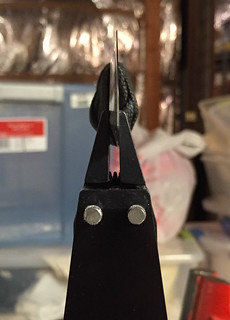
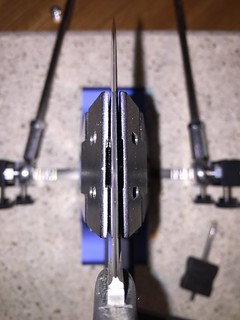
Ran into some issues with the highly convex ground blades. My Fallkniven F1 barely fit in the vise and I was able to (with force) rock it back and forth and it stayed canted where I left it. I didn’t take any pictures of that because I think the test might have been marginal due to the thickness of the blade and the vise limits. I tried the Fallkniven WM1 next:

This one still could be rocked a little and remained canted, and you can see (hopefully) that there are gaps around the jaws where it is gripping:
I want to do more testing on highly convex ground knives tomorrow. I have a whole slew of Bark River knives to try.
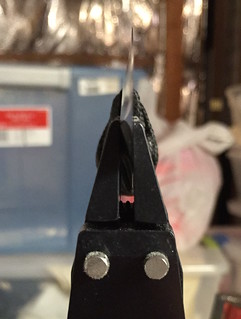
Finally, with some discussion of asymmetrical grinds, I wanted to try the ultimate asymmetric grind, a single bevel kiradashi:
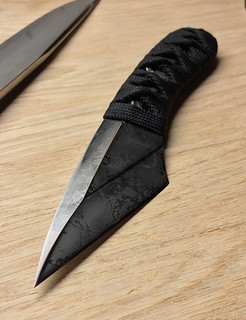
To my utter amazement, the jaws still managed to center the blade, at least as far as my eyes could tell! I tried to photograph it, but the photos weren’t everything I’d hoped they would be:

More to try tomorrow and then I’ll be passing it on. Thanks for this opportunity, Clay! I’ll be calling tomorrow with a Gen III pre-order. :woohoo:
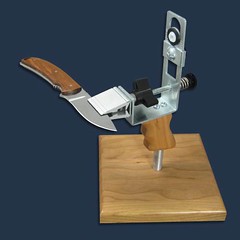
01/28/2015 at 3:16 am #22943Saw a clamp for woodworking the other day that auto adjusts to any piece of wood that fits between it’s jaws with, what the manufacturer claims at least, provides constant clamping pressure regardless of the size you’re clamping, the Kreg Automaxx Clamps[/url]. With the recent discussions of the new vise, I got to thinking this evening, wondering if the technology from the clamp could somehow be applied to the new vise as regards allowing larger blades without compromising anything. Don’t know how the current implementation auto-adjusts, so it may very well already be doing this kind of thing.
Just throwing it out there to see if anything sticks.
~Dan
01/27/2015 at 3:19 pm #22918Dan (in Virginia) would be interested in doing the pass around, though, like tuffybraithwaite, I’m ready to buy! :cheer: Was sharpening my wife’s carving knife that has a varying taper this past weekend and was wishing I had this upgrade already.
In addition to just selling the vise as an upgrade, it would be great if you sold the Gen III without stones when it is released so current Gen II owners could get the quick angle adjust too if interested.
Cheers,
Dan01/01/2015 at 4:12 am #22356Been off the forum for a little while. Where can you get these longer arms? Was thinking earlier today they would be nice.
Thanks,
Dan12/21/2014 at 3:50 pm #22179Can’t wait for this to come out, Clay! Been super stoked ever since you said you might be working on this a few months back. Even with the current thickness limitation, I’d be in. If you solve that, even better!
~Dan
05/25/2014 at 8:35 pm #18858Your post brought back to mind another post I read recently where the poster had draped fishing line over the edge of the blade with weights on each end of the line. He would look at how the weights fell relative to the vise and wiggle the handle back and forth until the weights were even on each side. I just searched but wasn’t able to find the post again right off the bat.
I keep hoping there is some way to get the floating vise on the professional model for our models. No more clamping issues then. I also keep wondering if I could fashion something like the KME sharpener’s clamp (I think similar/same as professional model floating clamp) and replace my WE clamp with it.
~Dan
05/20/2014 at 10:21 pm #18816I’m happy to try and demonstrate what I did last night. (Click on the photos for larger versions).
- Firstly, I inserted the knife into the vise where it seemed like a good place to clamp (more towards the handle), putting it at roughly a 20-30 degree downward angle, and snugged up the top screw.
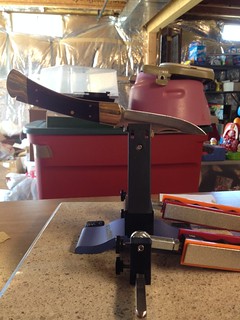
- Then I placed a piece of painter’s tape on a stone.
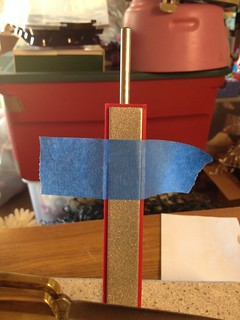
- I placed the stone at a point on the blade where it was approximately perpendicular to the edge and marked a line with a pencil.
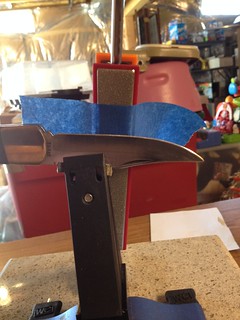
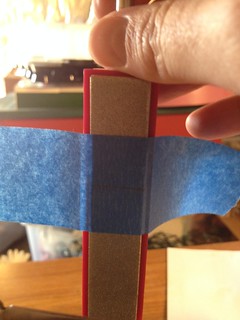
- I then moved the stone (while still pressed firmly down against the arm at the base) to the tip and wiggled the knife up and down gently until the tip was hitting the line.
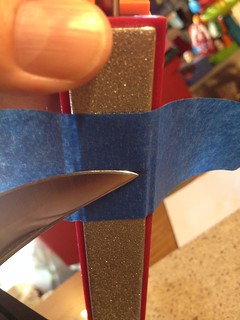
- I moved the stone back and forth between those two points and continued gently wiggling the knife until the line was hitting dead on in both places. I then snugged up the bottom bolt to finish clamping.
- In this case, there was still plenty of blade directly over the clamp that I took my reading as normal for the angle with the stone right in line up and down with the clamp, but in the case you are too close to the handle, I would use Josh’s suggestion of holding the stone at the rearmost point on the blade edge which will probably be butting up against the choil/handle, put the angle cube in line with the clamp as in the picture a few posts back, and take my reading there.
I’m still working on this one as it needed quite a bit of reprofiling, so the edge doesn’t look great, but it looks so even!
Hope that helps!
~Dan
05/20/2014 at 5:12 am #18812Thanks, Josh. I tried this on an old folder from a friend this evening and it worked fantastically! I thought it was going to be a real chore too (before reading all this) as the tip is almost level with the spine, which usually requires clamping very close to the tip. I’ve never had a more even bevel! On this particular knife, I was able to clamp far enough up the blade to take the reading as normal, stone parallel to the clamp, but I hear what you are saying about anchoring against the choil to be consistent.
I think it’s safe to say this post (and cbwx34’s) has fundamentally changed how I will sharpen with the Wicked Edge in the future. It was actually easier to forgo the depth key and alignment guide and just worry about getting a firm clamp and good angle on the blade.
I snugged the top screw up with the blade a reasonable depth in the clamp and angled down ~20-30 degrees. I then applied a piece of painter’s tape to a stone, pushed it firm against the bottom of the arm and at a point on the blade where it was perpendicular to the edge and marked a line with a pencil. I then brought the stone (still firmly held down against the bottom of the arm) to the tip area and found where the line sat. I wiggled the blade up or down until the line was the same at the tip and that perpendicular spot on the blade. Used the angle cube to set my angles and was good to go.
~Dan
05/20/2014 at 12:29 am #18809Well, I suppose you could do this to check the angle:

Or is there an easier way that I’m missing? Seems like the above way would be difficult to replicate repeatedly.
~Dan
05/20/2014 at 12:10 am #18808Just stumbled across this post and the one by cbwx34. Fantastic idea! Would have helped me a couple of times.
One question that came to mind, though, is how do you measure the angle with the blade tilted like that? If you’re following an established bevel, it doesn’t seem like it’d be an issue, but if you’re trying for an exact angle (reprofiling) seem like it would be hard to measure.
Also, per this post, I’m assuming the angle on the straight part will remain constant for the same reason it does if the straight part is mounted normally in the vice?
Thanks,
Dan05/03/2014 at 5:33 am #18506I tried your small circular technique and it worked wonderfully for me. I also tried lapping film and had no success. I did use a flexible substrates though. I was thinking I would try a solid substrate but after using the circular method I do not see a point. I made the clearest mirror polish I have ever made and I made the sharpest edge I have ever made.
I couldn’t quite grasp it from the descriptions; are you guys using the circular motion with all the stones or just the ceramics?
~Dan
- Firstly, I inserted the knife into the vise where it seemed like a good place to clamp (more towards the handle), putting it at roughly a 20-30 degree downward angle, and snugged up the top screw.
-
AuthorPosts
