mirror finish
Recent › Forums › Main Forum › Techniques and Sharpening Strategies › mirror finish
- This topic has 34 replies, 10 voices, and was last updated 05/04/2014 at 5:36 am by
Mikedoh.
-
AuthorPosts
-
04/11/2014 at 11:37 am #18218
Nice job on building your own paddles
Sent from my Nexus 10 using Tapatalk
04/12/2014 at 3:00 am #18226As usual, my late-night math is suspect. The diamond film packs from Lee Valley actually are 3″ by 6″ sheets of four different grits, each sheet producing three strips, for a total of 12 strips per pack. But who needs only three strips when you have two paddles? So I bought two packs for about $47. Twenty-four strips at $47 works out to $1.96 per strip. Pricey stuff.
Lee Valley recommends a light oil to remove the swarf. They claim that the diamond film will last quite a bit longer than other abrasives. It does lay down very nicely on glass and looks absolutely flat.
Having done only a few knives so far with the diamond film, I have to say that I prefer the flatness and exact angle of the film on glass to the flexibility of soft strops. If anybody finds diamond lapping film for less cost, please let me know.
04/13/2014 at 7:16 pm #18245The 4 3m sheets from Amazon were about $6 each and are 6×6. I wipe them clean with alcohol after using them
04/14/2014 at 4:43 am #18247If they’re 6 X 6 that’s less than half of the cost of the film from Lee Valley, which are 3 X 6 and cost $6.50.
Can you please give me the Amazon page link for them? They have hundreds of 3M films.
Thanx much Dan! 🙂
Tom / TC
04/14/2014 at 6:48 am #18249I bought two sheets each of 6 different grit (0.3, 1, 3, 5, 9 and 12mu) adhesive-backed lapping films from Best Sharpening Stones, cost $92 w/ shipping. About 16 strips per page, less than $0.50 per strip.
Wanting to sharpen with diamond grits higher than 1000, I then bought 2 sample packs of diamond grit film from Lee Valley. (Stock # 54K9630 Set(4) PSA Diamond Films) Each pack had 6 small sheets of different grit which would each produce only about 3 strips per sheet. Cost about $47. About $0.65 per strip.
Knowing I was trying to accumulate a lot of grits, I ordered a blank set of blocks from WE, but then decided that I needed way more than I could afford. I made a bunch of blocks out of wood with bronze bushing inserts and 1/4″ plate glass. So far so good. My experience it that they last longer than I thought, but I haven’t tried more than a few so far.
They are all adhesive-backed film. I even tried moving a used one from one block to another and found that if you lift the tape up keeping tension toward the lifted end, you’re less likely to leave adhesive behind.
I’d never use them on a soft substrate, but just because it seems intuitively wrong. Metal or glass get my vote.
Tc, where do you get the bronze bushings from? How is the play in them? As good as or better than stock?
Josh
04/14/2014 at 7:38 am #18251http://www.amazon.com/gp/aw/d/B00FW6YNE6/ref=mp_s_a_1_1?qid=1397446410&sr=8-1&pi=SX200_QL40
The ones i got weren’t self adhesive and cheaper but i cant find those. These are the .5m . The 1, 3, and 6 are all linked together04/14/2014 at 10:23 am #18252With apologies to Clay…
I got the bushings from McMaster-Carr: item # 6338K412 for $0.79 each. They have a 1/4″ ID and a 3/8″ OD.
I went this way because it’s really, really hard to drill a straight hole 6″ long, maintaining a precise distance from the surface of the platens at both ends. So what I did was make my blocks in 2 pieces and routed an oversized 3/8″ half-round channel in each piece. Then, with a bushing placed in each end and with a length of 1/4″ rod holding the bushings straight, I glued the two halves together, but didn’t glue the bushings into place. It was just too many pieces to manage at once. After the glue for the wood had set, I re-set the bushings into position with JB Weld (epoxy), again using a length of rod to ensure alignment.
Before assembling, I had hand counter-sunk the inside of the bushings so a rod entering from one end would have no trouble finding the hole in the opposite bushing. After the epoxy had set, I counter-sank the outside ends as well.
Obviously, before any of this, I ran the stock thru my planer to hold the correct total thickness.
Unlike the standard blocks, which have a continuous bore, this method leaves a long stretch of unguided rod, so you have to make longer rods – about 12″, and this can be a problem, as the ends are threaded to an uncommon 1/4″-28. If you have a die handle, a round die is a $10 investment. If you can find one with a hex die, a little more. For me, more toys in my estate.
Did I answer all your questions? Oh, yeah… Yes, I think they definitely have less play than standard blocks, but this is dependent on the rod stock you buy. There is a couple of thou difference in the various stocks. The stainless I bought (McMaster #89535K85) is too tight and needs to be sanded and polished down. The crummy carbon steel rod I bought at the local hardware store after polishing is outstanding.
Of course, there is the possibility that I might help you out, but I would prefer that Clay and the guys from WE get the business and I’m sure they’d accommodate you.
05/01/2014 at 5:54 am #18489call me crazy but I’ve had pretty good luck doing small circles with the ceramics up and down the stone to even out the wear. super light pressure, almost the weight of the stone and nothing more. it’s giving me really good results, and I’ve been starting with the 100’s to do initial profiles quick. It takes a lot of work but by the time I end up on the fine white ceramic it’s nice and shiny. 15-20 minutes with the strop and paste and they are looking very nice.
I tried your small circular technique and it worked wonderfully for me. I also tried lapping film and had no success. I did use a flexible substrates though. I was thinking I would try a solid substrate but after using the circular method I do not see a point. I made the clearest mirror polish I have ever made and I made the sharpest edge I have ever made.
This might have something to do with my diamond stones finally breaking into the point where they are not scratching where scratches are not wanted. I am on knife number 57 and I can finally call the edge a wicked edge.
Thank you very much
05/03/2014 at 5:33 am #18506I tried your small circular technique and it worked wonderfully for me. I also tried lapping film and had no success. I did use a flexible substrates though. I was thinking I would try a solid substrate but after using the circular method I do not see a point. I made the clearest mirror polish I have ever made and I made the sharpest edge I have ever made.
I couldn’t quite grasp it from the descriptions; are you guys using the circular motion with all the stones or just the ceramics?
~Dan
05/03/2014 at 5:44 am #18507I did 100 small circles every 3/4″ up along the blade twice on each side starting with the 1200 and ending with the micro fine. The course side of my micro fine I’d coarser than my 1200 so I never use it. With the 1200 and even the 1600 I noticed a burr developer after my circles so I just did a few alternating stropping strokes after every 100 circles along each side was complete. I then did 500 strokes total per grout with leather starting with 5 micron and ending with .5 micron.
You have to have your previous scratches with you diamond stones totally erased though. I used a cross hatch method to achieve this.
Good luck
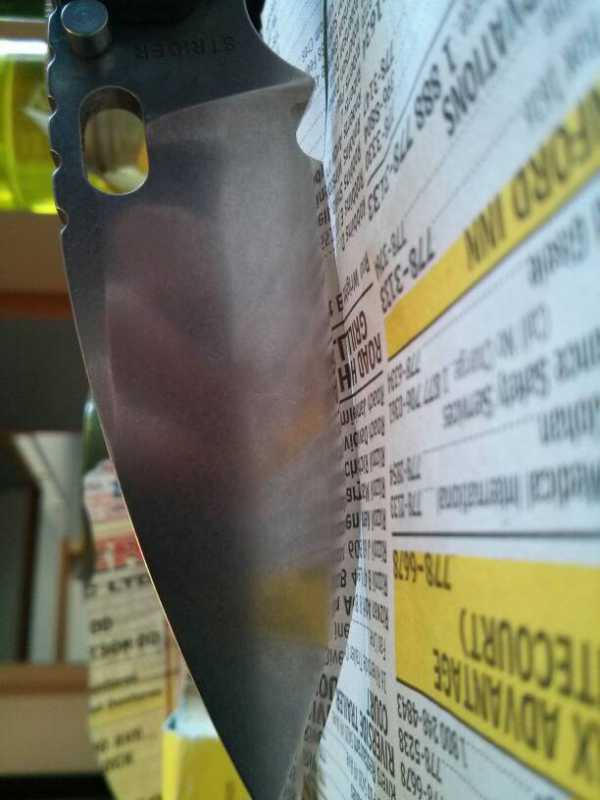
05/03/2014 at 5:47 am #18509 Attachments:05/03/2014 at 5:52 am #1851005/03/2014 at 5:52 am #18511
This is a sharpness test of the same knife.
05/03/2014 at 11:42 am #18517Well, that’s a convincing a demonstration of sharpness as I’ve seen. Especially so with a wide bevel.
BTW, I’ve been using film on glass platen blocks, and you can’t use a down-stroke once the edge is pretty sharp. It will find enough softness in the film to cut into, just as you would with leather strops, but on a much more limited scale. Kind of like shaving off the high spots with your straight razor, but once it bites, it lifts the film and digs in. With a soft platen, it would be no different than with leather strops.
05/03/2014 at 11:59 am #18520I found that with an Edge Pro and drill stop collar which maintains the angle setting between stones that it is possible to use films without cutting them although it is worthwhile doing a couple of trailing strokes first . I think if you get the SWATS or whatever they are called now you will be able to uses the films with no worry of cutting into them . Before I had the drill stop collar on the Edge Pro this was a problem since if the angle is out by probable a 10th of a degree the blade will cut through the film.
Leo Nav
-
AuthorPosts
- You must be logged in to reply to this topic.