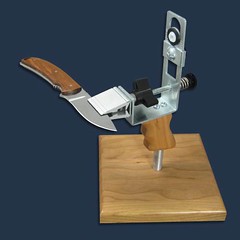
Securing the knife in the clamp
Recent › Forums › Main Forum › Getting Started › Securing the knife in the clamp
- This topic has 44 replies, 13 voices, and was last updated 06/18/2014 at 9:57 pm by
 wickededge.
-
AuthorPosts
-
05/23/2014 at 9:55 pm #18831
Gib,
It has to be your technique. Which direction and motion do your use to sharpen?
05/24/2014 at 1:03 am #18832Gib,
It has to be your technique. Which direction and motion do your use to sharpen?
Start with platen down, near the handle/heel. Then, light pressure up and toward the tip.
I may slightly be “pressing”, or “rocking” the leading edge of the stone into the blade as I begin the stroke. That might “dig” the edge of the stone into the blade enough to not cause a physically measurable “dent” or mark but is enough to cause a difference in the reflectivity?!!?
That’s my current working theory.
~~~~
For Now,Gib
Φ
"Everyday edge for the bevel headed"
"Things work out best for those who make the best out of the way things work out."
05/24/2014 at 1:13 am #18833Gib,
It has to be your technique. Which direction and motion do your use to sharpen?
Start with platen down, near the handle/heel. Then, light pressure up and toward the tip.
I may slightly be “pressing”, or “rocking” the leading edge of the stone into the blade as I begin the stroke. That might “dig” the edge of the stone into the blade enough to not cause a physically measurable “dent” or mark but is enough to cause a difference in the reflectivity?!!?
That’s my current working theory.[/quote]
Try a different stroke… Such as with the stone at the heel of the edge and all the way in the raised position… Then go down and toward the tip.
Or
You could keep your stone in contact with the edge the whole time while you use your normal motion. But keep it in contact on the return stroke… That way you will reduce your tendency to roll it
05/24/2014 at 4:58 am #18834It’s because of the little “triangle” area where the blade connects to the tang or back of the blade. It causes the stone to start slightly rotated in. If you don’t correct this, it’ll eventually start a little recurve in that area where you now see the “wave”, or it will cut a small groove in the bevel. You can (in no particular order):
- make sure the stone starts just in front of the triangle
- start your stroke at the tip and move toward the heel,,, if the stone rides up, it won’t cut into the edge.
- grind the triangle flat as you sharpen – you can do this by making sure the stone is only touching the triangle as you start the stroke. (this may result in a wider bevel in that area)
- cut a small sharpening choil (notch)
05/24/2014 at 5:59 pm #18836Once you have decided where to place the knife using the ruler and the depth gauge, tighten the screws in this manner: ……
Leo, thank you for starting this thread….
Everyone… thanks for the input…. personally I have gained a lot…
Yesterday, after reading through and looking at the photos again, I couldn’t wait to put a knife in the vise and walked around for an hour looking in every drawer I could think of that might have an unsharpened knife.
I was saved by some friends coming over for cocktails. They know I sharpen. I know they sharpen their own knives so it was a little bit adventurous but I offered to sharpen their cutlery and they said yes.
So, any new, breakthrough theoretical understanding gets to be put to the test in the real world soon!!
Thanks, again, everyone for all your work and willingness to share your understanding of this art & science.
~~~~
For Now,Gib
Φ
"Everyday edge for the bevel headed"
"Things work out best for those who make the best out of the way things work out."
05/25/2014 at 5:47 pm #18852I had a Eureka moment the other day sharpening freehand which I think translates to the WE .
I recently changed to starting the sharpening at the heel of the knife but I found often the bevel angle would shallow so it occurred to me too start just a little inboard of the heel now I think this would apply to the WE the stone needs to be in full contact with the bevel otherwise it will drop the angle it only say half the stone is on the bevel .
I think this should help a little.05/25/2014 at 6:59 pm #18857Every time I attempt to clamp a full-flat-ground blade using a compressible media, I end up with a slightly different vertical angle. So I have had to rely on using angle-cube readings off the blade sides to estimate the actual vertical axis.
I am not the only one who keeps ruminating on the issue and I really like the recent ideas and insights.
As I’ve had a knife in the vise and looking at the photos posted and trying the procedures the following idea popped into my mind’s eye.
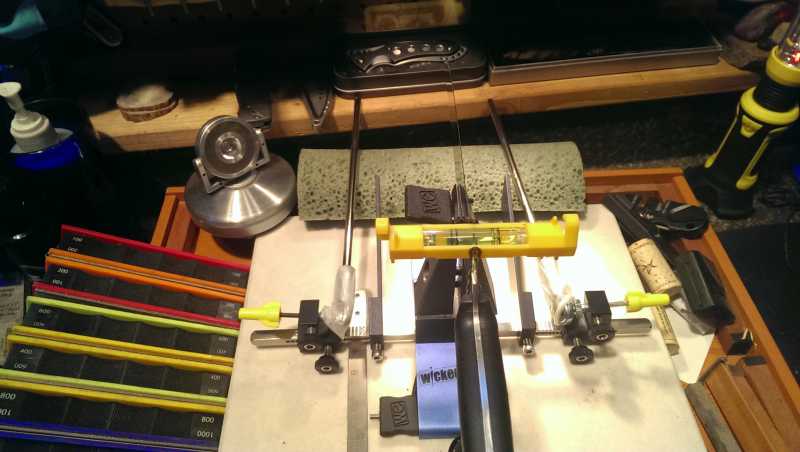
I glued a couple of bobby pins onto a line level. This isn’t meant to be a finished product just a rudimentary attempt a visualizing an idea.
The strange little device seemed to clip to the blade and “attempted” to self-center. Then, twist handle to adjust to level and tighten vise.
OK. I don’t consider myself a design engineer. Could a simple device be able to consistently grab a full flat grind? This prototype is not accurate.
If/when I have time I may try to improve this. Does it have any possibilities? If yes and you have mad manufacturing skills, go for it.
Attachments:~~~~
For Now,Gib
Φ
"Everyday edge for the bevel headed"
"Things work out best for those who make the best out of the way things work out."
05/25/2014 at 8:35 pm #18858Your post brought back to mind another post I read recently where the poster had draped fishing line over the edge of the blade with weights on each end of the line. He would look at how the weights fell relative to the vise and wiggle the handle back and forth until the weights were even on each side. I just searched but wasn’t able to find the post again right off the bat.
I keep hoping there is some way to get the floating vise on the professional model for our models. No more clamping issues then. I also keep wondering if I could fashion something like the KME sharpener’s clamp (I think similar/same as professional model floating clamp) and replace my WE clamp with it.
~Dan
05/26/2014 at 11:31 am #18871Gib:
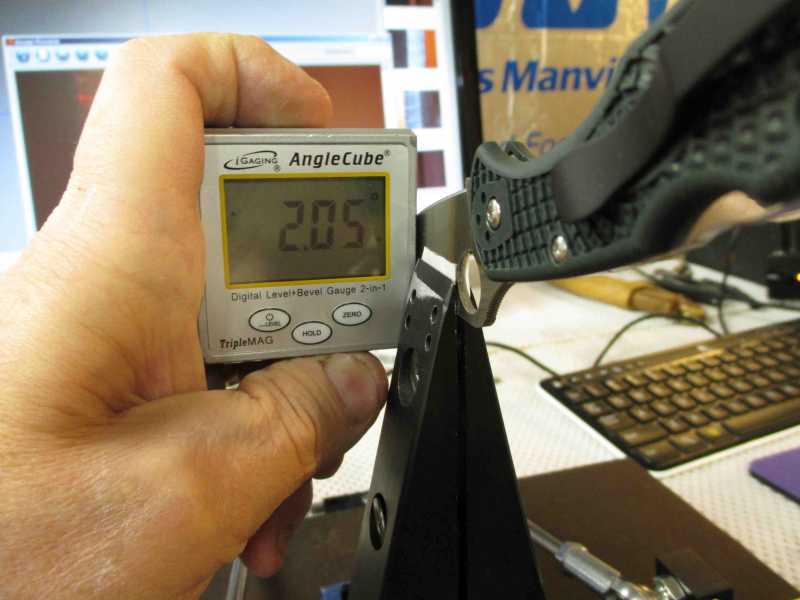
I too, am waiting with bated breath for a kit to retrofit the symmetrical clamping of the Pro rig. I’ve got it pretty well figured out, and I’ll kick the idea around a little to see if it develops. Meanwhile, here’s what I do:Clamp the blade in a vise (not necessarily your WE vise) so that you can use your AngleCube to measure the angular difference between the two flats. For instance, suppose my Spyderco Delica has a total included angle of 4.0 degrees. This means that when the blade is dead vertical, I should read 2.0 degrees on either side. So I use my AngleCube to set the angle of one of the flats to 2.0 degrees as shown in the pic below. Of course, you may have to loosen and tighten the vise several times while you’re trying to find the right angle.
Attachments:06/16/2014 at 4:34 am #19123So many great ideas in this…must go play with my new found knowledge.
06/16/2014 at 4:44 pm #19125Gib:
I too, am waiting with bated breath for a kit to retrofit the symmetrical clamping of the Pro rig. I’ve got it pretty well figured out, and I’ll kick the idea around a little to see if it develops. Meanwhile, here’s what I do:Clamp the blade in a vise (not necessarily your WE vise) so that you can use your AngleCube to measure the angular difference between the two flats. For instance, suppose my Spyderco Delica has a total included angle of 4.0 degrees. This means that when the blade is dead vertical, I should read 2.0 degrees on either side. So I use my AngleCube to set the angle of one of the flats to 2.0 degrees as shown in the pic below. Of course, you may have to loosen and tighten the vise several times while you’re trying to find the right angle.
I do something similar Tom. So what I do is pretty much the same thing. i measure both “flats” on either side of the knife while it is locked in the vise, however, from this point I just adjust my rod arms on the base bar to compensate for the angle. So if my left side is measuring 2* and the right side is measuring 6* then I know that my blade is tilted with the edge to the left. Then I take the difference (4 degrees) and split it in half. From this point, whatever my target degree mark is (let’s say 18 dps for reference) then on the left side I move it to 16* and the right side to 20*. This will give me a perfect 18 dps. Hope this makes sense =)
Gib, did you ever figure out the problem?
06/16/2014 at 5:04 pm #19127……. Gib, did you ever figure out the problem?
Which one? :woohoo:
Joah, pretty sure the solution was nailed when I read, “…. your technique….”
As I improve technique and understanding, little problems keep getting remedied….
The heel and the tip are my (subtle) but persistent challenges!
~~~~
For Now,Gib
Φ
"Everyday edge for the bevel headed"
"Things work out best for those who make the best out of the way things work out."
06/16/2014 at 5:06 pm #19129……. Gib, did you ever figure out the problem?
Which one? :woohoo:
Joah, pretty sure the solution was nailed when I read, “…. your technique….”
As I improve technique and understanding, little problems keep getting remedied….
The heel and the tip are my (subtle) but persistent challenges![/quote]
the problem where you were creating a detent about 1″ in from the heel… glad it sounds like you got it resolved! Yeah, tip issues are very important. If you let your stone “roll” around your edge even only 1-2 times it can destroy your tip… practice makes perfect!
06/16/2014 at 5:24 pm #19131the problem where you were creating a detente about 1″ in from the heel… glad it sounds like you got it resolved! Yeah, tip issues are very important. If you let your stone “roll” around your edge even only 1-2 times it can destroy your tip… practice makes perfect!
Thanks to you and others for all your input.
I slowed way back down when I first start the stroke. The last two knives have been fine. But,the knife currently in the vise began to show that “detente” or “wavey” pattern so I slowed down another speed and a few strokes later the spot was cleared.
I was working a pocket Buck yesterday and was going great. I was just getting that last little spot of blue marker at the tip of the tip and let the platen slip our of my hand. I grabbed it quick without getting cut. It didn’t fall too hard on the blade but by grabbing it I caused it to roll around the tip… with some extra pressure and it quickly redesigned the tip on the right side!!
So, that knife is still in the vise and I’ll drop down a couple of grit levels and fix that and then it should be fine….
~~~~
For Now,Gib
Φ
"Everyday edge for the bevel headed"
"Things work out best for those who make the best out of the way things work out."
06/18/2014 at 9:57 pm #19147Floating vise jaws are in the works! It may be a little while yet but we proofed at the concept yesterday at the machine shop.
Your post brought back to mind another post I read recently where the poster had draped fishing line over the edge of the blade with weights on each end of the line. He would look at how the weights fell relative to the vise and wiggle the handle back and forth until the weights were even on each side. I just searched but wasn’t able to find the post again right off the bat.
I keep hoping there is some way to get the floating vise on the professional model for our models. No more clamping issues then. I also keep wondering if I could fashion something like the KME sharpener’s clamp (I think similar/same as professional model floating clamp) and replace my WE clamp with it.
~Dan
-Clay
-
AuthorPosts
- You must be logged in to reply to this topic.