Re: the new 2200/3000 stones?
Recent › Forums › Main Forum › Techniques and Sharpening Strategies › Abrasives › Re: the new 2200/3000 stones?
- This topic has 37 replies, 10 voices, and was last updated 07/04/2019 at 10:17 am by
Brewbear.
-
AuthorPosts
-
07/01/2019 at 1:57 pm #50852
Might be a nice addition to my set of 1200/1600 ceramics.
1 user thanked author for this post.
07/01/2019 at 2:12 pm #50853Thanks for the detailed response Clay!
2 users thanked author for this post.
07/03/2019 at 11:59 pm #50881Alas. I’m just getting around to trying the new stones. Mine are actually quite pristine, with the first inspection resulting in a very positive impression. I approach the grit combinations from a slightly different perspective, as I remounted my stones in a different sequence, running 200/400, 600/800, 1000/1500. My rule of thumb has been that the steps in grit should be somewhere between 50% and 100%. In other words, the next step up from 1000 grit should be somewhere between 1500 and 2000 grit. While the WE grits tend to be on the low side of the step increases, I would have chosen to go straight to 3000 grit from 1500. I plan to test my “theory” after I’ve got the new stones broken in. Sorry for not getting around to this sooner, but I had earlier picked up a collection of eleven old wood planes on Craigslist and have be working my way through a restoration program. Some really interesting learnings on sharpening really old blades.
If I may ask, how did you go about re-mounting the stones on the handles? Thank you.
07/04/2019 at 2:31 am #50882If I may ask, how did you go about re-mounting the stones on the handles? Thank you.
I have an old hot plate – actually, I think it was used for fondue. Anyway, it has a small pot that sits on an open hot plate with the temp controlled by a simple adjustment knob. I don’t use the pot. I set the temp of the plate to about 200F and rest the face of the stone I want to remove on the hot surface. When the temp of the stone reaches about 180F, I slowly pry the stone from the handle with a knife.
Peeling the tape off is a chore. Pushing the VHB tape sideways with your thumb when it’s hot can blister your thumb badly, so wear gloves.
Having cleaned the residue of the original double-faced tape from the stone, I remount it to the new handle using three short pieces of VHB tape – one at each end and one in the middle.
3 users thanked author for this post.
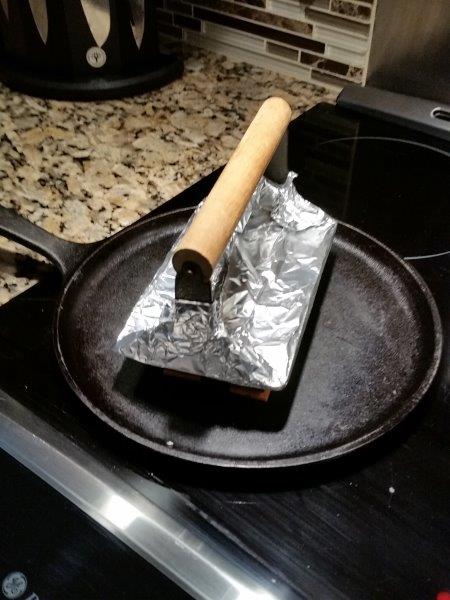
07/04/2019 at 9:05 am #50887Brewbear, I followed Tom’s method only on the electric range top. I used a cast iron griddle. I worked just at 200ºF verified with my IR Thermometer. That’s still a low enough temperature to not effect the plastic handles but also work efficiently against the 3M VHB double sided tape.
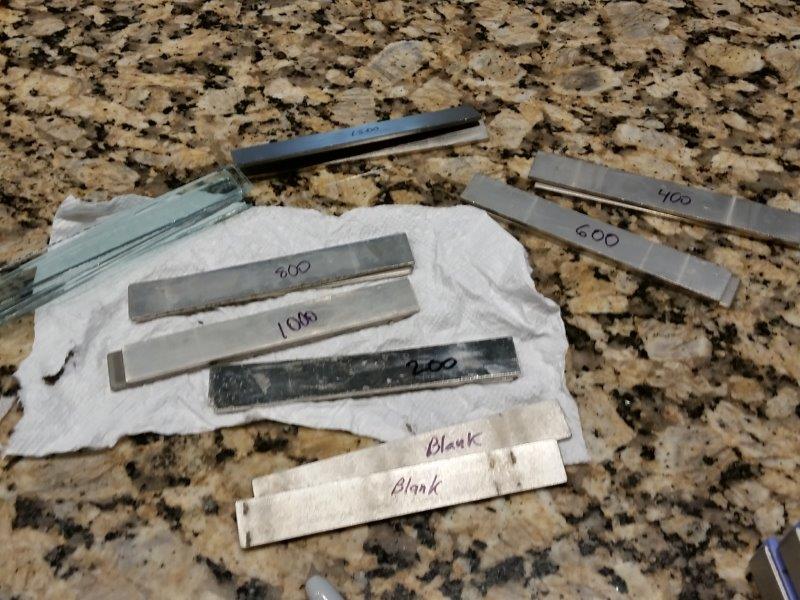
I let the two steel diamond stones rest against the skillet for about 5 minutes, with a bacon press weighting them down. I quickly pried the stones up and flipped them sideways, the short way, with a very thin screw driver. Like Tom said it is hot so wear safety gloves. I found at that slightly hotter temp the original double stick tape lifts right off with the screw driver if attempted immediately after removing the stones. I did the glass blanks also with the same method. (I used “Goo Gone” to remove any adhesive residue from the glass blanks. Then I cleaned them again with Windex before remounting).
Be sure to label the stone diamonds appropriately with their respective grits so not to get them crossed when re-mounting.
I asked Tom via email which VHB tape he used and purchased the same 3M VHB RP32 tape from Amazon. For the re-mounting step I found it is easier to apply the tape pieces down onto the plastic handles into the flat indented mounting pads first. Then after the tape is positioned flatly and securely, peel the backing. Then use the raised edges to help you position the stones on the indented flat mounting pads. If you place the end of the stone just against the little lip it will fit right down flat with out the other end getting caught up on the lip causing a uneven mounted stone.
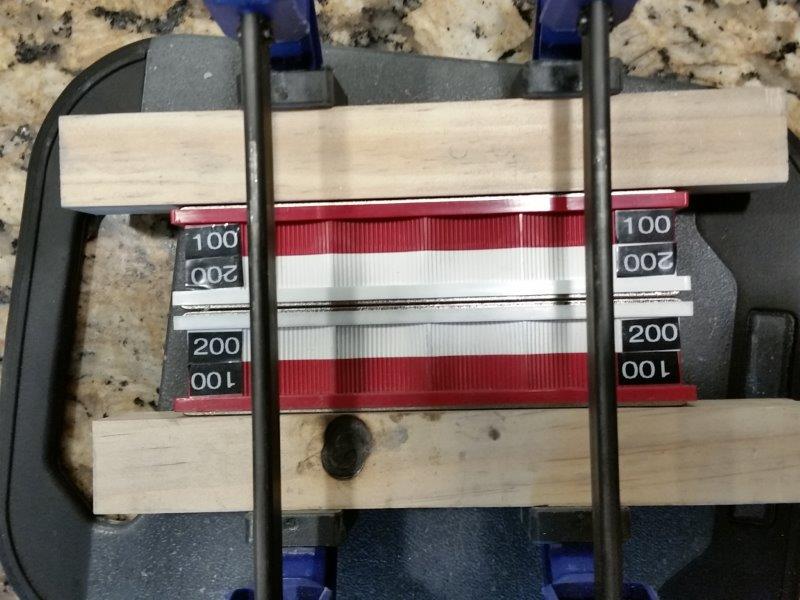
I worked two stones at a time when re-mounting them. I clamped the like grit pairs face to face with a paper towel between them and a thin piece of wood on the outside and clamped them for about 5 minutes. The clamping is probably unnecessary but it won’t hurt either.
I made new labels with my “Brother P-Touch TZ Tape Printer” using “TZe-325″ 0.35” Black Tape with White Writing to re-label the handles appropriately.
I want to thank forum contributor TCMeyer, Tom, for his help showing me the way in his earlier posts.
Marc
(MarcH's Rack-Its)Attachments:
You must be logged in to access attached files.
5 users thanked author for this post.
07/04/2019 at 9:34 am #50897Thank you both for the detailed replies. I just ordered the 2200/3000 grit stones and I’m planning to : remove the glass side on the 1500 I already have (with 6 micron DLF) and replace it with the 2200 stone. Attach the glass to the 3000 handle so my progression will be 800/1000, 1500/2200, 3000/6 micron DLF, 3 micron/1.5 micron, 1 micron/0.1 micron. I haven’t gotten to the stropping side yet, but I’ll get there, I finally got a microscope I have yet to install.
1 user thanked author for this post.
07/04/2019 at 9:41 am #50900I finally got a microscope I have yet to install.
The window is waiting to be opened..
2 users thanked author for this post.
07/04/2019 at 10:17 am #50901I finally got a microscope I have yet to install.
The window is waiting to be opened..
I can hardly wait for a bit of time when I can play, unfortunately work keeps me busier than a one armed paper hanger! My eight hours work days stretched to 12 and 16 hours of late and once home I have remodeling projects started long ago that I need to complete. I will get to play one of these days but for now I’m happy to sneak in an hour or so every once in a while and our knives are sharper than they ever were before.
2 users thanked author for this post.
-
AuthorPosts
- You must be logged in to reply to this topic.


