Need Angle of 45 Degrees
Recent › Forums › Main Forum › Techniques and Sharpening Strategies › Need Angle of 45 Degrees
- This topic has 42 replies, 6 voices, and was last updated 04/26/2021 at 8:00 am by
 Marc H (Wicked Edge Expert Corner).
-
AuthorPosts
-
03/20/2021 at 3:49 pm #56418
Power planer – 2 blades that spin and run live edge lumber over them
Like Emily Litella used to say on SNL (’70s), “oh!, that’s very different, never mind”.
Marc
(MarcH's Rack-Its)03/20/2021 at 4:39 pm #56419Emily was played by the late, great Gilda Radner. I remember her wondering what all the fuss was, about “sax and violins” on television. That was another of her “Oh! Never mind!” moments. I thought she was even better in her other character role, as Rosanne Rosannadana. Gilda, a gifted comedienne, was married to Gene Wilder and died in 1988 of ovarian cancer. Lots of youtube videos of her.
03/20/2021 at 4:54 pm #5642003/21/2021 at 4:47 am #56430LOL – listening to the book “Live from New York” – behind the scene interviews with cast members and writers from 1975 – 2015 – very interesting stuff. SNL was a “must see” for me
1 user thanked author for this post.
03/21/2021 at 10:15 am #56431Yeah, it used to be fun to watch. It’s probably been over a decade since I watched it.
04/19/2021 at 9:59 pm #56570…planer blades that require a 45 degree angle. …I have the WE130 and the largest angle is approximately 38 degrees.
I have the WE120 and wonder if there is some way to LOWER the clamp that holds the blade in order to achieve a wider angle.
The WE scale goes out to 35, I can use the angle cube and get it out to 38-40 but that is it. I am sharpening “goat hoof shears” which look just like the small pruners that gardeners use. At my max angle I have to reprofile all her shears, that are likely around 42 degrees from the factory.
When you hit the limit on how far out you can move the arm, you just have to wonder if it’s possible to put a smaller riser / spacer that sits below the clamp. That would achieve the same result of a bigger angle…
04/19/2021 at 10:31 pm #56571…planer blades that require a 45 degree angle. …I have the WE130 and the largest angle is approximately 38 degrees.
I have the WE120 and wonder if there is some way to LOWER the clamp that holds the blade in order to achieve a wider angle. The WE scale goes out to 35, I can use the angle cube and get it out to 38-40 but that is it. I am sharpening “goat hoof shears” which look just like the small pruners that gardeners use. At my max angle I have to reprofile all her shears, that are likely around 42 degrees from the factory. When you hit the limit on how far out you can move the arm, you just have to wonder if it’s possible to put a smaller riser / spacer that sits below the clamp. That would achieve the same result of a bigger angle…
The scissor attachment won’t work for the goat hoof shears?
04/19/2021 at 10:44 pm #56572The scissor attachment won’t work for the goat hoof shears?
I thought they would have a much more blunt angle – but I can’t seem to find any numbers on that from Wicked Edge…
But maybe you are right – I found a scissor site that said 40-45 degrees which is what I need. I will have to pick up that attachment. I think it would clamp the disassembled shears well. Yeah I will give that a try.
04/19/2021 at 11:01 pm #56573The scissor attachment won’t work for the goat hoof shears?
I thought they would have a much more blunt angle – but I can’t seem to find any numbers on that from Wicked Edge… But maybe you are right – I found a scissor site that said 40-45 degrees which is what I need. I will have to pick up that attachment. I think it would clamp the disassembled shears well. Yeah I will give that a try.
It works great for me on my scissors. I forgot what the offset is from the base level for the scissors attachment, but the chisel attachment is offset 26° from base level, if I remember right. But the easiest way to sharpen them is with the sharpie method anyway. The scissor attachment also grips very well, better than I expected it would.
1 user thanked author for this post.
04/23/2021 at 10:37 pm #56593It works great for me on my scissors.
…But the easiest way to sharpen them is with the sharpie method anyway.
OK, got the scissor attachment in today – and it is the opposite problem. The angle is too wide, the sharpie gets hit along the apex. Previously it was hitting along the base of the bevel.
I tried the 3 mounting points on the attachment, the one that angles “down” more rather than level is approximating what I need on this odd 40 to 45 degree angle on the wife’s hoof shears. But it’s not angled down enough, and it is like the sliding arm needs to be a couple inches longer for that to work (I have the WE 120 that is numbered out to 35).
I removed the “riser block” on the WE 120 which fixed everything for this odd application – but it is a pain to go back and forth.
She has a bunch of goats, and needs these things sharpened all the time. Has several sets of these shears, and I have been reprofiling them to about the 38 degree max that is mentioned on the first post of this thread.
04/23/2021 at 11:49 pm #56594It works great for me on my scissors. …But the easiest way to sharpen them is with the sharpie method anyway.
OK, got the scissor attachment in today – and it is the opposite problem. The angle is too wide, the sharpie gets hit along the apex. Previously it was hitting along the base of the bevel. I tried the 3 mounting points on the attachment, the one that angles “down” more rather than level is approximating what I need on this odd 40 to 45 degree angle on the wife’s hoof shears. But it’s not angled down enough, and it is like the sliding arm needs to be a couple inches longer for that to work (I have the WE 120 that is numbered out to 35). I removed the “riser block” on the WE 120 which fixed everything for this odd application – but it is a pain to go back and forth. She has a bunch of goats, and needs these things sharpened all the time. Has several sets of these shears, and I have been reprofiling them to about the 38 degree max that is mentioned on the first post of this thread.
It’s hard to know what people are really talking about when they don’t show any photos. But I googled goat hoof shears and figured that sharpening them wouldn’t be much different than sharpening scissors. The angle offset from the base with my SA on my WE130 is 24°. The angle out to the outer hole on the angle bar with my aftermarket micro-adjusters screwed all the way back is 25.7°. I could go a little further if I don’t use the hole and instead use the micro-adjuster L-screw to lock the L-Bracket. That’s 50° or so that I can go. It seems to me that it should work.
04/24/2021 at 7:45 am #56595
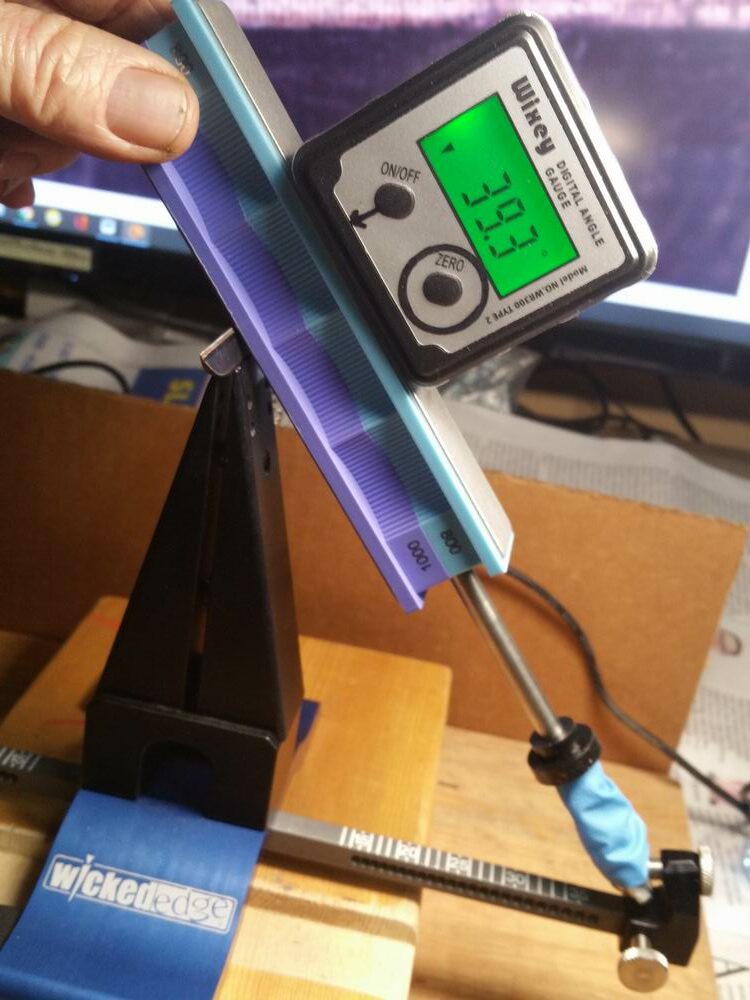
Factory profile on this hoof shear is about 40 degrees. With the WE120 set as far wide as it can go, it barely clears the sharpie off the factory bevel. She has several different manufacturers of these shears, some factory edges are a bit over 40 degrees and I have to reprofile.
Here we are getting a proper angle – just barely.Attachments:
You must be logged in to access attached files.
1 user thanked author for this post.
04/24/2021 at 7:48 am #56599
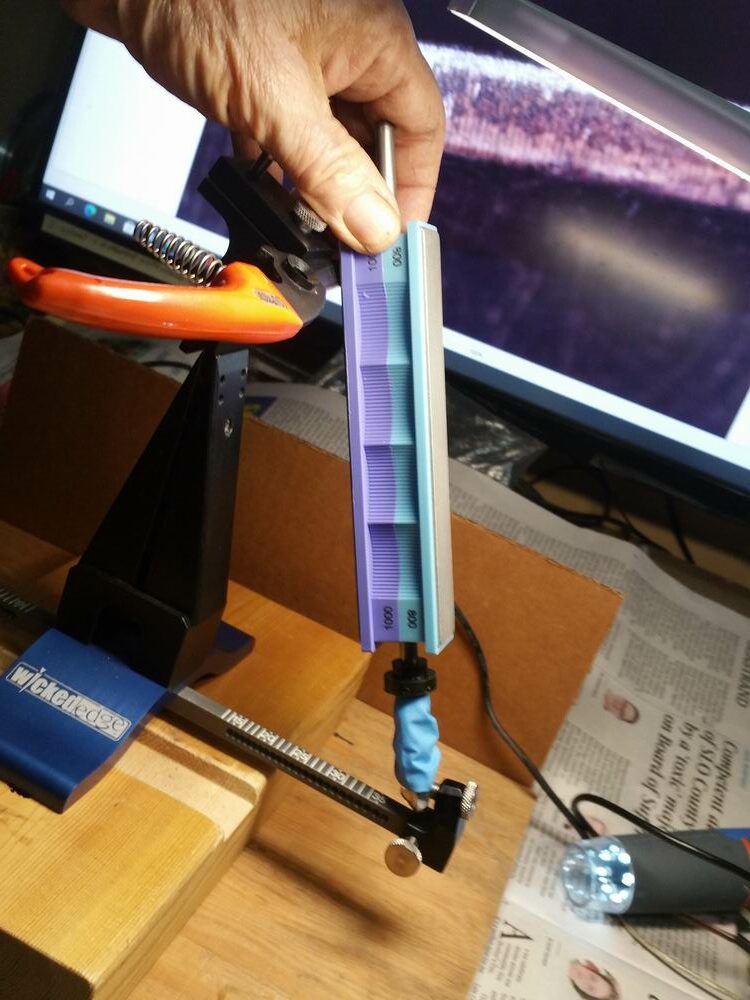
While waiting for scissor attachment to arrive, I took the riser block off.
Now it goes to 45 degrees easily, so I have freedom to easily move around that 40 degree range to clear the sharpie and approximate factory angle (which is usually around 40 degrees)Attachments:
You must be logged in to access attached files.
1 user thanked author for this post.
04/24/2021 at 7:56 am #56603
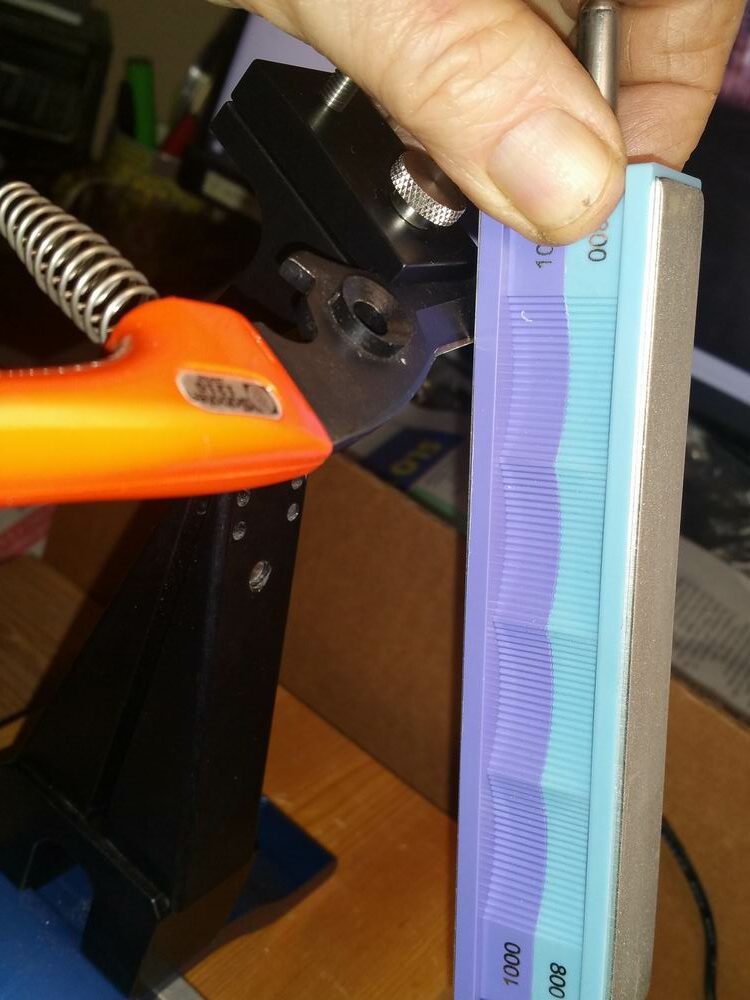
Here the scissor attachment is on. Of the 3 positions this is closest I can get to factory angle but can’t clear the sharpie off anything but the apex.
Celestron USB close up. Best I could do with scissor attachment on this particular hoof shear.
WE120 with arm moved outward as far as it can go.At this point, I think I am going to do all my long kitchen knives while the riser block is in place. Then remove it so I can do the constant supply of dull goat hoof shears, and still do the average length knives, my Paramilitary 2’s etc. without riser block.
Attachments:
You must be logged in to access attached files.
1 user thanked author for this post.
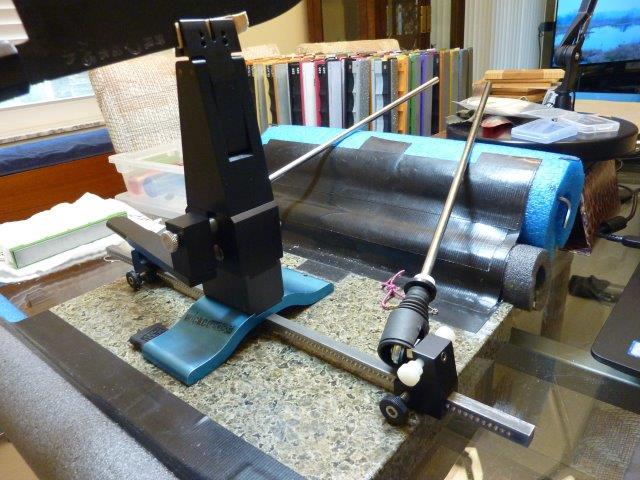
04/24/2021 at 8:05 am #56609Bob, the Wicked Edge steel square bar is 5/16″. You can replace it with a longer bar. It probably needs to be 14″ or 16″ longer, overall. Then you’ll be able to achieve the wide angle settings needed to sharpen the hoof sheers with the SA while the riser block is still in place. The longer square bar won’t effect your knife sharpening ability. You will have to learn to work with a flat sided square bar without the delineations or angle indents. The mini L brackets can be locked in place against a flat square bar if the set screw pointed tips are flattened. You may find it’s helpful to use two 10-32 set screws for each side bracket. One screwed in from the front side and a second one in from the rear.
If you want to pay the expense you can have a bar machined with the indents. I met a guy that did that for me years ago as a one-off deal. See the attached photo showing my modified setup.
The new square bar will need one hole drilled up through the square bar to secure the bar up underneath the blue W.E. mount and up into the stationary left vise side. If you have the tools to do metal fabrication you may be able to cut and drill the 5/16″ steel bar yourself. If not a local metal shop, machine shop or welding shop can easily knock it out.
Coincidentally the 5/16″ steel is the same dimentions as many rotisserie rods like those used on an outdoor BBQ grill rotisserie accessory.
I made this modification to my W.E. setup many years ago to improve my overall angle range I can achieve. I work with this longer square bar in place all the time.
Marc
(MarcH's Rack-Its)Attachments:
You must be logged in to access attached files.
2 users thanked author for this post.
-
AuthorPosts
- You must be logged in to reply to this topic.

