This is a knife!
Recent › Forums › Main Forum › Knife Photos › This is a knife!
- This topic has 14 replies, 5 voices, and was last updated 04/02/2022 at 1:51 pm by
Timm.
-
AuthorPosts
-
03/29/2022 at 8:30 pm #57742
This was made for me back in the late seventies while visiting a rancho high in the central mountains of Baja Sur, where they made these blades. The steel is Chevy truck leaf spring–they were very specific about that, including the year and model (which I’ve somehow forgotten).

All the tools were hand-powered, with the exception of the blower for the forge, which was powered by a burro. The temper on this is excellent. It sings when you pull it from the sheath and I’ve never chipped the blade in all these years. It holds an edge very well. I use it mostly for large meat-carving jobs in the kitchen, but it’s seen use for most everything.
The original grip was aluminum bolsters (cast from beer cans) with steer horn flakes. That died many years ago and I made the current grip about a decade or so ago.
I don’t know what this type of Mexican knife is called. It was the EDC for most campesinos in Northwest Mexico back in the day, and was a regular multi-tool for them. Need frame members shaped for a fishing boat? You have the tool. Need to dress out a deer. Yep. Settle an argument? Yeah, that too.
But I can’t find picture one of it on the internet.
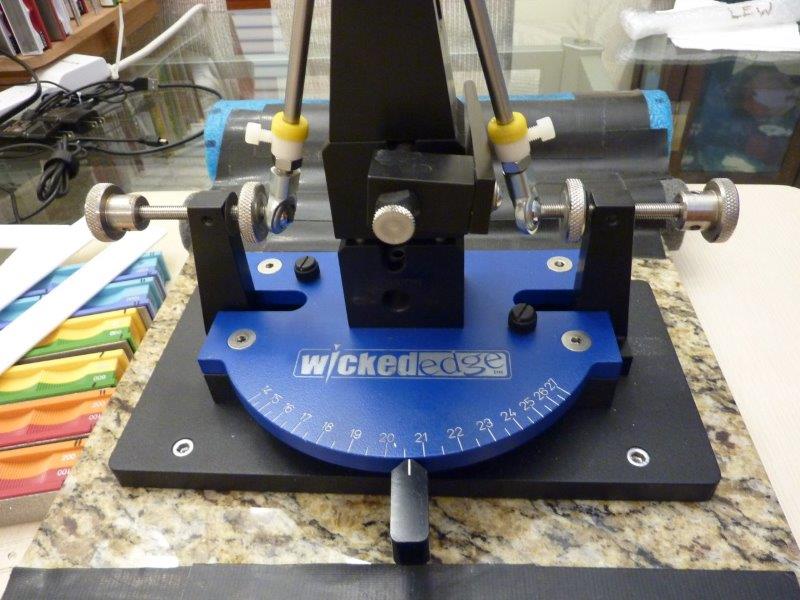
It’s big (11 3/4″ blade), it’s fairly heavy from the wide blade, but also thin. I couldn’t get it to stay in place in the vice, so had to rig something up:

Toyota scissors jack under the handle stabilized it nicely!
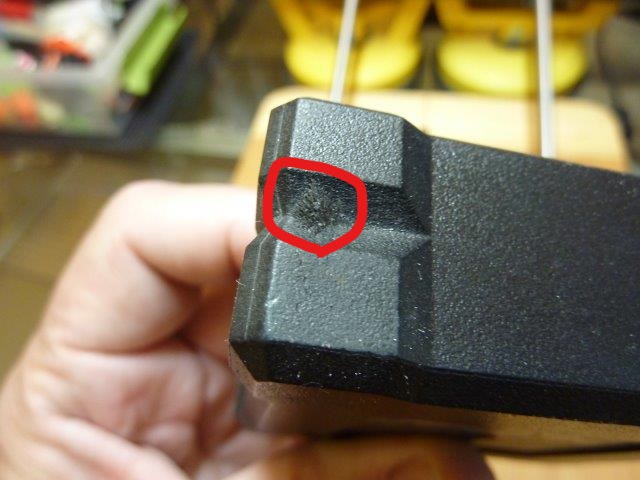
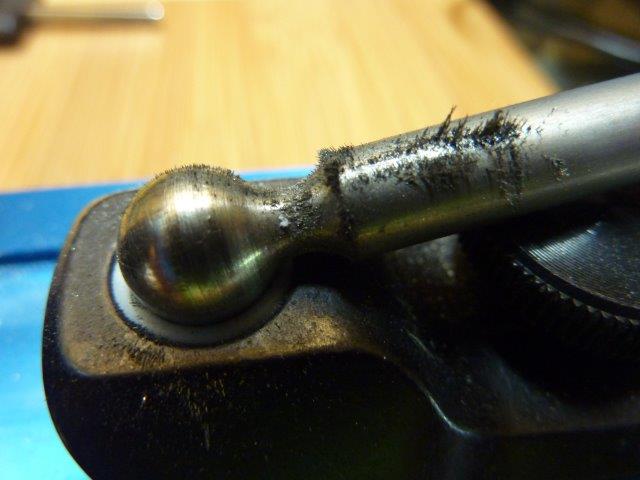
I learned some things about big blades with this one. For one thing, I need longer rods and rod stops. Not only did I give it a Wicked Edge (the photos are during re-profiling–I’ll try to get a good “after” pic tomorrow), but I also gave it Wicked Scratches from running past the end of the stones on an edge-leading stroke. At the full extension of the paddles, only about an inch of rod was inside the paddle.
I also learned that re-profiling a blade this size is a LOT of work!
I just ordered the 14″ rods–this being my largest blade I’ll be sharpening on the WEPS (I think I’ll just stick with hand-stoning for my 28″ blade machete), I measured and the 14s will give me about an inch above the end of the paddle–plenty of room for a stop so I don’t run the bottom edge of the stone down the blade. While I was at it, I also got the 1500/2200 paddles just for excess sharpening and the AAG for better repeatability. Now I need to get hold of Airscapes and order some stops and the hand-held kit for the Pluggable scope.
03/31/2022 at 2:23 pm #57748Nice Knife and great idea on the scissor jack! You will find the bottom stone stop very helpful when setting the angle. You can place it so the stone is centered on the the blade for a more stable measurement, assuming you are using the digital angle cube.
03/31/2022 at 3:55 pm #57751Nice Knife and great idea on the scissor jack! You will find the bottom stone stop very helpful when setting the angle. You can place it so the stone is centered on the the blade for a more stable measurement, assuming you are using the digital angle cube.
I can’t wait to get them! I’m currently using a “bulldog” paperclip to hold the stone centered on the blade when measuring for angles.
Here’s the so-far finished knife:

In its hand-tooled sheath:

Marc–that looks like part of a tripod. It would need something to anchor it to the benchtop. Maybe something as simple as a plumbing wall-flange would do the trick? I’m tempted to get one just to experiment with. Might be real handy for the USB ‘scope, too.
03/31/2022 at 8:25 pm #57752I used rubber grommets for stone stops until mine came in.
03/31/2022 at 9:43 pm #57754Timm, they have all sorts of things that other W.E users have adapted for similar supporting situations


Marc
(MarcH's Rack-Its)04/01/2022 at 1:17 pm #57764I’ve seen those. Cell phone support, right? I forget the brand, but probably a better solution than the do-all scissors jack. It’s just what I had around the shop, and it worked.
I really envy the set-up in the second picture. My workbench is also my workbench for work, so I have to set up and break down every time I use the WEPS.
I also work standing up, and I think I’ll try taking the shelf assy. off of the Pro G3 vise so I can look down more on the blade. As it is, the knife is about even with my shoulders, and I get tired of this position pretty fast and find myself taking lots of breaks while sharpening.
04/01/2022 at 2:08 pm #57765That’s how I had my Gen 3 Pro set up. Sitting for me is the way to go.
Marc
(MarcH's Rack-Its)Attachments:
You must be logged in to access attached files.
04/01/2022 at 3:44 pm #57768I took the shelf unit off the Pro G3. I used some little rubber feet on the bottom and it seems to be very stable on the 3/8″ chunk of steel on my shop bench.

I’m much more comfortable keeping my hands down below my shoulders, but still standing. I spend about half of most of my days sitting in front of a computer screen, so try to stand when practical. I now need to get used to looking down on the the blade, rather than down the length of it.
BTW, that’s a Smithfield breaking knife I’m working on, a challenging blade to sharpen with the WEPS.

I’m sacrificing that shoulder of the vise as I can’t get the blade any higher and keep the angles consistent. The knife is too long and flexible for the Tormek Small Knife adapter.
04/01/2022 at 8:51 pm #57770I have taken to doing my wife’ s boning knife in stages and then over lap them, rather than trying to mount in a manner that lets me do it in one setting.. In other words.. do all the grits, remount, do them all again over lapping and then one more time for the tip..
04/01/2022 at 9:24 pm #57771That boning knife isn’t that big and the blade shape looks mostly flat in the blade’s center. I think I would have clamped it so the center flat portion is centered with the jaw and the blade was mostly parallel to the jaw line, with it high up in the jaws so it’s clamped by just the tips of the jaws . That’d be essentially with the tip just lowered a bit from how it’s clamped in the photo. In this way if you didn’t match the full length of the bevel you’d be reprofiling just the tip a little bit for the first time sharpening it in the W.E.in that clamping position. Any change would be barely noticeable and it’d work just fine. Subsequent touch-ups clamped this same way would match right up.
Marc
(MarcH's Rack-Its)04/02/2022 at 3:37 am #57773The black plastic clamping schemes are from the “RAM” family of mounts. You can find most of their stuff on Amazon. I have the vacuum mount part numbers somewhere if you’re interested.
04/02/2022 at 10:53 am #57777Thanks, all.
Marc: I found this mounting using the Sharpie method to find the “sweet spot”. It still didn’t match the old profile (probably not the original), but came much closer than mounting with the straight portion flat to the jaws. I checked angles on the stones at various points along the blade, and this was the best compromise for a continuous 20 dps. With the back of the blade resting on the rear pin, and the front edge barely engaging the jaws of the vise, it should be easy to duplicate.
AAG is on its way with my new paddles and rods, so it will be easier to document oddballs like this in the future.
Tom: I’d appreciate that parts list for the vacuum-mount unit. I found the selection on the website a little mind-boggling. Do they offer a magnetic base? My shop bench has a 3/8″ steel plate, so a mag base would work very nicely.
Now I have a little Swiss Army gentleman’s knife to do for a friend. It’s brand-new, so shouldn’t take much. He wants a steeper angle on the main blade and a surgical edge on the smaller one.
04/02/2022 at 12:03 pm #57779Magnets seem like a good idea but they do not fare well once they start collecting fine steel dust from knife sharpening. Especially if the magnet(s) are strong enough to hold well and stay where placed. I found the very fine steel dust piles on the magnets and grows like a steel furr ball. It tends to just push and move around on the magnet as I tried to wipe it clean to remove it.
Marc
(MarcH's Rack-Its)Attachments:
You must be logged in to access attached files.
04/02/2022 at 12:18 pm #57783Here are the Amazon links. For the arm and clamp, you have to select the size:
04/02/2022 at 1:51 pm #57784Marc: I use a lot of magnets around the shop, and also work a lot of ferromagnetic metals. I’ve found the best (only?) way to clean the magnets is a high volume, high pressure blowgun from my compressor. It really knocks those wads of filings for a loop.
Tom: Thanks! I’ve gotta sharpen a knife right now, but I’ll peruse those links later.
The only real problem with using the scissors jack to support the handle of the knife–just against sag, not sideways motion–was that it interfered with my elbow some when sharpening. A smaller jack might also be just fine.
-
AuthorPosts
- You must be logged in to reply to this topic.