Spyderco Para 2
Recent › Forums › Main Forum › Knife Photos › Spyderco Para 2
- This topic has 27 replies, 7 voices, and was last updated 08/28/2020 at 6:17 pm by
 Marc H.
-
AuthorPosts
-
01/25/2020 at 11:53 am #53316
Keep us posted on this when you’ve done the sharpening and sharpness testing (perhaps in a new thread?). I’m interested to see how it turns out.
1 user thanked author for this post.
01/28/2020 at 12:11 am #53339I’m interested too!
BTW Ed, I have several folders with M390 blades, it is my favorite steel by far (for now at least). I have a couple of Spyderco knives but as age goes up, ability to finger flick them open goes down (for me at least) so I’m happier with the Hogue made Doug Ritters RSK Mk1 and Hinderer xm-18. My best effort on a Ritter scored 175 but I only spent 30 minutes or so on it.
1 user thanked author for this post.
01/29/2020 at 8:27 pm #53359Ed that Bess score is excellent. I’ve sold all brands of folders I have except Spyderco now and keep around 8-12 at a time buying and selling trying different steels. Keep the odd favourite. They just have so much steel selection (albeit a lot of them are sprint runs that sell out very quickly) and seem to also spend a lot of R&D on nailing the heat treat. Anyway, if you find you like the M390, I’d recommend you try something in Cruwear. Personally I feel I can get it sharper but I don’t have a Bess to quantify that. I don’t find that either M390 or Cruwear hold their edge as long as S110V. S110V looses its “just sharpened” edge quickly but then keeps a good working edge for a long time. I also find that high carbide steels like S110v operate better in real world usage (cardboard, rope, zip ties, etc.) with a toothier edge although that would likely hurt its Bess score.
Others I’d really recommend (although they are more tool steels that will patina in case you prefer stainless) are K390 and Rex45.
2 users thanked author for this post.
01/30/2020 at 4:50 pm #53361I’ve been sharpening my paramilitary 2 (cpm s30v) at right on lower line 6 with tip right in the left lower corner of C with the AAG. This is using the lower holes of the AAG and the wE130. Interested to hear what settings other people are using with this knife. I also have a new m390 Para 2 sitting in the box looking at me. It’s probably asking me to please leave it alone!
01/30/2020 at 6:49 pm #53362I’ve been sharpening my paramilitary 2 (cpm s30v) at right on lower line 6 with tip right in the left lower corner of C with the AAG. This is using the lower holes of the AAG and the wE130. Interested to hear what settings other people are using with this knife. I also have a new m390 Para 2 sitting in the box looking at me. It’s probably asking me to please leave it alone!
I used the settings shown in this video by Clay. Worked great for me. I actually mirrored a Para3 beside the Paramilitary 2 clamped like this to see how it aligned on the AAG and use those settings now on that model. I find I get a nice even bevel in both cases. I sharpen all of my Para models to 15dps and that covers a range of steels currently including S110v, Maxamet, Cruwear, 52100, M4, Rex45, and BD1N.
I used to polish that main bevel right up to 1 micron diamond emulsion and then add a toothier 18dps microbevel with the 800 grit stones. I liked that edge a lot for an EDC folder, however, now I don’t bother usually with a microbevel. I just run the main bevel at 15dps and usually stop with the 1500 stones. Still push cuts newsprint but grabs and cuts fibrous materials with ease. Over the years through practice and patience my sharpening technique has improved that I can now appreciate how versatile an edge is with a very true apex finished with the diamond stones, no ceramics nor stropping compounds. At least on a EDC type pocket / multi-use knife. I think the 1500 stones are about 5 micron.
Sharpening knives can be a cerebral exercise. Deciding settings and angels depends on so many factors as well as personal preference. Steel type, heat treat, blade geometry, style of grind, thickness behind the edge, intended usage, etc, etc, etc … I too am interested in what others are doing with similar knives. I often go the the knife setting database to see if anyone has uploaded settings previously on something new to me to sharpen.
01/30/2020 at 11:08 pm #5336345srbest, Jeff,
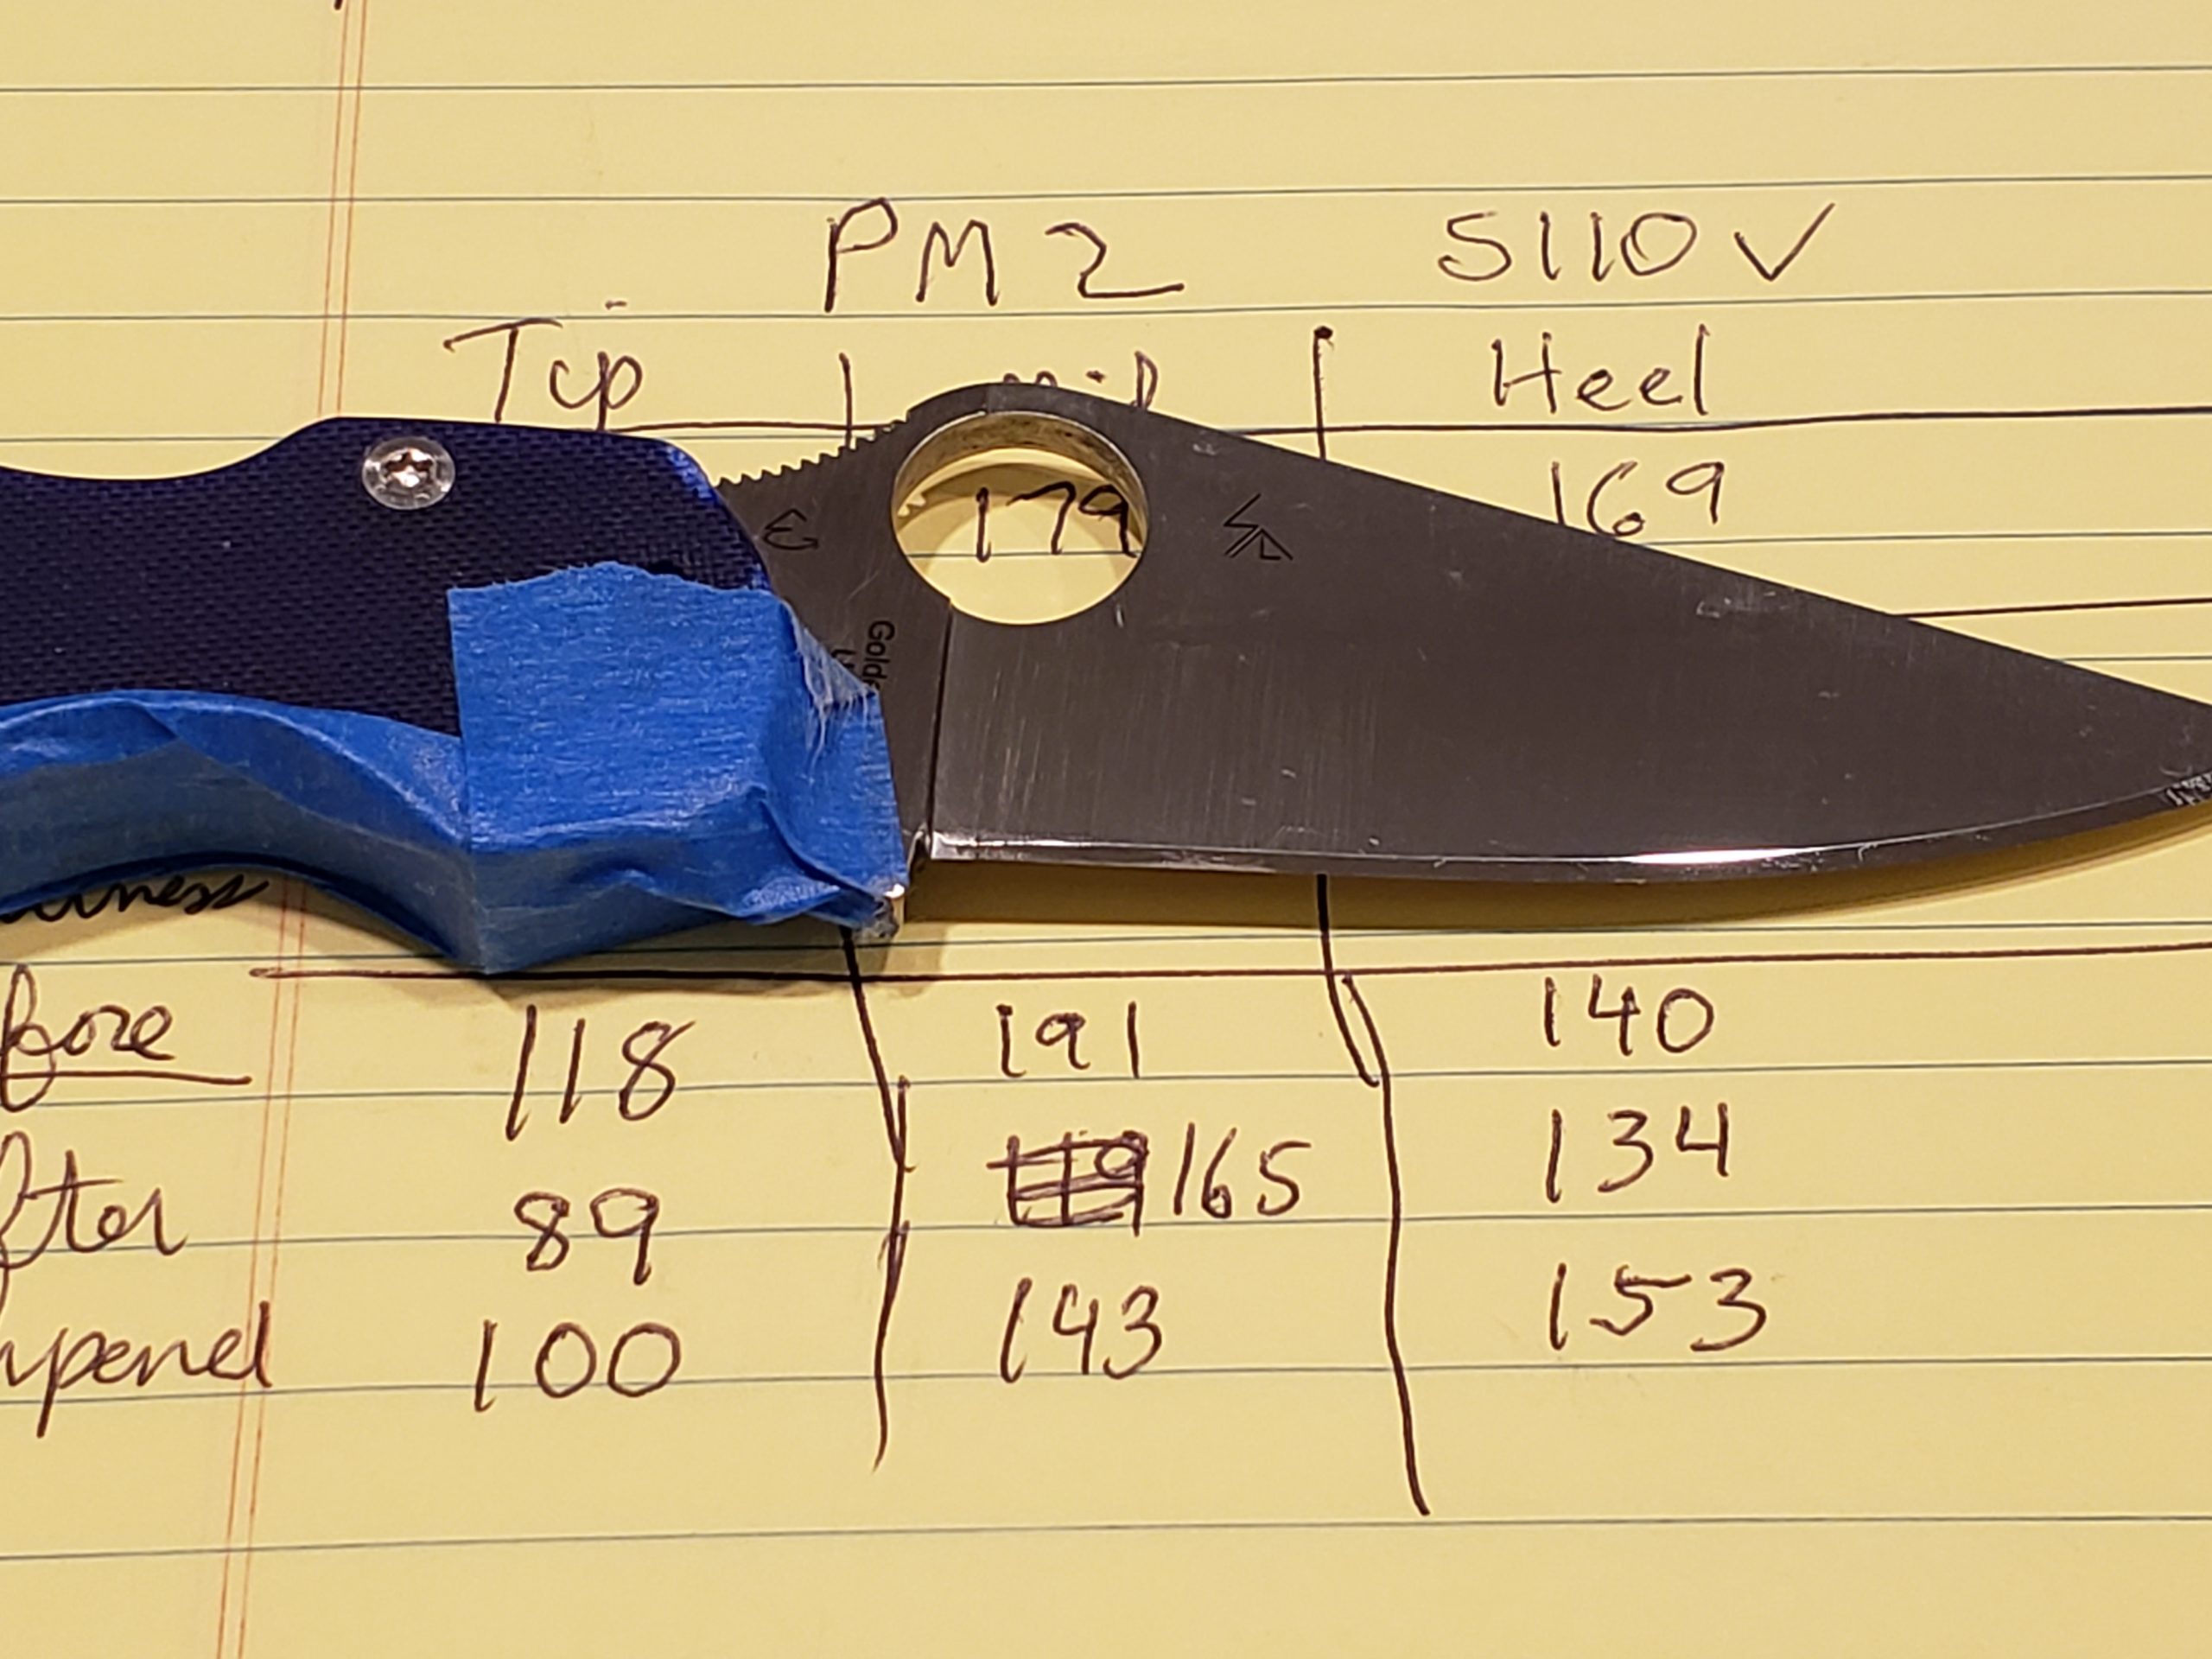
Here are the Pics I sent MarcH so he has a reference on how I’ve been clamping the S110V PM2. I didn’t sharpen it, I just clamped it for the reference pics.
The blue lines are where I took the BESS measurements. The knife has been in use for over 2 months since the last touch up.
Ed K.
Attachments:
You must be logged in to access attached files.
02/02/2020 at 11:48 am #53388I just finished Ed’s PM2. I sharpened it to 17º per side, just as he had last done. I used Shapton Glass Whetstones, (these are no longer available). The progress: Shaptons 500/1000/2000/4000/6000/8000. Then W.E. DLF’s: 3µ/1.5µ/1.0µ/0.5µ. Then leather strops with 4µ then 2µ W.E. diamond emulsions.
Here are the BESS Scores and photos: (three tests per blade section, tip, mid, and heel),

My sharpening impressions: I could definitely feel the hardness of the S110V Stainless Steel. It did take some effort with the first 500 grit Shaptons Stone to remove previous edge damage and profile the bevels to 17º per side. I did not find the steel to be too chippy, but this is why I use the Shaptons on these hard brittle steels. The Whetstones are able to sharpen steels without it chipping out whereas I find the diamond stones can’t. I was pleasantly surprised as the apex leveled and smoothed out with each subsequent finer grit. Even still the steel does keep a toothiness to it.
I used scrubbing strokes to start with each sharpening stone. Then I followed that with alternating side edge leading strokes. I did spend quite a bit of time with each grit looking to achieve the best results I could. I find it’s better to do more work, spend more time and give more attention then to not, to achieve the final results expected then to wish I had.
The DLFs did bring out an impressive mirror polished bevel. The last stropping phase did smooth off some of the grab of the just sharpened knife edge, leaving an edge that easily sliced newspaper with a whisp. I will be curious to see how well this edge stands up to EDC use.
Marc
(MarcH's Rack-Its)Attachments:
You must be logged in to access attached files.
5 users thanked author for this post.
08/27/2020 at 5:26 pm #54877With the advanced sharpening guide are we to let it dangle as Clay has here or are we to straighten it so it is level with the jaw edge of the Gen 3 ?
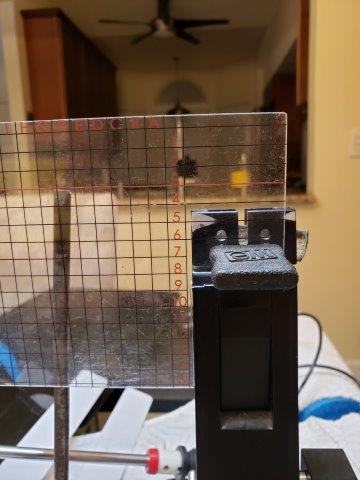
08/27/2020 at 7:07 pm #54878An alignment guide is used as a position referencing tool. So it’s used in a repeatable orientation. To insure the guides orientation is the same each and every time I use it, I align a horizontal gridline so it is parallel to the horizontal top of the vise jaws. I also align a vertical gridline so that too, is parallel to the vertical edge of the vise. It may be helpful to use a piece of tape to hold the alignment guide stationary in that aligned referenced position while you are finding the desired position to clamp your knife.
Marc
(MarcH's Rack-Its)1 user thanked author for this post.
08/28/2020 at 3:44 am #54881Thank you as I was wondering why Clay let it fall to a slanted position using the top holes I understand horizontal alignment with top of vise but how do you do vertical since it is slanted and not rectangular?
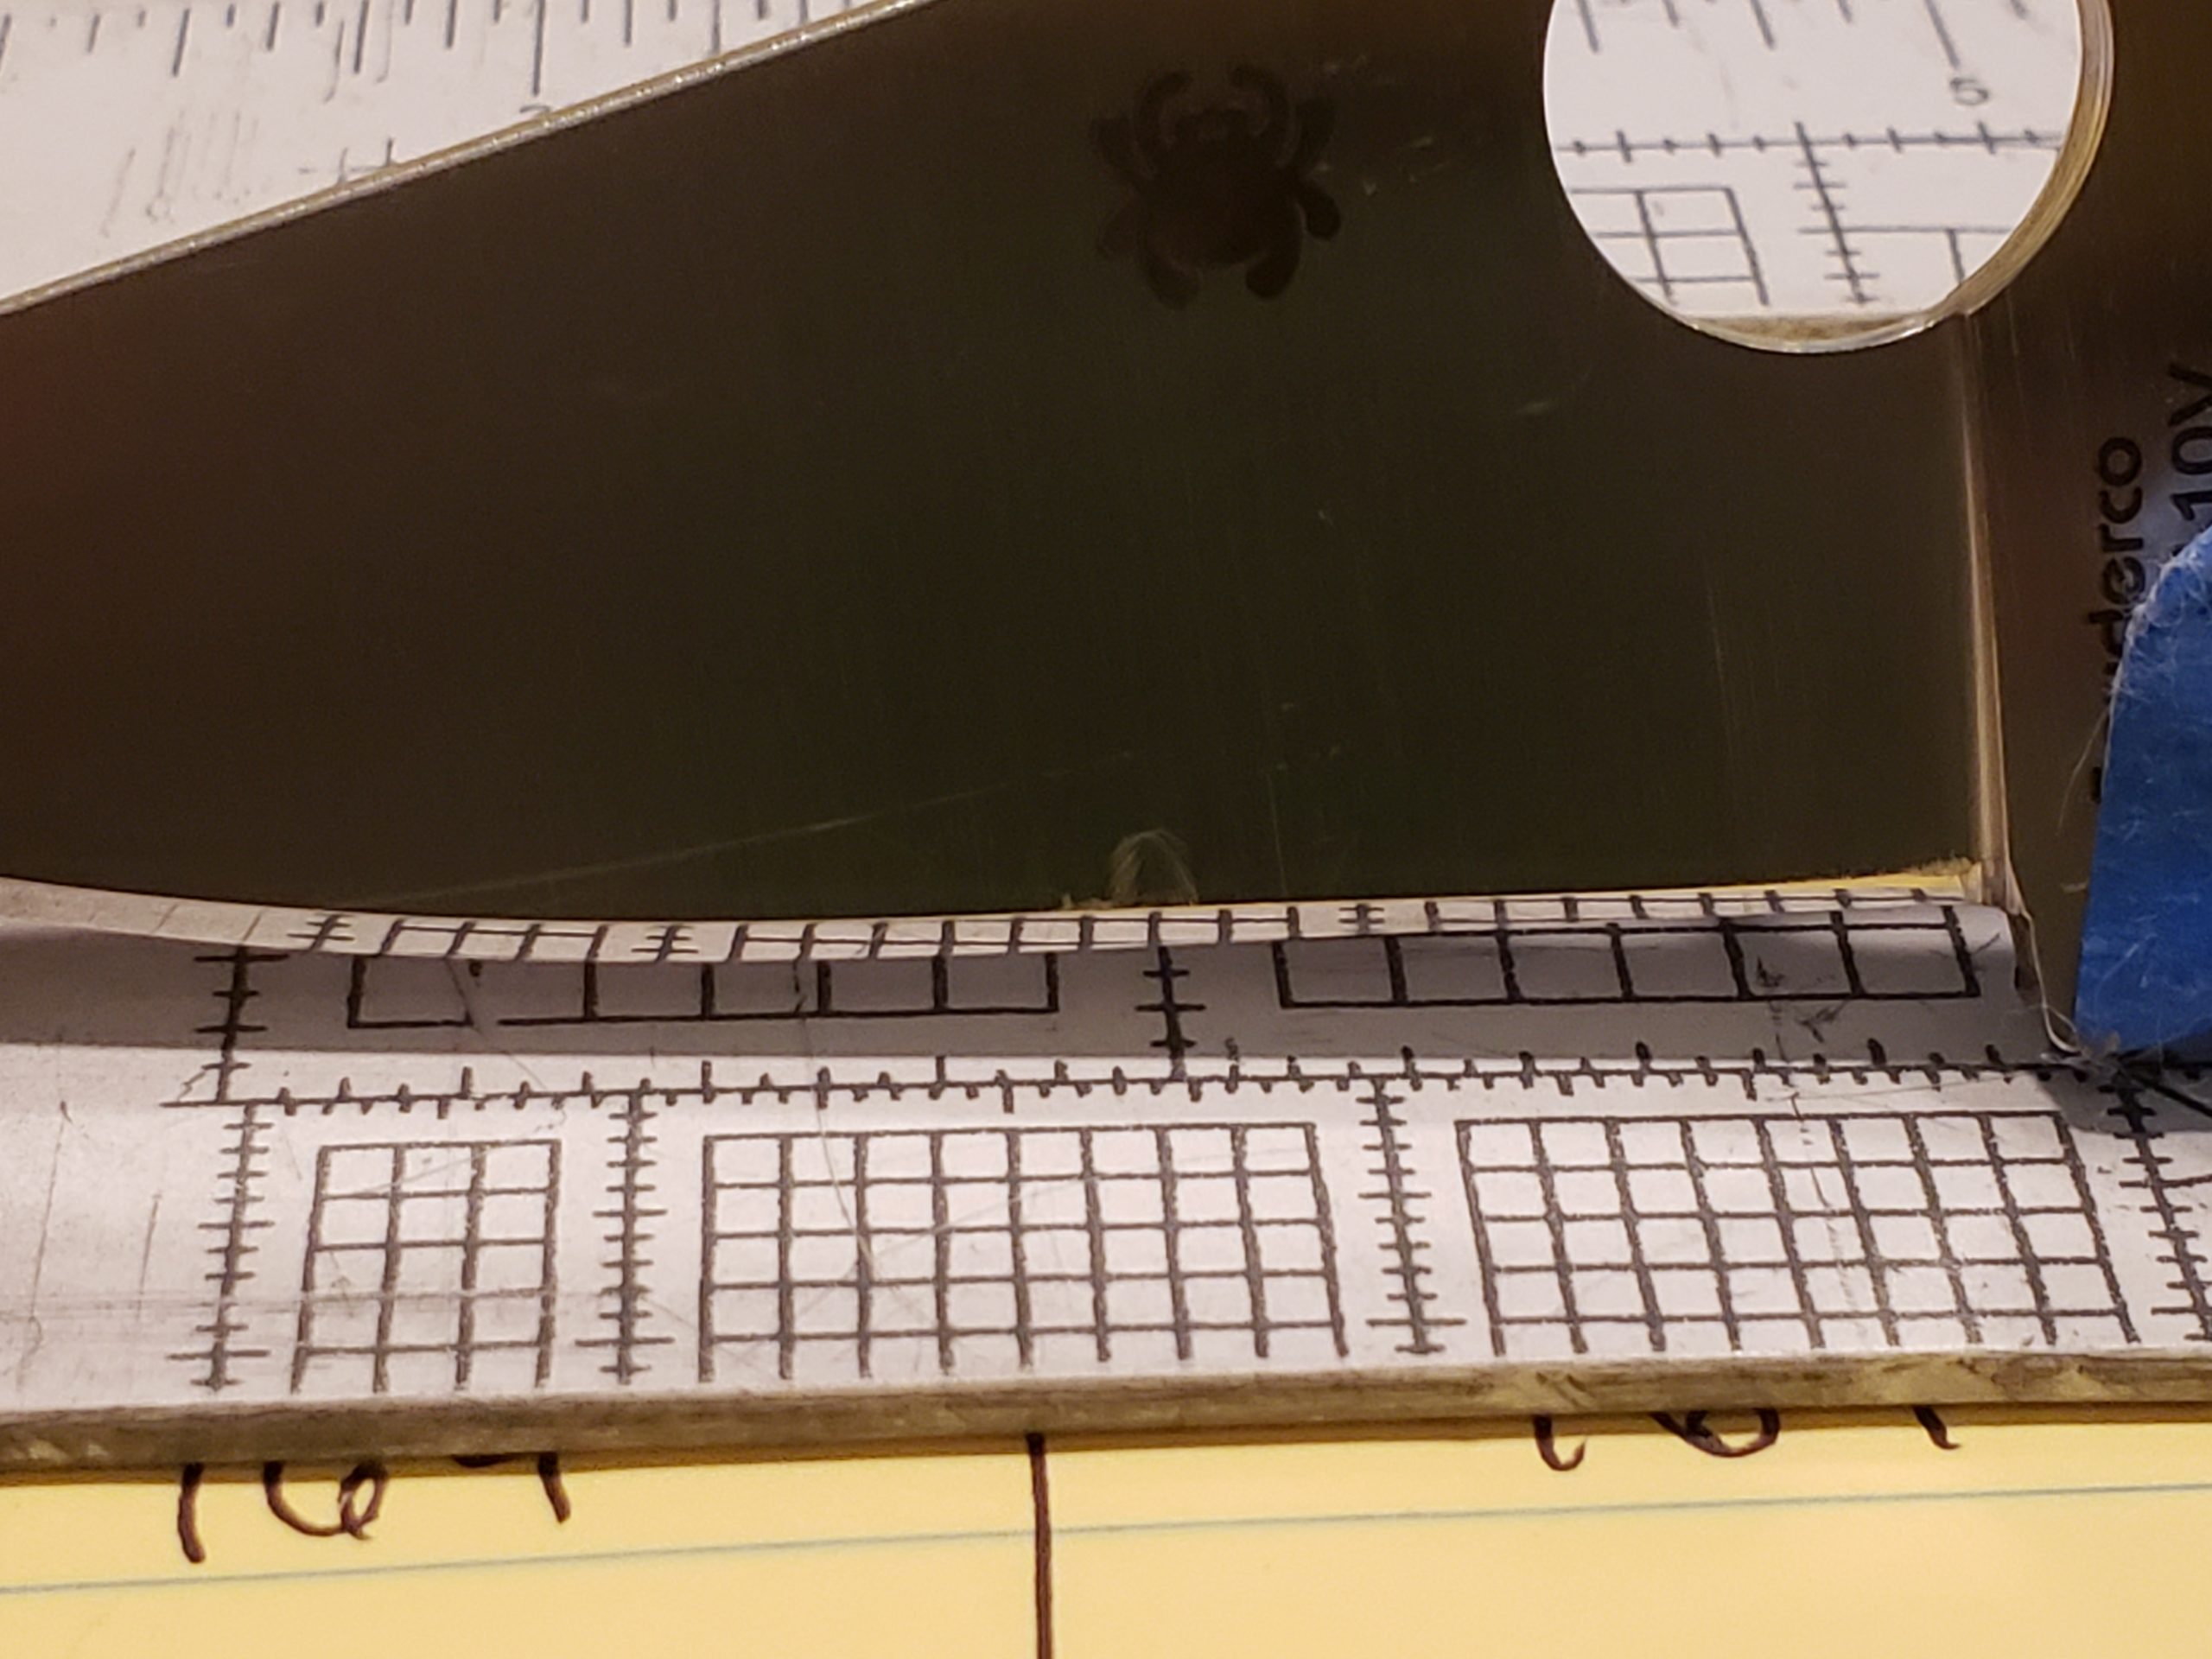
08/28/2020 at 8:22 am #54882When I use the AAG to get my reference points I look at it from the left side.
This left side view allows me to align the AAG’s position relative to the vise for my referencing position….horizontal to the jaws and vertical to the front of the vise. As you see the horizontal gridline is parallel to the jaw line and the vertical gridline is parallel to the forward flat vertical edge of the vise.
When I record a knife’s clamping position in my sharpening log, I indicate which pin hole pair, the upper or lower pair, the knife was resting on and whether it rested on the front pin, the rear pin, both pins or neither pin. This notation also tells me where I had placed the AAG, because it is held in place in that same depth key pin position.
Marc
(MarcH's Rack-Its)Attachments:
You must be logged in to access attached files.
1 user thanked author for this post.
08/28/2020 at 5:33 pm #54885How can a knife using the alignment guide not rest on any part of the pins either front or rear.. I thought we were to use the guide with the tip or the knife equaling the referencen point? Boy I have a lot to learn and I appreciate your teaching. By the way are there any knife sharpening services on this forum that only use Wicked Edge as their sharpening system?
08/28/2020 at 6:17 pm #54886Generally the knife is positioned so it rests on the depth key pins or maybe just one pin. But this is not a requirement. The only requirement is that a knife be clamped securely so it can be sharpened.
Sometimes I have to clamp a knife so it’s just held by the tips of the jaw to avoid the stones impacting the vise or maybe an undesirable part of the knife. As long as I can get two position reference pairs, (X1, Y1, and X2, Y2), with one pair towards the blade’s tip and another towards the blade heel or maybe on the handle, I can recreate the same clamped position for a touch-up. I may have to make a notation in my sharpening log to help guide me to that same position. In that clamping situation I also need to include which key pin holes I used to position the AAG when I took my positioning readings. That’s no big deal. I just make a notation in a manner that makes the clamped position clear to me with words. A saved smart phone photo is another handy method.
Every so often I may even need to use the AAG to record the knife tip coordinates then remove the key pin and flip the AAG over facing towards the rear of the vise to get the second coordinates pair from the knife’s handle end. Whatever it takes. Let your ingenuity guide you. Nothing is wrong if it works for you.
I think many of us do use alternative sharpening methods when the W.E. just won’t work. The W.E. is a very good knife sharpening system but there are so many different kinds and shapes of knives it shouldn’t be expected to work for everyone of these. After trying to use the W.E. with the low angle adapter, (LAA), or maybe with another accessory like a Tormek Small Knife Adapter, sometimes these two helpers just don’t work well for the odd character knives. Then I’ll use another method like a Spyderco Tri-Angle Sharpmaker or maybe even a free hand stone. Others sharpeners/users have their favorite, tried and true, go-too fall backs. Whatever it takes.
Marc
(MarcH's Rack-Its)2 users thanked author for this post.
-
AuthorPosts
- You must be logged in to reply to this topic.