Sharpening a skinner, finding the sweet sot on a bad beve–and first USB photos!
Recent › Forums › Main Forum › Techniques and Sharpening Strategies › Sharpening a skinner, finding the sweet sot on a bad beve–and first USB photos!
- This topic has 3 replies, 3 voices, and was last updated 03/17/2022 at 12:00 pm by
Timm.
-
AuthorPosts
-
03/15/2022 at 5:50 pm #57688
A friend has had me sharpen his Cat Skinner skinning knife a couple of times a year, and I asked him to bring it back so I could repair what I’ve done with my hand stones over the last few years.
It’s an odd shape, but thankfully, I bought the Tormek Small Knife Holder–no way I could clamp this in the right orientation otherwise!

I asked him some questions about how he uses the skinner for field-dressing game. Among other things, he hunts bobcat, which have thin, valuable skins. He said he mostly uses push strokes to keep from cutting the hide. Unfortunately, at this point, I only have WE stones to 1K grit, so I settled on an alternating tooth with the 1K for the finish, figuring that should be a good edge for him.
Well, first, I had to play with my new Pluggable USB scope.

Maybe $2K of professional tripod, head and macro focusing stage is a bit of overkill for a $40 camera, but I figure, if I’ve got it, use it.
Here’s what I’ve been doing to blades for the last few years as my hands and eyes have started to fail me:
I guess you could call that a convex edge, but I call it a faceted edge. I count at least five different bevels in there.
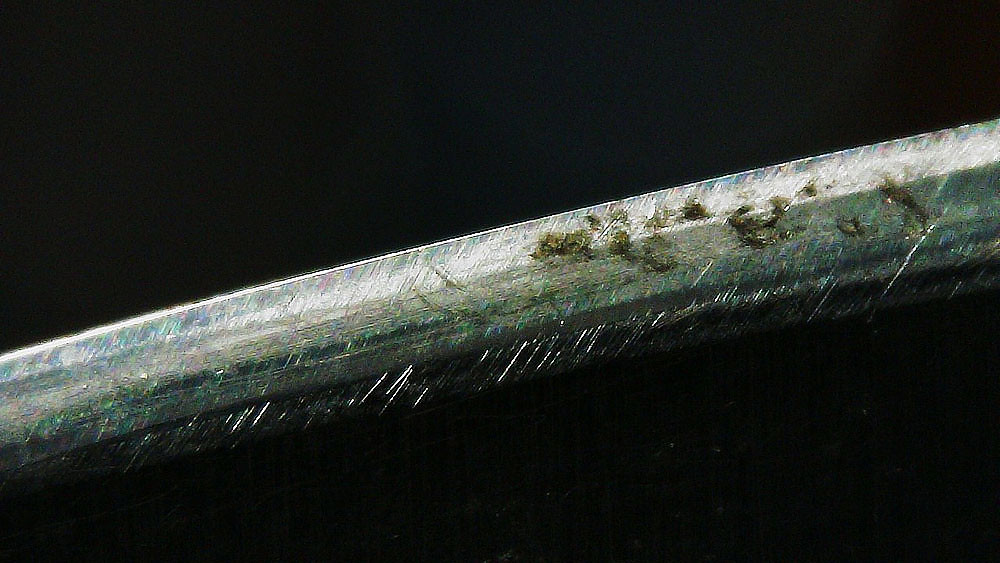
I mentioned to another user in a post that I had a trick for “finding the sweet spot” on a bevel like this. I said I used the Sharpie trick and just tried to get the blade oriented where the silver streak revealed by the 1K stones was centered in the bevel, from heel to tip. This is what I meant:

When that streak is centered like this for the length of the blade, I reckon I’m ready to put a flat bevel on it.
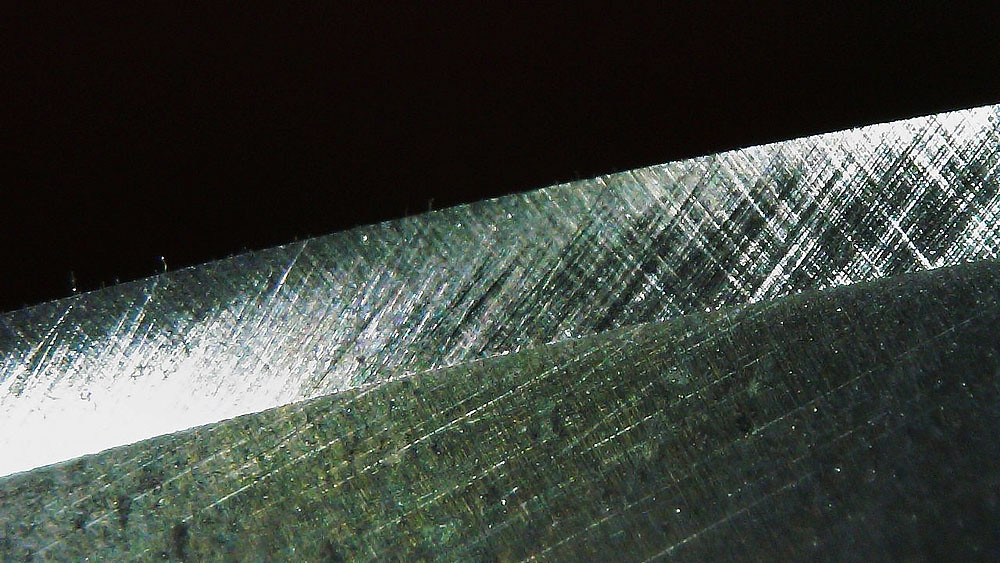
An hour later–soft steel, fortunately:
I need to practice with the USB scope more. I’m getting the hang of free-handing it while sharpening, but still use my 10X pocket loupe quite a bit. I’m particularly struggling with the exposure–the little camera seems to like blowing out reflective areas and reducing the light just causes it to increase the exposure. I’m using MS Camera for it–does the Pluggable app work any better?
TFL–
-
This topic was modified 2 years, 1 month ago by
03/17/2022 at 4:02 am #57698Actually, your ‘scope work looks pretty good. And your method of centering the belly of the blade over the center of the vise is exactly the method I use for my skinners. Skinners are one of the specialty blades where I deviate from the more common 20 dps bevels. I’ve gone as high as 24 dps with a highly polished bevel with a 1000-grit microbevel about 2 degrees higher. Maybe three VERY light stroke on each side. The higher angle is to reduce the chance of unwanted cuts in the hide, the microbevel, of course, is to bite into any tough sinew and the polish is to reduce the force needed to push through any tough, thick hide sections.
Hand sharpening produces convex edges as a natural part of the process. Even the best sharpeners won’t hit the apex every time. The resulting convex removes the shoulders of the bevel facets and increases the cutting effectiveness. The one drawback is that you can spend a lot of effort without touching the apex. I can’t begin to think how many strokes I’ve made and didn’t have a clue as to why the edge wasn’t getting sharper.
Back on the subject of skinner edge profiles, I grind my skinners fairly thick at the bevel shoulders – maybe 0.080″ – 0.090″, as opposed to the few kitchen knives which I grind to about 0.010″ – 0.015″. Such thin edges will slices into a hide at the lightest contact.
Don’t get the idea from this that I make skinners and kitchen knives regularly. I gift my knives to family and friends. I’ve asked for feedback on the skinner performance, but the reports are that the gifts are held as collectables and not used for their intended purpose. Hence my note to you, Timm. If I’d sell ’em, maybe people would try ’em.
-
This reply was modified 2 years, 1 month ago by
 tcmeyer.
03/17/2022 at 7:10 am #57700Timm you may be interested in a Kit I make for the scope to assist in using it by hand when sharpening. Fixes a bunch of issues with the design that come to light when using it for the specific purpose viewing the entire blade (sides and well as the apex whil looking down) while sharpening.
Your photos are outstanding, the mount makes all the difference. Taking photos while holding the scope is rather challenging to say the least.
See this post for scope kit.
https://knife.wickededgeusa.com/forums/topic/pluggable-and-carson-scope-accessory-kit-introduction/
03/17/2022 at 12:00 pm #57701Thanks, folks!
TC: I think I got the mounting technique from you–try to get a line from tip to base level with, and centered on the clamp. I did check it using the Sharpie and it was dead on on the first try.
I’ve seen one picture of your skinners–beautiful work! I want to see more!
I spoke with a couple of friends since you PMed me. One guides for bear and other big game, the other is mostly a commercial bobcat hunter. Both agreed that the best way to skin–once the initial opening cuts are made–is to push the knife through the connective tissue between the skin and flesh when possible, as this prevent nicking or slicing the skin. They also both use a separate knife to open the skin, as the dirt and grit in the hair quickly dulls an edge–especially bear, elk and moose. Both prefer one of the disposable-blade knives for this phase.
Airscapes–I’m probably going to buy a few accessories from you when the wallet recovers a bit. Not that they are expensive, but as soon as I dropped the dimes on the Pro G3, my rig broke down–of course.
Thanks again!
1 user thanked author for this post.
-
This topic was modified 2 years, 1 month ago by
-
AuthorPosts
- You must be logged in to reply to this topic.