Wire Edges
Recent › Forums › Main Forum › Techniques and Sharpening Strategies › Thoughts/Theories/Science Related to Sharpening › Wire Edges
Tagged: knife sharpener, sharpening, wicked edge, wire edge
- This topic has 31 replies, 8 voices, and was last updated 04/24/2016 at 1:50 am by
 tcmeyer.
-
AuthorPosts
-
04/22/2016 at 9:28 am #33598
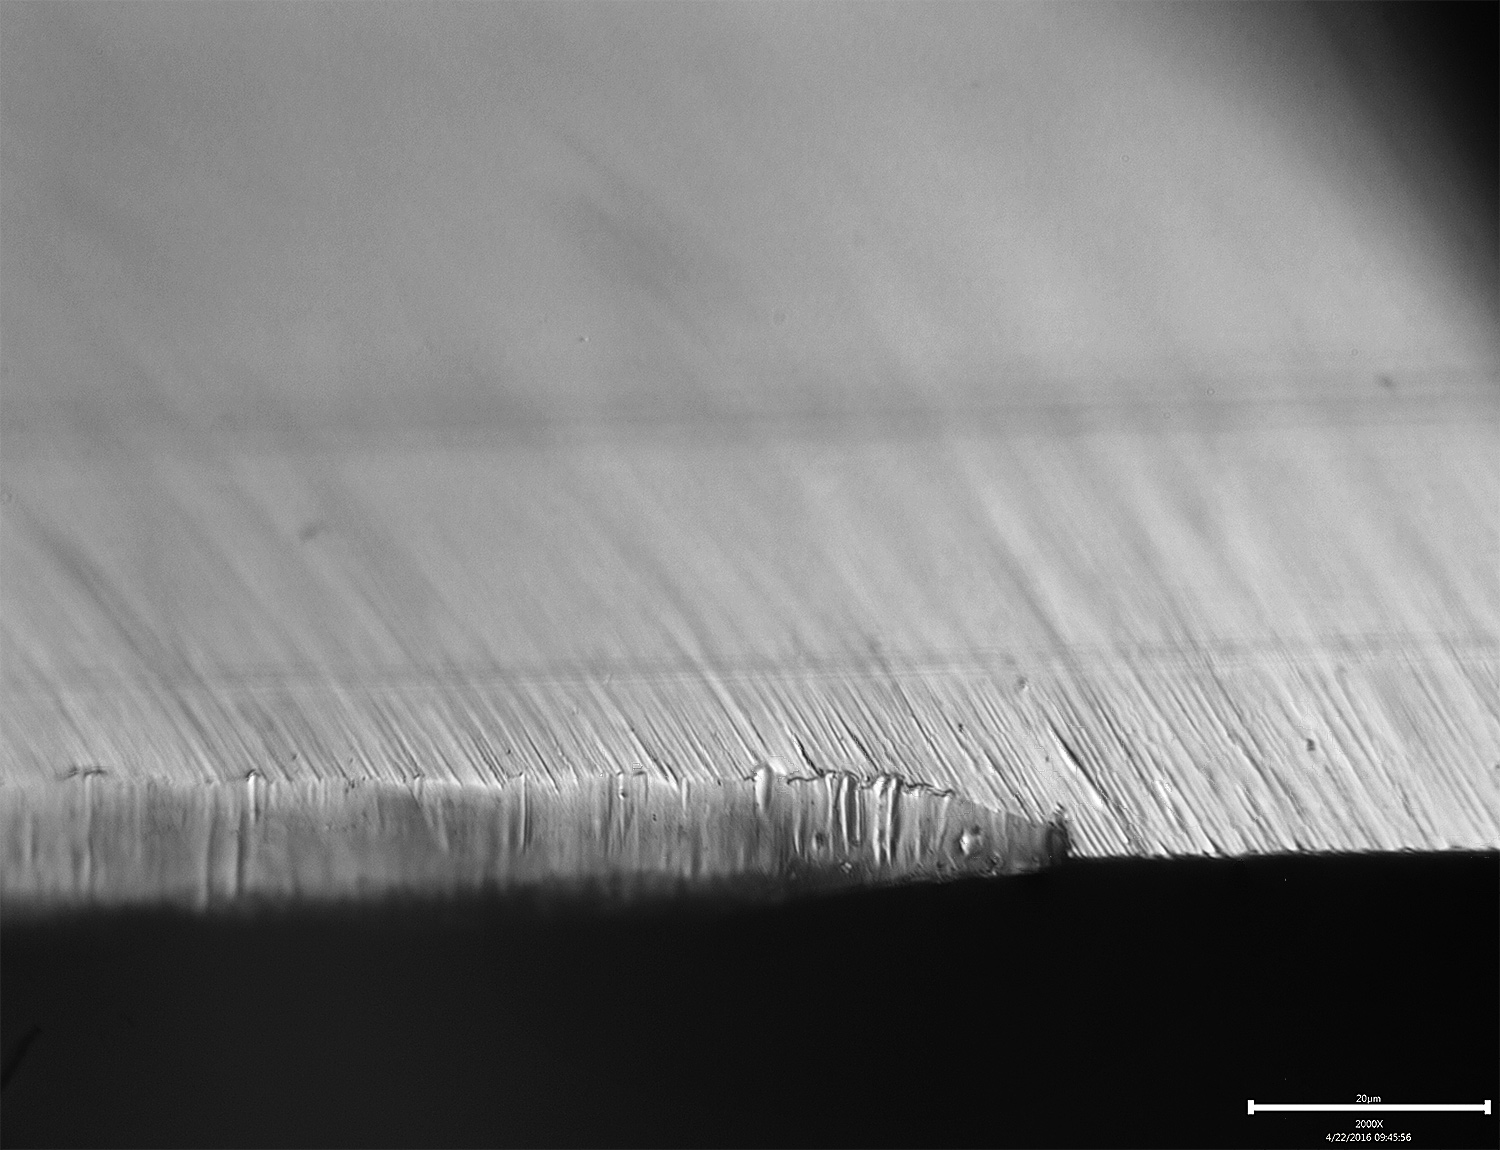
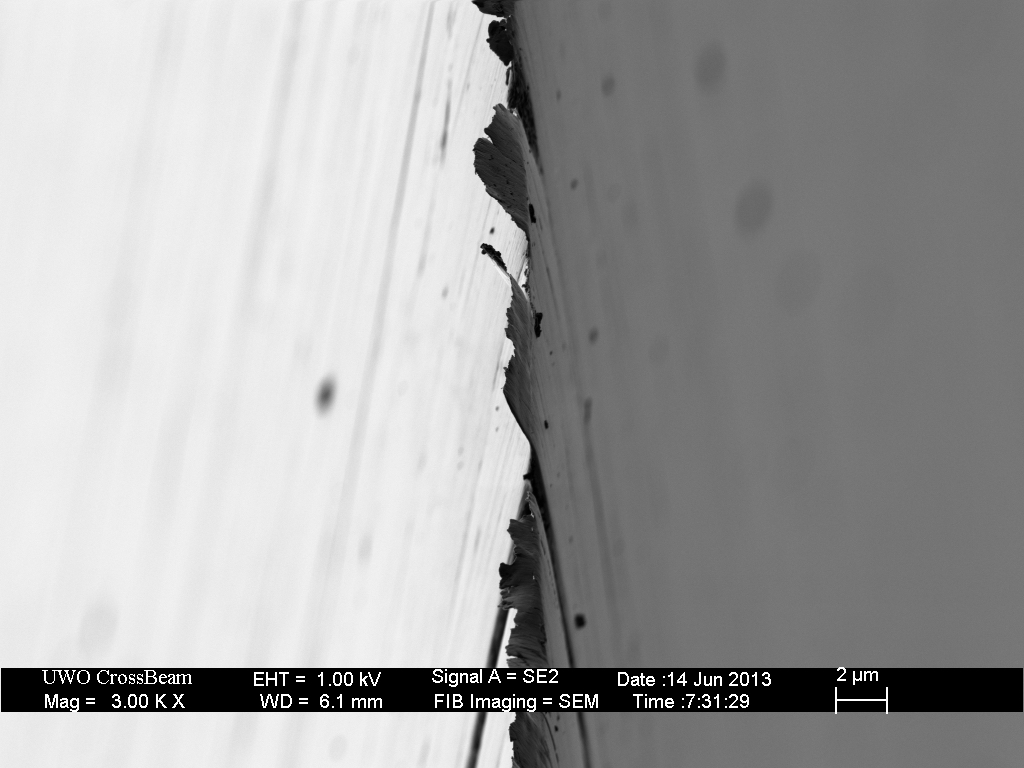
I put a blade I’d previously sharpened under the scope yesterday and got a big surprise. There was an enormous wire edge that had started to peel away from the rest of the material. This was a blade I’d imaged many times and had never detected the wire edge. I believe that why it suddenly showed up is that I had been trying to image straight down onto the edge and the various objective lenses I was using brushed back and forth across the edge as I was trying to find it in the scope. They must have pushed over the edge, which clearly turns out to have been very fragile. Check it out:
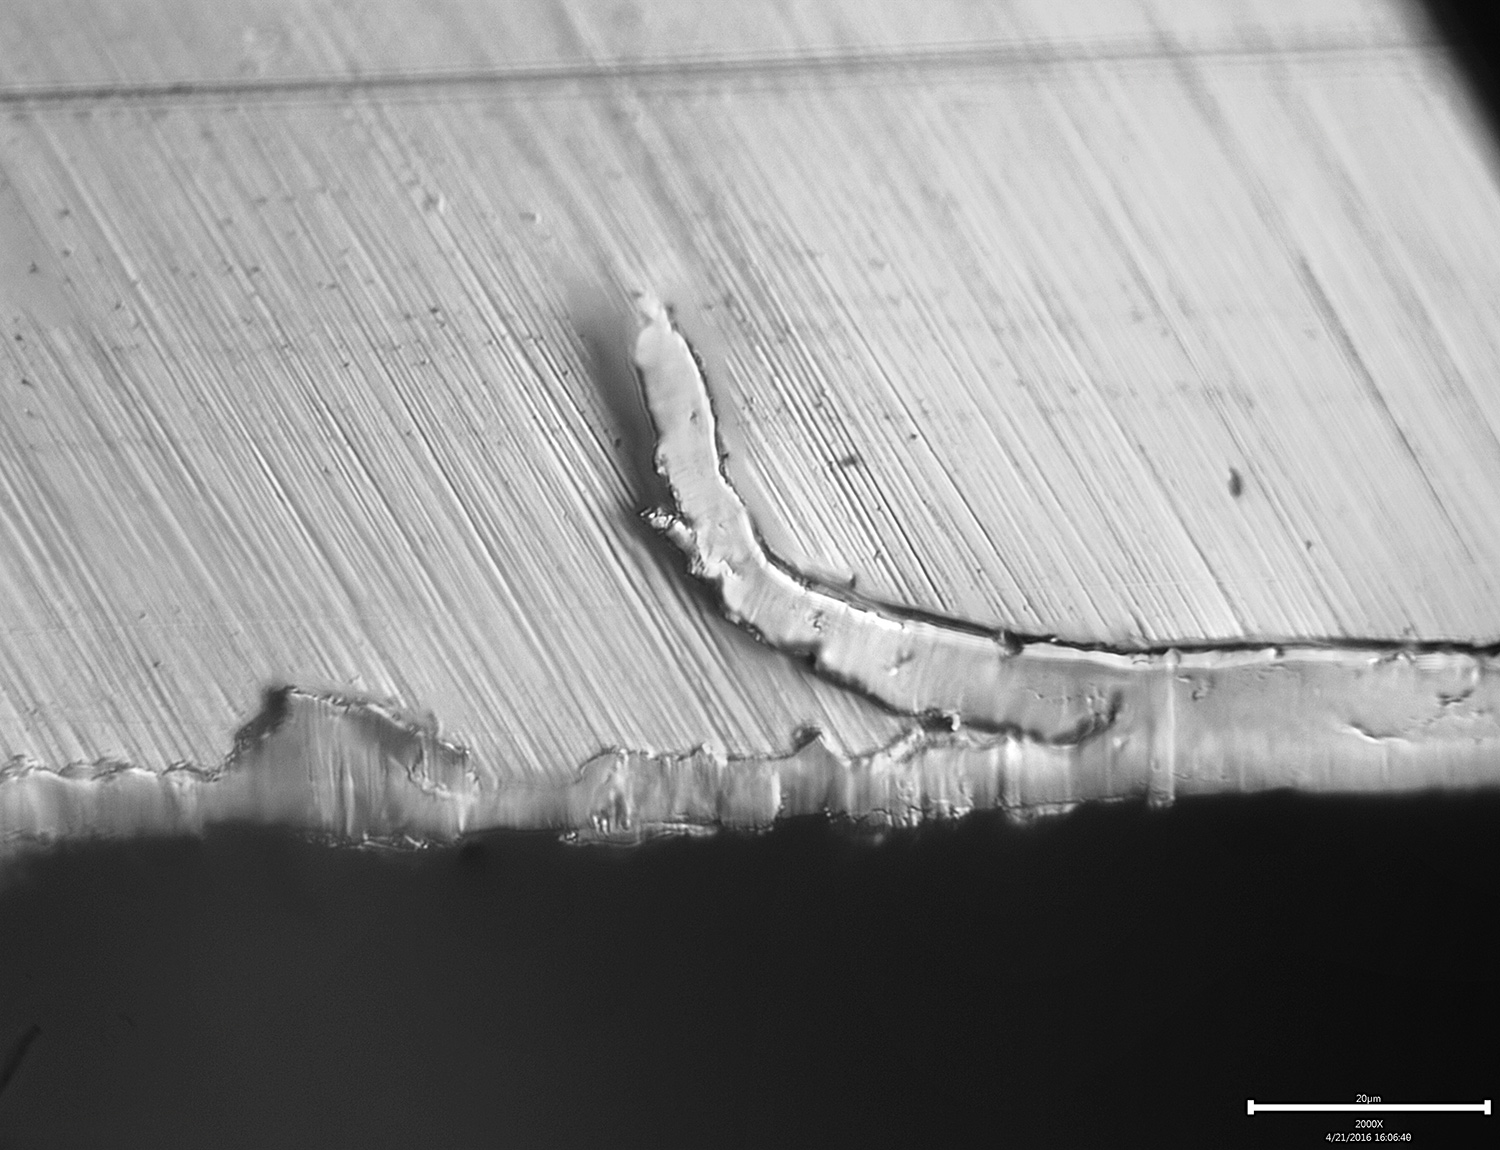

A couple of notes:
- The wire edge pieces that are tearing loose measure around 6µ.
- The images are stacked for greater depth of field. It seems to be working pretty well lately.
- At 200x, the wire edge just looks like some debris:
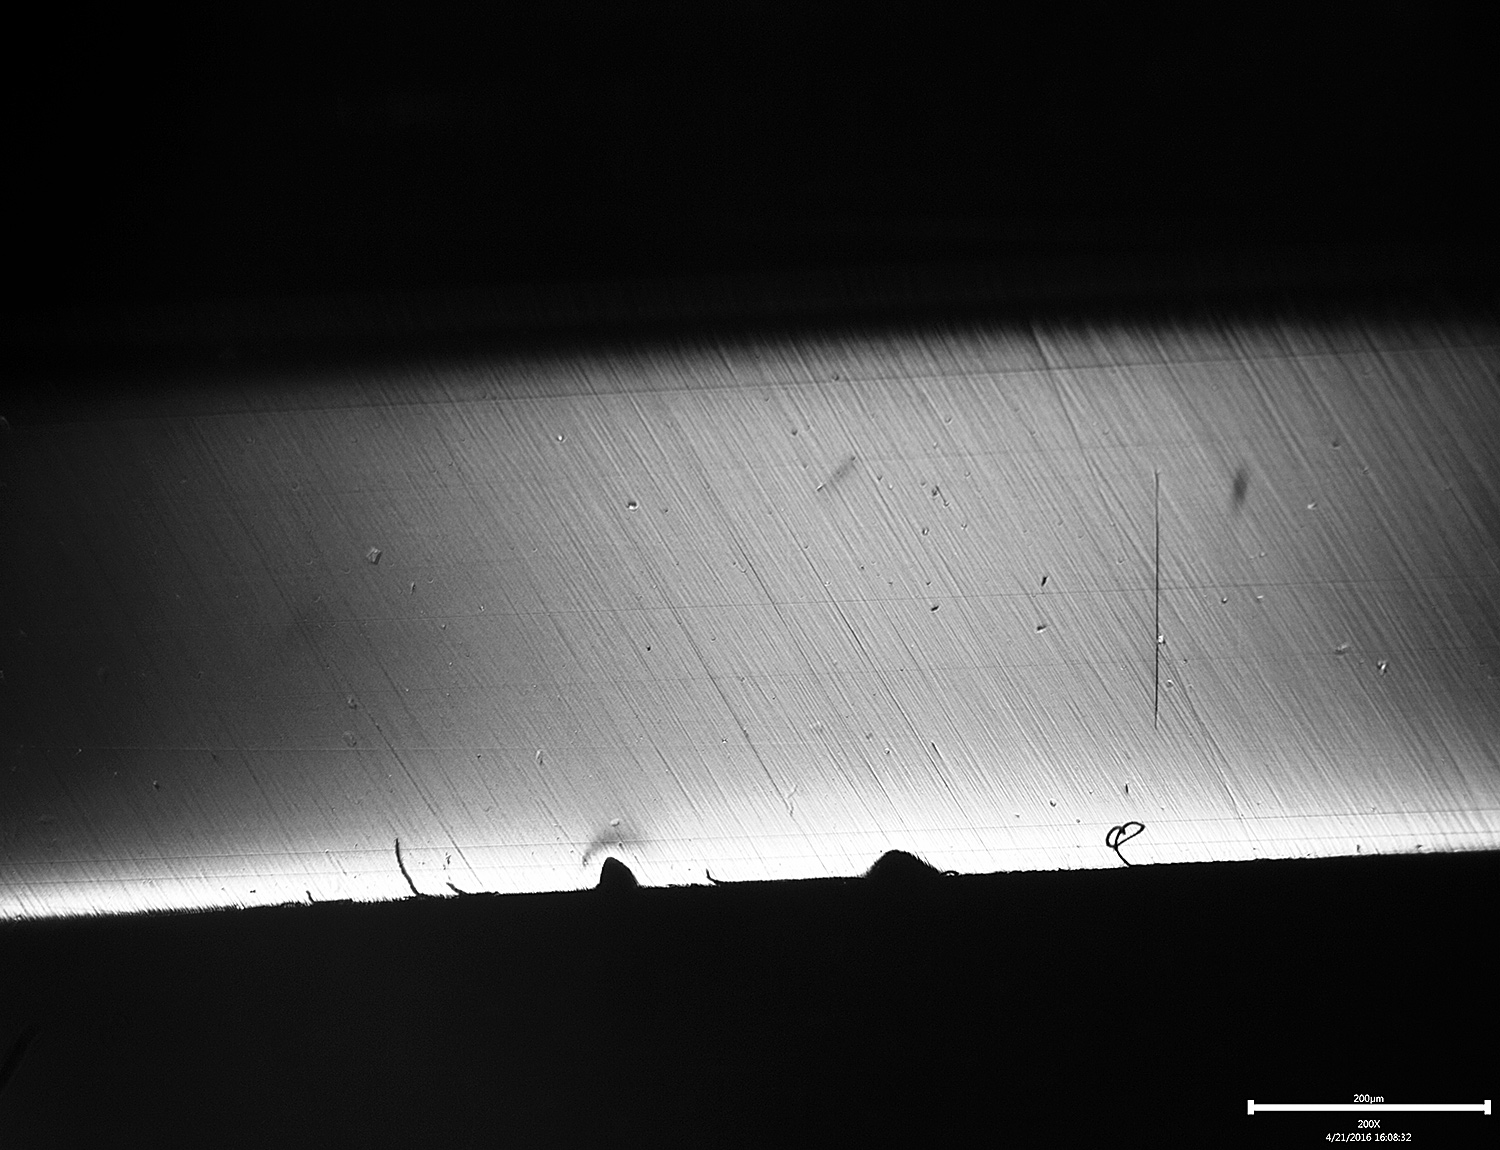
The chips missing from the edge in the 200x image are from where I knocked them loose to give myself a reference point to be able to find the same spot in the scope.
-Clay
Attachments:
You must be logged in to access attached files.
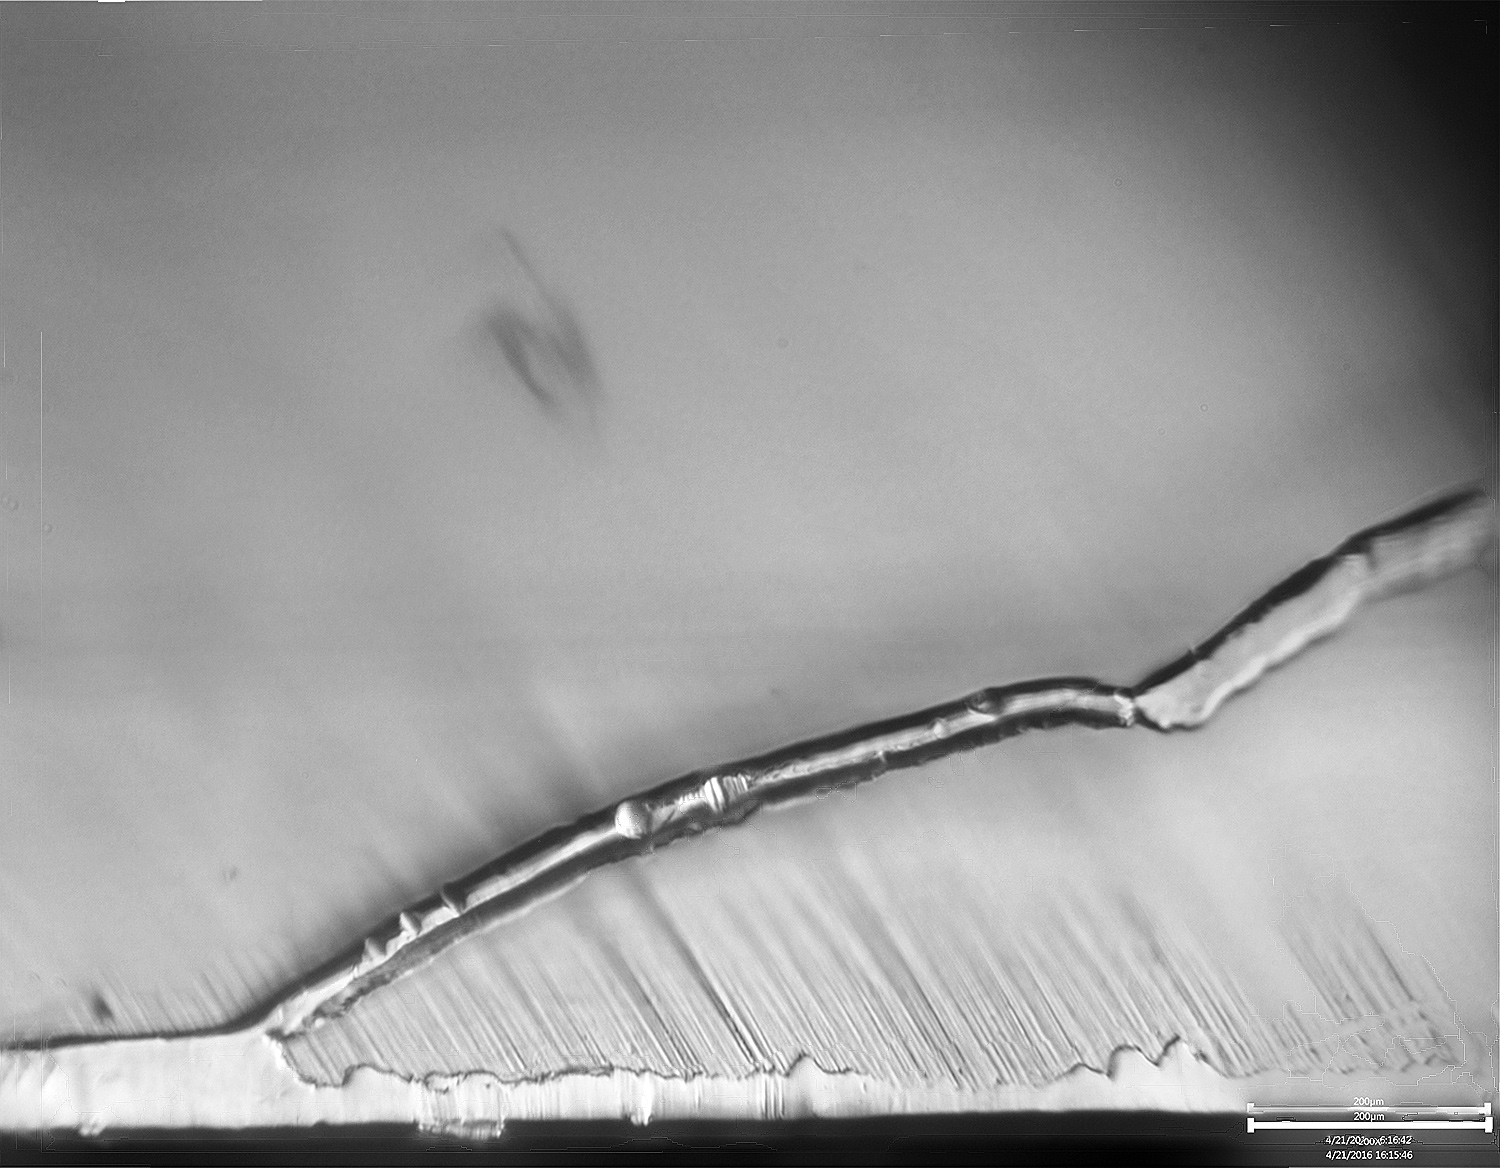
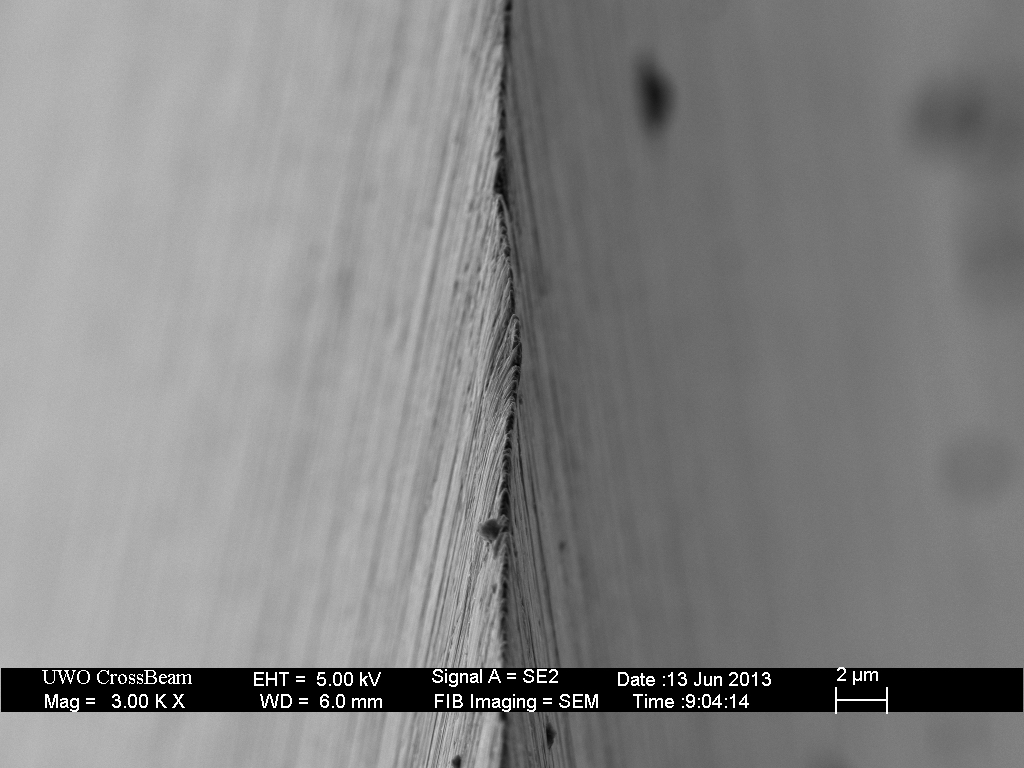
04/22/2016 at 9:35 am #33603This image shows another section that hasn’t peeled away but appears flattened to the side of the blade:
-Clay
Attachments:
You must be logged in to access attached files.
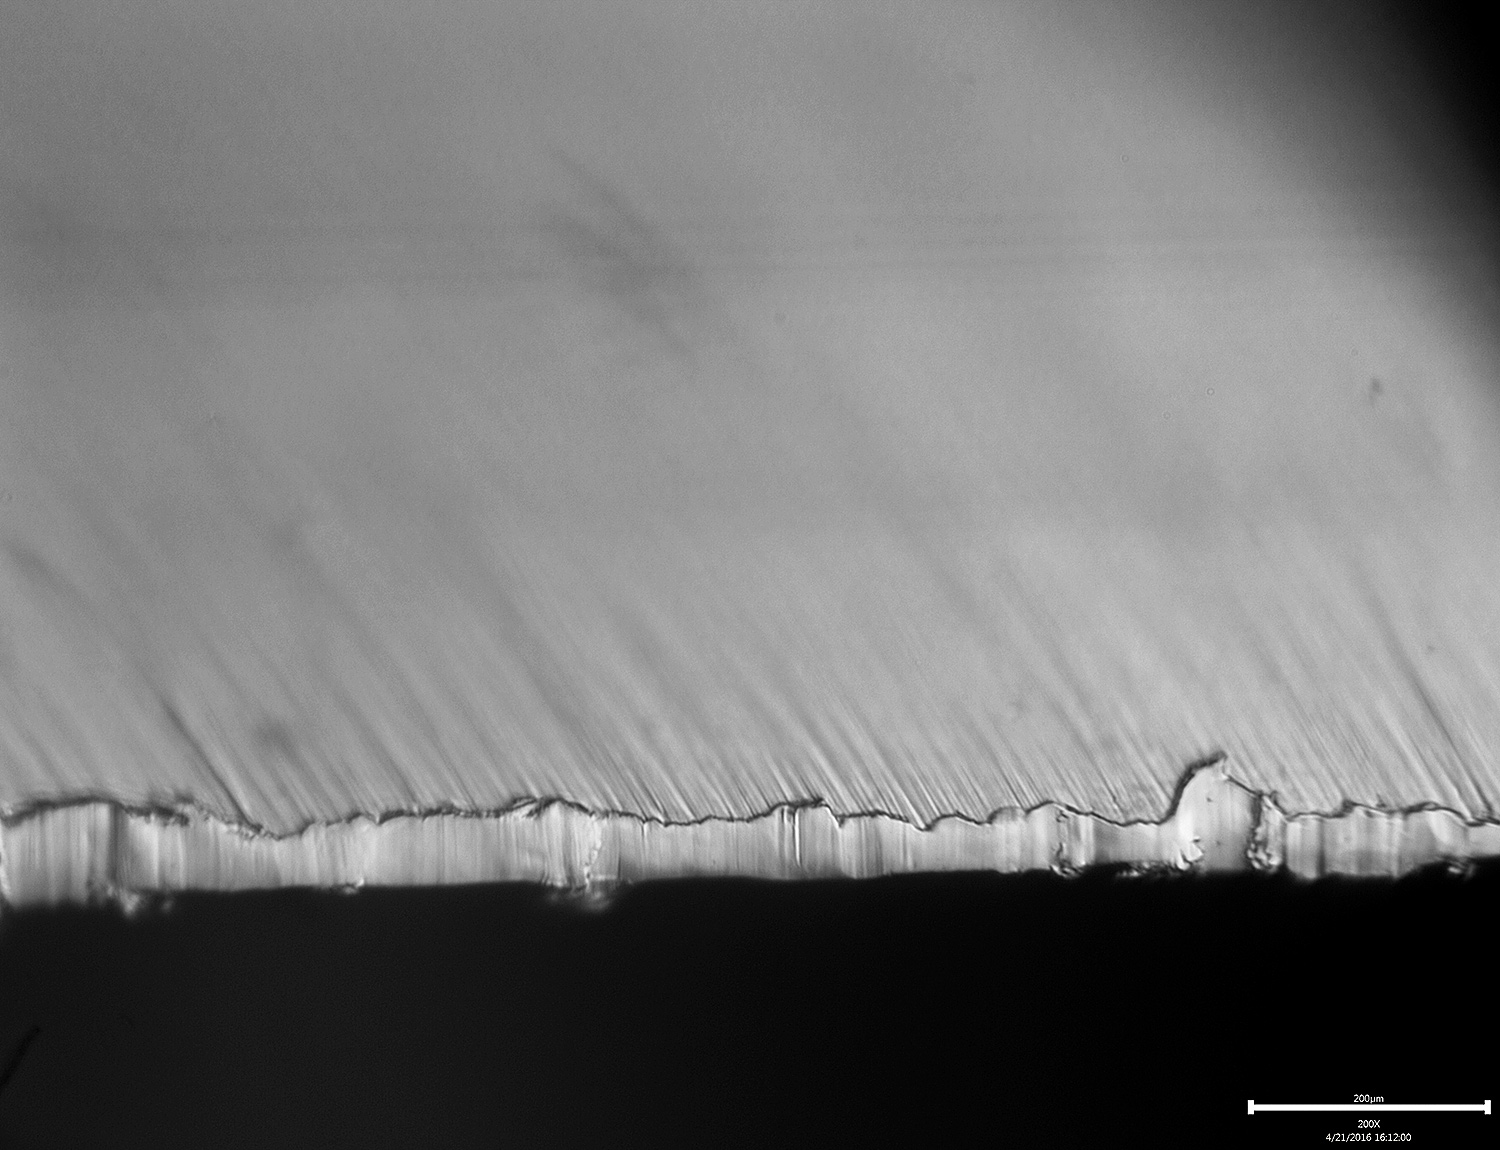
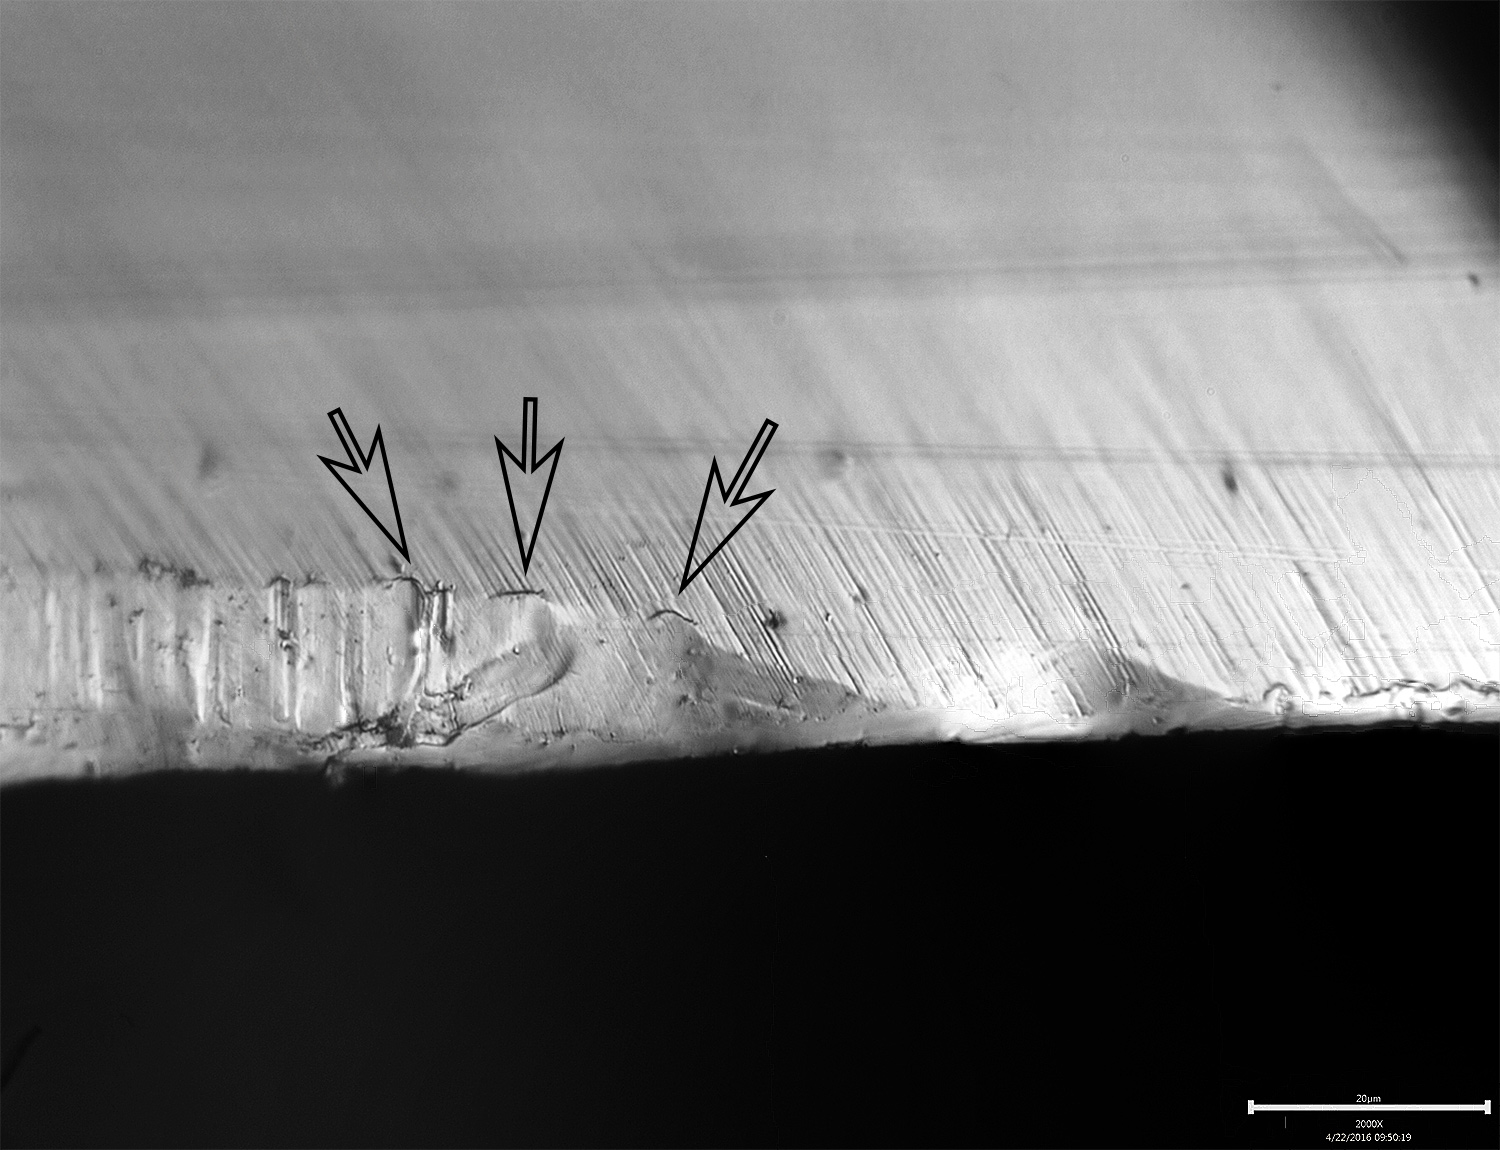
04/22/2016 at 10:03 am #33605Here are a couple more that show where the edge is folding over. There are cracks where I’ve placed the arrows. They’re hard to distinguish in the photos because they look like shadows, creating the illusion that there is a mass of metal that is built up, but it’s very clear in the scope that they are cracks.
-Clay
Attachments:
You must be logged in to access attached files.
04/22/2016 at 10:50 am #33609Quite daunting this. Any idea how this came about? It is my experience that if, with the finder grits, I finish an edge with soft sweeps alternately on both sides I hardly/do not get a wire edge.
Molecule Polishing: my blog about sharpening with the Wicked Edge
1 user thanked author for this post.
04/22/2016 at 11:13 am #33610Quite daunting this. Any idea how this came about? It is my experience that if, with the finder grits, I finish an edge with soft sweeps alternately on both sides I hardly/do not get a wire edge.
I think, based on the images of stropped edges at Todd Simpson’s blog, I’d drawn up a very thin edge, stretching the metal until the last 10µ-15µ of the bevel were at an angle that was much lower than what I was actually sharpening at. I really want to study it in cross section to see if I can verify that hypothesis. I’ll mill some sample blades to expose the cross section and then strop them a lot. Then I’ll get them under the scope and see how they measure.
-Clay
2 users thanked author for this post.
04/22/2016 at 11:24 am #33611Here are some images from Todd’s blog (https://scienceofsharp.wordpress.com/2015/01/13/what-is-a-burr-part-2/comment-page-1/#comment-559):
“Straight razor edge view after Shapton Glass 8k. Prior to stropping; the razor is not sufficiently keen to shave; however, there is no burr.”
“Edge view of the Shapton 8k edge following 10 stropping laps on a hanging latigo leather strop loaded with 0.25 micron mono-diamond spray.”
“Cross-section view of the Shapton 8k edge following 10 stropping laps on a latigo leather strop loaded with 0.25 micron mono-diamond spray. The foil-like burr is approximately 100nm thick and 3 microns long.”

“Cross-section of the edge after an additional 90 laps (total 100) on 0.25 micron mono-diamond on a hanging Latigo leather strop. The foil-like burr is approximately 20nm thick and 500nm long.”
I think that this is essentially what happened with my blade and when I ran it back and forth and it hit the lenses, the foil collapsed and folded over.
-Clay
04/22/2016 at 11:30 am #33612Very cool.
Just out of curiosity, do you have to manually add the magnification level? For example, in your first post, the 1st image says 2000x, then all the others say 200x, even though they don’t appear to be (and clearly not the same as the one that is 200x). Just wondered.
Cool photos though!
04/22/2016 at 1:27 pm #33613Very cool. Just out of curiosity, do you have to manually add the magnification level? For example, in your first post, the 1st image says 2000x, then all the others say 200x, even though they don’t appear to be (and clearly not the same as the one that is 200x). Just wondered. Cool photos though!
Yes, thanks for mentioning it. I have to put input the magnification into the software when I snap the photo and sometimes I forget to change it back, which is the case on these photos. They were all, except the one, done at 2000x.
-Clay
3 users thanked author for this post.
04/22/2016 at 1:56 pm #33614Wow! Outstanding! Never seen it this way with a optical scope before. Great results Clay. So you used EDOF Image stacking on these images?
Eddie Kinlen
M1rror Edge Sharpening Service, LLC
+1(682)777-162204/22/2016 at 2:01 pm #33615Sorry yes you did. I missed a paragraph.
Eddie Kinlen
M1rror Edge Sharpening Service, LLC
+1(682)777-162204/22/2016 at 2:20 pm #33616I think I am convinced that I need 2000x microscope to see the details I have been wanting to see independently. Of course, this is absolutely not nessisary to sharpen a knife. But if we wish to dig deeper “we need more power”- Yes, this was a lame Star Trek reference to Scotty. These images are amazing and exactly what I personally am shooting to achieve. And share. My tools are coming together. Clay, I can’t help noticing how similar these none SEM images are to Todds work. These images are starting to look 3D, does anyone share my thoughts? I have ordered my scope, I’ve got my smugmug worked out and worked out the bugs in my software. Now all I need, is some real time to play with all the parts.
Eddie Kinlen
M1rror Edge Sharpening Service, LLC
+1(682)777-162204/22/2016 at 3:04 pm #33617Clay have you studied your diamond stones under this microscope? I’m really interested in your observations about your stones compaired to the DMT stones studied in Todds blog. If I am not mistaken, Todd observed the DMT 325 putting shallow scratches on the surface of the bevel as opposed to the higher grit DMT diamond stones that appear to put deeper and thinner scratches in the bevel? Simply because the surface area of the diamonds at lower grits was much larger and the diamonds are more uniform. This is counter to what we all believe and am interested in peer review of this information.
Please correct me me if I am wrong. It sounded like he was suggesting that the small diamonds at higher grits may be removing more metal than required and actually putting deeper scratches in the bevel surface? I think he used the “bed of nails” example. And indicated that the smaller grit stones may have ununiformed diamond sizes and the larger diamonds among the smaller ones may be digging into the bevel like a single longer nail would in a bed of nails that are supposed to be the same size??
Have you come to any of the same conclusions? This research is compelling. To be honest, these photos have really changed the way I look at bevels. As pictures speak a thousand words I think those of us looking really need to peer review these observations.
Please see the attachment. The diamond in this picture looks like a “big pink elephant” in a room of monkeys?
I can’t help but believe this would cause a significant gouge in the bevel surface, what do you think?
Eddie Kinlen
M1rror Edge Sharpening Service, LLC
+1(682)777-1622Attachments:
You must be logged in to access attached files.
04/22/2016 at 3:23 pm #33619MirrorEdge – this image of Todd’s is almost certainly a new diamond plate because each of the stones has very sharp corners. Those corners get rounded off pretty quickly through regular use. He’s also found on great big diamond that found its way into the mix. I have taken lots of microscope images of our stones though it’s been hard because of depth of field issues. The bit of focus stacking I’ve done in the past with them hasn’t helped. Continuing the effort…
-Clay
04/22/2016 at 3:28 pm #33621Here’s a somewhat worn 1000# stone at 2000x:

-Clay
Attachments:
You must be logged in to access attached files.
1 user thanked author for this post.
04/22/2016 at 3:43 pm #33623Basically, I’m putting this post together with your “scratch on a convex” posted here; https://knife.wickededgeusa.com/forums/topic/following-a-single-scratch-on-a-convex-edge/. Could this “gouge” be a result of a larger diamond among the other diamonds? In the paste or the higher grit stone? Is contamination possible and just somehow being overlooked?
I’m confused…….about the idea that a carbon steel metal can damage or round off the edges of a diamond? Isn’t it more likely to come loose from the substrate that it is stuck too than for the steel to damage the diamond?
See the attachment of missing diamond in the substraight.
Eddie Kinlen
M1rror Edge Sharpening Service, LLC
+1(682)777-1622Attachments:
You must be logged in to access attached files.
-
AuthorPosts
- You must be logged in to reply to this topic.