Sneak Peak
Recent › Forums › Main Forum › Product Announcements › Sneak Peak
- This topic has 95 replies, 18 voices, and was last updated 08/09/2013 at 7:36 pm by
Tim Tritt.
-
AuthorPosts
-
05/03/2013 at 10:20 pm #11299
You just go away for a week and exciting things are happening… Looks great, Clay!
I am also very interested in the comments of the beta (alpha?) testers. How easy is it to reclamp a knife, for example, if you are sharpening a very long knife? Is that a matter of just opening the top vise or do you need to open the bottom vise as well in order to open the top one?
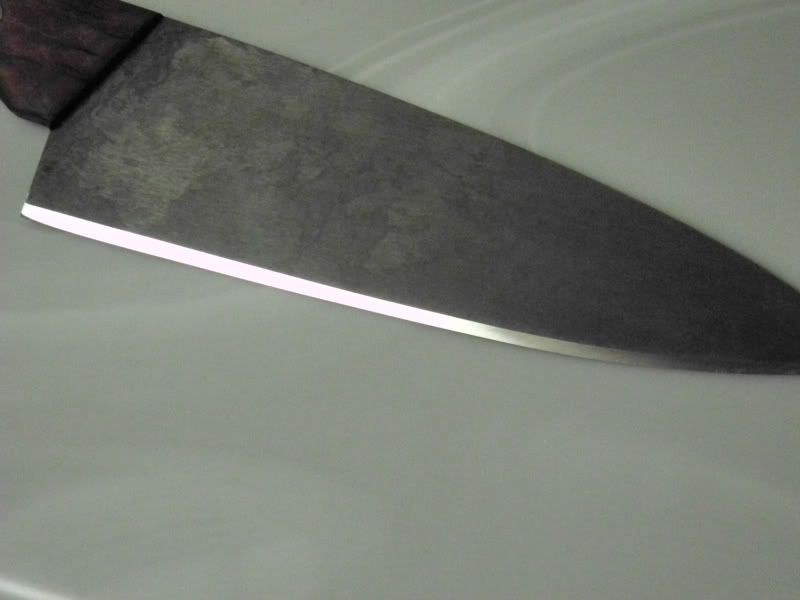
I am also very interested in how it does on Japanese kitchen knives. I don’t know if anyone has one, but one reason I am interested in this extension is that I have a couple of Japanese kitchen knives (gyuto – chef’s knife and sujihiki – carving knife) that have a rather broad bevel (say, half an inch) at a very low angle (down to 9 degrees per side) and no secondary bevel. See for example the knives in the picture below. It is clearest in the deba (middle knife).
Is it possible to sharpen such bevels using the vise extension?
Molecule Polishing: my blog about sharpening with the Wicked Edge
05/03/2013 at 10:51 pm #11300First, clamping and unclamping is virtually identical to what we do with the current configuration. It is no harder than that. The only difference is that the extension has a fixed shoulder for setting the depth of the spine in the clamp. But it still uses the same two screw system. Clamp snug with the top screw and add additional clamping force as required with the bottom screw.
I clamped up a 210 mm Gyoto last night. I was easily able to get to 10 degrees. I can give it a shot at 9 tonight. I think it will do it. The lowest achievable angle is dependent on how much the blade extends from the top of the extension clamp.
If you can get the angle that you need, I don’t see why you could not do the wide single bevel. As with any knife, just match the angle and go. Removing the burr from the flat side…. well that is something you would have to figure out. This new extension, as it is in the configuration that I have, will not get to a low enough angle to allow you to sharpen nearly as flat to the non-beveled side as you may want to do to keep the original configuration (pure single bevel). I suppose that you could do that part by hand.
05/04/2013 at 1:16 am #11303First, clamping and unclamping is virtually identical to what we do with the current configuration. It is no harder than that. The only difference is that the extension has a fixed shoulder for setting the depth of the spine in the clamp. But it still uses the same two screw system. Clamp snug with the top screw and add additional clamping force as required with the bottom screw.
I understand. But what I mean is the following. In what order do you close the two vises:
- do you first clamp the knife in the vise extension and then clamp the vise extension in the standard vise, or
- do you clamp the vise extension in the standard vise and then clamp the knife in the vise extension?
In the first case, you would have to unclamp and the re-clamp both vises if you wanted to move the knife. Correct?
I clamped up a 210 mm Gyoto last night. I was easily able to get to 10 degrees. I can give it a shot at 9 tonight. I think it will do it. The lowest achievable angle is dependent on how much the blade extends from the top of the extension clamp.
If you can get the angle that you need, I don’t see why you could not do the wide single bevel. As with any knife, just match the angle and go. Removing the burr from the flat side…. well that is something you would have to figure out.
Excellent news! I guess that this guy who has been trying to sell JNats to me for some time will finally be successful :-). The knives are double-beveled by the way, but removing the burr from a single-beveled knife is easy enough (indeed, by hand).
Molecule Polishing: my blog about sharpening with the Wicked Edge
05/04/2013 at 1:24 am #11304Mark,
I mounted the extension in the stock vise and just left it there for the duration of the tests. In fact, it is still clamped securely into my stock vise.. I haven’t moved it. Once it is clamped into the stock jaws, the rest of mounting and unmounting, or moving, of the blade is done with the screws on the extension.05/04/2013 at 2:15 am #11306Mark,
I mounted the extension in the stock vise and just left it there for the duration of the tests. In fact, it is still clamped securely into my stock vise.. I haven’t moved it.Once it is camped into the stock jaws, the rest of mounting and unmounting the blade is doen with the screws on the extension.Thanks! Even more good news… Is there nothing negative you guys can find? 😉
Molecule Polishing: my blog about sharpening with the Wicked Edge
05/04/2013 at 6:04 am #11310]Thanks! Even more good news… Is there nothing negative you guys can find? 😉
Nothing not already discussed (ie – the need for longer arms. Different screws etc) I think it may not plumb the blade quite as true but it’s pretty darned close. Not an issue on any of the ones I’ve tried.
Finally finished the Astrid so off to “test” my other Roselli. Probably tomorrow.
Ken
05/04/2013 at 11:02 pm #11317Next was the Roselli fillet knife. My wife got me this knife last fall for my birthday! 😉 Although this is technically a fillet, I use it in the kitchen as a large paring/small utility knife. Clamped the it in the base clamp:
Moving it to riser clamp took off almost 2°
Actually a bit more than I needed for this knife so I backed it off a degree. Coming along nicely, although there is one “wonky” place in the factory grind that’s taking a while to get out 😉
This is a very thin blade and it’s taking a delicate touch around the tip.
Ken
05/06/2013 at 12:18 pm #11334I sent Clay a quick note about how well finished the adapter looked, and how the design looked elegantly simple; and 3 days later I had one in my mailbox to test. The first thing I did was take it apart and inspect it; overall the fit and finish are top shelf (as everyone has thus far stated).
The only “improvement” I made was to deburr the lock screw so that it wouldn’t cut into the beautiful anodizing. I’ve only tested one knife so far, but as you can see it doesn’t scratch the anodizing.


 05/06/2013 at 12:19 pm #11335
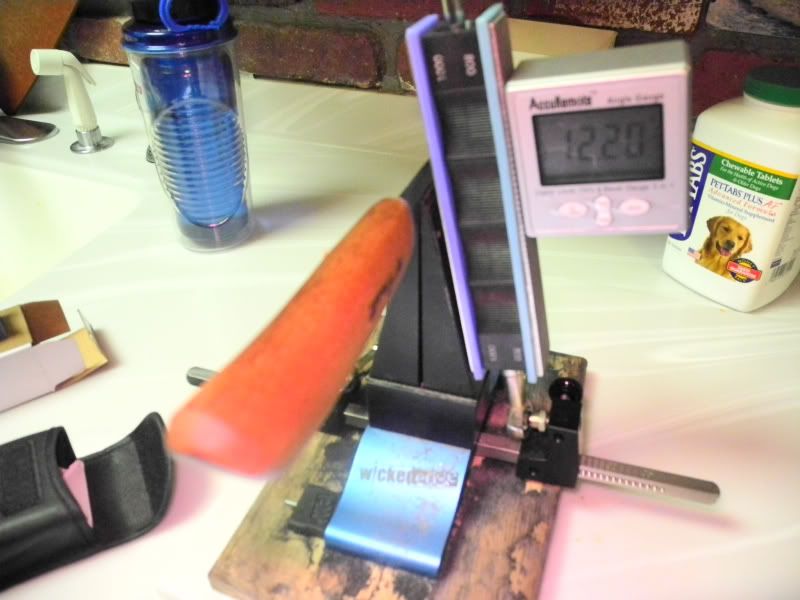
To test, I used my everyday cheapy paring knife; 3″ blade, 3/4″ tall, FFG (full flat ground) 1/16″ at the thickest. But before I jump to the new low angle adapter, I’ll clamped it in the new ball joint arms with riser setup. Being FFG, you’ll notice the LH (floating) clamp was really kicked out so that you get a good grip on the blade. On a side note, I don’t really like the idea of putting other materials (e.g. chamosis cloth or blue painter’s tape) in there. I used my angle cube to determine that when the blade is flat to the RH (fixed) clamp, the other side is 3 degrees off; so to simulate a straight up/down clamping, 3 degrees needs to be added to the LH side. In the picture, the RH is set to 14 degrees, and the LH is set to 18 degrees (I had it at 17, but it was hitting).
Angle without the adapter is: 19 + 13.5 = 32.5 degrees inclusive (16.25 degrees per side).


 05/06/2013 at 12:19 pm #11336
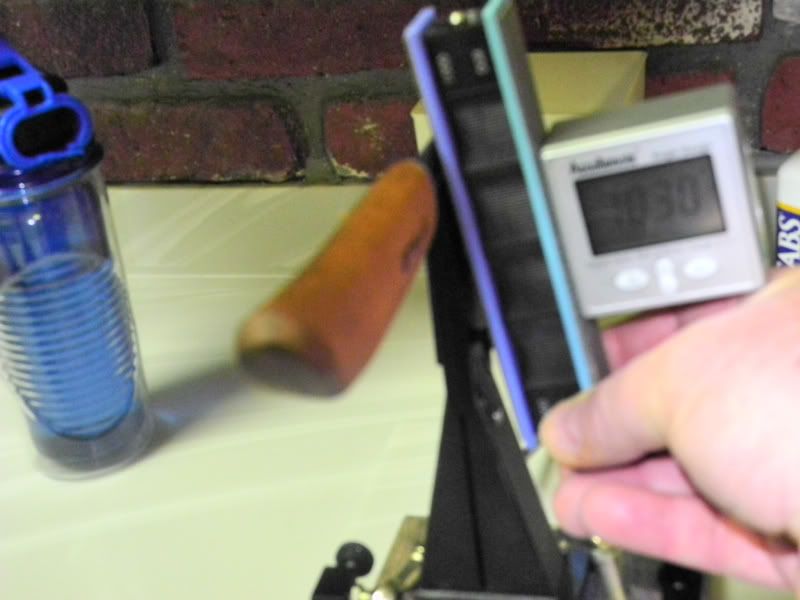
Mounting the low angle adapter is very straight forward; the one thing I’ll point out is when mounted correctly, the floating clamp should not kick out at all, and the fixed and floating clamps should be parallel.


As you’ll see here, plenty of clearance at these angles, although when I was done, I noticed some material removal from the adapter jaw at the very corner (oops).


With the low angle adapter, the final angle was: 9.35 + 12.85 = 22.2 degrees inclusive (11.1 degrees per side), compared to 32.5 degrees inclusive (16.25 degrees per side). So the adapter allows for a 10 degree inclusive (5 degree per side) reduction (for this particular knife).


Great job Clay, the constant innovation of the Wicked Edge will keep this product at the “cutting” edge for many years to come.
05/07/2013 at 2:37 am #11345Great review! What did you think about the length of the arms? Longer? Ok as is?
05/07/2013 at 4:06 am #11350There is something really important that I forgot to mention right from the outset of this sneak-peak: (cbwx34) was really instrumental in the design. He made the initial mock-up from his old Gatco jaws and brought them up to the office. He deserves a ton of credit for helping to get this going. THANK YOU cbwx34!
-Clay
05/08/2013 at 5:53 am #11365Kudos Curtis! Score 1 for an assist! 😉
Ken
05/09/2013 at 5:26 pm #11390Three cheers, many kudos and a hug for Curtis!
I know I’m an impatient guy, Clay, but have you got any idea when you could bring this on the market? (Hoping I don’t have to ask the if-question…)
Hurray and cheers again! 🙂
Molecule Polishing: my blog about sharpening with the Wicked Edge
05/12/2013 at 3:48 pm #11429Havent signed on to forum for several months and thought “sneak peak” might be about solution for serrated edges. Seems like solution for serrated has been in the works for a long time.
-
AuthorPosts


- You must be logged in to reply to this topic.