Newbie from SoCal
Recent › Forums › Main Forum › Welcome Mat › Newbie from SoCal
- This topic has 8 replies, 6 voices, and was last updated 01/29/2019 at 3:00 pm by
 Marc H (Wicked Edge Expert Corner).
-
AuthorPosts
-
01/25/2019 at 10:13 am #49168
Hello everyone! Newbie here from SoCal with a few questions.
Santa was nice and dropped off a WE50 for Christmas. I want to sharpen some of my kitchen knives using the 600, 800 and 1,000 grit stones.
- I realize the importance of creating a burr. If I create one using the 600 grit stone and then change stones, do I have to create a new burr each time I change stones or am I basically refining the original burr?
- Touchups – What is the proper procedure for touchups? Do I recreate a new burr, or do I simply sharpen what is already there? What stones should I use for touchups?
Thanks in advance for your help. You can obviously tell I’m a newbie by the questions, huh? But I figured I would risk sounding dumb and get the answers from the pros.
01/25/2019 at 12:22 pm #49171You will get different answers from different people. Some like to raise a burr with every grit, some skip pulling a burr like every other grit. It is mainly to ensure that you are reaching the apex. On touch up I still raise a burr with first grit I start with usually 800 or 600 depending on condition of blade. Some will chime in with more advise I am no professional. I have realized some have different methods especially those with more experience. Welcome to the forum by the way.
3 users thanked author for this post.
01/25/2019 at 1:42 pm #49172You only need to raise a burr once during the sharpening of a knife. It doesn’t hurt to raise a burr again during the sharpening process (aside from a tiny quantity of unnecessarily removed blade stock).
For resharpening I would suggest starting with the same grit that you finished with or perhaps the previous grit. For example, if you sharpened the knife to 1000 grit, try resharpening at 800 or 1000 grit.
6 users thanked author for this post.
01/25/2019 at 4:59 pm #49173Hutch,
I follow Organic’s process – raise the burr on each side at the first grit and then rely on the sharpie and scope to ensure the following grits reach the apex.
This process has served me well with few exceptions. When things seem wonky it is usually a loose lock nut and the angle has shifted on one side. Or, my AccuRemote angle cube seemed to have a problem maintaining a zero reference on both the left and right side. I have since starting using the DXL360S angle protractor which is rock solid.
The sharpie and optical magnification are paramount to me in getting that wicked edge.
Question to the group; were you able to raise a burr on S110V. I didn’t detect a burr on my Spyderco PM2 with that steel with my fingers. I ended up relying on removing the sharpie marks to make sure I hit the apex. S110V still won’t get as sharp (keen) as the other high end steels but really does hold that edge.
Ed K
4 users thanked author for this post.
01/25/2019 at 5:29 pm #49174For the new users with limited experience, with a W.E sharpener or knife sharpening, in general, drawing a burr is the quickest, simplest and most reliable method to determine your work is reaching the knife edge, (i.e., apexing the edge), without having and using other helpful tools. Once you gain some experience and employ alternate monitoring methods, you may not need to form the burr.
In the mean time, the burr, the accumulation of steel rolling over to the opposite side of the knife edge, then your sharpening, is probably the way to go, to be sure your sharpening is effective. Forming a burr with each grit insures your sharpening is continuing to be effective.
To refine the sharpened edge and remove the burr steel, I use alternating, left-side, right-side, left-side, right-side, edge leading strokes, at the end of each grit I’m using in my sharpening progressions. Edge leading are strokes going down and onto the exposed knife edge.
As the grits get finer and your edge gets sharper, the burrs will form easier and be smaller. (If the burr is not removed the sharpened edge will not be exposed). Therefore, I always use the edge leading strokes, last. Exercise care and safety when using edge leading strokes since your fingers may be placed where they can come in direct contact with the sharpened cutting edge.
For touch-ups I use the finest grit that will remove any damaged steel and refine the edge easily and quickly. If after a few minutes it seems I’m not making easy progress, I’ll step back down a grit level or two coarser and go at it again. For touch-ups, positioning the knife just like you had when sharpening it, is crucial for a quick and efficient touch-up.
Marc
(MarcH's Rack-Its)4 users thanked author for this post.
01/25/2019 at 6:03 pm #49175Marc’s point about getting the blade clamped the same way for re-sharpening is a big one. Use the alignment guide and record those settings! This will save you a lot of effort for future work.
4 users thanked author for this post.
01/29/2019 at 12:25 pm #49223An alignment guide did not come with the WE50, so it looks like I should purchase one to make sure the knives are positioned correctly.
Thanks for your help.
01/29/2019 at 1:11 pm #49224An alignment guide did not come with the WE50, so it looks like I should purchase one to make sure the knives are positioned correctly. Thanks for your help.
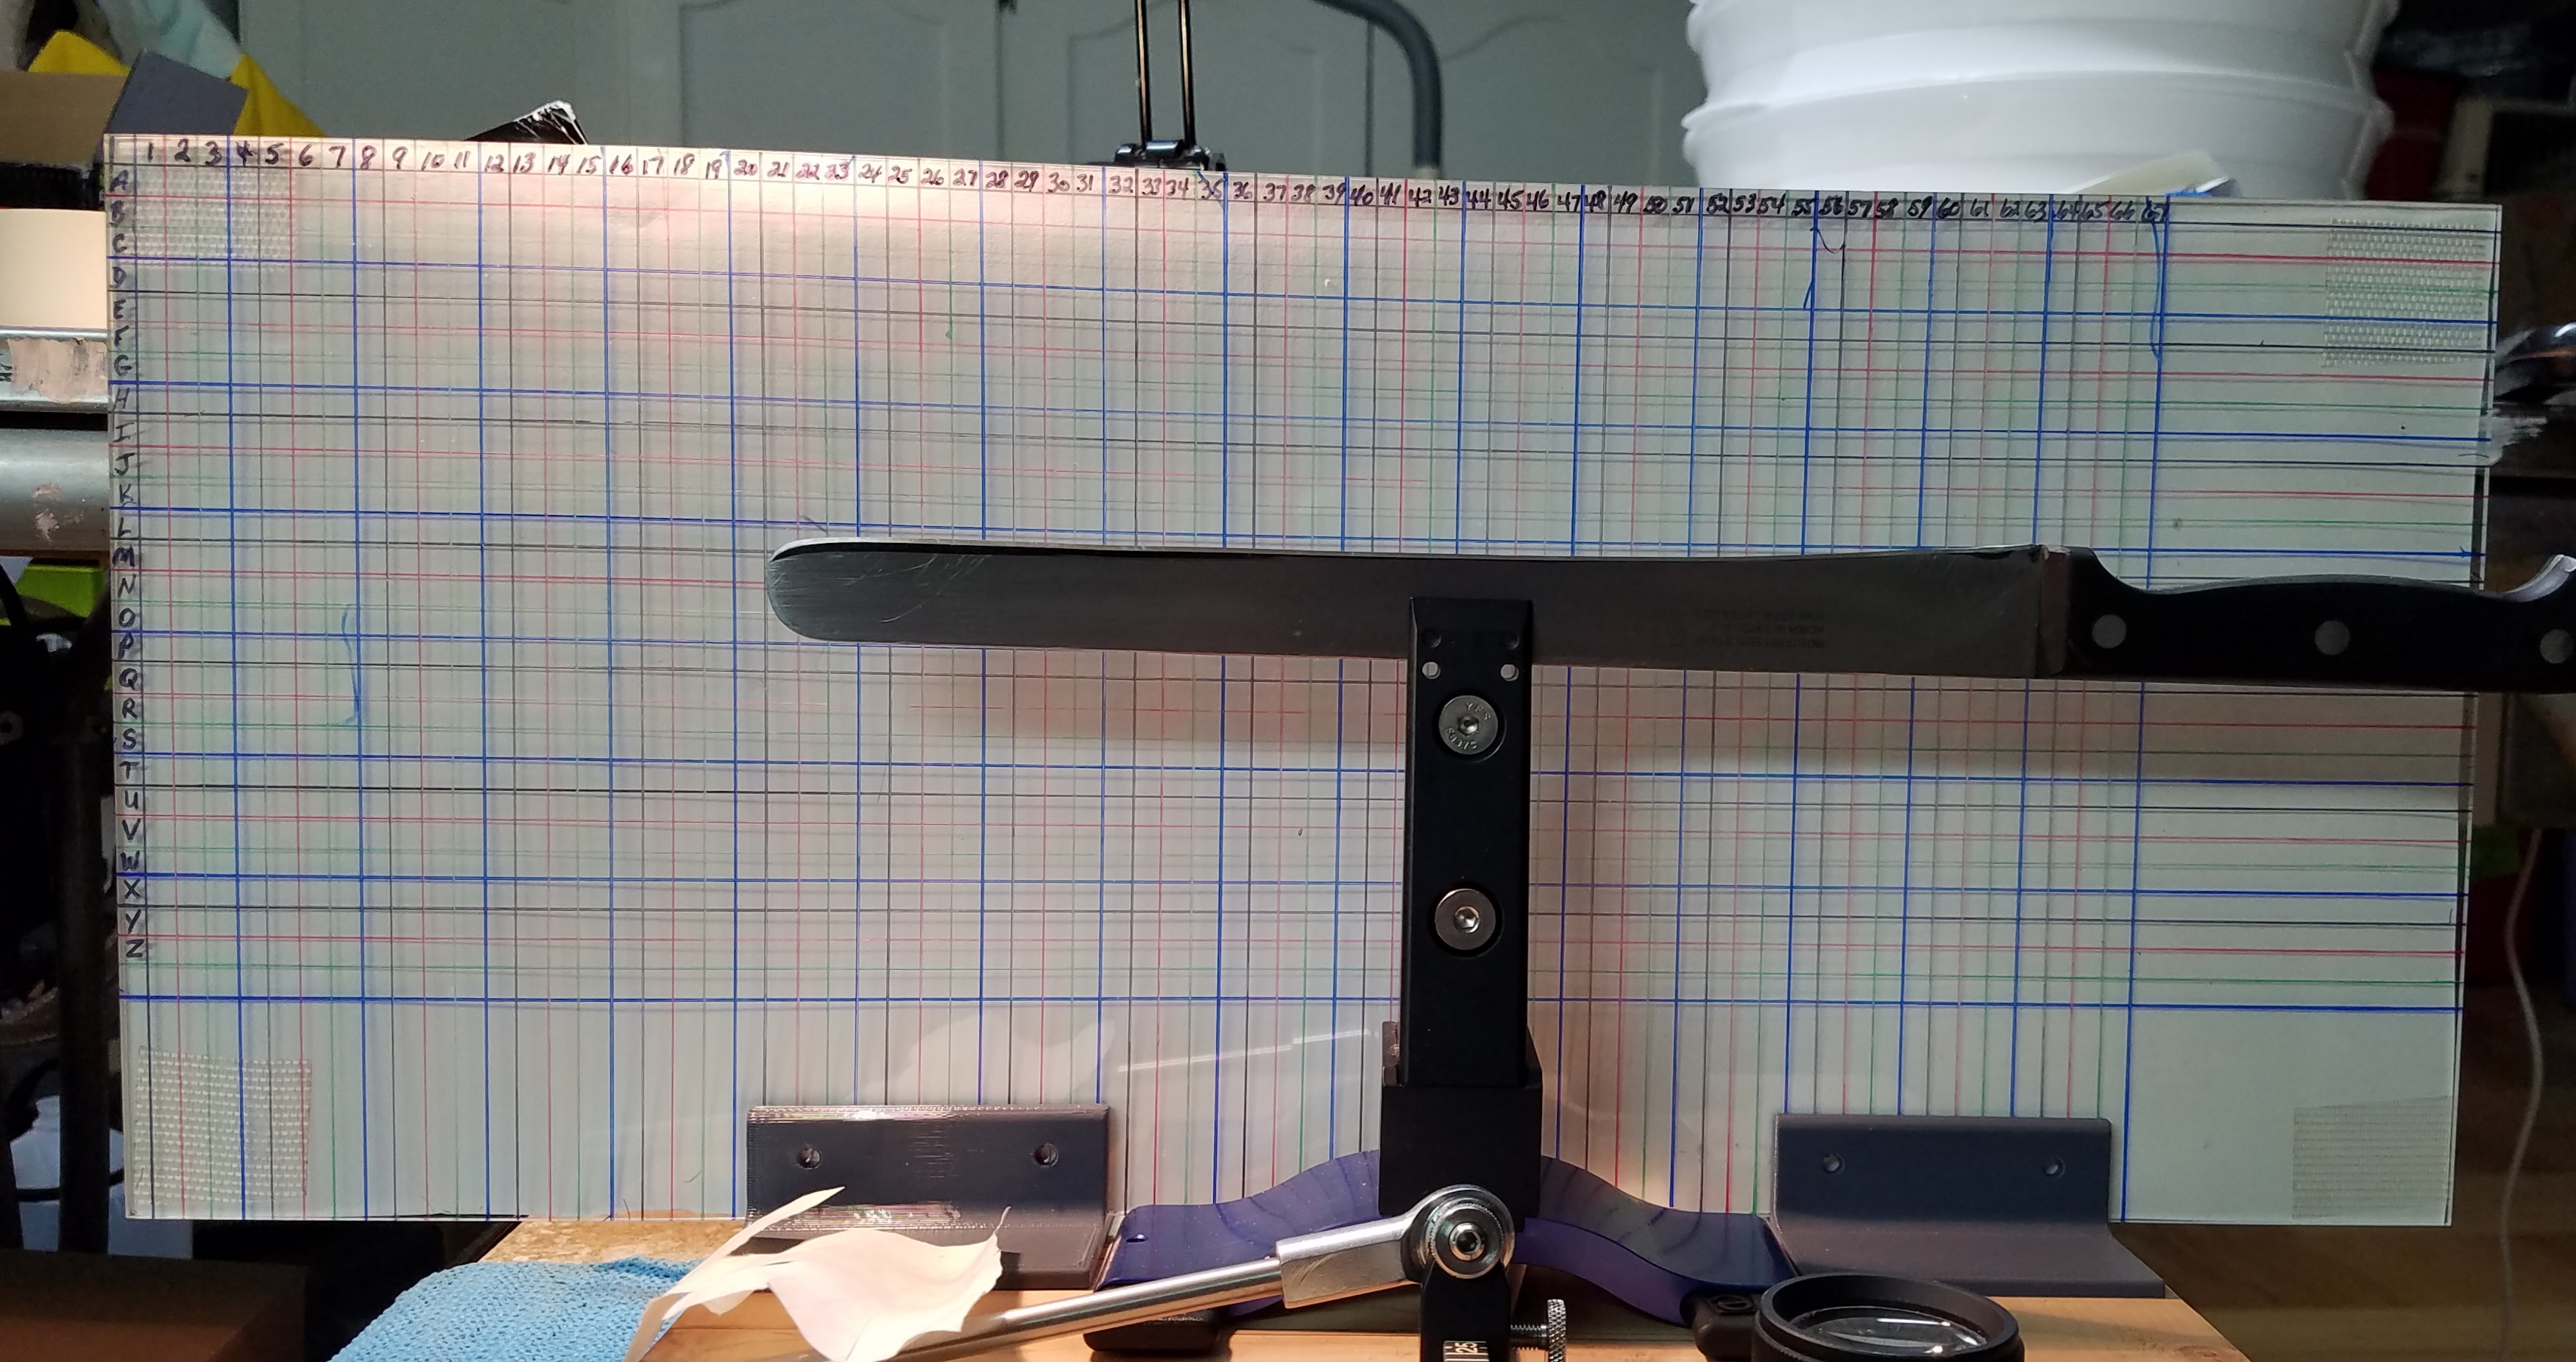
You can make one if so inclined. I am a really new user and wanted something that could provide a point of reference at both ends of the blade, even if it was very long.
This is just Plexiglas which I created a 4 color grid every 1/4 inch with sharpie’s and a scribe. It is notched to go over the angle rod and free standing. Of course it sits back from the blade so you have to eye things up right on axis and taking a photo with a phone is almost impossible.
-
This reply was modified 6 years, 1 month ago by
airscapes.
-
This reply was modified 6 years, 1 month ago by
airscapes.
Attachments:
You must be logged in to access attached files.
2 users thanked author for this post.
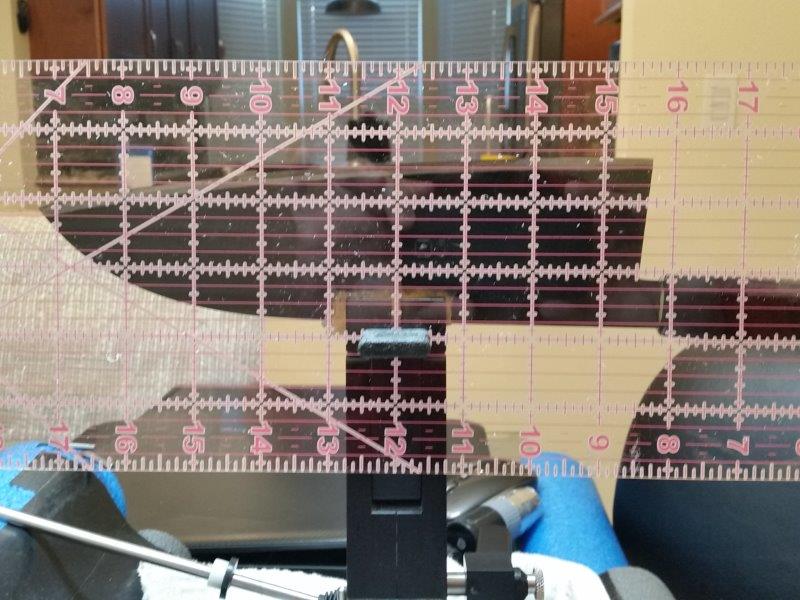
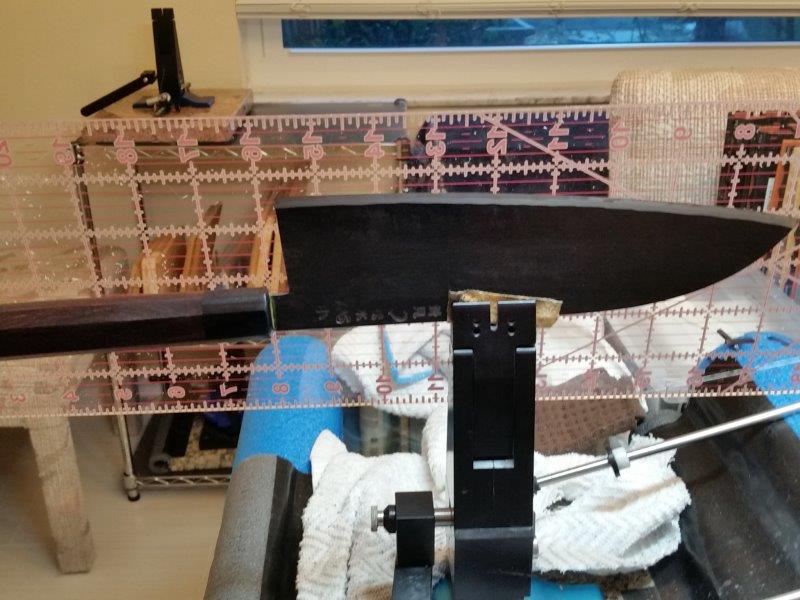
01/29/2019 at 3:00 pm #49229I made a similar Extra Large Advanced Alignment Guide, (XLAAG), from a store bought large plastic ruler. I made holes to fit the depth key just as you would with the regular W.E. AAG. I do line it up with the vise, (vertical) and jaws, (horizontal) and place a piece of blue tape to maintain this orientation. I’m able to get an (X,Y) for the tip, an (X,Y) for the heel and and (X,Y) for the belly, and any other points of reference I choose to use. It’s large enough to use when sharpening over 12″ long blades. The downside is it’s not very portable due to it’s XL size.
Marc
(MarcH's Rack-Its)Attachments:
You must be logged in to access attached files.
-
AuthorPosts
- You must be logged in to reply to this topic.


