Left and right angle inconsistency with angle cube
Recent › Forums › Main Forum › Techniques and Sharpening Strategies › Basic Techniques and Sharpening Strategies › Left and right angle inconsistency with angle cube
- This topic has 12 replies, 5 voices, and was last updated 01/17/2014 at 12:07 pm by
Leo Barr.
-
AuthorPosts
-
12/24/2013 at 3:46 am #16136
Hello,
I bought a WEPS with the PP2 8 or 9 months ago, but only recently have had time to really play with it. The Angle Cube it came with was seriously out of calibration. I wasn’t having much luck trying to recalibrate it (lack a sufficiently flat surface, for one), so I ordered another. However, I’m still getting unexpected results.
The cube is reporting about 2.5o mismatch between the left and right side. After reading various threads here, I decided to remove the knife as a variable and locked the depth gauge into the vice in place of a blade for testing purposes. (Since it’s thin, flat and doesn’t have a sharp edge to worry about.)
I clamp the “blade” in at the top position, and set the angle to 20o on both sides. To ensure that the fine adjustment is fairly close on both sides, I set it so that the end of the screw is flush with its hole. I make sure the Angle Cube is flush with the top and side of the paddle, and square it against the base so that the face is perpendicular. I zero out the AC before measuring by placing it on the beam.
I’ve repeated the procedure a couple of times now, and according to the Angle Cube it is around 19.5o on the left, and 22o on the right. Any suggestions on what’s going on here? Defective cube? I don’t see any obvious bend or defect on the WE. I wouldn’t expect perfect consistency, but 2.5 degrees is quite a bit.
Thanks,
cubix
12/24/2013 at 6:26 am #16140If you are setting your angle by the degrees marked on the bar, that is most likely the cause of the discrepancy . This occurs because one side of the clamp is fixed, and the other side moves. Set your angle using the cube and you’ll be ok.
Here’s a link to get you started. http://wickededgeusa.com/wiki/index.php?title=Beginners_Guide_to_the_Wicked_Edge
There is a lot of helpful information on the wiki, and on the forum in general. You can search or just browse around the index page for topics that catch your eye.
12/25/2013 at 11:33 pm #16155Make sure to calibrate the cube to your base before starting as well. If the surface you have it sitting on is not perfectly level that can throw the apparent angles off as well. I’m sure you know that since you are zeroing to the beam, but I’ve been told it’s bad to assume. The surface you sharpen on doesn’t need to be perfectly level, but the cube must “see” where level is relative to.
If you are not re-profiling a blade, I would use the sharpie method to match what’s there. For me, it’s faster and in most cases, let’s you sharpen even lopsided blades while not having to remove too much material.12/26/2013 at 12:35 pm #16169I’d really be surprised to see an angle cube that far out of whack. A very simple check is to set the cube on a flat surface and press the “zero” button. Then lay the cube on its side and you should read very close to 90.0 degrees plus or minus whatever the manufacturer says the accuracy should be. Flip it to its opposite side and it should read -90.0 degrees.
Next, I’d switch rod-end attachments, left to right, and then recheck the angles. If the angle readings have flipped, there’s something wrong with one of the attachments.
If that doesn’t change anything, next I’d flip the beam (increment bar). If the angles flip, I’d guess that the angle detents aren’t centered, relative to the mounting screw.
My angles seem to vary by about .75 degrees, but I’ve never had enough reason to dig into it. I always assumed that it was related to the blade and how it squares up in the vise. Good Luck, I’m looking forward to finding out what you learn.
01/14/2014 at 10:25 am #16436Thanks for the replies. Sorry it took me so long to get back to this.
I’d really be surprised to see an angle cube that far out of whack. A very simple check is to set the cube on a flat surface and press the “zero” button. Then lay the cube on its side and you should read very close to 90.0 degrees plus or minus whatever the manufacturer says the accuracy should be. Flip it to its opposite side and it should read -90.0 degrees.
It seems to be passing this test OK.
Next, I’d switch rod-end attachments, left to right, and then recheck the angles. If the angle readings have flipped, there’s something wrong with one of the attachments.
Good suggestion, and when I tried it, sure enough, the numbers flipped.
I thought I would just trust the angle cube, and sharpened a couple of inexpensive knives to see what happened. It seemed to be OK, so I went on to my new Izula. Unfortunately, I suppose because I dropped the angle down to 16 deg, the mismatched bevels became alarmingly apparent. I’m kicking myself now for not having resolved it before going on to a knife I care about. 😳
It was definitely set to 16 as per the cube on both sides, and I double checked periodically. I’m fairly sure the blade was vertical. I put a few layers of latex between the knife and the vice.
Re-examining the cheaper knives, I think they are mismatched as well, but it is not as visible at the higher angle. I’m really confused as to what’s causing it. Every measurement I take, albeit with just a ruler, looks alright, but as you suggest (tcmeyer), there might be something wrong with the attachments. Any suggestions on how to proceed?
01/14/2014 at 1:58 pm #16438Find which rod attachment is providing the right angle (matches the detent position on the base rod.
Now go to the attachment with the wrong angle. If you have the Pro-Pack II, you should be able to adjust the position of the rod-end coupling – the ball of the ball-joint coupling. Loosen the set-screw on the front of the slide-bar attachment and then adjust the in/out position of the screw that goes thru the attachment as you watch your angle-cube reading. When the angle matches that taken on the good side, tighten the set screw. As an old friend liked to say, “Viola.”
01/15/2014 at 4:20 am #16443Find which rod attachment is providing the right angle (matches the detent position on the base rod.
Now go to the attachment with the wrong angle. If you have the Pro-Pack II, you should be able to adjust the position of the rod-end coupling – the ball of the ball-joint coupling. Loosen the set-screw on the front of the slide-bar attachment and then adjust the in/out position of the screw that goes thru the attachment as you watch your angle-cube reading. When the angle matches that taken on the good side, tighten the set screw. As an old friend liked to say, “Viola.”
That’s a nice way to compensate while keeping the markings useful.
However, I’m still at a loss to explain why, when the AC read 16o, I got noticeably different bevels on each side. I wasn’t actually paying attention to the position markings at that time. I didn’t think it should matter as long as the AC was reporting the same angle on both sides.
01/15/2014 at 6:04 am #16446I did a little checking as by coincidence, I have a knife in my WE vise that seems to take a wider bevel on one side than the other. Since the blade has wide faces on each side, I am able to read them with my Angle Cube and can see that there’s a difference. With the Cube zeroed on the base, the left side reads +1.0 degrees. The right reads -3.6 degrees. Obviously, my blade is not clamped vertically in the vise. The difference is 4.6 degrees, so to get matched bevels, I need to clamp the blade in such a way as to read 2.3 degrees on each side. Easier said than done. I played with shims but wasn’t able to correct the error. Next I’ll look at the blade grind profile at the point where it’s clamped. Or maybe my vise isn’t absolutely true. I’ll clamp a flat piece of steel (like a planer blade) to see if it too is out of vertical. In any case, the cant of the blade accounts for the difference in bevel widths.
If a blade is being held vertically and both blocks read the same angles, there is the possibility that the edge of the blade may simply be off center. If the blade has a favorable flat grind, one way to test it is to lay the blade flat on a surface. Press the edge against a fixed vertical block, so as to leave a mark. Then flip the blade over, make another mark and see if the marks match. If you get two discrete lines, I think the solution is to stone the narrow side until the bevels nearly match, then follow through as you would normally.
01/15/2014 at 5:04 pm #16454I think if there is a big a difference from side to side of the blade it should be clear to eyeball it looking down the blade from the point.
Next I have noticed that sometimes when the blade is clamped it is not over the centre of the vice base again the mk 1 eyeball should reveal that I suppose one could put a reference line down the vice base centre to make it easier to check this . I would not think this is a particular problem as long as the angle match on the angle cube.
Once again it maybe that the edge of the bl-ade is not central this could be corrected by taking more off the side where the bevel is narrower until each bevel is equal ( and then checking to see if the edge is central) once again one must bear in mind that most knives are sharpened by hand so it is probable that a lot of knives are not totally symmetrical ; using a controlled angle sharpening tool is likely to reveal such imperfections then it is also possible that the flats of the knife are not even and may not even be flat this could be corrected by either sanding with wet and dry on glass or using fine silicon carbide to flatten the blade .
The big question to ask is the knife worth that level of work the more one pays for a knife the less likely this is to be the case (often I would imagine his is what adds to the cost of production of a knife) and lastly does the knife do what it is supposed to do if it does I would say does it really matter if a lower quality knife exhibits some of these traits?
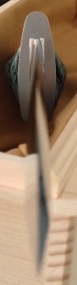
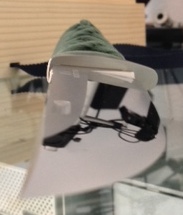
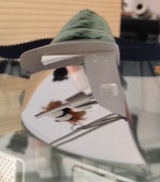
An expensive knife will be correct that is probable one of the reasons it is expensive!Attachments:01/15/2014 at 10:26 pm #16461Hi Leo!
That’s a beautiful knife! Can you tell us about it?
01/15/2014 at 11:29 pm #16462Its a Rockstead Un 044 Made in Japan April16th2013 ZDP189 / HRc 67.1 clad with ATS34 HRc 60.9
Length 255.5mm Blade 149mm Weight 254g
the cord is silk over a Menuki each side mounted on top of stingray .
I bought it as a treasure to build in value it is razor sharp like a Samurai it is sharpened by hand with an angle of about 12Ëš per side at the kissaki which increases to 15Ëš as it graduates towards the handle .
I do hand sharpen some knives using Choseras & Shapton glass ceramics and sometimes do similar angles these are convex angles . this knife is so sharp I put it on a duvet to photograph it and it cut both through the cover and the duvet just resting there . I have never intentionally cut anything with it and do not intend to I enjoy its beauty and in any case it is too large to wear in most places . I do have smaller less valuable Rocksteads that I do use and indeed sharpen but not this one .01/17/2014 at 11:42 am #16488Gee, thanks a lot, Leo. I watched a bunch of Rockstead’s videos and if there was any question up until this point, it is now clear that I am unworthy, both as a knifemaker and a sharpener.
I have never been a collector and being from a frugal background, I’ve been buying a lot of cheap pocket knives. I get them really sharp, but I need a lot of them because they dull so easily. Now I know why. My Japanese Seki’s are made of AUS-6. Rocksteads are made of Unobtainium.
01/17/2014 at 12:07 pm #16489What I would say is that even some good knives I have a Japanese Honyaki Nakiri vegetable knife which I spent some hours convex thinning many of the Japanese chef knives of high quality assume the user will customise parts of the knife be it thin it or changing bevels .
What I would say that should you find a worthwhile knife be it the steel or the shape it could well be worth the work to remove the imperfections that in reality is very rewarding . Tuffy found a MAC knife I think at a thrift store and bought it for a fraction of the original price sometimes people throw out stuff not knowing the value.
If you are a knife maker there are some great steels available sometimes on ebay or similar places there are some great damascus blanks either high quality American made or low quality Asian made . One day I intend to have a go at making some knives when I have a back yard I would first make one using a blank or an old file they make great knives they need de tempering first to work it then re tempering after shaping this is affordable hard steel .Seki made knives are great I have one I bought and a Yangi I was given both are razor sharp both I have hand sharpened since a Yangi really is not suited to the WE with it convex thinning and the Uri sharpening and the other was con vexed to begin with so it would be a shame to change it.
-
AuthorPosts
- You must be logged in to reply to this topic.