KaBar USMC
Recent › Forums › Main Forum › KaBar USMC
- This topic has 29 replies, 7 voices, and was last updated 12/29/2021 at 10:56 am by
 Marc H.
-
AuthorPosts
-
07/22/2020 at 4:48 am #54652
Doing much better now with my WE.Have received great tips from many.Went to tackle a larger blade Ka Bar USMC.Any tips on this one.
2 users thanked author for this post.
07/22/2020 at 1:57 pm #54655Hi Kenny,
Try mounting the blade so that the back of the vise is lined up with the start of the belly of the blade, or thereabouts. You’ll have to tinker a little to find the “sweet spot”. If you need more info on finding the sweet spot, do a search here on the forum and you’ll find some excellent posts from forum members. You’ll probably find that the factory angle is pretty wide, maybe even 25 degrees per side (DPS) or more. I’d start with sharpening at the current grind and see how it goes before trying to re-profile it to a lower angle.
-Clay
2 users thanked author for this post.
07/22/2020 at 3:33 pm #54657Thanks Clay,yep 20 was not working,I was guessing it was about there.I will give a go once more.
1 user thanked author for this post.
07/22/2020 at 4:27 pm #54658Hi Kenny, Try mounting the blade so that the back of the vise is lined up with the start of the belly of the blade, or thereabouts. You’ll have to tinker a little to find the “sweet spot”. If you need more info on finding the sweet spot, do a search here on the forum and you’ll find some excellent posts from forum members. You’ll probably find that the factory angle is pretty wide, maybe even 25 degrees per side (DPS) or more. I’d start with sharpening at the current grind and see how it goes before trying to re-profile it to a lower angle.
I’m still unclear on how to approach the heel of the blade on a knife like this. Doesn’t the ricasso prevent the stone from reaching the entire edge? I’ve decided I don’t want to cut off the plastic finger guards on the platons. Do some people carve a small choil into the edge? How would you approach a knife like this if it belonged to someone else and carving a notch were not an option?
1 user thanked author for this post.
07/23/2020 at 11:48 am #54659Not every knife is able to be sharpened with the Wicked Edge. In most situations there are helpful workarounds, two of these you mentioned:
I’ve decided I don’t want to cut off the plastic finger guards on the platens. Do some people carve a small choil into the edge? How would you approach a knife like this if it belonged to someone else and carving a notch were not an option?
If you find that you’ll be facing this sharpening situation from time to time, it may be helpful to buy a set of W.E. stones that you do remove the plastic finger guards. You can still don a pair of cut free gloves to use those stones safely.
Another option might be to acquire a set of Whetstones to use for this situation. The profile on new Shapton Pro Stone whetstones are quite tall. They allow you to work closer to the ricasso then you would normally be able to with the shallower diamond stones.
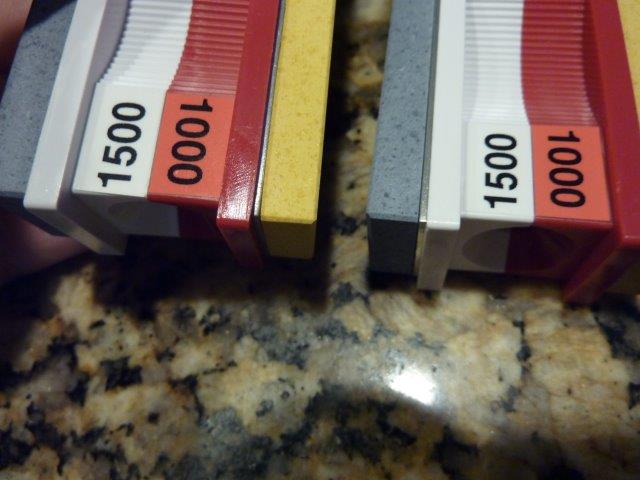
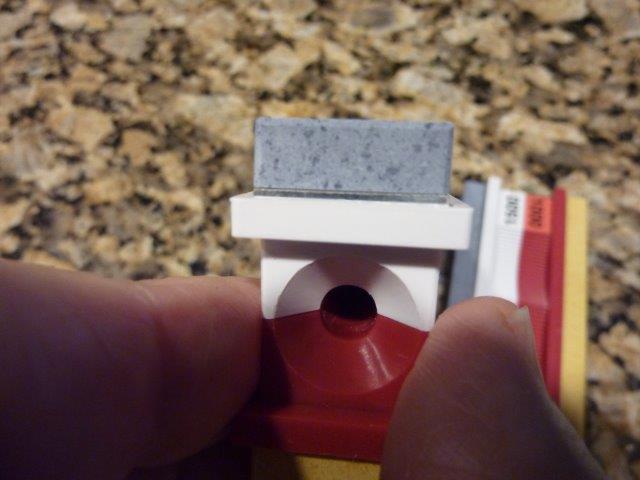
These Shapton Pro Stones are “spritz and go”. They only need to be misted with water to use them properly so they’re not very messy to work with. They will afford you lots of hours of sharpening use before they wear done enough that you’ll need to replace them with new taller stones.Marc
(MarcH's Rack-Its)Attachments:
You must be logged in to access attached files.
5 users thanked author for this post.
07/23/2020 at 5:37 pm #54663Best advice on the internet, my friend. I will look into this.
1 user thanked author for this post.
12/27/2021 at 11:33 pm #57408Rather than starting a new thread on the same knife, I figured I would post here. Aside from the issues related to the heel, I’m having a hard time mounting this knife in my WE120. First, I struggle with the position of mounting this style of knife. Using the Sharpie method, I keep coming up with a position that is very far forward and highly angled. I’ll post a picture with an Ontario SP-1 (a cheaper knife in a similar style) in the position where I get the best result.
The second problem I am having is getting the clamp to hold the knife in this position. With most of the weight near the handle, it just wants to rotate toward level and the clamp is not able to stop it from moving. When I lock in FFG kitchen knives I can pick the WE120 up by the knife handle it is so well locked in. With this style of knife, I have much less success. If I try to pick the sharpener up by the knife handle, the knife just moves. I’ve tried bare metal, painters tape, and electrical tape with the same result. I’ve cranked down on the clamp screws as much as I can with the provided hex key and would not want to go further for fear of bending the vise. Any advice on how to approach this style of knife is greatly appreciated.
Attachments:
You must be logged in to access attached files.
12/28/2021 at 1:50 am #57410Here’s a photo of a US Navy KABAR mounted in my Gen 1 vise while sharpening it some 7 years ago. I don’t recall any problems and don’t have much to share, except that the mounting position is much like Clay described, with the start of the belly lined up with the back face of the vise. You can see that the bevel width flows nicely through the belly, suggesting that it’s in the sweet spot.
Since this knife has a story behind it, the owner (my brother-in-law) didn’t want the blade patina to change and I wasn’t about to alter the Ricasso. I did restore some finish to the leather handle, which was badly dried out. I used red rouge polishing compound on a buffing wheel. The leather looks in good condition but looks like it should after 3 tours of combat in Viet Nam. BIL was an A-Team captain and was wearing the knife when he was struck by a 7.62 cal “ChiCom” bullet, The bullet struck the spine of the knife, saving him from serious pelvis injury or possibly death, but not from a purple heart. You can see the fracture divots along the spine in the photo. There are similar fracture divots on the opposite side.
Why a Navy KABAR issued to an Army Special Forces officer? This was at the spooling up of action in country and they issued what they had, I guess.
I wish I’d taken more photos…

1 user thanked author for this post.
12/28/2021 at 4:40 am #57411Thank you not only for the help, but also for the outstanding story. I am clearly making some foundational mistakes with the Sharpie test. When I place the knife as you have it, I hit the apex on the straight part of the blade just fine at 20 degrees, but as I go from the belly to the tip, the stone comes way down into the shoulder, leaving the apex untouched. To compensate, I keep moving the blade further back in the vise and increasing the forward tilt on the blade until I end up with the position in my earlier photo. That hits the apex at all points, but is clearly not the correct approach. Rather than moving the blade back and tilting it down as I have been, what other adjustments should I be making to hit the apex? Any suggestions greatly appreciated.
12/28/2021 at 8:05 am #57412I have no experience with that particular military style knife. For similarly shaped long-ish knives when I need to rotate the handle for clamping to best find a “sweet spot” I always rotate the handles down and the tip up, both. It’s a slight downward position for the handle below the horizontal of the jawline and a slight upward rotation of the belly and tip. No-where as large a rotation as you used. The knife is usually good more centered to it’s length also. More like Tom’s knife is clamped but just with the handle slightly down.
Marc
(MarcH's Rack-Its)1 user thanked author for this post.
12/28/2021 at 12:16 pm #57413Ideally, the edge would follow a constant distance from the pivot point of the rod to the apex, but this assumes that the blade is the same thickness at the shoulder of the bevel. But some knives are shaped rather thick at the tip (for strength) and you simply can’t avoid leaving a wider bevel there. The same situation applies where the previous sharpener did not maintain the same low angle when he was sharpening the belly/tip. If he followed a higher angle there, it will simply require more strokes (probably many more) to reach the apex at the lower angle.
In the case of the KABAR in my photo, you can see that you simply cannot move the blade much farther to the right. Doing so will increase the angle through the belly, and the tip will increasingly approach the vertical, at which point the bevel angle will become undesirably high. As Marc suggests, you could move the belly so that it falls directly above the vise, with the straight section sloping down towards you. If the rod length doesn’t let you reach the heel, you could sharpen in two steps – one, with the belly over the vise and two, with the straight section horizontally and above the vise.
As you experience sharpening blades of widely different shapes, you’ll find it helpful to consider the shape of the blade relative to the sweep of the stones as they rotate about the pivot point of the rods. Try to align the center point of the belly’s radius with the pivot point of the rods. At this point, the bevel angle will vary the least.
In this case, I would sharpen the entire length in one step, as shown in my photo, accepting that the bevel width at the tip will be noticeably wider. Good luck.
1 user thanked author for this post.
12/28/2021 at 2:07 pm #57414Sometimes knives just need to be reprofiled. All 3 of the brand new M7 Bayonets that I bought had terribly profiled edge bevels. I had to reprofile all of them. But Clay has a video about finding the ‘Sweet Spot’ in the ‘Knowledge Base’. It is up at the top right of the screen.
1 user thanked author for this post.
12/28/2021 at 4:50 pm #57415Sometimes knives just need to be reprofiled. All 3 of the brand new M7 Bayonets that I bought had terribly profiled edge bevels. I had to reprofile all of them.
Whether simply sharpening knives or reprofiling them, the process is essentially the same…it’s just a matter of degrees, how much steel is removed. You still need to find the best, most efficient clamping position, “the sweet spot” to carry either one out.
The poster, “Steve” who resurrected this old thread is aware and already using the techniqIue to find “the sweet spot”. His problem is the knife clamping position he found using this technique does not lend itself to be very practical. Sometimes you need to work with a second choice position and just be aware that the second best “sweet spot” will lead to some edge reprofiling the first time that knife is sharpened. In reality, with fixed angle guided sharpening systems, like the W.E.P.S., every knife you clamp and sharpen for the very first time will undergo some small amount of edge reprofiling. Just the first time to get the knife edge aligned with the stones and the system. Subsequent sharpening if positioned and clamped the same way, the edges will match right up across the entire length and should only require a touch-up.
To actually decide to reprofile a knife edge, that is, to intentially change the edge shape, and the angle is really sharpening just to a greater degree. I like to believe the knife maker profiled, that is shaped the knife as they did, for a reason. I try to work with the profile and only make the minor reprofiles that come with using a guided angle sharpening system.
Intentionally reprofiling, for me, is only for removing damaged edge steel and is the exception. I reserve to do this when it’s required as part of sharpening a knife or repairing it.
Marc
(MarcH's Rack-Its)12/28/2021 at 5:01 pm #57416Sometimes knives just need to be reprofiled. All 3 of the brand new M7 Bayonets that I bought had terribly profiled edge bevels. I had to reprofile all of them.
Whether simply sharpening knives or reprofiling them, the process is essentially the same…it’s just a matter of degrees, how much steel is removed. You still need to find the best, most efficient clamping position, “the sweet spot” to carry either one out. The poster, “Steve” who resurrected this old thread is aware and already using the technique to find “the sweet spot”. His problem is the knife clamping position he found using this technique does not lend itself to be very practical. Sometimes you need to work with a second choice position and just be aware that the second best “sweet spot” will lead to some edge reprofiling the first time that knife is sharpened. In reality, with fixed angle guided sharpening systems, like the W.E.P.S., every knife you clamp and sharpen for the very first time will undergo some amount of edge reprofiling. Just the first time. Subsequent sharpening if positioned and clamped the same way, the edges will match right up across the entire length and should only require a touch-up.
Yep, it’s tough sometimes. I’ve tried using tape, cloth, and leather and stuff. Some knives just don’t want to be clamped. For them I try to use my Tormek small knife holder. I’m not sure how well it would work for a large knife though.
1 user thanked author for this post.
12/28/2021 at 7:07 pm #57417Yep, it’s tough sometimes. I’ve tried using tape, cloth, and leather and stuff. Some knives just don’t want to be clamped. For them I try to use my Tormek small knife holder. I’m not sure how well it would work for a large knife though.
That’s why I’m a proponent for using creative thinking, accessories and modifications to help W.E. user’s to use their sharpeners easier, more efficiently and effectively. The W.E. alone cannot easily clamp and sharpen every knife. There are too many sizes, styles and varieties. Sometimes the W.E. needs help and we have to get creative and intuitive. Afterall, the W.E. is really just a well engineered bench top vise to facilitate a hands-free operation. By that I mean, the vise clamps our knives stabily, freeing our hands of the need to hold the knife, so we can use both hands to sharpen the steadied knife. Our hands are freed to use them.
The Low Angle Adapter, (LAA), is a W.E. accessory, the Tormek Small Knife holder is another helpful one, RAM mount accessories and riser blocks are a couple more. Using whatever you need to help you clamp and sharpen your knife is using one tool to help or enhance the capabilities of another. It doesn’t mean the one tool alone, the W.E., is faulty or inadequate, just that our needs exceeded it’s design and basic capabilities. To meet all our needs sometimes we need to “think outside the box”.
Marc
(MarcH's Rack-Its) -
AuthorPosts
- You must be logged in to reply to this topic.