Edge-On-Up Professional Edge Tester
Recent › Forums › Main Forum › Techniques and Sharpening Strategies › Advanced Techniques and Sharpening Strategies › Edge-On-Up Professional Edge Tester
- This topic has 34 replies, 6 voices, and was last updated 09/25/2018 at 8:20 am by
 Marc H (Wicked Edge Expert Corner).
-
AuthorPosts
-
09/18/2018 at 11:53 pm #47663
Ed, I was really asking the question in relation to the pictured Forschner 40020, but I’m glad you answered it in terms of general practice.
I’m surprised by the variance in the readings along the edge of the “Old Timer” looking folding knife. I see it’s almost double from the rear portion close to the handle as compared to the curve of the tip. Would you attribute that to the thinness of the grind at the rounded tip?
Another question, do you have a preferred stroke direction? That is edge leading vs edge trailing?
Marc
(MarcH's Rack-Its)09/19/2018 at 6:34 am #47667That is the instructive part of having the tester. Since I currently sharpen for free I use a chess timer and try not to spend more than 30-40 minutes per knife.
I believe that the variance is due to me not spending enough time at the heel of the blade as well as the thinness at the tip. For a work knife like that one, I’m happy with readings under 200.
For EDC work knives I almost exclusively go heel to tip edge trailing. For quality kitchen knives I sometimes alternate where I start (heel or tip) with each grit change. And, I take the grit up to 3000 on the Chosera stones with light passes edge leading.
Ed K.
1 user thanked author for this post.
09/19/2018 at 7:11 am #47668Ed, I sent you a private message. To read it click the blue message notification on the black stripe at the very upper right of your browser window.
Thanks
Marc
(MarcH's Rack-Its)09/19/2018 at 10:35 am #47669I’ve also got one of these on order to test out. We had purchased one of their very first models that required the user to incrementally add steel shot into little cups in order to build force on the blade vs the testing medium. It was pretty cumbersome and we instead preferred to use our own jig built off the design from Cliff Stamp and BassLakeDan. This new design from Bess looks much easier to use. At some point, we’ll get back to building our robot for edge testing, but for now, we’ll try this method out.
-Clay
09/19/2018 at 6:06 pm #47675Ed, thanks for taking the time to respond to the questions along with the pics. Great post!
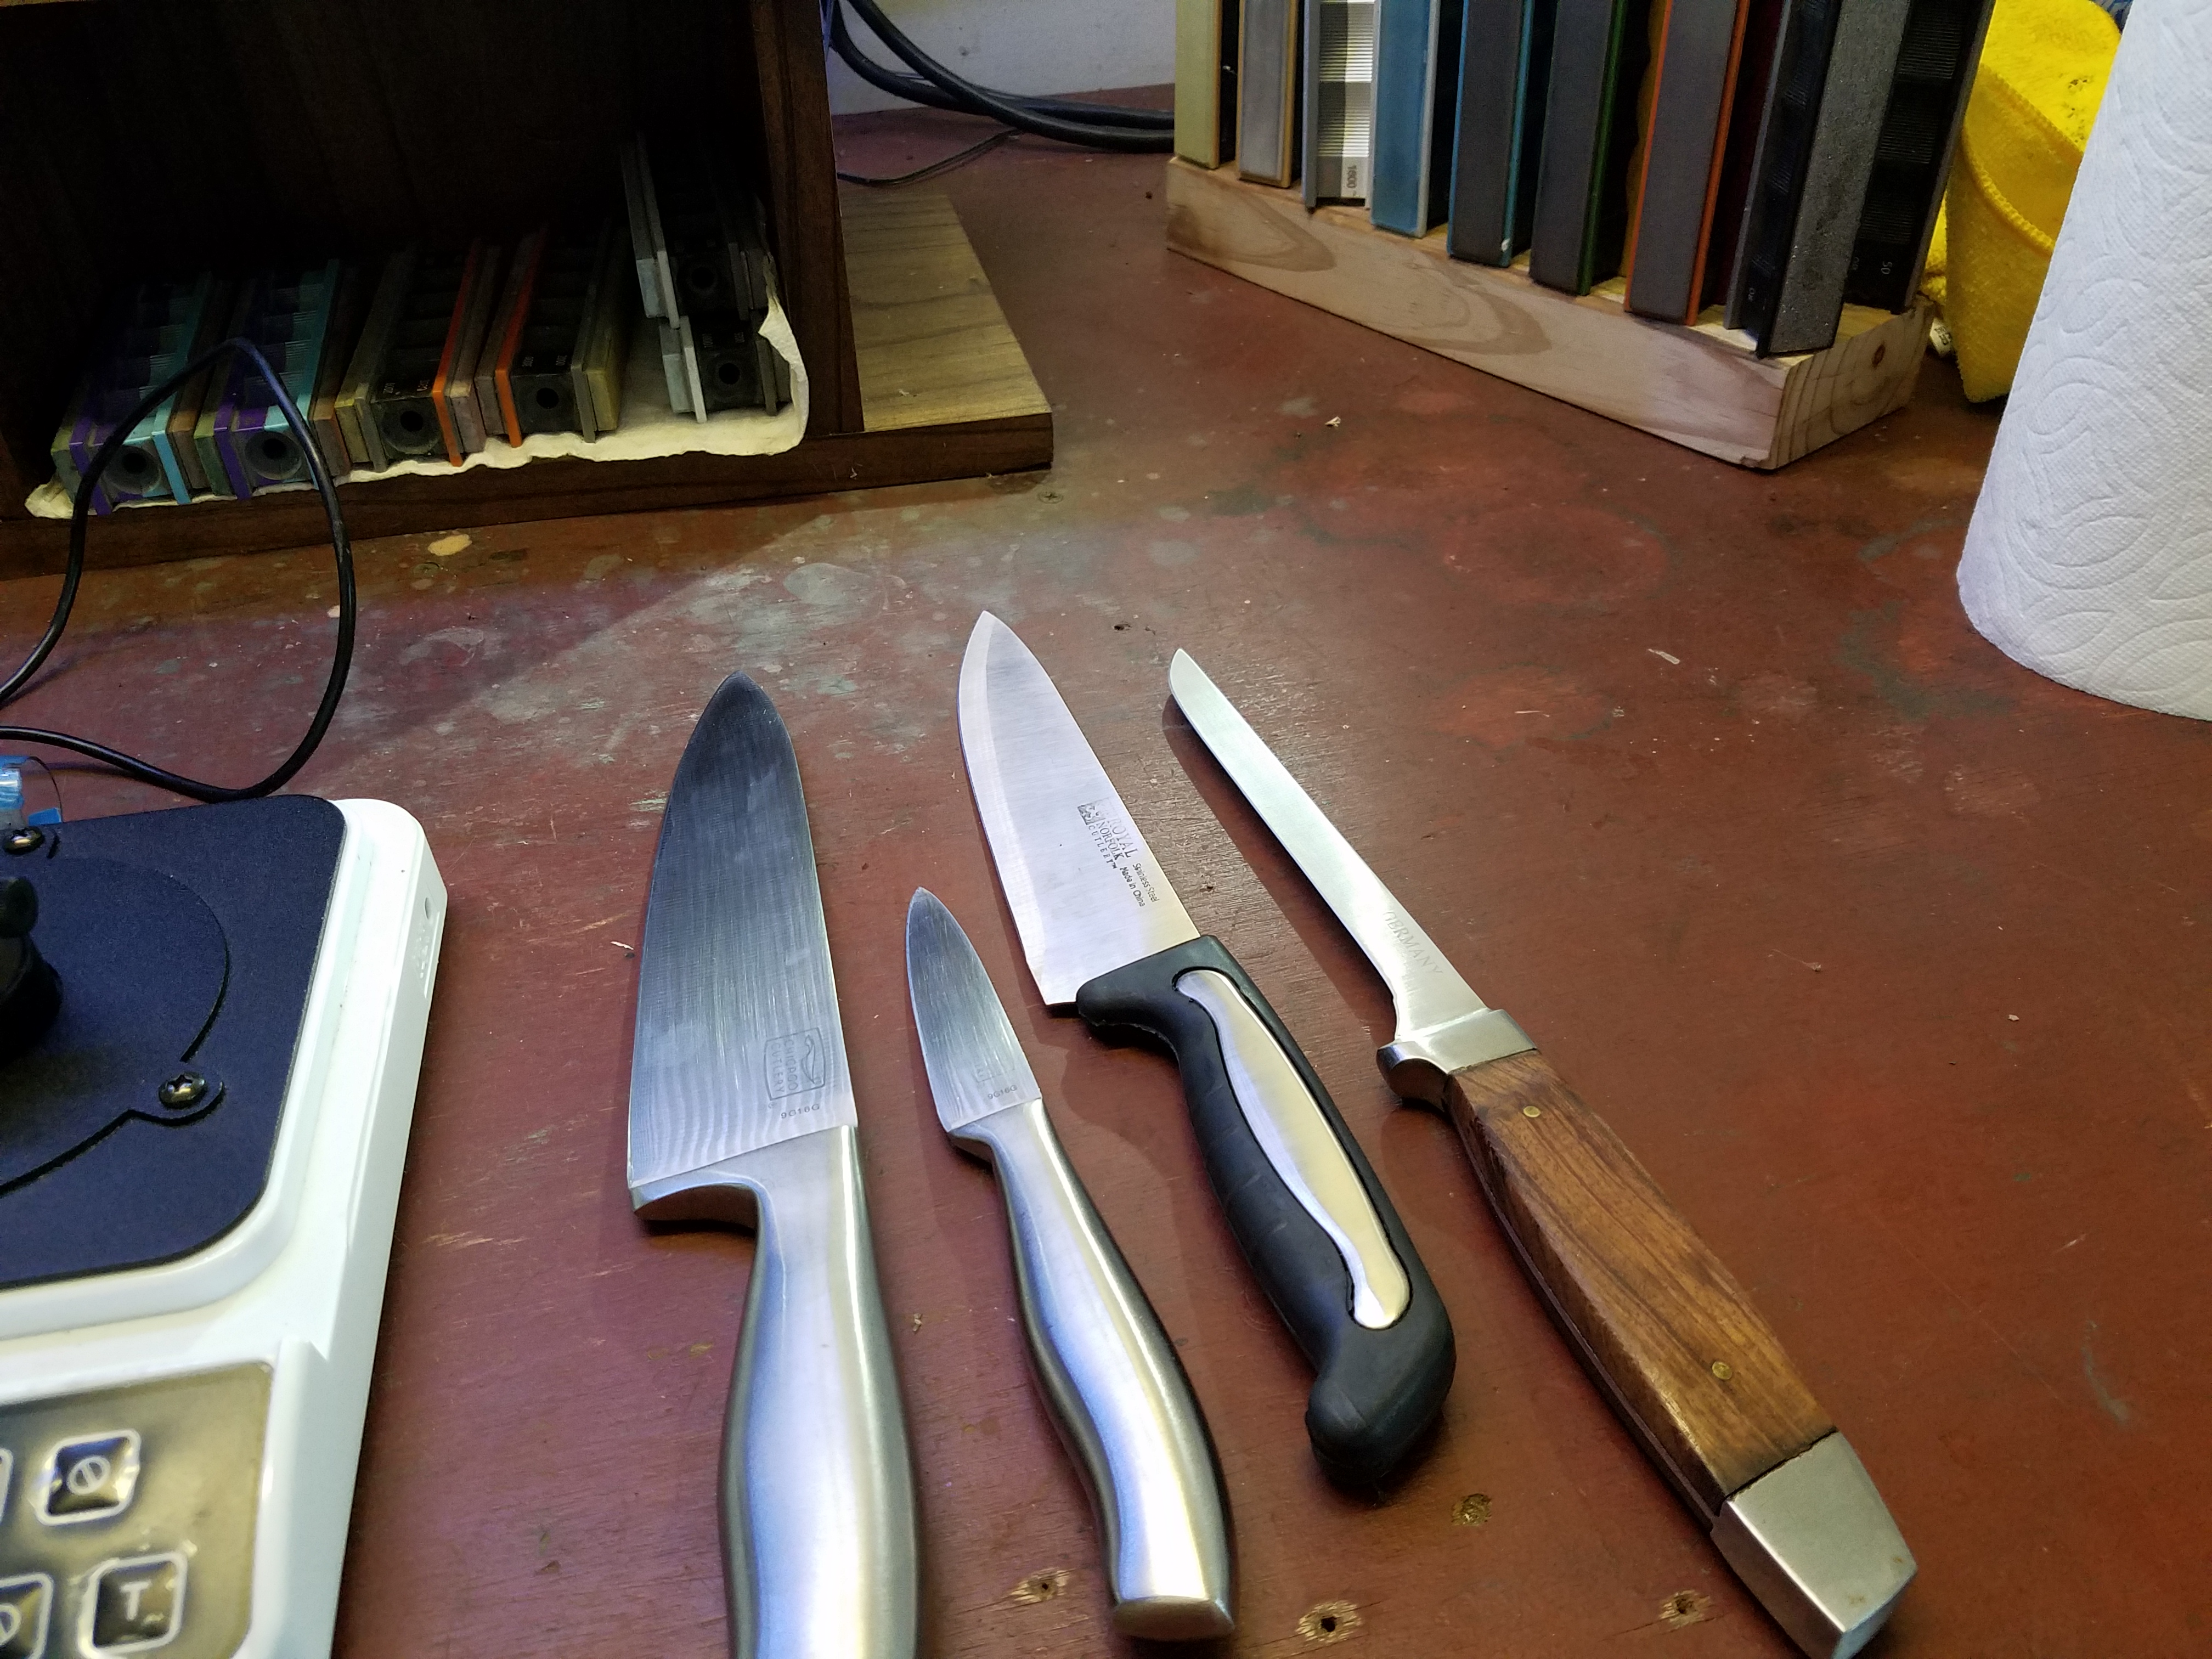
09/19/2018 at 9:09 pm #47676One last post on a knife I sharpened tonight. I broke my 40 minute rule to take pictures and measurements. I got 4 knives from a friend at work to sharpen this week. I thought I would walk through how I sharpened one of them.
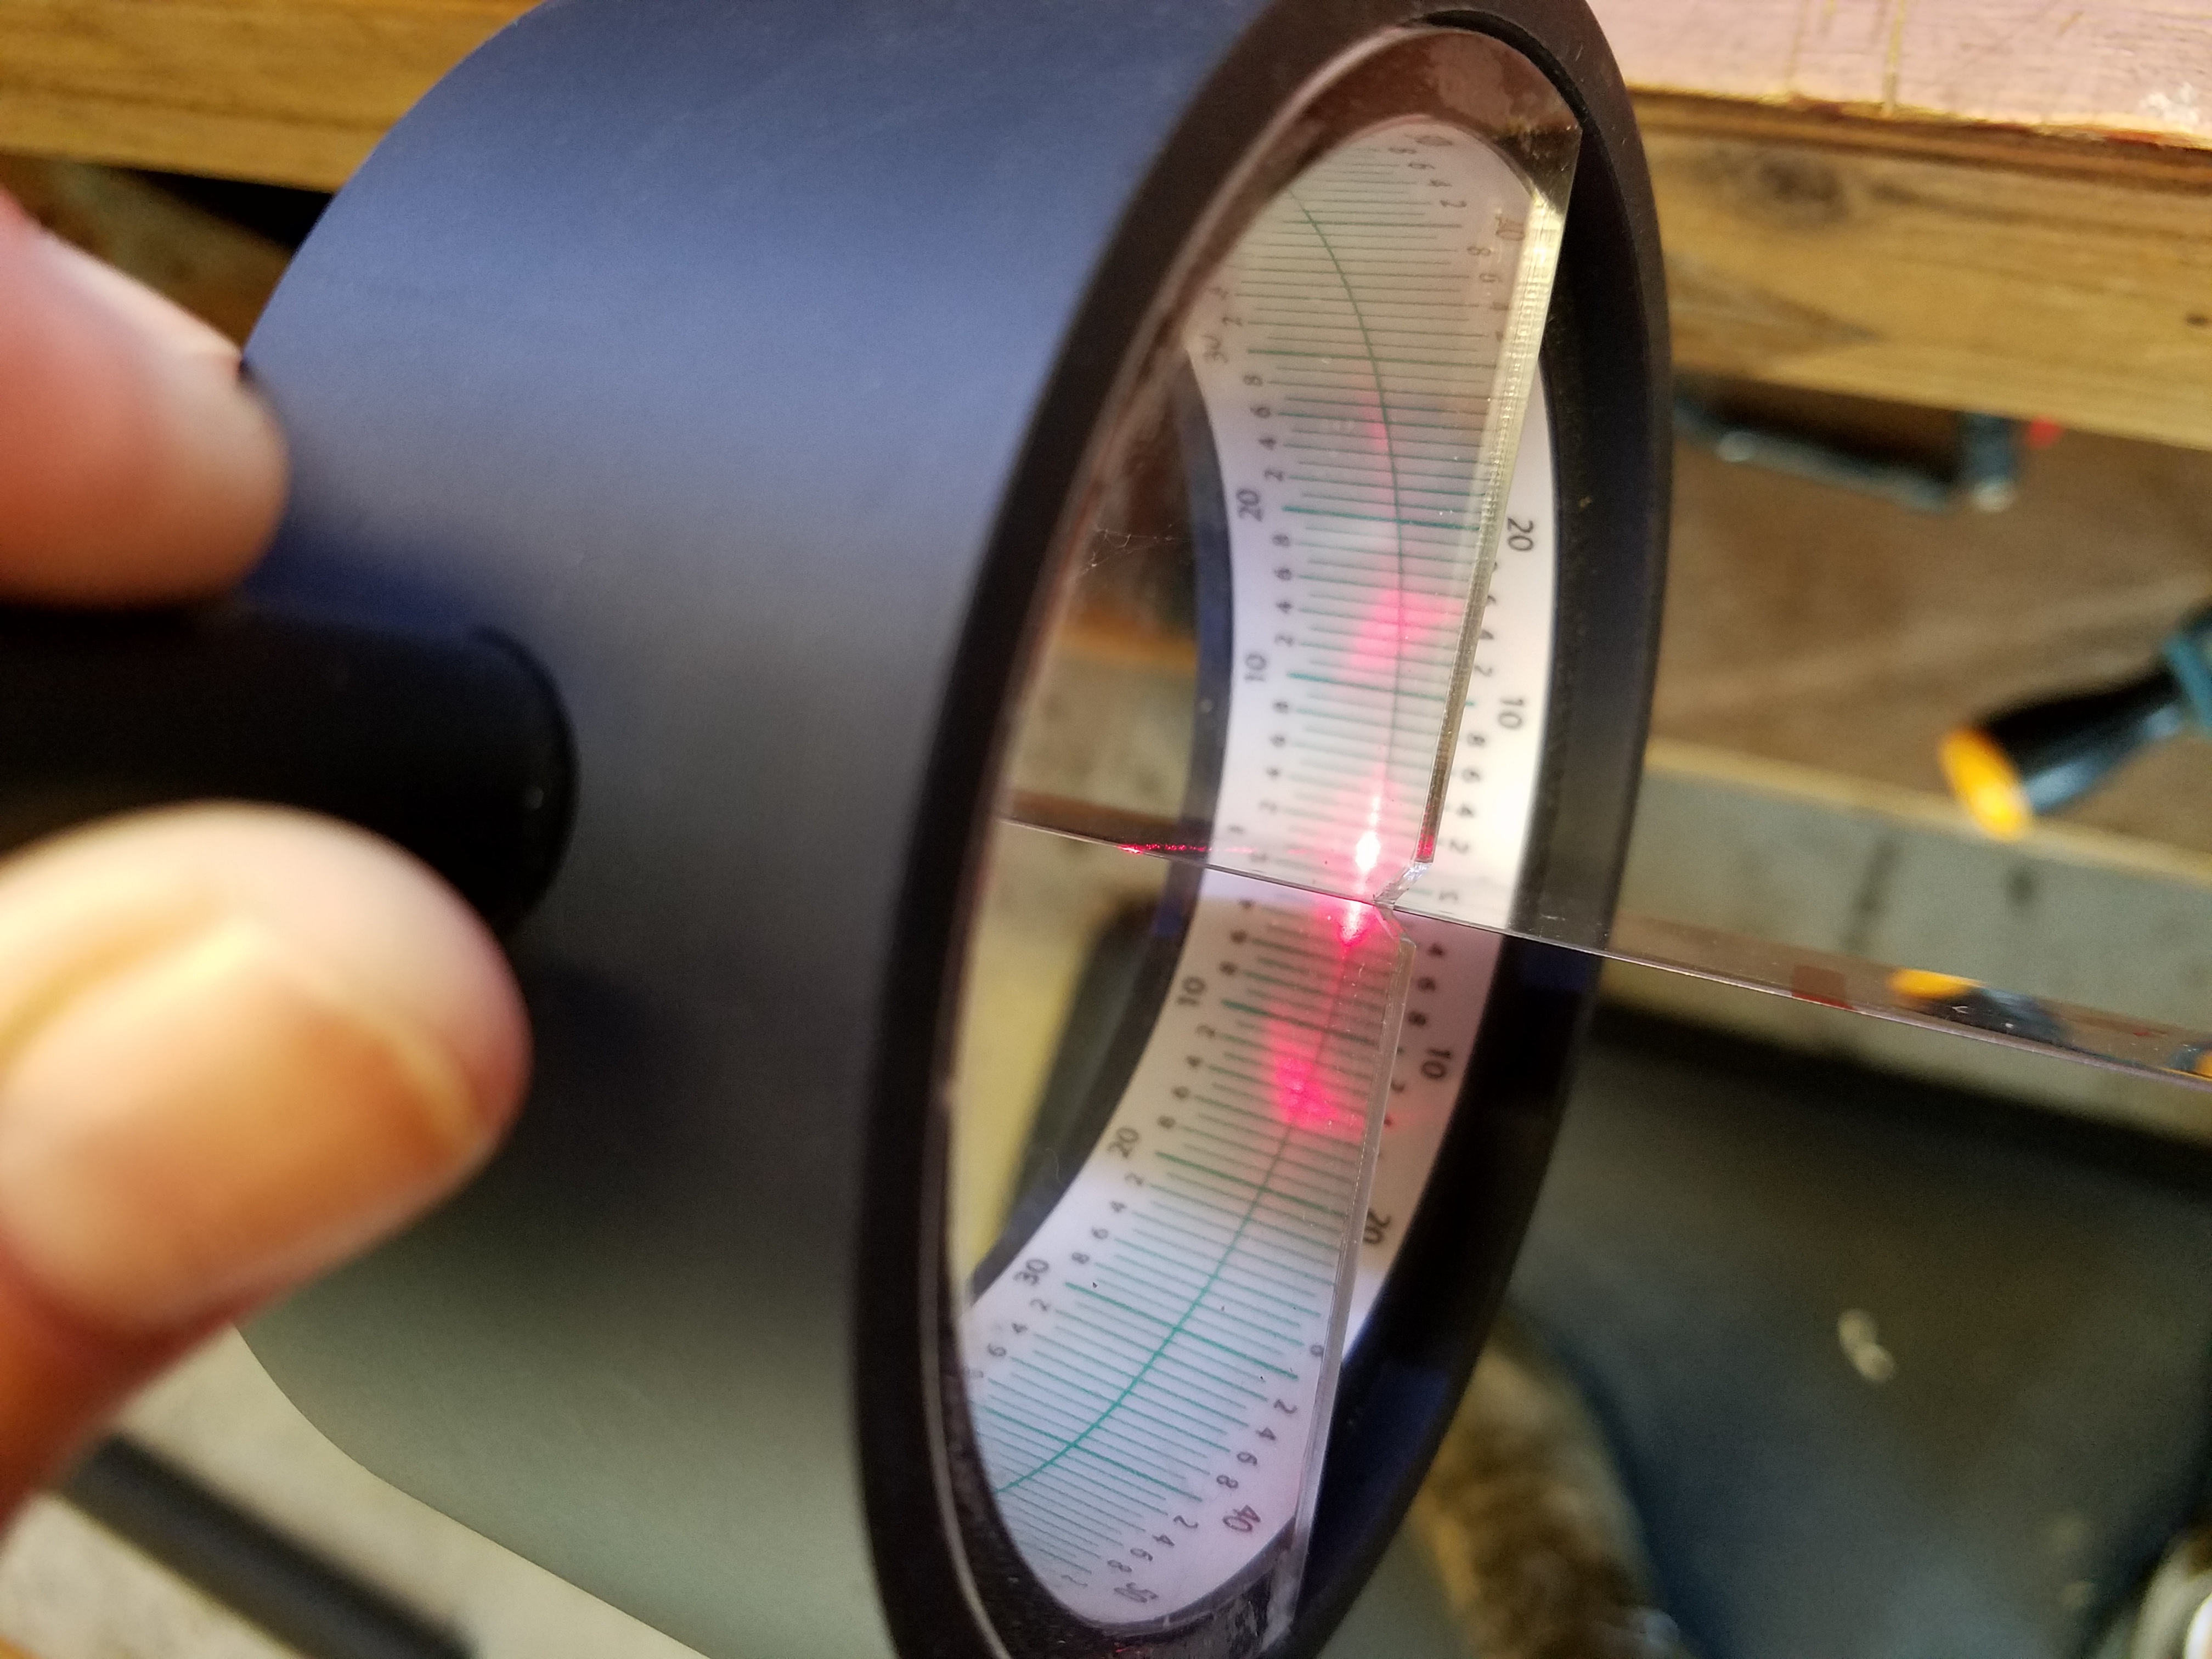
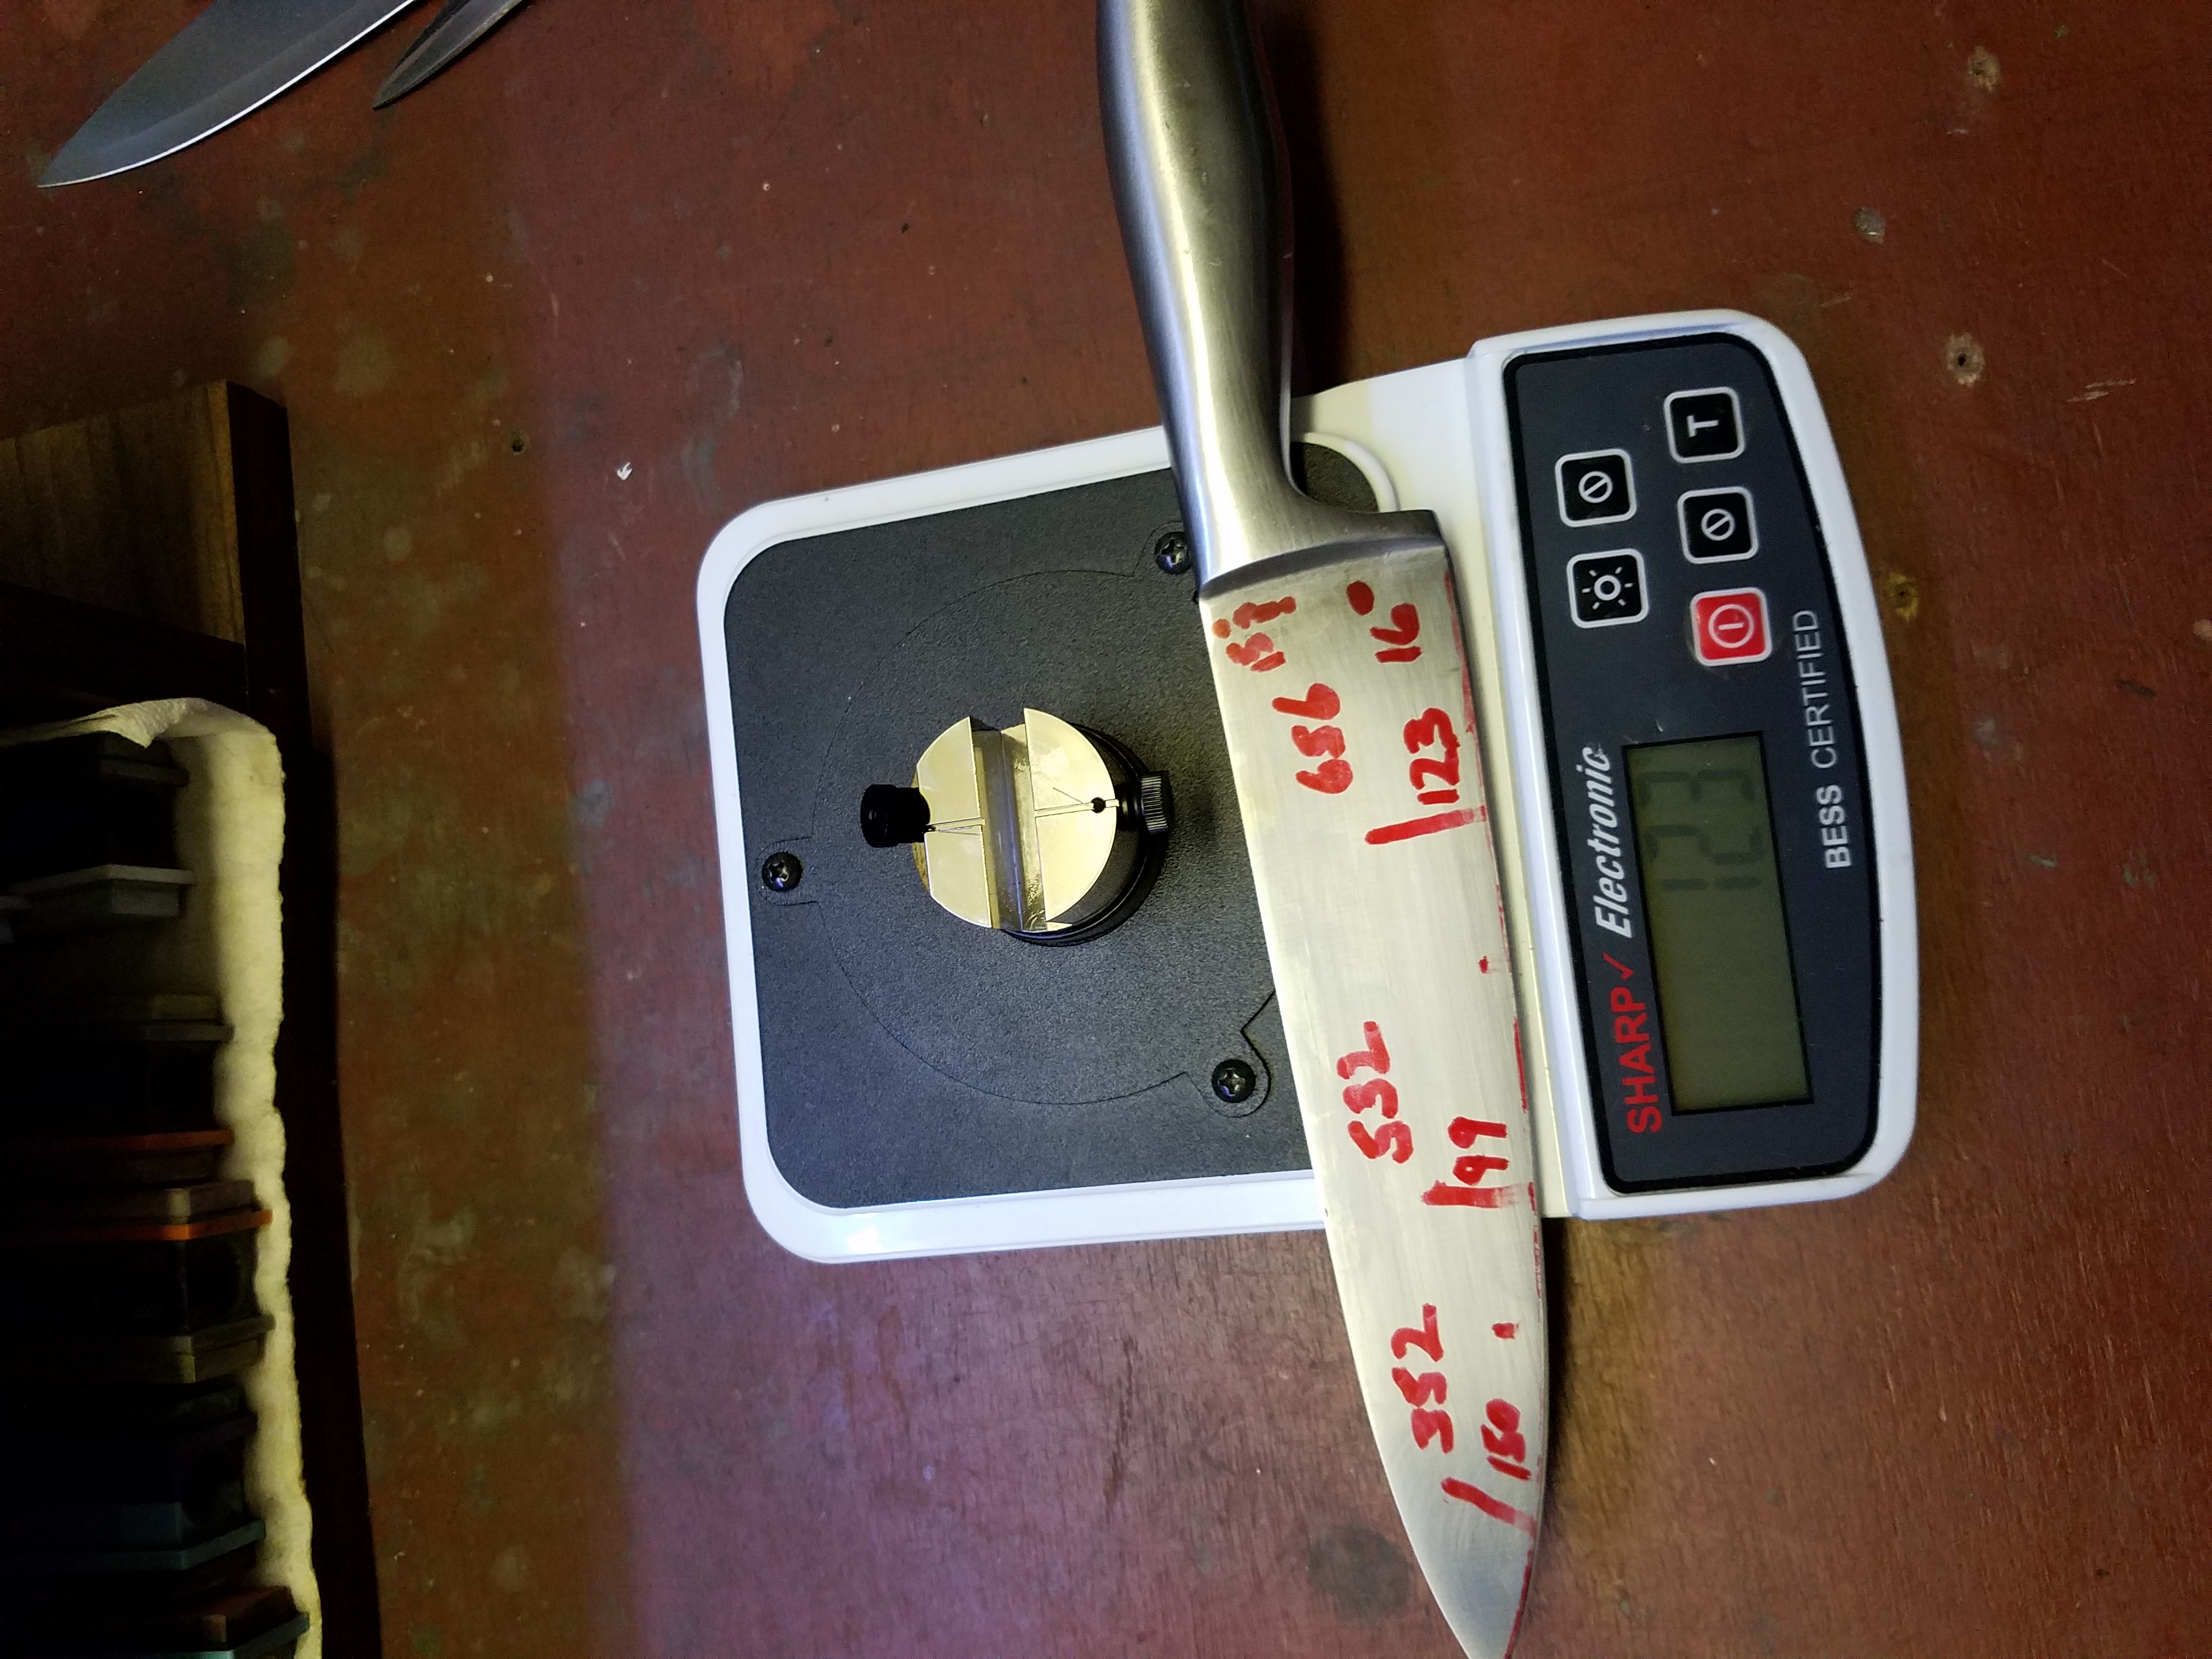
I picked the larger Chicago Cutlery knife for the example. First I used the laser protractor to try and find the bevel angle. As you can see, at around 15 degrees there is a “smear” of light. I chose to set the new bevel at about 16 dps.
Then I measured the “sharpness” at three spots before I started. In the picture, the upper numbers are Before Sharpening (BS) and the lower numbers are After Sharpening (AS).
I made one light pass at 16 degrees on each side raising a small burr using my Kally 1×42 with a 150 grit Cubitron belt. (Hat tip to Grepper)
Since I had a good bevel from the Kally, I just started with the 800 Chosera. I worked the 800 for about 20 minutes and moved up to the 1000 Chosera. I switched to starting with the tip at the 1000 and worked it for about 10-15 minutes. This whole time I’m using a sharpie and looking at the apex with my old abused Pluggable scope.
As you can see from the lower numbers, the tip is not as sharp (150) as the rest of the blade. It’s still really sharp but not as consistent as I want it to be. Using the scope and looking directly down at the apex there was no visible light being reflected along the whole blade edge. All I can think of is that when my cheapie scope shows no reflection I’m at least at 150. I could have a keener bevel but the scope can’t discern the difference.
To be honest, for a kitchen knife 150 is my goal and for an EDC pocket knife at or under 200 is my goal.
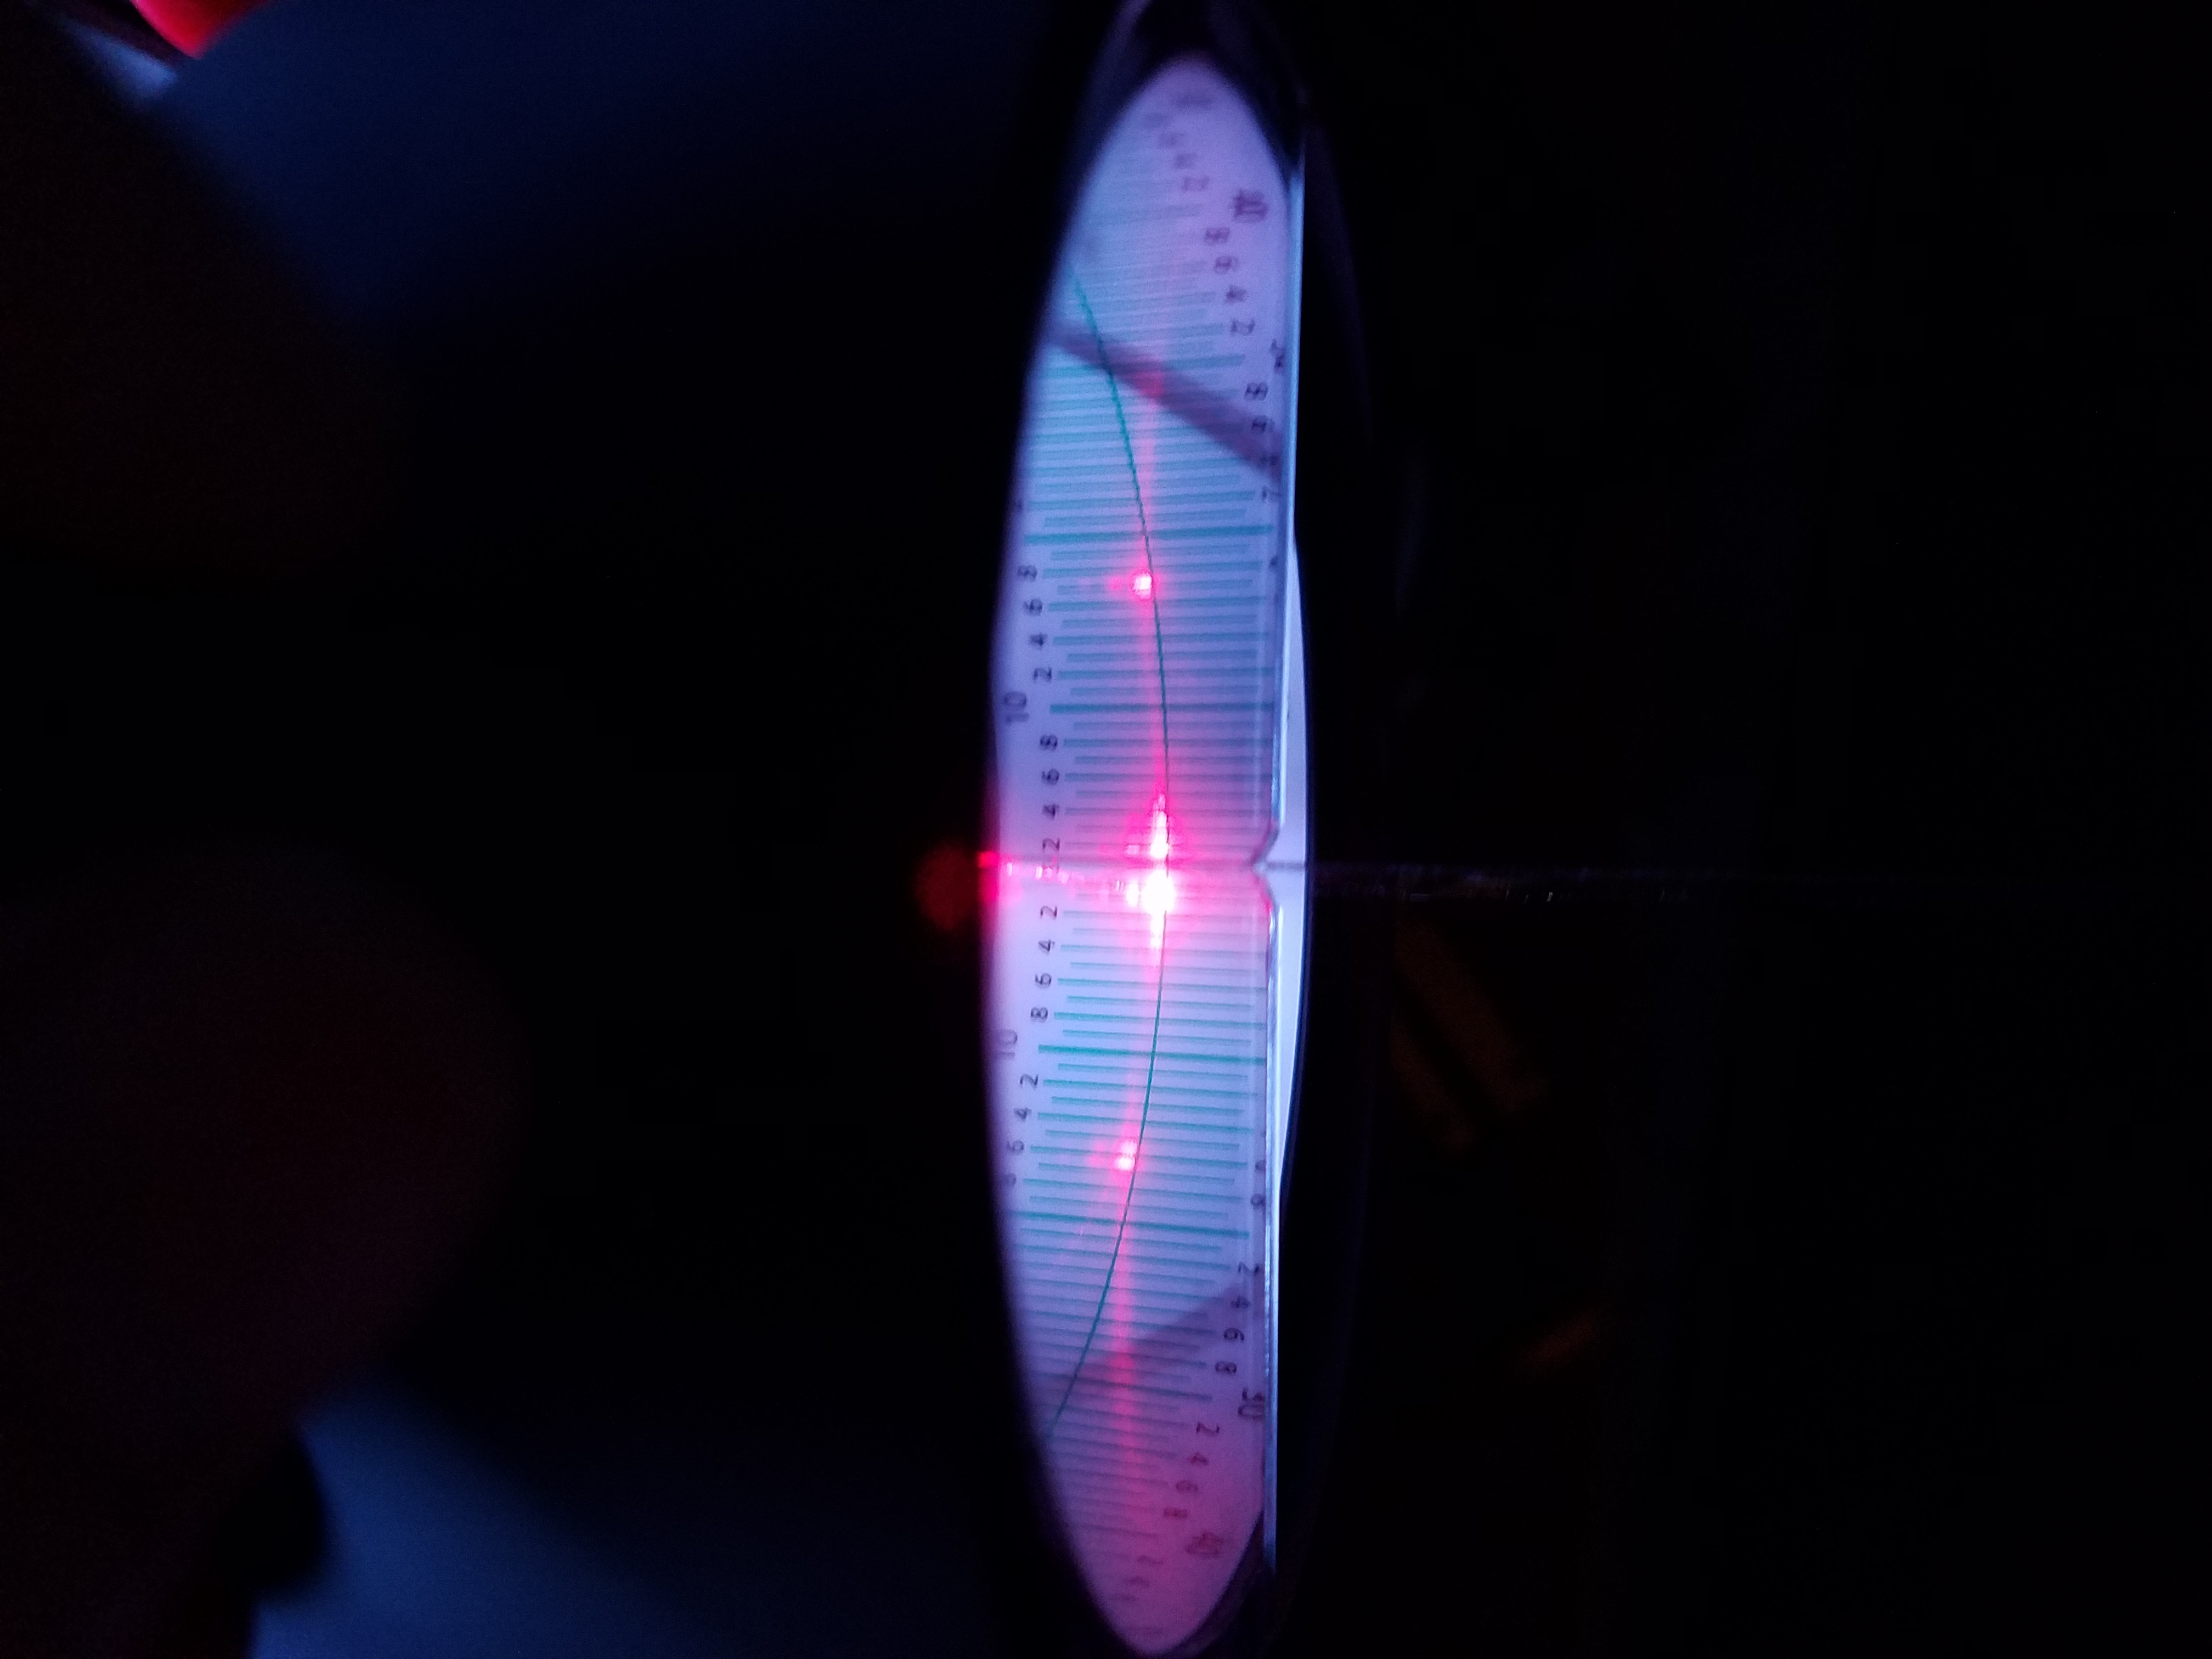
The last picture is the laser protractor after sharpening. This shows that the WE gives you a very clean precise bevel at the angle you set – as long as you use the angle cube at each grit. The larger the dot or out of round/smear means that there is some “wobble” to your bevel or the edge is convex.
Ed K.
Attachments:
You must be logged in to access attached files.
3 users thanked author for this post.
09/20/2018 at 3:10 pm #47684Edgeonup arrived today (2 day free shipping over $99).
My first test out of the box was one of my “everyday carrys” CRK Sebenza 21’s which I had sharpened 2 months ago on my WE. Sebenza’s have a convex edge, but so far, I sharpen them just normally. Clay also has a video on youtube showing how to sharpen a Sebenza’s convex edge on the WE.
First edge test on this Sebenza shows on the scale at 120. By the included factory edge chart, this sharpeness level is just over that of a double edge razor blade. I’d say thats a credit to how sharp a layman like myself can use our WE systems to put on a “Damn Sharp” edge!
As comparison test, I received a few days ago an Osborne 940 that I bought used that still has its factory edge on it. This was a user by the seller, but its in excellent condition. I was holding off sharpening it until I received my edgeonup so I could chart the before and after. This edge still cuts paper very smoothly . . . but check out the edge measurement at a “345” in the attached pic!
I’ll post back my results once I get a WE on this Osborne. I’m not running tests along the entire blade lengths as if I’m getting numbers like 120 (and this one was my first of my premium steel blades that I attempted) But with a number like 120 that is already very close to “razor blade” sharp.
I’m told a reading of “0” will cut through air without leaving a trail . . . Just kidding :o)
Attachments:
You must be logged in to access attached files.
3 users thanked author for this post.
09/20/2018 at 3:22 pm #47688Ed, a few questions. Your use of that laser digital protractor to define an edge is intriguing. I also like the tip on using a red sharpie as you say it shows up better on a digital microscope or loop. I do have trouble seeing minute areas of black marker of where I was not profiling enough and apexing the smallest area which is usually near the tip. Twice now I’ve noticed it AFTER I’ve pulled the knife from the clamp and going over it with alcohol to clean it up and several times “there it was”.
So I’ll re-read your posts to ingest how you are using the protractor looking down on the edge to discover wobble as the red marks will appear larger, thus indicating more stone wobble across the length of the blade in my technique (am I on the right track).
Where did you pick that style that you show in the pic and how much was it. A search for digital laser protractors does not turn up a source for your round model.
And one other question. The sheet that came with the unit has no mention how taught to make the test wire? There is an online manual but I have not had the time to check it out yet.
Thx
Paul
1 user thanked author for this post.
09/20/2018 at 5:15 pm #47689Paul
https://www.catra.org.uk/CATRA_Hobbigoni_blade_edge_protractor_p/cuhg.htm
I use it also, look at my YouTube film about stropping the benchmade 940-1
-
This reply was modified 6 years, 10 months ago by
jabas2000.
3 users thanked author for this post.
09/20/2018 at 7:05 pm #47691I have that same knife arriving any day (again) I already owned it and sold it because I was accumulating too many folders. At 2.4 oz its a true Gentleman’s carry! I was sad to sell it. But when I saw it used for $170 I couldn’t pass it up! Can’t wait to put the WE on it. I never edged the first one I had as I knew it was going to be a catch and release for me.
Thx for the heads up on the Catra. Now that I know what it is and does … Ill try and snag one used!
Good vid. How much did you pay for your protractor? $150 seems steep to me even though as Marc says “its a precision instrument”.
09/20/2018 at 7:55 pm #47692Ed, I noticed your read on a single edge blade was 140. I just tested the same same single edge right out a a wrapper and got a reading of 70.
My first reading was a Chris Reeves Sebenza 21 which read 120. That seemed low to me too as I know I’m not that proficient on the WE yet after only 4 months.
This AM when I gave the 2nd new testing unit to my friend he tried my Sebenza on it and it read 165. I’m wondering if my units calibration is off? The online manual says the unit calibrates itself each time you turn it on and requires no calibraition after it is set by the factory.
I might call Mike and ask him. I’m sure he knows what each factory edge reads as the card points out. My single edge was new and at 70 its right in-line with the chart (for a double edge though). Was your single edge pictured already used giving that higher than mine reading?
Attachments:
You must be logged in to access attached files.
09/20/2018 at 8:38 pm #47694Interesting eight-year-old post on blade forums about using laser protractor. Check out post #9 for a good explanation.
Last post in the thread has nice things said about Clay too.
https://www.bladeforums.com/threads/is-it-the-grind-or-the-sharpener-wicked-edge.880983/
09/20/2018 at 9:10 pm #47695Paul,
I’ll try to answer your questions in both posts.
So I’ll re-read your posts to ingest how you are using the protractor looking down on the edge to discover wobble as the red marks will appear larger, thus indicating more stone wobble across the length of the blade in my technique (am I on the right track).
If you decide to purchase the Hobbigoni, the booklet describes the different patterns. If at each checkpoint, the laser dot is (almost) perfectly round you have a good polish and a straight (not sure straight is the right word) bevel. In my cases, I would get some “wobble” or elongated dots on the longer knives at the heel and the tip. My guess is that the blade is flexing ever so slightly as I sharpen those areas. Those “wobble” areas also showed up on the tester as being less sharp.
Looks like Jabas2000 provided the link to the CATRA page for the Hobbigoni.
As for media tension on the ATF, don’t try to pull it really taught or leave it slack. I loosen the feed nut, pull just enough out to reach the tension nut plus enough to let your fingers get below the tension nut. Recently, I’ve discovered that when I feed out the media after a test there is a “wrinkle” in the media where the feed nut locked down on the media. Look closely and you should see it. When you pull the media out for the next test, take that “wrinkle” out to the area of the tension nut. Tighten the feed nut and just pull the media under the tension nut and tighten. Think “middle of the road” when tensioning.
Ed, I noticed your read on a single edge blade was 140. I just tested the same single edge right out a a wrapper and got a reading of 70.
I’m looking at your picture and I see the fulcrum up against the ATF. Did you use the fulcrum for the test? In my picture I did it “freehand” without the fulcrum. One of the most important things to understand is that there should be no slicing motion. The edge should be perpendicular to the media as you press down. If one side of the blade edge is elevated as you push down you will incur some slice. Also, if you do “freehand” you must keep the blade from leaning toward or away from you. Straight up and down, level on the horizontal plane, and slowly push down. And to add to all that, I had a picture of 5 or 6 brand new SE razors I tested that had quite a bit of deviance in score. This was right when I got the tester so I probably (surely) didn’t have the understanding of the rules I just typed above. Just looked on the server and I can’t find it.
I have said this on another forum in the same galaxy: I am grateful to be perched on the shoulders of many <span class=”highlight”>giants</span>. So almost all the things I have learned came from many others who took the time to answer my questions.
Ed K.
09/21/2018 at 7:03 am #47697Thanks for those quick responses Ed.
And the tips on how to use the unit. From the videos and the instructions they are using the fulcrum “as a fulcrum” or pivot point. I can see how that can also cause a slicing effect when holding say the tip as a pivot point. Wht you are saying is try and get the testing motion more like a “Guillotine motion straight down and the fulcrum is just to steady the blade especially a longer one.
I did try the new single edge blade again freehand straight down and it read 75 this time where as I was using the fulcrum the first time which had a diaagonal slicing motion which probably accounts for the 5 gram difference in the second test. Also, the brand I have might be sharper out of the box than your brand.
I just tried a Wusthof parer I did 4 months ago (my first WE) I had freshened it up a month ago. But it read 650! I felt the edge and looked closer and could feel a burr on one side. I took a steel to it and it flipped over to the other side. Then I steeled both sides back and forth and now its reading 165.
My question is I apexed this knife or I wouldn’t have the burr. But the burr is pretty weak being thats a Wusthof is a decent steel. Is this normal for this flexible burr forming from daily use or was it already there because I did not profile the blade correctly in the first place?
I have not used steels to freshen the edge between sharpening for fear of scratching the mirror edge but the steel worked very good in this case. Id=s it OK to steel between WE freshen ups.
The unit seems calibrated. I need to call Mike from their c/s as I noticed they say use unit o a flat surface. But mine has a won=bble to it when pressing on the right corner. It took me 9 sheets of post-it note paper (or a match top cover folded in two) to fill the gap between my table (I tried it on several areas of my counter top too). The rubber feet are all on and are the same size. The plastic case must have come warped.
Thanks for that explanation of how to diagnois the red laser spots.
Attached is a pic of their online intructions. You can see how they use the fulcrum as a pivot point which tends to slice the wire. I can see your Guillotine motion will be more accurate and repeatable. They do say use downward pressure, but thats hard to do if you hold the tip of a knife in a pivoting position, its going to “slice”.
Attachments:
You must be logged in to access attached files.
1 user thanked author for this post.
09/21/2018 at 9:11 am #47700Paul,
I didn’t care for the original fulcrum so I ended up not using it. The new fulcrum is much better in my opinion and I am using it now.
The subject of the burr is something I can’t speak about. I am a neophyte in burr removal technique. There are other sites that have very active discussions concerning detecting and removing a burr. I can tell you that I use a leather belt on my 1×42 Kally turned rough side out with no compound applied. I make multiple very light passes – sometimes approaching 45 degrees – until the scope says the apex is clean. I got that tip and what little I know about using a Kally to sharpen from Mr. Grepper over on the BESS exchange.
Hope that helps.
Ed K.
-
This reply was modified 6 years, 10 months ago by
-
AuthorPosts
- You must be logged in to reply to this topic.


