My first knife on the Wicked Edge
Recent › Forums › Main Forum › Techniques and Sharpening Strategies › My first knife on the Wicked Edge
- This topic has 31 replies, 8 voices, and was last updated 12/16/2012 at 3:09 pm by
Xbander.
-
AuthorPosts
-
01/23/2012 at 3:57 am #1420
Most likely wood isn’t offered as a base, because most wood is too light and does not give the weight one needs to have the rig adhere to the desk or table without moving around. I had a wooden base at first, but quickly discovered I didn’t like it. I now have a granite base and it rocks.
Some folks have gone to their local counter top makers and/or funeral monument makers and have made bases out of scraps they bought or were given. A weight of 7 pounds or more with sticky rubber feet should do it!Leo
01/23/2012 at 4:33 am #1421Hi Lukas,
Yes, the wooden board from IKEA works fine. It weighs 4 kliograms, that is almost 9 American pounds (Lbs), which is more than enough. You can add rubber feet if you want to, but it is not really necessary. Maybe I’ll give the board a finish with a hard lacker, that would make it slightly easier to clean.
I got my Wicked Edge from Peter Fronteddu of Fehlschaerfe in Germany, http://www.fehlschaerfe.de. I can recommend him: he has good advice, most stuff in stock and delivery took less than a week (to Holland).
Mark
Molecule Polishing: my blog about sharpening with the Wicked Edge
01/23/2012 at 4:37 am #1422Leo, my friend, you have made my day! And at least the next week! You should have seen my smile today.
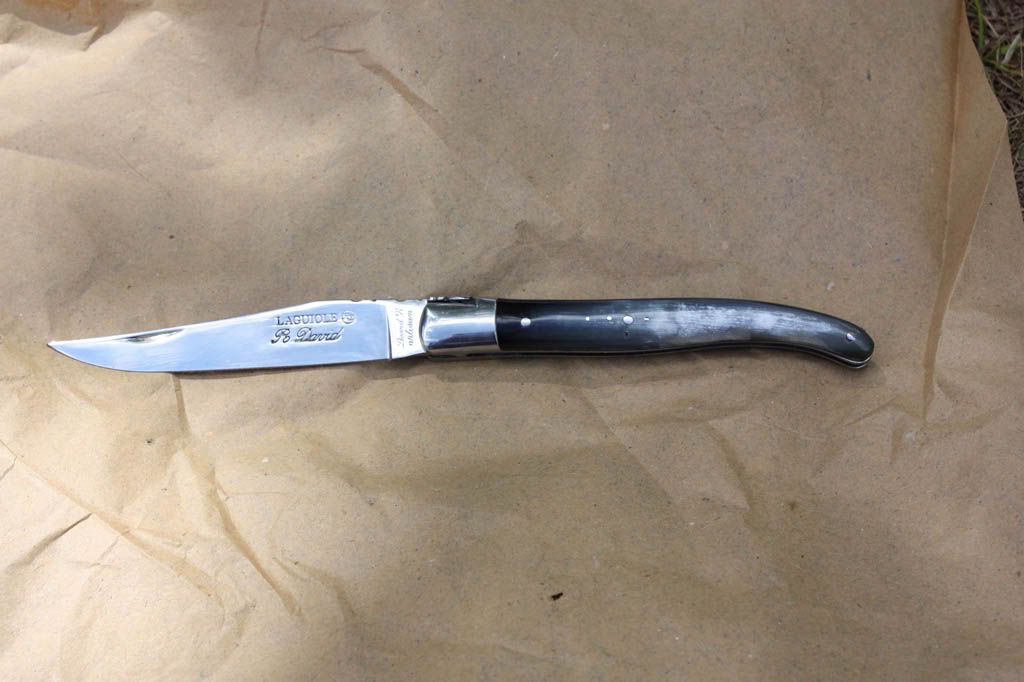
On the program was a beautiful Laguiole knife I picked up in France last summer. It has got a blade of Sandvik 12c27 stainless steel, HRC 56. The knife was made by Robert David, a well-known knife maker from Thiers. It is a nicely crafted knife, but the finish was not good. The bevel was barely visible with the naked eye and certainly well over 25* per side. Here is the knife:
Creating the initial burrs went relatively fast: I think I spent about 15 minutes on the 100 grit stone. Then I tried to follow your advice and not create a bevel anymore with stones on the higher grit sizes. I spent a few minutes per stone doing up-and-down or circular movements. Then I made 50 sweeping motions (which have become known as “Clay motions†in our house) on each side of the blade before going on to the next stone. I did the 200, 400, 600, 800, 1000, 1200 and 1600 grit stones.
Then on to stropping, which I had never done before. But it was actually quite easy now I had built up some muscle memory for the sweeping motions. The Wicked Edge also comes with good instructions on how much stropping compound to apply and how to apply it. I stropped with 5 micron and then 3.5 micron diamond paste.
All together it took me about an hour.
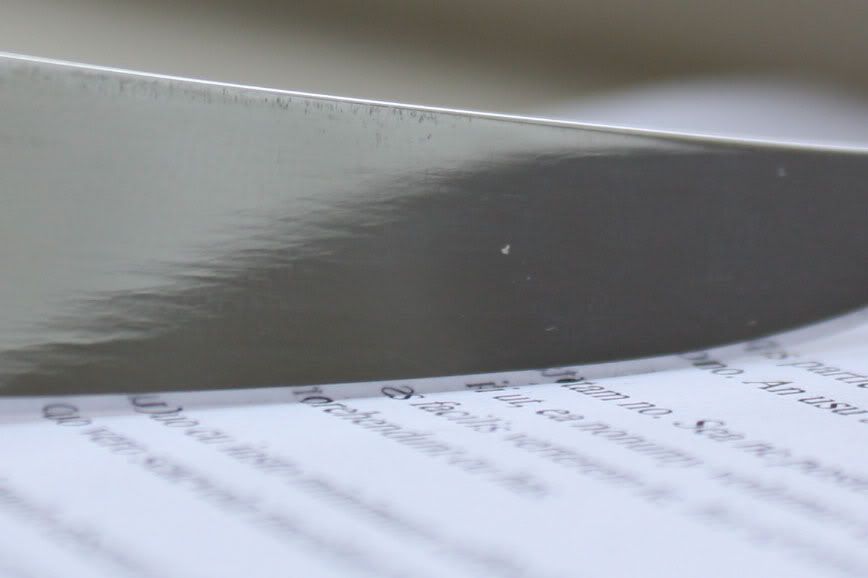
And then the result… a mirror edge! This was what I was after! Here’s the proof:
Having created a mirror edge in about an hour, as opposed to spending 5 hours on a knife, which I did yesterday, I wondered whether I could do it even faster. So I decided to literally follow the advice Leo had given me in a mail.
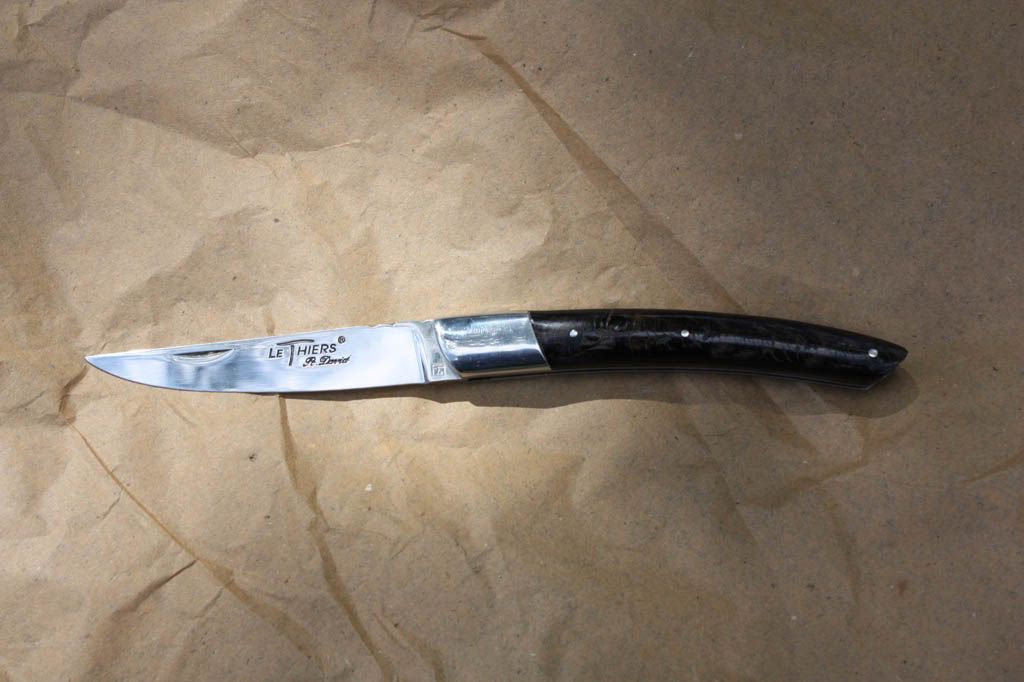
I took a Le Thiers folding knife, also by Robert David, with a blade of Sandvik 12c27 stainless steel, HRC 56, and hardly a visible bevel:
I got the initial burrs quickly: I spent about 10 minutes with the 100 grit stone. Then I just did 50 sweeping motions on each side of the blade using consecutively smoother stones. I did the 200, 400, 600, 800, 1000, 1200 and 1600 grit stones. Then stropping: again 50 sweeping motions on each side of the blade, first using 5 micron diamond paste, then using 3.5 micron diamond paste.
The complete sharpening process took me exactly half an hour.
And the result… a mirror edge again! It is too dark now to make a photograph of it, but I hope you trust me on this.
From hardly any edge to a mirror edge in half an hour! Man, I love this Wicked Edge more and more.
Molecule Polishing: my blog about sharpening with the Wicked Edge
01/23/2012 at 5:47 am #1424Thank you friends, I will try board from Ikea, cause it is quite heavy, and Peter Fronteddu doesn’t offer stone bases. If there will be any problems, I can visit some counter top/funeral maker.
Great edges Mark!Lukas
01/25/2012 at 12:36 pm #1448I have updated the link on my blog and it’s available here as well: Constant Angle Model You’ll need the eDrawings viewer available here: eDrawings Viewer[/url]
Hi Leo and Gofly,
Thanks for your help. I have read the theory by Clay regarding bevel angles and bevel width and I think I am beginning to understand it. On his personal blog he has also devoted a few posts to it. (http://sharpeningtechniques.blogspot.com/2010_11_01_archive.html) Unfortunately the links to the eDrawings do not work anymore.
I did my work on the cheap knife yesterday not so much in order to improve the knife, but to learn my skills on the Wicked Edge. That said, my girlfriend enjoyed it: she produced some very thin slices of tomato this morning. 🙂
Today I worked on her Global chef’s knife. That’s made of a much better steel already, although it is nowhere near CPM. After the 600 grit stones it was far less scratched than the cheap knife and it cut paper smoothly already. And after the 1600 grit stones it was sharper than it has ever been (as my index finger can testify – I had just got into this nice motion pattern Clay shows, when my finger slid off :ohmy: )
I am still not certain on how long I should continue with a particular grit of stone before I go on to the next. With the 100 grit stones I created a burr on one side after about three quarters of an hour. I was finished with the stones after about an hour. That was a long time, but I regrinded the blade from 20* to 15*, so that’s understandable.
However, after that, on the 200, 400 and 600 grit stones I had to polish for over half an hour to create a noticeable burr on one side and it took me three quarters of an hour before I could move on to the next stone. I know for certain I did hit the edge pretty soon (using a magnifying glass and the Sharpie trick, and working only on one side of the knife to create the burr), so perhaps I am just bad at feeling burrs.
How much time on average do you guys spend on the 200, 400 and 600 grit stones for this type of knife? (Relatively large – a chef’s knife – and medium hardness – around HRC 57.) Three quarters of an hour just seems way too long.
Thanks again,
Mark.-Clay
04/10/2012 at 10:50 pm #2617My kit also arrived allready :-). I bought base kit + 800/1000 diamond stones + 1200/1600 ceramic stones + 5/3.5 leather strops. At first I tried to sharpen cheap kitchen knife to 20 degrees angle. I created burr with 100 grit stones on both sides, and then use stroping motion with each grit from 100 to 1600 and finally with leather strops. It become guite sharp, but nothing remarkable. I forgot that leather strops arrived blank, and diamond paste must be applied first. Next I sharpened better kitchen knife (Victorinox 56 HRC) to 16 degrees. I had applied diamond paste to strops already. And I made it very sharp! The edge was almost mirror, and it cut paper very nicely, and shave easily.
I think I must say thank you to people on this forum, so I had clear idea of good sharpening technique and learning was very fast. Other knives become similarly sharp.
After some pracitise I have several remarks and topics to future discussion.1. learning was really fast (with this forum help) and results are very nice and consistent, regardles of the knife and steel.
2. each of 800/1000 diamond stones, 1200/1600 ceramic stones and 5/3.5 leather strops bring noticeable improvement to resultant edges and I am happy I have them.
3. it tooks me about 1/2 hour to reprofile and sharpen knive, it depends mainly of the hardness of the steel. At coarser grits, I feel that the friction between stones and steel become smoother after some time stropping, but I can’t feel or hear any progres with finer stones and strops, so I can only guess when the amount of strokes on specific stones are sufficient. How do you guys handle this?
4. I use wooden cutting board from Ikea as base, and it is fine (thank you Mark). It is bigger than bases sold on this site (37 x 37 cm), but it is right size to my cupboard, and I store all my stones and strops on this board.
5. There are definitely some linkage play and blade of thin kitchen knives bends when sharpening, so there are some imperfections of keeping the exact angle, but I can’t se any difference in looks and cutting performance of the resulting angles.
6. The top tightening screw overreachs when sharpening thin knives, it prevents from reaching acute angles if the blade is low also. I used a metal base under the head of this screw to solve this, but I think that one extra shorter screw for thin blades will be better solution. Unfornately, in Czech Republic we use different sizes of the thread than in USA, so I haven’t any at home, but I will ask in some shops.
7. The screws holging the rods to devise unscrewed sometimes, they need to be checked time to time.
8. Leather strops are very prone to get damaged by the edge, I became to move paddles more upwards than in case of stones to solve this problem.
9. I can’t get really mirror edge or consistently hair whittling sharpness. What do you think, is it problem with technique, or Chapton/Chosera stones are necessary to get such results?
To sum up, I am happy with my new sharpener, it isn’t perfect, but it is far better than any other sharpening equipment I tried so far.
04/11/2012 at 2:32 am #2619A couple of points to watch out for:
-remember the diamonds require a breaking in period and will do a better and better job the more you use them
– be really certain that the burr you have raised is along the whole length of the edge and that the scratches you make run right out to the edge…also be certain the burr is really there by using either a cotton ball dragged along the edge to see if the burr catches the fibers of the cotton all the way along. I found testing with my fingernail was not as reliable.
-caution…the only time you use pressure on the paddles is while scrubbing up and down making the burr! All other paddle work with the finer and finer grits should use little pressure…I describe it as caressing the edge;;;this light pressure holds true for using the strops too.There is my two cents worth. I think it will help.
All the best
Leo04/11/2012 at 3:20 am #2620A couple of points to watch out for:
-remember the diamonds require a breaking in period and will do a better and better job the more you use them
– be really certain that the burr you have raised is along the whole length of the edge and that the scratches you make run right out to the edge…also be certain the burr is really there by using either a cotton ball dragged along the edge to see if the burr catches the fibers of the cotton all the way along. I found testing with my fingernail was not as reliable.
-caution…the only time you use pressure on the paddles is while scrubbing up and down making the burr! All other paddle work with the finer and finer grits should use little pressure…I describe it as caressing the edge;;;this light pressure holds true for using the strops too.There is my two cents worth. I think it will help.
All the best
LeoThank you for advices Leo! I reprofiled 8 knives , so I think that 100 grit stones are broken in already, but finer grits probably need more time. I use tip of my index finger (not nail) to check the burr, I will try cotton, but don’t think that this is problem, because the resulting edge is about the same quality all the length of the blade. I strive to use light pressure, I will try to use even less.
All the best
Lukas04/11/2012 at 3:30 am #2621One more question Leo. I noticed that you have two great 3g steel fallkniven knives. I have also one( TK4), not so beautiful like yours, but steel is the same. Are you able to get better edges with this or similar high end steel than with cheaper one, or are the difference mainly in edge retention?
All the best
Lukas04/11/2012 at 5:26 am #2622Both my TK2 and PXL folder have frighteningly sharp edges…no problem. I get those with the standard kit plus the ceramic paddles. When I add some work with the Choseras they are even sharper and prettier too! 😉
Cheers
Leo04/11/2012 at 5:44 am #2623Hi Lukas, good to hear that your WEPS has arrived and that you like it. You seem to have done it the same way I did: first prepare yourself well at this forum and then dive in. (It is really funny reading back the questions I had then. It is only two and a half months ago, but it seems a lot longer.)
Apparently (ahum) I also had some questions as to how to get the edge as sharp as possible, particularly as to how many strokes to use at each grit. And Leo responded he was into Zen and Tom wrote “it dependsâ€. Man, these guys frustrated me :evil:.
Fortunately for you there is a very good post by Leo (which he wrote after he made me sweat so much 🙂 ) here. Hopefully that helps.
Leo recommends 30-50 light strokes per stone per side after raising the initial burr, which should be enough. I learned that it takes some practice to feel this initial burr (and the cotton swab trick only worked for me on really obvious burrs).
After seeing some photographs by Tom, showing scratches appearing out of nowhere (here is a blog post[/url] on it), I got paranoid :woohoo:. This guy causes serious mental illnesses… So if I now really really want to be sure that I properly polished the edge with each stone, I do a few minutes of up-down scrubbing with some pressure, followed by 200 strokes per side.
In this way, if I sharpen with all the stock stones (100 grit – 1600 grit) and finish with some stropping, I always get a mirror edge. (Although there are mirrors and mirrors. The picture at the top of my blog was of a knife stropped after the 1600 grit stones.) Usually they also shave arm hair, but not always. Some knives, like my el cheapo kitchen knives, just don’t take an edge. I also did not get my Global kitchen knives to easily shave arm hair.
I’ve never gotten a knife so sharp I could shave my face with it. I think there is a reason an 8000 grit stone is considered the minimum in the straight razor world. (On Bladeforums though, I’ve read many accounts of people claiming to have gotten their edges razor sharp after 320 grit stones or so…)
Luckily there is a pair of 5K/10K Choseras waiting for me!

A few more tips:
- The top tightening screw may seem a bit too long, but wait until you want to sharpen a Fallkniven A1…
- The Ikea butcher’s block works very well. However, if you clean it under a running tap, it may curve. (I thought a thick block glued vertical to the grain should be able to handle some water, but mine didn’t.) I am now using a new block that I dyed with some marine varnish.
- I think it is quite normal for your first pair of strops to get nicked. (It’s the business model of Wicked Edge ;).) The good news is that, unless they are nicked severely, they work just as well. But to prevent the strops from getting nicked, I now only make a straight up-down motion with the strops, so that I only strop a patch of the edge. I then repeat it on other patches.
Success with the next steps!
Molecule Polishing: my blog about sharpening with the Wicked Edge
04/11/2012 at 9:10 am #2643Hi Mark, it looks, that I do sharpening essentially right, I will try to be more patient. You haven’t your pair of 5K/10K Choseras yet? I hope that you will write some fine post on your blog about these stones 😉
04/11/2012 at 3:41 pm #2648Hi Mark, it looks, that I do sharpening essentially right, I will try to be more patient. You haven’t your pair of 5K/10K Choseras yet? I hope that you will write some fine post on your blog about these stones 😉
I will. Just quietly working down my way in micron size :mrgreen:.
Molecule Polishing: my blog about sharpening with the Wicked Edge
04/17/2012 at 8:07 am #2809Hello all, I got my WE about 1 year ago and my first try at one of my kitchen knives was a disaster. So I went to the dollar store and bought a knife, hit the edge with a file and started to practice and when that was sharp (after a few tries) then I went to work on my knives. There is a learning curve, be patient……Bill
12/16/2012 at 5:54 am #8268A few observation after 8 months with WE. Recently I bought 3 new items – micro fine ceramics, balsa strops with 1 and 0.5 um diamond paste and ultra coarse diamonds. I think that micro ceramics and balsa strops improved my edges somehow. I lapped micro ceramics as recomended, it takes surprisingly much time – they are very hard, but it works great. Ultra coarse diamond are very fast, but my 100 diamonds are quite worn off (maybe they are finer now that 200), so there is a big gap between 80 and 100 diamonds.
My 100-1000 diamonds are well breaked in, but 100 works much slower than when being new. I use scrubbing motion only to raise a burr at first, becouse at finer grits it seems like waste of time to me. But now I use scrubbing motion with every grit. I control burr only with 100 (or the coarsest) and with finer grits I perform some scubbing motion with very low pressure before turning to sweeping. Now it seems to me more efficient in refining the edge than using only sweeping motion. And the changing of motion reduces fatigue. Anyway, low pressure is the key in refining the edge. In this way I am able to produce hair whittling edge if I continue to micro ceramics and strops.
Long and thin blades are more difficult. They require patience. I use a small cheap microscope http://dx.com/p/60x-100x-zoom-microscope-with-led-illumination-light-25239 to check the progress along all the blade.
But using a full available progression is quite time consuming. I am not able produce fast touch ups with WE. So with my knives I use polished steel from Dick to keep my knives sharp. Some members of my family aren’t able keep knives sharp and I have to sharpen them often. So I use short progression 100-600 diamonds and then 5 um leather strops. Its much quicker than full progression and resulting edges are still pretty sharp.
But this interests me. How do you solve touch ups? And when you buy new diamonds, how do you place them between existing worn off stones?
-
AuthorPosts
- You must be logged in to reply to this topic.