Leading or Trailing Strokes
Recent › Forums › Main Forum › Techniques and Sharpening Strategies › Advanced Techniques and Sharpening Strategies › Leading or Trailing Strokes
- This topic has 54 replies, 11 voices, and was last updated 08/13/2014 at 5:45 pm by
Gib Curry.
-
AuthorPosts
-
08/22/2012 at 7:45 am #4823
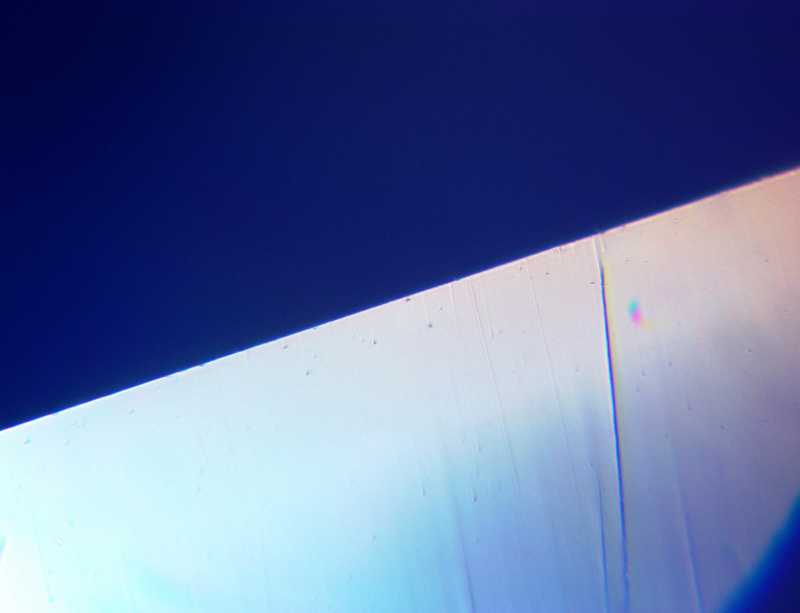
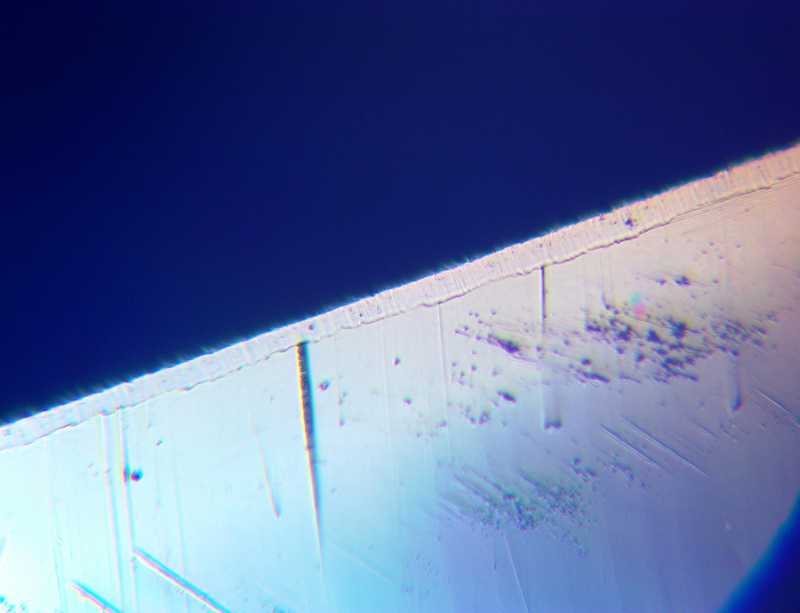
I did a quick experiment with the .6 Micro-Fine Ceramic stones and edge-leading and edge-trailing sharpening. First I polished the edge .25um with the kangaroo strops. Here is the clean edge:
I didn’t go for perfect, just good enough to have a clean slate.
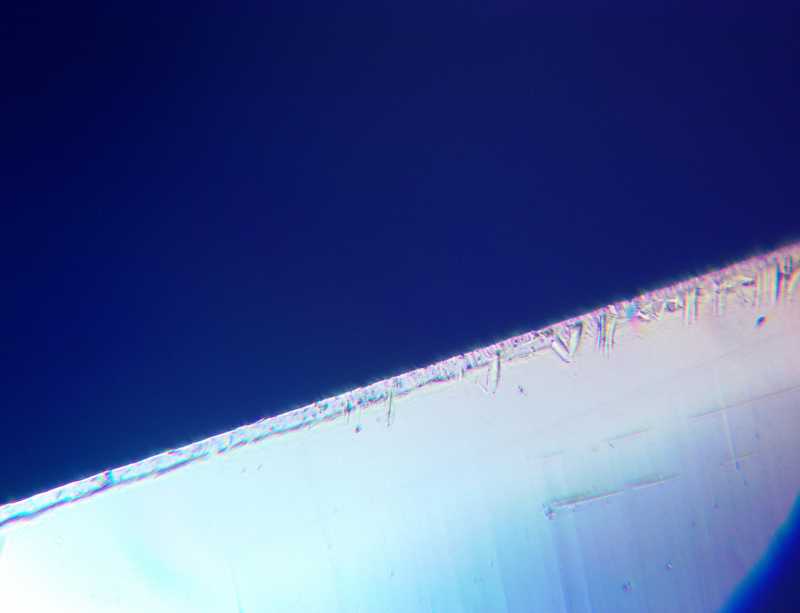
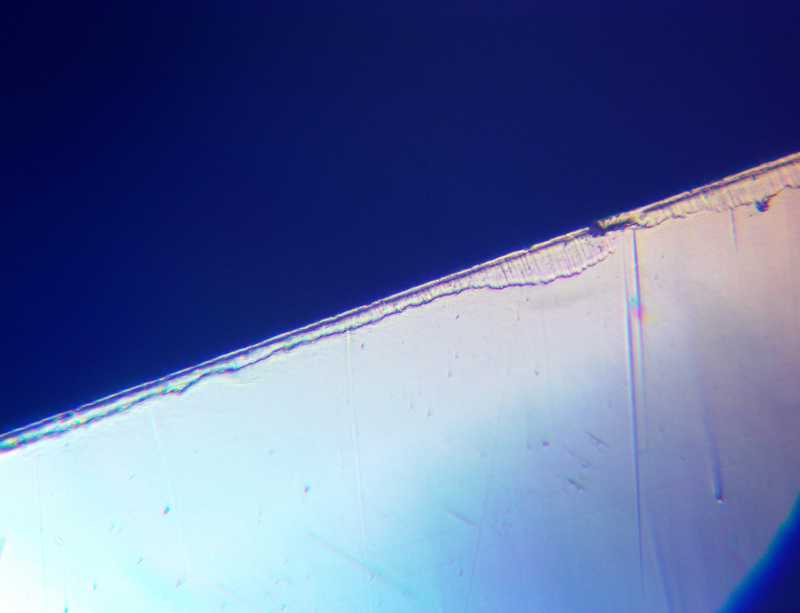
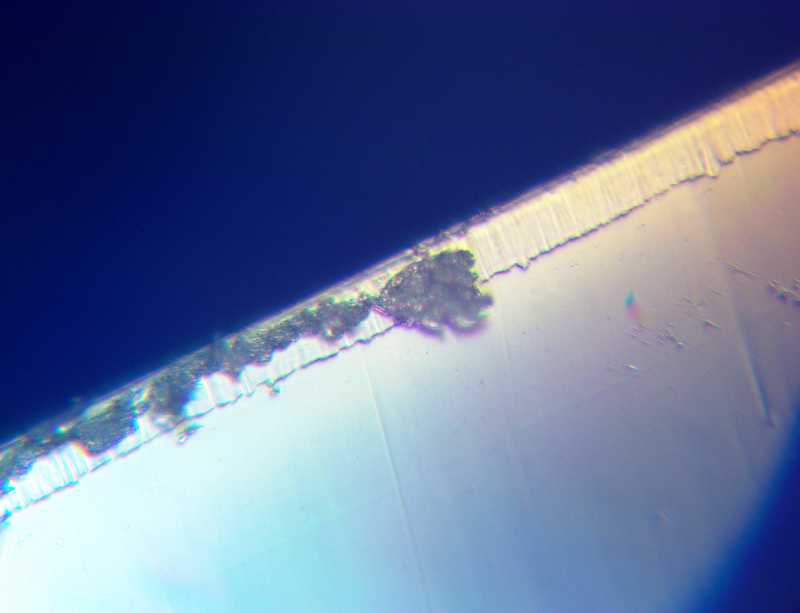
Next I did 5 very light trailing strokes with the .6um Micro-Fines at 5 degrees wider. Here is the result:
I did another 20 strokes, edge-trailing:
-Clay
08/22/2012 at 7:48 am #4827I cleaned up the edge again:
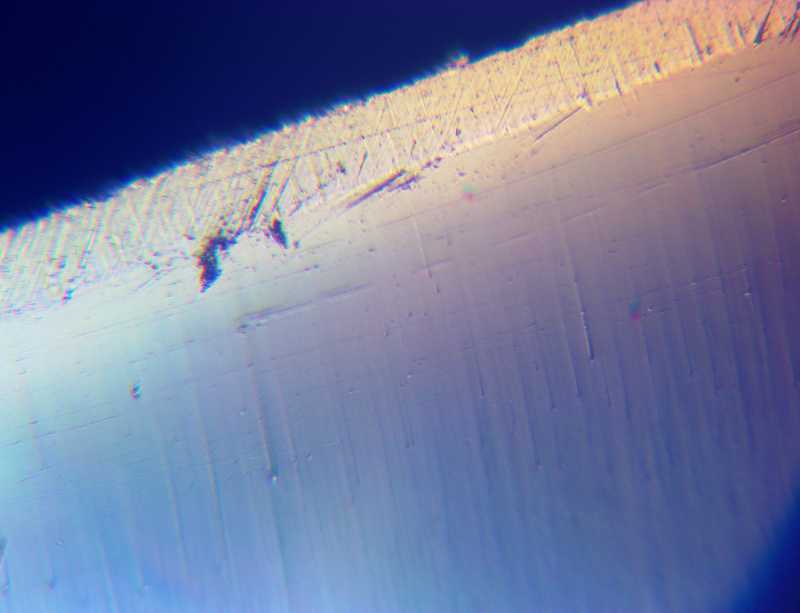
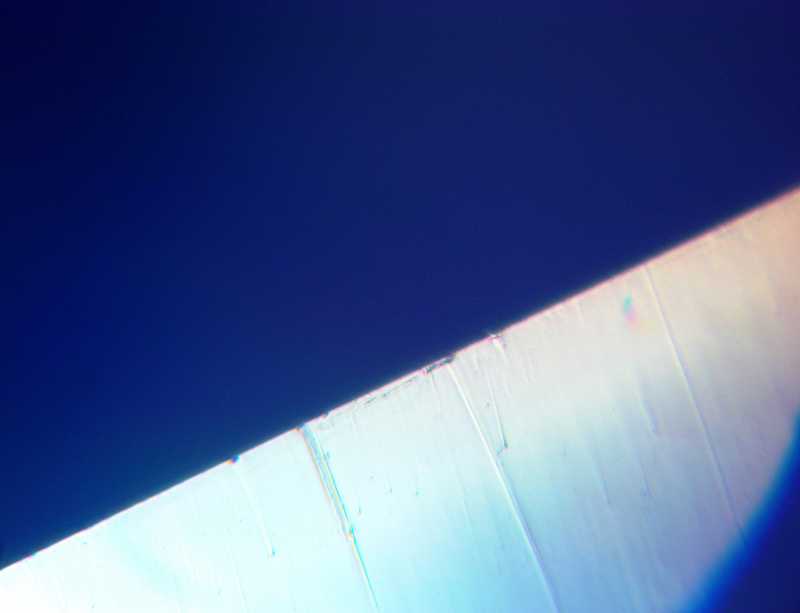
Then did 5 light strokes, edge-leading:
and 20 more edge-leading strokes:
I’m again fascinated by the way metal can be so easily pushed along the surface and piled up on the bevel. I was using whisper-lite pressure.
Hopefully people will jump onto this topic to explore it further and relate anecdotal information about cutting performance with edge-leading and edge-trailing techniques.
-Clay
08/22/2012 at 10:29 am #4834This interests me, but I can’t tell what’s going on in the 2nd edge leading photo, other than the metal being pushed you referenced. I don’t see a defined bevel like the edge trailing photo, it looks like a serious burr or that the edge is folded over, and it looks like the pic was taken farther away?
Sorry if its just me… but can you interpret it a bit?
08/22/2012 at 11:21 am #4835I agree that the second edge-leading image is odd. Clearly a big burr (you know, about 4 microns or something 🙂 ) was formed. I’m not sure why since I used very light strokes. I’ll have to wait until tomorrow to repeat it and redo the photography.
This interests me, but I can’t tell what’s going on in the 2nd edge leading photo, other than the metal being pushed you referenced. I don’t see a defined bevel like the edge trailing photo, it looks like a serious burr or that the edge is folded over, and it looks like the pic was taken farther away?
Sorry if its just me… but can you interpret it a bit?
-Clay
08/22/2012 at 2:35 pm #4839very interesting Clay! I have a theory on why the edge bevel is wider on the edge-trailing strokes… I believe it is because you were using more pressure. The reason being is because you are lifting the paddle as you push into the stone, therefore your muscles are keeping the contact and it is harder to regulate the pressure. With the edge-leading passes, you basically just are using the weight of the stone and almost letting it fall. Sound about right? Just a theory 😉
that’s really weird why the edge looks so un-even in the edge-leading photos… why do you think that is?
08/22/2012 at 10:28 pm #4842very interesting Clay! I have a theory on why the edge bevel is wider on the edge-trailing strokes… I believe it is because you were using more pressure. The reason being is because you are lifting the paddle as you push into the stone, therefore your muscles are keeping the contact and it is harder to regulate the pressure. With the edge-leading passes, you basically just are using the weight of the stone and almost letting it fall. Sound about right? Just a theory 😉
that’s really weird why the edge looks so un-even in the edge-leading photos… why do you think that is?
Interesting theory – I bet I could put the sharpener on a scale and measure the pressures I’m exerting while sharpening to test it. As for the unevenness, I’m not sure – I’m going to repeat the edge-leading portion today and see if I get the same results.
-Clay
08/22/2012 at 11:19 pm #4846Clay,
What kind of steel is this blade and what hardness was it tempered to, that you used for this round of tests?
BTW, even though it is not constructive in this case, this sort of deformation or “plastic” flow of the metal is what burnishing is all about (what I have fixed in my head that it is anyway).This is why I ask about the type of steel and the hardness. It looks more like plastic that has been partially melted than steel 🙂
Phil
08/22/2012 at 11:42 pm #4847It’s just an unspecified high carbon steel – I’m using a bunch of utility blades so that I can easily compare apples to apples in different sharpening sessions. I don’t know anything about the hardness. I agree about the burnishing and I find it really fascinating that leather can do it so easily.
Clay,
What kind of steel is this blade and what hardness was it tempered to, that you used for this round of tests?
BTW, even though it is not constructive in this case, this sort of deformation or “plastic” flow of the metal is what burnishing is all about (what I have fixed in my head that it is anyway).This is why I ask about the type of steel and the hardness. It looks more like plastic that has been partially melted than steel 🙂
Phil
-Clay
08/22/2012 at 11:46 pm #4850Well, in the case of these pictures, was that not done with and by the ceramic stones.
You did get rid of it with the srops though…Phil
08/23/2012 at 12:11 am #4851Yes, in these pictures the deformation we’re seeing is from the ceramics. I’m about to clean the edge back up and then repeat the edge leading photos.
Well, in the case of these pictures, was that not done with and by the ceramic stones.
You did get rid of it with the srops though…Phil
-Clay
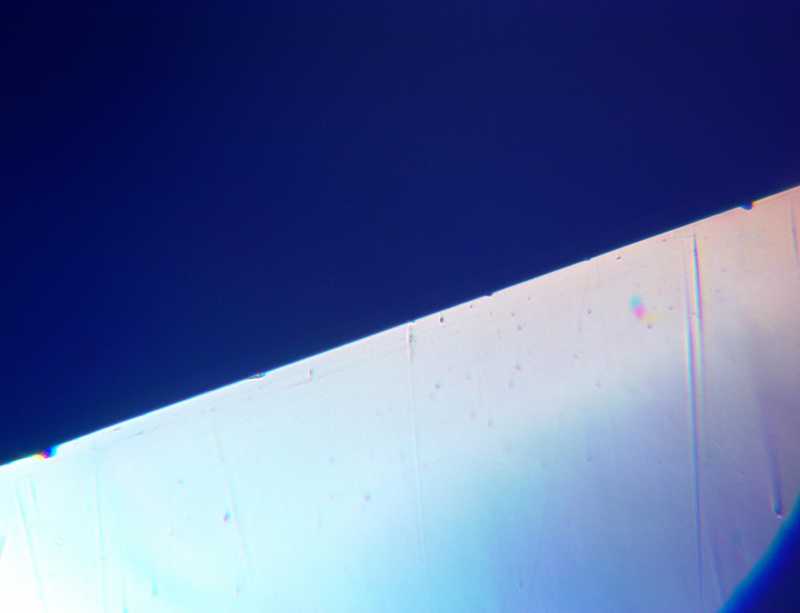
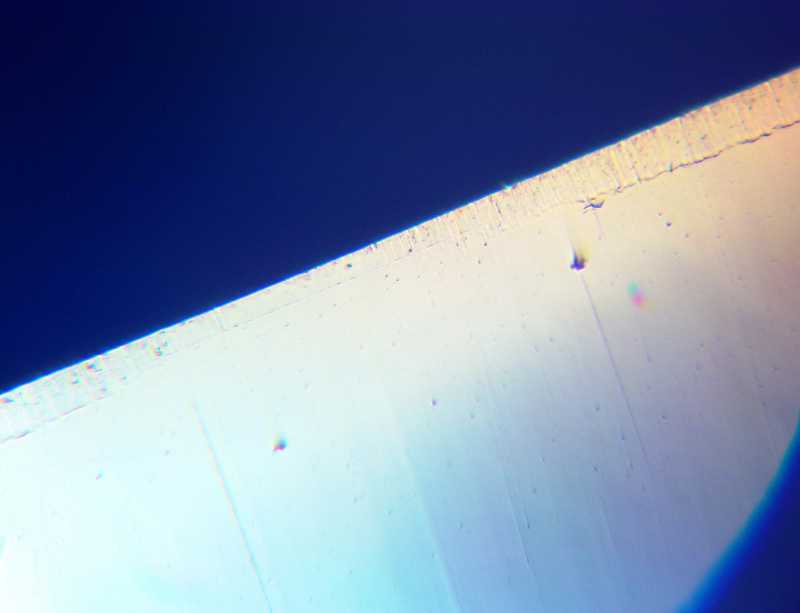
08/23/2012 at 12:43 am #4857Here is another shot of the blade as I left it last night after the 20 edge-leading strokes:
I cleaned up the edge again with the .25um kangaroo strops, 20 strokes per side. Again I’m impressed by how well it works. Here is that picture:
I then went on to edge-leading with the .6um Micro-Fine Stones using ultra-light pressure. My technique was to just rest the stone on the blade and let gravity pull it down and using my hand to guide the direction and speed so I wasn’t applying any force in the direction of the blade. Here it is after 5 strokes:
Here it is after 20 strokes with ultralight pressure:
and another 20 strokes with firm pressure:
Attachments:-Clay
08/23/2012 at 1:02 am #4859Clearly a big burr (you know, about 4 microns or something 🙂 ) was formed.
Haha… I do forget the magnification we’re looking at these sometimes…
I’m looking at them this a.m. on a big screen tv. (god bless modern technology). 🙂
Now I’m wondering if it’s possible, to take a shot of the edge looking straight down… to see if that shows any differences between the edge trailing vs. edge leading edges?
08/23/2012 at 1:06 am #4860Clearly a big burr (you know, about 4 microns or something 🙂 ) was formed.
Haha… I do forget the magnification we’re looking at these sometimes…
I’m looking at them this a.m. on a big screen tv. (god bless modern technology). 🙂
Now I’m wondering if it’s possible, to take a shot of the edge looking straight down… to see if that shows any differences between the edge trailing vs. edge leading edges?[/quote]
Funny you should mention that – I was just working on it this morning and modified my jig to allow the blade to sit up vertically under the scope. It’s hard to find the edge but once I do, I can focus on it fairly well. I did some measurements and got and edge thickness of between .45um and .29um with the Mirco-Fine .6 stones at 28 degrees.
-Clay
08/23/2012 at 1:07 am #4861Clay, What angle did you use to clean up the edge with the ‘roo and then what angle did you use with the 0.6um micro-fine ceramics?
Thanks,
Ralph
08/23/2012 at 1:34 am #4862Clearly a big burr (you know, about 4 microns or something 🙂 ) was formed.
Haha… I do forget the magnification we’re looking at these sometimes…
I’m looking at them this a.m. on a big screen tv. (god bless modern technology). 🙂
Now I’m wondering if it’s possible, to take a shot of the edge looking straight down… to see if that shows any differences between the edge trailing vs. edge leading edges?[/quote]
I’ve been waiting for this for a while! Thanks so much Clay! Can’twait to see different results 🙂
Funny you should mention that – I was just working on it this morning and modified my jig to allow the blade to sit up vertically under the scope. It’s hard to find the edge but once I do, I can focus on it fairly well. I did some measurements and got and edge thickness of between .45um and .29um with the Mirco-Fine .6 stones at 28 degrees.[/quote] -
AuthorPosts
- You must be logged in to reply to this topic.