Kikuichi Deba – Need Advice!
Recent › Forums › Main Forum › Welcome Mat › Kikuichi Deba – Need Advice!
- This topic has 11 replies, 7 voices, and was last updated 12/17/2014 at 3:54 am by
 Josh.
Josh.
-
AuthorPosts
-
12/16/2014 at 12:47 am #22065
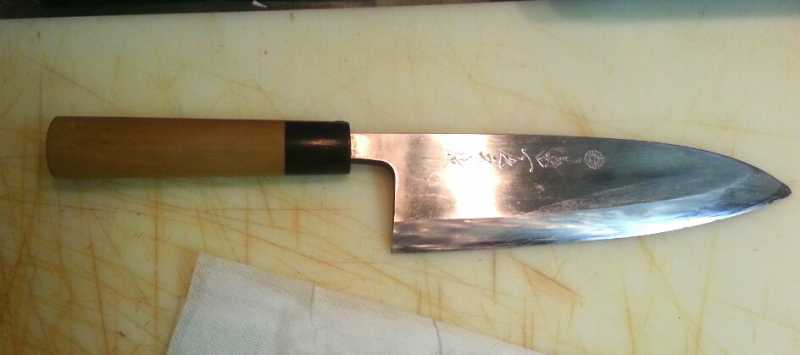
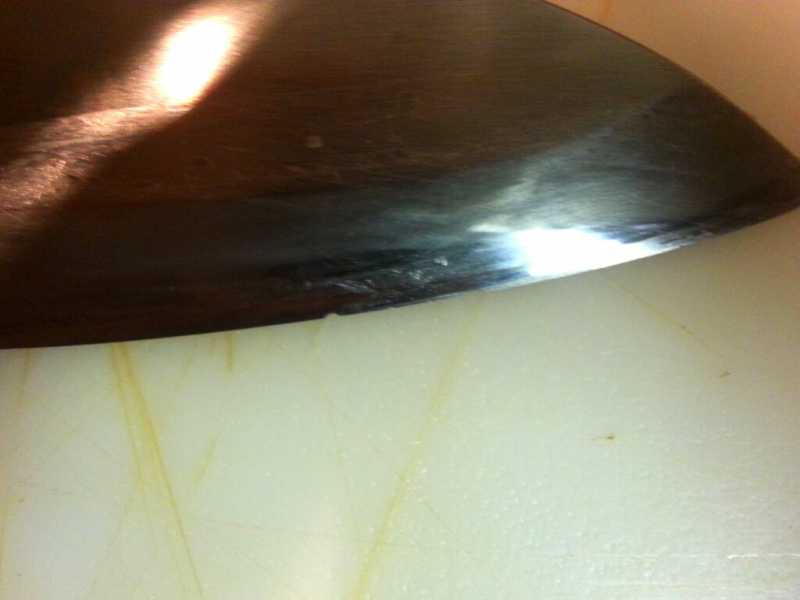
A sous chef at the restaurant I work at has an AWESOME deba he uses to break down fish. Over the past year or so he’s put some pretty massive chips along the entire length of the blade, which is probably a half inch thick. (Wow!!) He’s asked if I could repair and sharpen it for him, but I might be out of my league…
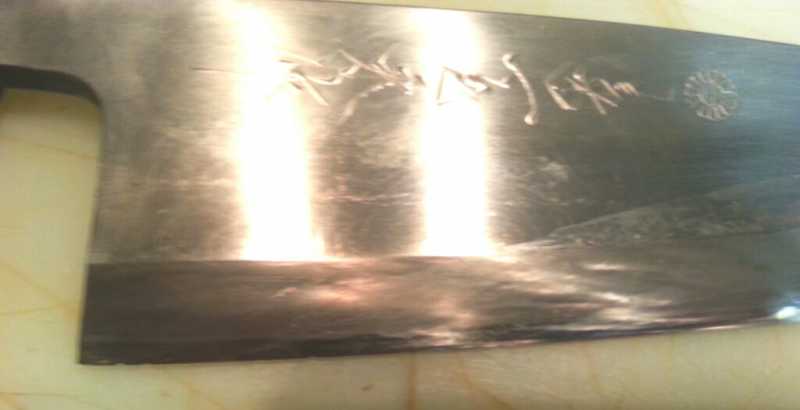
There appears to be 3 different facets to the overall bevel, which is only on the right side of the blade since he’s right handed.
So…
1) Do I take a 100 grit diamond stone perpendicular to the edge until all the chips are put then simply follow the final most tertiary bevel to bring back the cutting edge?
2) From there do I make a few passes on the left-hand side to knock off the burr?
3) Am I biting off more than I can chew?Thanks.
12/16/2014 at 6:30 am #22072It looks like the angle of the primary edge bevel changes over the length of the blade? I’m still a rookie man, but what I do know from a large knife I started referring to as my white whale, if you pick a lower angle and dig deep into the shoulder when trying to re profile.(mine had a huge concave bevel to the apex) .. its a ton of work without low grit stones…
Sorry man, not much help here, I’ve yet to see a knife like this. A compound bevel sounds like a fun challenge tho. Hopefully some of the experience Japanese knife guys will jump in. Good luck man!
12/16/2014 at 8:01 am #22076Thanks for the insight!
12/16/2014 at 11:31 am #22077First thing I would do is to make several outlines of the blade flat side on some fairly stiff paper for reference. You may want to cut one out later and hold it against the blade for reference.
Second: I would chuck it up in the WE and use the Sharpie trick to find out exactly what angles were used originally; including the location form the handle to the vise jaw, the angle cube readout on the flat side of the knife, angle cube reading on the sharp edge (you could use the cube on the bottom with one edge against the handle for a repeatable reference), as well as the angle cube reading on the diamond stone for the actual bevel. Write these parameters on one of your outlines sop that you can duplicate the settings easily. . You may have to move the knife back and forth and play with the tilt to get the best spot. If the sharpening angles of the stock knife change significantly along the blade, you may want to ask the owner to show you how it is used and determine if different angles are needed.
Third: This is the point of no return. Use an appropriate grit diamond (400 may be course enough, but you may have to ) and take off the all of the chips making a flat edge as others have done to de-stress the edge. (do a forum search on de-stress or destress for more information). Compare the new profile you have made to the original and do what you have to to make the curve smooth and approximate the original as well as possible. When you are satisfied that all of the chips are gone and the profile is acceptable, you want to remove any burr from the non beveled side of the knife and the new flat you have made so you wont fool yourself later into thinking you have a burr. You can do this on a bench strop or maybe a ceramic stone on the flat edge. I prefer a loaded bench strop. Then use a different colored sharpie on the new flat edge so you can see it clearly; you may have to re apply the sharpie several times along the way. I like to use red for the edge and blue or black for the bevels. The easy part is over.
Fourth: If you have a belt sander you can thin the fatter bevel a little at a time with power to save a bunch of time, but be careful not to go too far too fast. If you have a steady hand and can mount the knife securely in a flat position, a small angle grinder with sandpaper flap disk can do a lot of metal removal in a controlled manner; practice on something else, use really light pressure and wipe the blade with a wet rag on each pass if you try this; I use this on a lot of axes and splitting mauls. You can always put the knife back in the WE and sharpie and course diamond from time to time and judge your progress appropriately. Somebody with a lot of experience and the proper belt grinder / belt grit can whip this part out in minutes, but the rest of us just have to have patience and good judgement. Unless you are really experienced, stay away from the newly flattened edge with power grinding. If you don’t have power tools, you’ll just have to start with course diamonds and grind away; but along the way check the width of the bevel with a sharpie a number of times. You can make minor adjustments to the bevel by grinding proportionately more in the areas that need it, but you need to keep on track the whole way or you’ll end up with a wavy edge. Also check to see that the knife hasn’t shifted in the vise occasionally. If you have course diamond bench stones and want to save your WE stones, a lot of rough metal removal can be done by hand.
Fifth: When you have the largest bevel close to what you want, start working on the other bevels a little at a time. Work the grit progression on each bevel before moving to the next finer grit. You may have to go back to a courser grit sometimes but it is better than over grinding and putting too deep of scratches on any of the bevels. Be very careful of the final bevel and approach removing the sharpie mark on your newly made flat edge with no courser than 400 grit stones that are well broken in; you don’t want to have to start all over. This is really an experience judgement. You want to get a fine burr, but not chip the edge.
Sixth: follow the latest forum thinking and finish the edge with 1000 grit diamond lightly polished but not polished enough to remove the tooth form the 1000 grit. You may want to micro bevel the very edge at a slightly more obtuse angle than stock for less chipping. Lastly a couple strokes on a loaded bench strop on the flat side of the blade; don’t tilt the blade toward the edge.
Seventh: I hope you get lots of free sushi for all this effort. Keep the templates and angle dimensions for future touch ups and convince the owner that touching up the edge really removes less metal than a major sharpening.
I, for one, am a firm believer that removal of stressed metal at the edge of a quality knife is well worth the effort in the long run; this knife edge has obviously been stressed.12/16/2014 at 12:25 pm #22079Amen to Gregg’s comments. I would pick a higher grit to do the de-stressing. A flatter edge is a little easier to visualize as you move thru the grits. I usually use 600 or higher. If there’s a lot of steel to be removed, go to the lower grit, then clean up with the higher grit before proceeding with the bevels.
12/16/2014 at 7:57 pm #22083Whoa Steven! This will be a great project for you!
From the pictures, if I had to guess, it looks like that is supposed to essentially be a single bevel Scandi grind. Therefore, that is ONE THICK EDGE that you will need to grind and it will take hours if not days to do by hand w/ out powered equipment (if you are going to do it this way). If you are just going to widen the bevel up and put a bevel on the very edge this would work but:
1. it will lower the cutting ability of the knife and
2. your wicked edge may not be able to reach that wide of an angle (have you measured it yet?It would be similar to me trying to do my Emerson Roadhouse without powered equipment… but would take longer probably (since that is such a thick knife:
Before:

After:

notice how thick the edge is before and how thin it is after… what makes this even nicer is that this micro beveled edge is 13 dps… not 25-30 dps that it was before I reground it! What you need is a belt sander man…
12/16/2014 at 11:02 pm #22086Wasn’t that Emerson chisel-ground? If so did you put a bevel on the back side as well or is it 13 degrees inclusive?
12/16/2014 at 11:08 pm #22087Wasn’t that Emerson chisel-ground? If so did you put a bevel on the back side as well or is it 13 degrees inclusive?
It is v ground on the primary and chisel ground on the final/secondary bevel (i.e. the actual edge). So yes, I hate chisel grinds with the exception of one done the correct way, and so I converted it to conventional =)
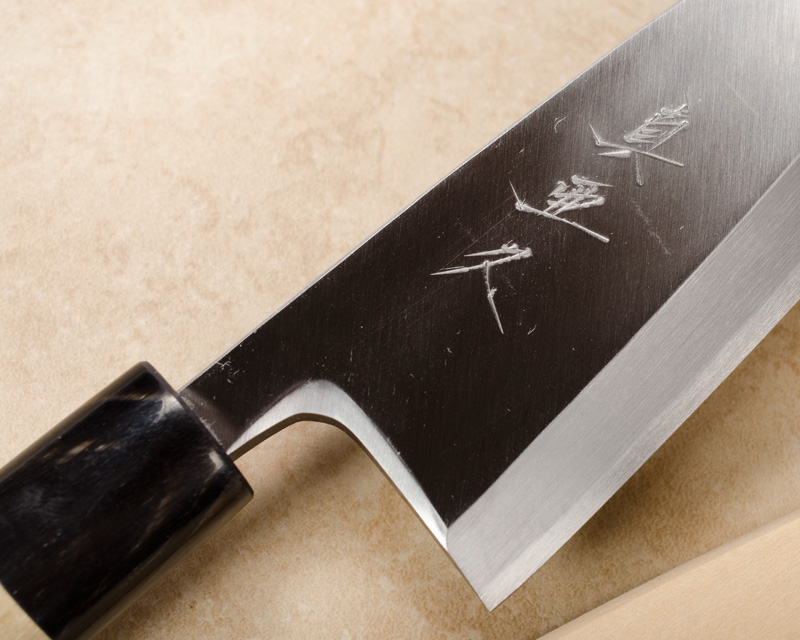
12/17/2014 at 12:47 am #22090Just for a reference that may help, I was curious and while researching your knife there I found this image showing the factory grinds pretty good:
Attachments:12/17/2014 at 3:39 am #22095Nice work is there a slight curve in the leading edge nice if it is.
12/17/2014 at 3:47 am #22098Normally the secondary bevel ends as seen in the photo the angle just steepens say 3-5˚ then it is best to put a micro bevel on the edge for durability and often the last quarter near the heel has a V bevel for strength when pushing through vertibrae .
12/17/2014 at 3:54 am #22100Normally the secondary bevel ends as seen in the photo the angle just steepens say 3-5˚ then it is best to put a micro bevel on the edge for durability and often the last quarter near the heel has a V bevel for strength when pushing through vertibrae .
Listen to Leo… he has WAY more experience than me in the topic of japanese cutlery!
Nice work is there a slight curve in the leading edge nice if it is.
not sure I understand the question… was this for me?
-
AuthorPosts
- You must be logged in to reply to this topic.