Extended Depth of Field Image Stacking
Recent › Forums › Main Forum › Welcome Mat › Extended Depth of Field Image Stacking
- This topic has 104 replies, 11 voices, and was last updated 05/23/2016 at 12:44 am by
 M1rrorEdge.
-
AuthorPosts
-
04/21/2016 at 12:57 pm #33560
Tom,
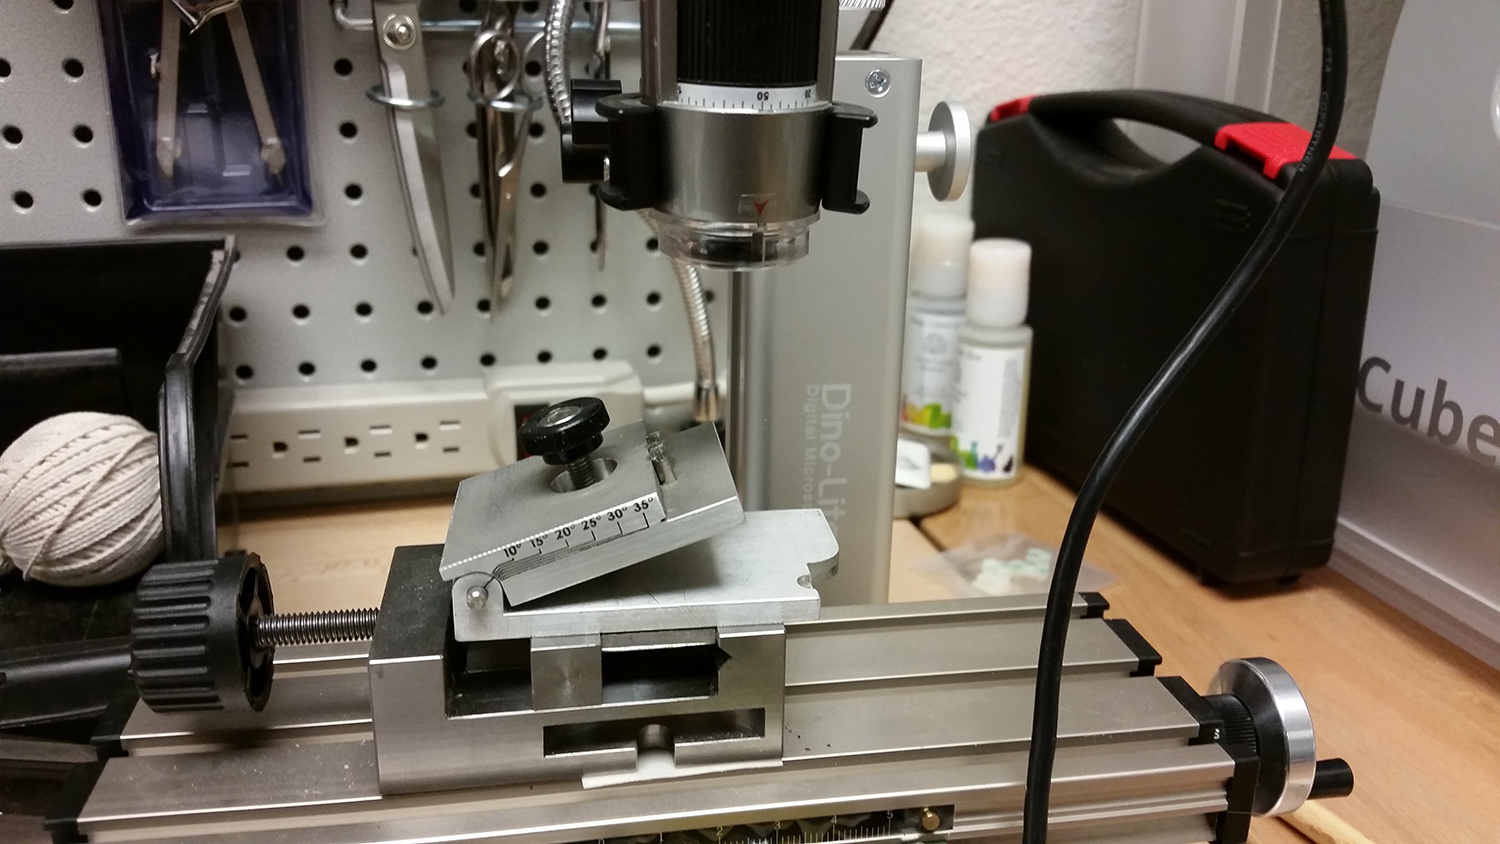
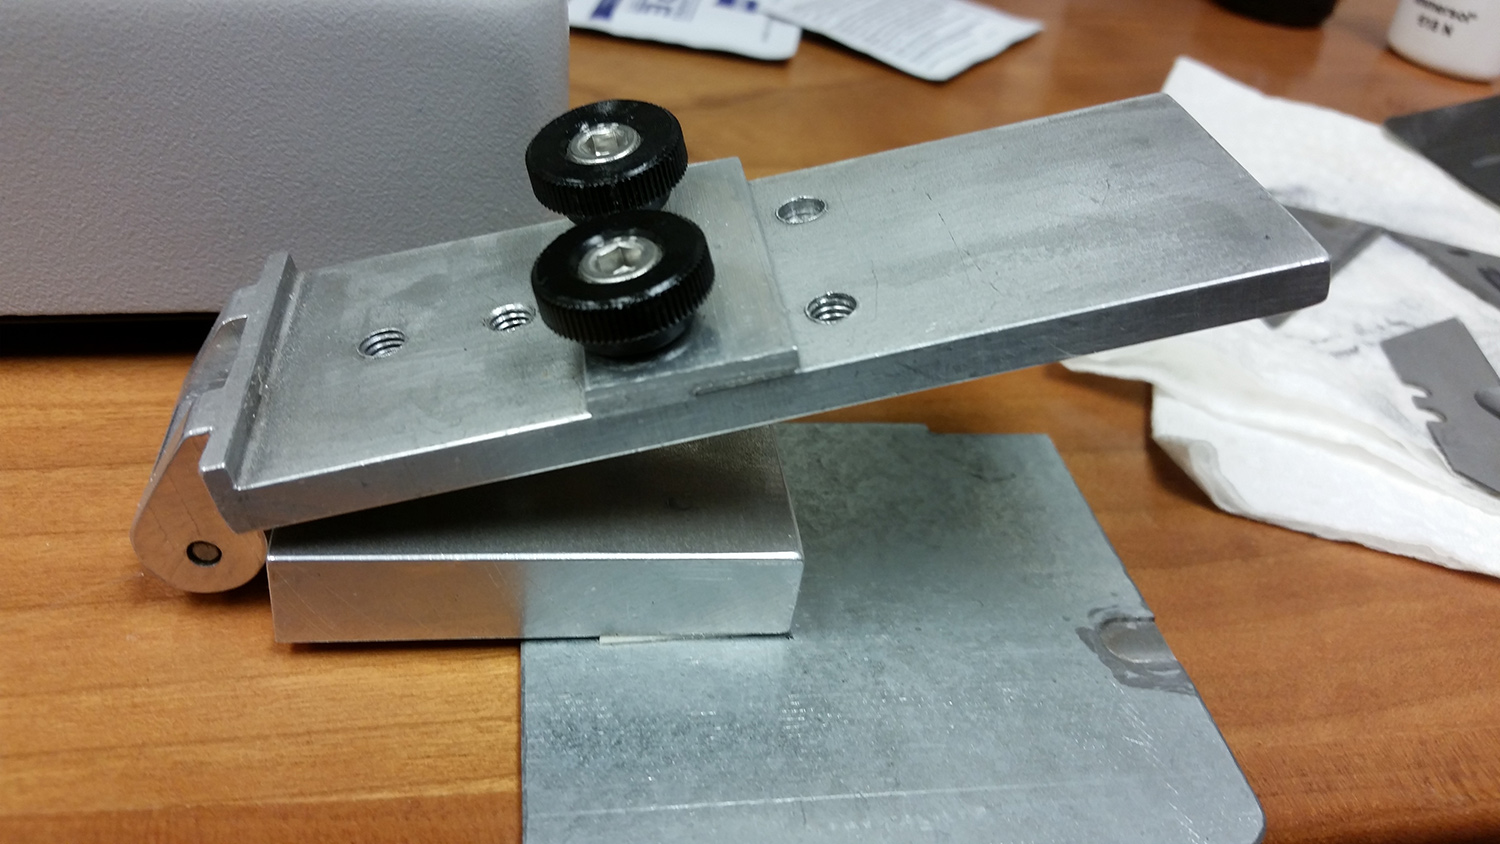
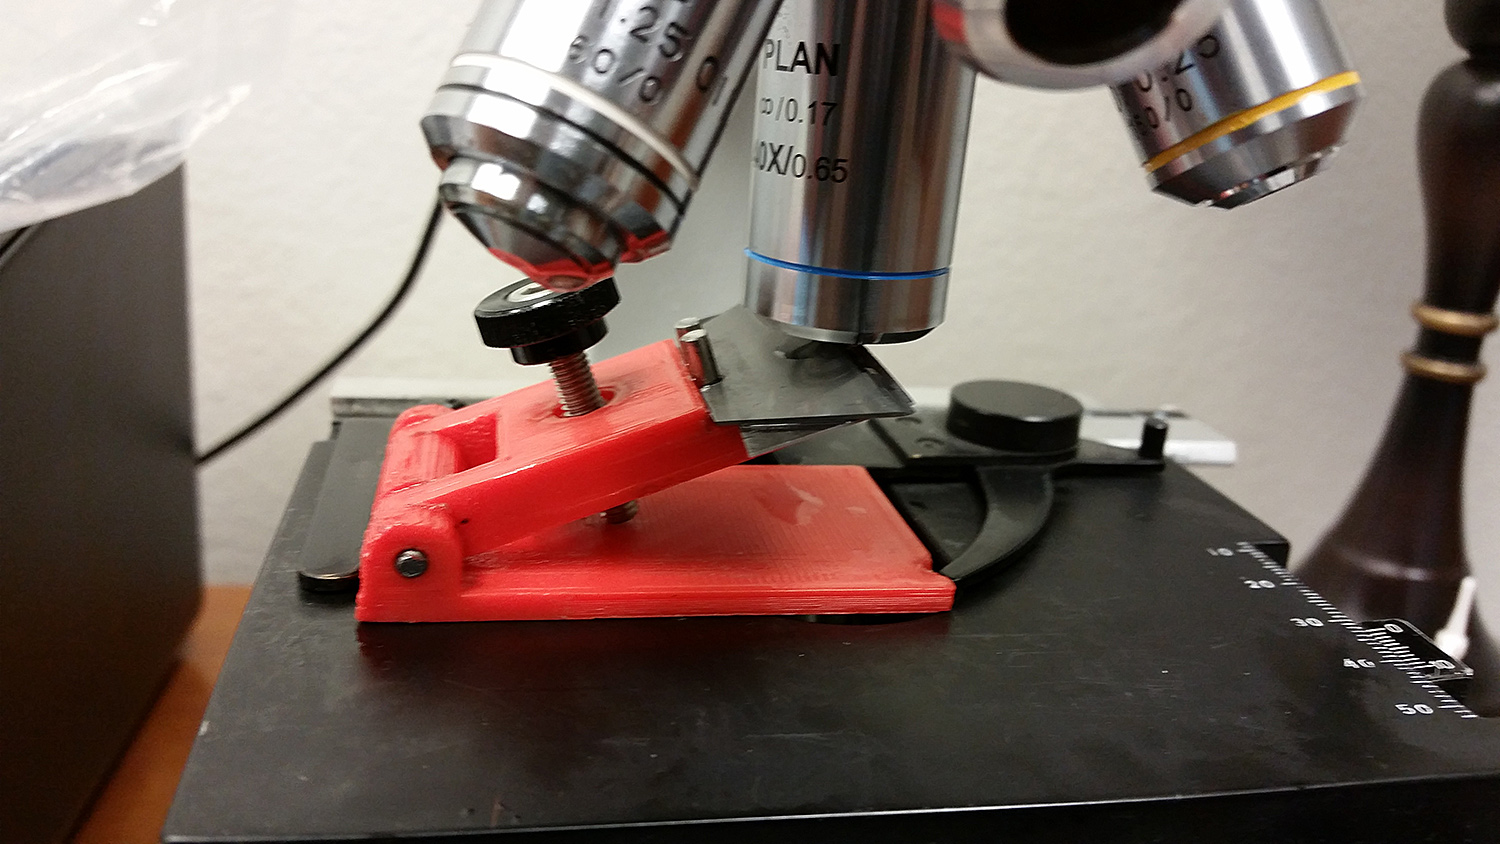
I’m thinking you mean something like these:
I printed the little red one and it works great. I then took my drawing to the machine shop and had the other two made. They’re very helpful. Even so, there is enough change in distance to the lens from one part of the bevel to another that it’s nearly impossible to get it all to focus. You’d need some sort of extremely sensitive leveling device that levels both parallel and perpendicular to the edge to get the whole thing in focus at high magnification. It’s not a big issue in the 200x range.
-Clay
Attachments:
You must be logged in to access attached files.
04/21/2016 at 1:40 pm #33566Awesome photo jig. I have been placing modeling clay under the edge and spine of the blade for a similar result. The focal point may still be a problem because it is so small but I can see this limiting the number of photos that need to be taken. I would like to make one of those. Could you please take some closer photos at different angles with a standard ruler in the picture? I have used emachine shop online to make custom parts in the past. http://www.emachineshop.com. It’s actually pretty easy but a little expensive. I am very limited out here so have been adapting and overcoming in many different ways. This is a great idea. I see the chemistry coming together already. If we use all of these tools in concert, I bet we could get some “wicked” results.

http://www.emachineshop.com/machine-shop/Machine-Shop-Overview/page826.html
Eddie Kinlen
M1rror Edge Sharpening Service, LLC
+1(682)777-16221 user thanked author for this post.
04/21/2016 at 1:57 pm #33569MirrorEdge – I can send you the IGS files if you’d like that have the dimensions. You could also maybe send out a drawing to be 3D printed. I love my little 3d printed version, it works great. You can also use a door hinge by just threading a hole in one side so you can use a thumb screw to adjust the angle. You might need a couple other threaded holes and strip of metal to hold the blade for you like you see in the photo titled Blade Holder 2.
-Clay
04/21/2016 at 2:16 pm #33570That would be great thanks for the offer!
Eddie Kinlen
M1rror Edge Sharpening Service, LLC
+1(682)777-162204/21/2016 at 2:43 pm #33572Did anyone think to move blade a very tiny bit, make another shot(s) and then create a 3D picture? It will look like you are walking on an alien planet, I guess. Imaging walking on your edge landscape.
04/21/2016 at 7:27 pm #33580Clay, those images are great! Love what you guys are doing!
This is the composite from the images above taken with a 900X dino lite camera on their premium stand (RK-10A). For good reason the WickedEdge site is limiting the size of the images and the number we can upload per post so I had to add a new post. I am going to set up a external location to place higher resolution images soon. This will also make a difference in comparison observations as well. We then could leverage the power of the computer to zoom in digitally. Can you imagine using the EDOF and HDR capabilities in 1080p or 1440p? Or even the next level full 3D ( I think Frans would love that based on his fliker site). I can almost see him salivating now. LOL!

Try Smugmug… cost a little bit, but unlimited storage and full resolution photos. I love it.
1 user thanked author for this post.
04/22/2016 at 1:14 am #33584Clay:
Well, I guess that’s another idea that’s been thought of before. Looks really good.

Wondering why its DOF is so sensitive? Do you have something to lock the fixture in position once you’ve established the angle? I’ve noticed that my new anglecube is real jumpy unless I forcefully hold it down – then it’s rock steady. Just letting it lean against the blade doesn’t work. Apparently there’s enough vibration in my bench to drive it nuts.
04/22/2016 at 8:30 am #33594I love smugmug. I use it for my private photos. Thanks for the suggestion. I am trying to figure out how to use it but I need to isolate my personal stuff from my public stuff.
Eddie Kinlen
M1rror Edge Sharpening Service, LLC
+1(682)777-162204/22/2016 at 8:33 am #33595I love smugmug. I use it for my private photos. Thanks for the suggestion. I am trying to figure out how to use it but I need to isolate my personal stuff from my public stuff.
I use it for both personal and business… I just “upload new photos” then you can select if you want the gallery to be “public, unlisted, or private (only for you)”. Works very well.
Or you can organize it into different folders and set permissions on those folders too I believe.
1 user thanked author for this post.
04/22/2016 at 9:18 am #33597Clay: Do you have something to lock the fixture in position once you’ve established the angle?
I do – The fixture for the AmScope is designed to get locked into place by the existing stage setup which is spring loaded. The other ones are held by a small vice that is attached to the compound table with the same double sided tape we use to attach the diamond plates to the handles.
-Clay
1 user thanked author for this post.
04/24/2016 at 1:25 pm #33692Smug-mug did the trick, thanks very much RazorEdgeKnives. I guess they now have a way of allowing access when someone only has the link. So, I set all my personal photos to “unlisted” by going to Settings, Security and Sharing and changed the visibility to each folder to Unlisted (Anyone with a link). I don’t want my family to not be able to access it, so this is perfect. The public files show up perfectly on the forum as images when I paste the link to my smugmug page. When you click on the image you can see it like the original. When I start posting HD images, you will be able to zoom in if required to see the details. Maybe this will help others on the forum. I have used smugmug for 10 years now and love it. Just never fully exploited the application. Thanks!
Eddie Kinlen
M1rror Edge Sharpening Service, LLC
+1(682)777-162204/25/2016 at 2:34 am #33698A question off line came up so I re posted my answer here. Why did I purchase a Dino Lite AM4815ZT? Originally, I believed that having the EDOF and HDR built right in to the device of my Dino Lite AM4815ZT and the Dino lit 2.0 Capture application, would facilitate and speed up the microscope imaging photo capture process. I also observed that photos everyone was posting where lacking depth of field (across the board), which, was the reason for my post on the topic. I hypothesized that depth of field “focus stacking” offered by this product would be a significant improvement to my photos.
I also believe using EDOF and HDR with the “cheaper” cameras would greatly improve all the photos taken. I was right. Everyone can bump up their image quality with the HDR and EDOF process without the added cost of a new microscope.
Learning to manipulate our Microscopes and take advantage of “focus stacking” is huge! Because of all the details we are missing at the micro level without it. Trying to take multiple pictures of the same bevel and then placing them on the page side by side is easier but is hard to follow for everyone browsing and it takes more data storage on the server.
After getting the AM4815ZT and using it for a while, I realized that the added features where expensive and just not practical for our application of photographing edge bevels and the apex of a blade because the resolution of 140X just wasn’t enough. If Dino Lite put these features on the 440, 500x, or higher resolution models it would be “spot on”.
For any other application where you need to photograph larger objects, this camera would be perfect. Example: For placing jewelry on E-bay or soldering under the microscope where you need to see the details of small objects. The AM4815ZT also has a neat feature of a Long Working Distance. What this means is that you can place the USB microscope lens further away from the object you are viewing. This can be huge in many applications where you don’t want to touch the object you are photographing. Clay experienced the results of that while photographing his edge in the Wire Edge post here (Wire Edges ). The longer working Distance of the AM4815ZT allows you to stay further away from your subject and not touch it.
I would use it to take images of my bevel while the knife is in the WickedEdge vise. One seriously cool application of this is… time lapse photography of the creation of a bevel. You can set the USB microscope up and not touch it at a long working distance. Think macro photography with a microscope with time lapse photography.
I have since discovered that Adobe Photo shop can focus stack and all I need to do is to take lots of photos at different depths of field and Image stack them. The HDF works similar but is a little trickier.
Additionally, I found two third party software products that once purchased produce amazing HDR and EDOF images. With the purchase of the additional software you will gain a side benefit of being able to use the software for all your other digital photo needs as well.
These applications are listed below:
EDOF: Helicon Focus 6 Adobe Photoshop
HDR: Photo Matrix Pro CinePaint Project
With everything mentioned in this post, here is my latest plan 25April16. I am going to keep the AM4815ZT and purchase the Radical Metallurgy scope. Shortly after I will get a Dino-Lite Eyepiece Camera. The Dino lite will be on the bench for quick inspection and the Radical will be for deep viewing. Sometimes the answer is “All the Above”
“life is journey not a destination”
Eddie Kinlen
M1rror Edge Sharpening Service, LLC
+1(682)777-162204/28/2016 at 5:17 pm #33809Did anybody try these?
They have Canon adapter as well … If it works, that might be an ultimate solution for both, focus stacking and HDR
04/28/2016 at 11:25 pm #33811Great find Dima! The really cool part of this adapter is that you can incorporate all the normal features of DSLR and at a capture size of 10MP or better and can you use the awesome power of digital zoom. As for the HDR and the EDOF photo editing this would be perfect, but we don’t want to sacrifice optical magnification. The only down side I see with this specific model is that it only has a eyepiece magnification of 2X so if you have a 50X objective lens on your scope the total optical power will only be 100X with a 100X objective lens the total optical power will be 200X. Normally on a microscope you will find 10X or 20X eyepieces. While digital zoom is great, everyone knows you lose details and see image “pixelation” when you zoom in. For the cost, this could be a great option for anyone. Thanks for sharing! Here is a video displaying this device.
Eddie Kinlen
M1rror Edge Sharpening Service, LLC
+1(682)777-162204/29/2016 at 2:43 pm #33833Actually their tech said that combined magnification of camera and adapter is about 12x, so it’d give about 1200x magnification with 100x objective.
-
AuthorPosts
- You must be logged in to reply to this topic.


