Ever wanted to measure and view a Edge Profile? Check this out!
Recent › Forums › Main Forum › Welcome Mat › Ever wanted to measure and view a Edge Profile? Check this out!
- This topic has 83 replies, 10 voices, and was last updated 04/29/2016 at 10:11 am by
 M1rrorEdge.
-
AuthorPosts
-
04/12/2016 at 7:04 pm #33340
I think that one of the potential problems (and also the reason why melting candle wax works so well), is that you want to be able to shave the surface so that you end up with a nice clean cross section.
1 user thanked author for this post.
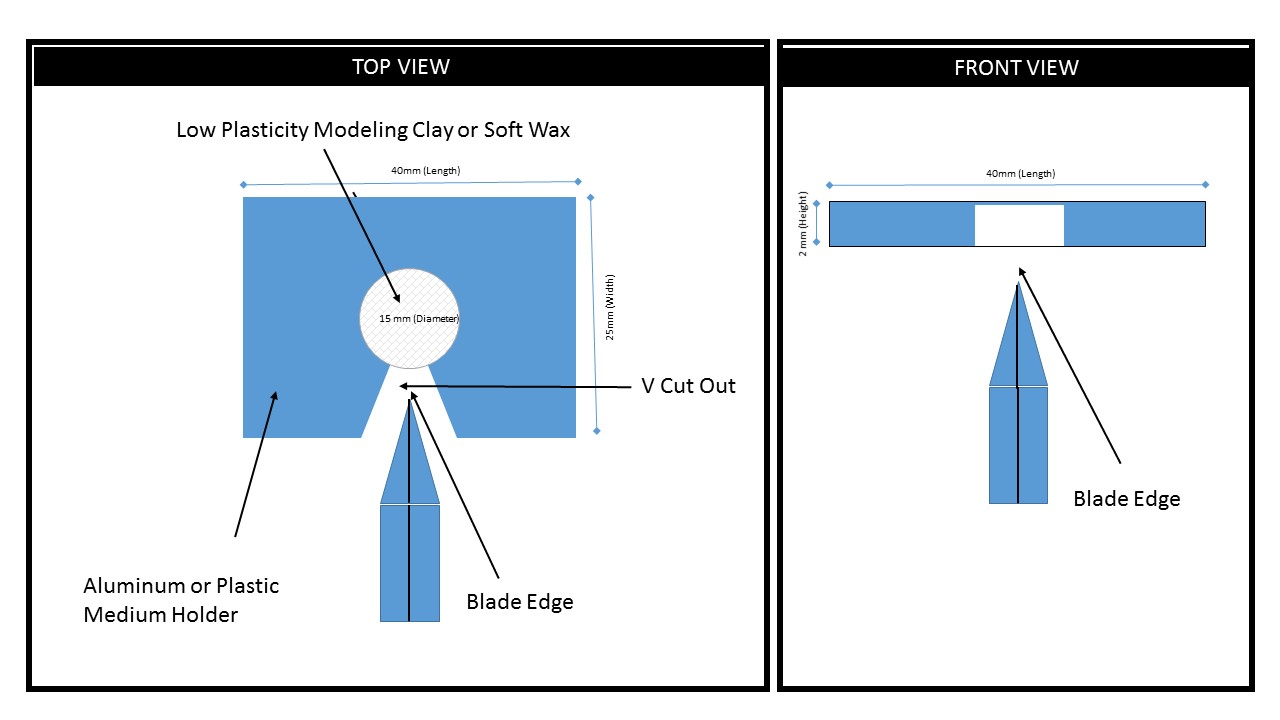
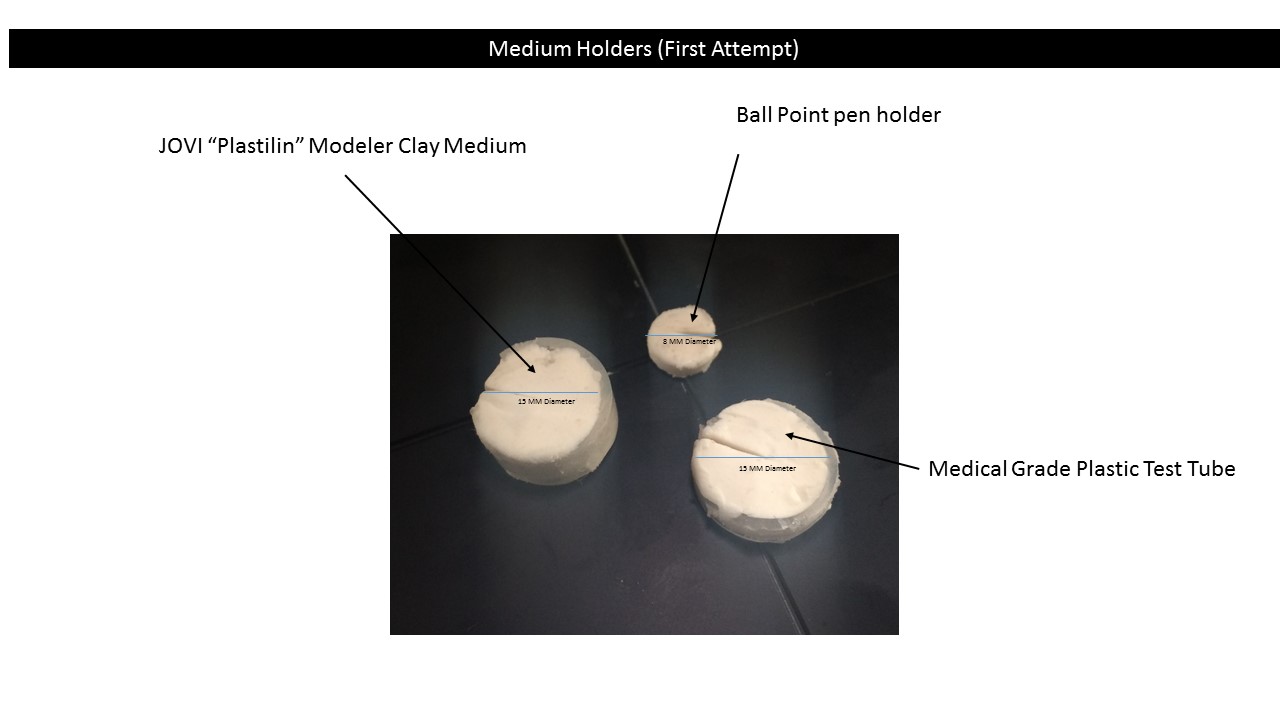
04/13/2016 at 6:34 am #33354In the attachment I have drawn a diagram of a potential holder idea. I cut a ball point pen in 2 mm sections with a Dremel tool as suggested by Clay, the trouble is… once the circle is cut it loses its rigidity thus the mold loses shape. I also cut a medical grade plastic test tube (See Photos). I would like to press the blade edge into the medium and then withdrawal it without any movement of the medium. Placing something on the blade first like Cliffcurry mentioned (Silicon spray) is a good idea, however, whatever we identify must not damage the surface in any way. Could you imagine for a second going into knife stores with little ball point pen diameter “Dots” with clay in it and asking to take impressions of all the factory edges (It must be nondestructive)? We are getting closer… “Placsticity” of the medium is the key, I think. Once the impression is made it needs to stay put. Because we are dealing with such little surface area the options are few. We need to find an acceptable medium to make the impression or its back to the WAX. I appreciate the Ideas, keep them coming.
Eddie Kinlen
M1rror Edge Sharpening Service, LLC
+1(682)777-1622Attachments:
You must be logged in to access attached files.
1 user thanked author for this post.
04/13/2016 at 9:06 am #33366How about dental alginate? I was thinking of teeth molds. Here it can be found on Amazon: http://www.amazon.com/Hollywood-Impressions-Molding-Powder-Alginate/dp/B000KI6W5Y
-Clay
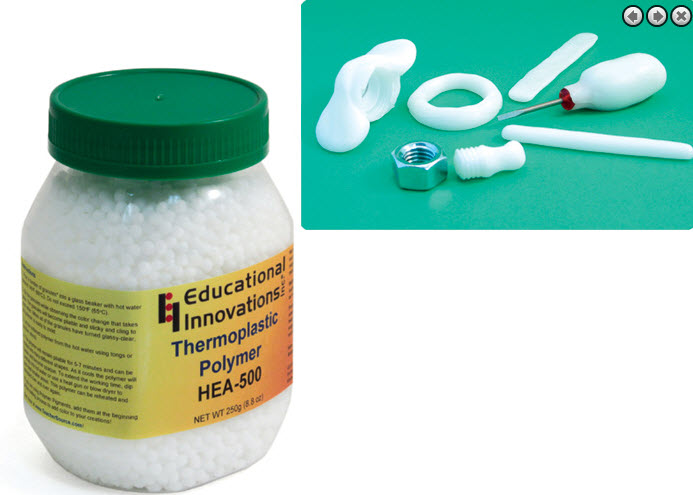
04/13/2016 at 10:04 am #33370How about this thermoplastic polymer:
http://www.teachersource.com/product/thermoplastic-polymer-and-pigments/chemistry
I tried to embed the Youtube video but it does not seem to work. Anyone any idea what is wrong with the link?
<iframe src=”https://www.youtube.com/embed/4-0y1I8-AAk?rel=0″ width=”560″ height=”315″ frameborder=”0″ allowfullscreen=”allowfullscreen”></iframe>
1 user thanked author for this post.
04/13/2016 at 12:28 pm #33373Just paste the basic link… Not the embedded stuff.
2 users thanked author for this post.
04/13/2016 at 2:21 pm #33375Just paste the basic link… Not the embedded stuff. <iframe src=”https://www.youtube.com/embed/4-0y1I8-AAk?feature=oembed” width=”670″ height=”377″ frameborder=”0″ allowfullscreen=”allowfullscreen”></iframe>
That was the first thing I tried but it did not work either, maybe a glitch.
I just tried again and now it worked so no idea why it did not before
Thanks !
04/13/2016 at 11:55 pm #33386Wow! Great responses guys. I think I am going to try the thermoplastic polymer simply because it is reusable when placed in hot water. I researched the Dental Alginate that Clay mentioned and discovered dentist and hygienist saying it sets quickly and is opaque but it looks hard to use in small quantities. The only real trouble I see with it, is it’s “One time Use”, and it requires a specific amount of water to harden correctly. As we are using the “Medium” in a “Pea Sized” amount, we also need to consider how it will be viewed under a microscope.
I wanted to send a “shout out” to FRANS as well. He made a great point. The reason the WAX is beneficial is due to the fact you can trim it after hardening to reveal a clean edge profile. This is also important under microscopic observation. My only concern with the thermoplastic polymer is it’s translucency. We will have to observe how it looks under a USB microscope. It appears to turn opaque white in the video, however, once you look up close, you never know what it will look like. Thanks for all the ideas! I looked and kept finding polymer clay’s of different plasticity and hardness.
We must remember the KISS method (Keep it simple stupid). When you to start pulling out beakers and mixing substances like in chemistry we are going to scare people away from trying it. I think the process is something everyone can do and benefit from in the Knife community, which is why I posted it on this forum.
I think we all agree on these variables; Usable in Small Quantities (Pea Size), Reusable, Opaque, Low Plasticity (Holds Shape), cheap to purchase and is easy to use.

Eddie Kinlen
M1rror Edge Sharpening Service, LLC
+1(682)777-16222 users thanked author for this post.
04/14/2016 at 12:22 am #33390This is some cool Stuff. Look what you can do with it. I am going to buy it, just to play with it. Some “kids” never grow up, LOL.
This amazingly versatile polymer can be heated and molded over and over again! It falls into a class known as thermoplastics. The melting point for this material is quite low, only 58C (136 F) to 60C (140 F) (That is as hot as a cup of coffee) , so it can be melted in hot water and molded by hand. It can also be cut or extruded. Safe and biodegradable. 250 g. ($24.00 With Shipping)
Eddie Kinlen
M1rror Edge Sharpening Service, LLC
+1(682)777-1622Attachments:
You must be logged in to access attached files.
1 user thanked author for this post.
04/14/2016 at 4:36 am #33394I have ordered the HEA-500 from Teachersource as well. From the description and what I see in the video, I think it will work very well for getting an edge profile but I see a million other uses as well.
I also found this British company that sells the same (or similar) product in different quantities, different colors, ships worldwide, is cheaper and also sells a version that melts at just 42 degrees Celsius but does not get as hard as the 62 degrees version.
http://www.polymorphplastic.co.uk/default.html
Funny, in the demonstration video they use it for a knife handle
1 user thanked author for this post.
04/14/2016 at 8:06 am #33403I think we are onto something here. The thermoplastic polymer can not only be used to mold the blade edge, but, can also be used to create the holder indicated in my previous post. I found several companies that manufacture or distribute this medium. The one with the most information is a company called Plastimake (http://www.plastimake.com/). The web site has an extensive list of “things” made with it. On this site, I found that the plastic polymer can be placed on a cookie sheet and baked at 70 Degree C or 158 Fahrenheit (http://www.plastimake.com/technique/making-sheets). This will make it nearly flat to about 2 mm (Bingo). If we drill an 8 mm hole with a Ball Point Pen and use a razor or sharp scissors to cut the “V” notch shown in my previous post as it cools, we have our holder http://www.plastimake.com/technique/using-tools.
Next, all we need to do is heat a “Pea Sized” amount of the newly identified “medium” to place in the holder. Insert our knife blade and then either place it in the freezer for a few minutes or submerge the holder and blade under cold water. Bingo again!, we have a perfectly molded edge and the whole thing can be used over and over again. I understand we can also purchase pigments so that the medium when viewed under a microscope or camera so we can easily distinguish between the medium and the background under it. This will make our measurements much more accurate. I bet that if we used a can of compressed air, we could get it to cool without Ice, water, or a Freezer for a perfect portable solution. I was thinking about using a two cup instant hot water kettle made by Geepas to heat the thermoplastic polymer which is also portable ( http://www.geepas.com/product_detail/geepas_product/1434/GK5447#.Vw-vm0ce-c0.)
According to my research on the polymer, it doesn’t stick to metal and if we do see it, we can use a tiny amount of vaseline to allow it to be removed easily from the medium in the holder.
This may be the prefect answer to the medium, now I just need to wait to get some. If you beat me to it, post your results as soon as you get them. Thanks everyone!
Eddie Kinlen
M1rror Edge Sharpening Service, LLC
+1(682)777-16223 users thanked author for this post.
04/14/2016 at 2:38 pm #33418Great find guys. I ordered some too. Thanks for this great topic!
-Clay
1 user thanked author for this post.
04/14/2016 at 4:58 pm #33420all we need to do is heat a “Pea Sized” amount of the newly identified “medium” to place in the holder.
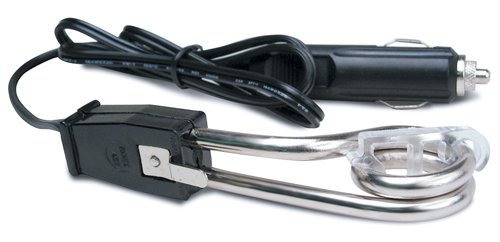
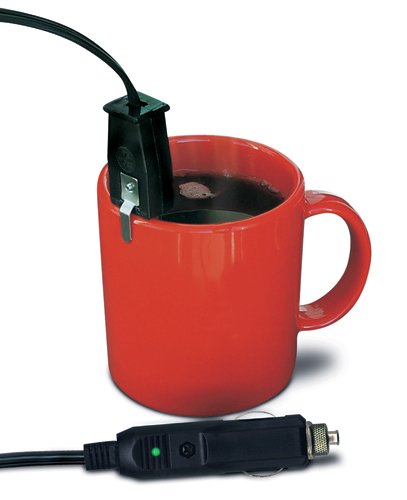
I was thinking about using a two cup instant hot water kettle made by Geepas to heat the thermoplastic polymer
I would not be surprised if we do not need a holder at all. I think you would only need a small piece, push the knife in and let it harden. If I would have the need to heat the polymer away from home, I would probably use a portable instant immersion heater.
Attachments:
You must be logged in to access attached files.
04/15/2016 at 5:35 am #33425I like the water heater Frans I had forgot about those
 . One of the reasons I keep mentioning the “holder” is because of my earlier experimentation with putty and play dough. What I was finding is… when I removed the blade edge from the putty, the stickiness or maybe “micro suction” or frictional forces applied to the medium was causing deformation of the angles upon blade removal. I saw this with the candle wax and play dough crucible as well (just not as dramatic). The wax was much more stable, in fact, all of the impressions I made with wax are still in near perfect condition today.
In my opinion, all the holder does or would do for us is to apply equal pressure and leverage around the medium to prevent this phenomena. Because of the size of material we are working with, I believe it will help us gain leverage. I realize now, we are in a whole new realm of possibility with this thermoplastic as it will harden exceptionally more than the clay and the wax. I expect little or no deformation of the angles upon edge removal with the thermoplastic. We will have to experiment further but believe we still may need leverage to remove the blade edge “cleanly”.
Study the photo of my earlier holders a little. Notice the holder just like a standard mold helps to make the impression and keeps the medium flat. When the added pressure of the blade edge is inserted, the holder causes back pressure on the medium to ensure a tight fit around the impression medium and blade edge. The famous phrase by Sir Isaac Newton comes to mind; “For every action, there is an equal and opposite reaction”. This may the way to mitigate the reaction. Just like with the wax, I believe we may need to trim the material a little to expose a perfect profile of the edge impression that will be placed parallel to camera lens.
I expect that we will need to wait until the thermoplastic hardens a little prior to inserting the blade edge. We will rapidly cool it and then we will require the leverage to remove the blade without causing and deformation of the edge impression.
Since the discovery of the thermoplastic, I have been browsing videos of “artsy types” molding Jewelry and other “things” with the thermoplastic (No disrespect). This is what has led me to some of my hypotheses. I have been studying how they are doing it, not so much the why. I am finding that the thermoplastic sets quickly and that it does stick to some surfaces. We want a tight bond to the edge initially (For accuracy), however, we also need it to break free cleanly. Once we have a clean impression, we need to be able to position it perfectly for its photo.

Has anyone studied Todds blog at; http://www.scienceofsharp.wordpress.com? If you have, than you know why I am so excited about this and the possibilities. For the first time, we may not need a Scanning Electron Microscope (SEM) to accurately measure the angles of the edge and the width of the metal behind the edge. I like how the world is beginning to define “sharp” or “Keenness” with evidence. This may make it possible for average persons to compare edges and make real improvements. “Sharpness through symmetry”.
Eddie Kinlen
M1rror Edge Sharpening Service, LLC
+1(682)777-16223 users thanked author for this post.
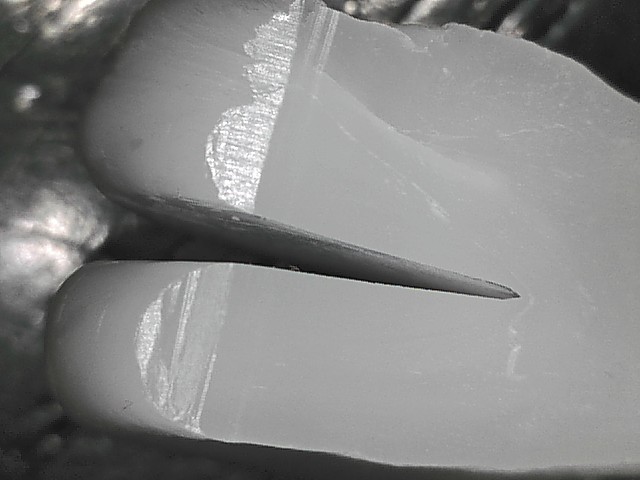
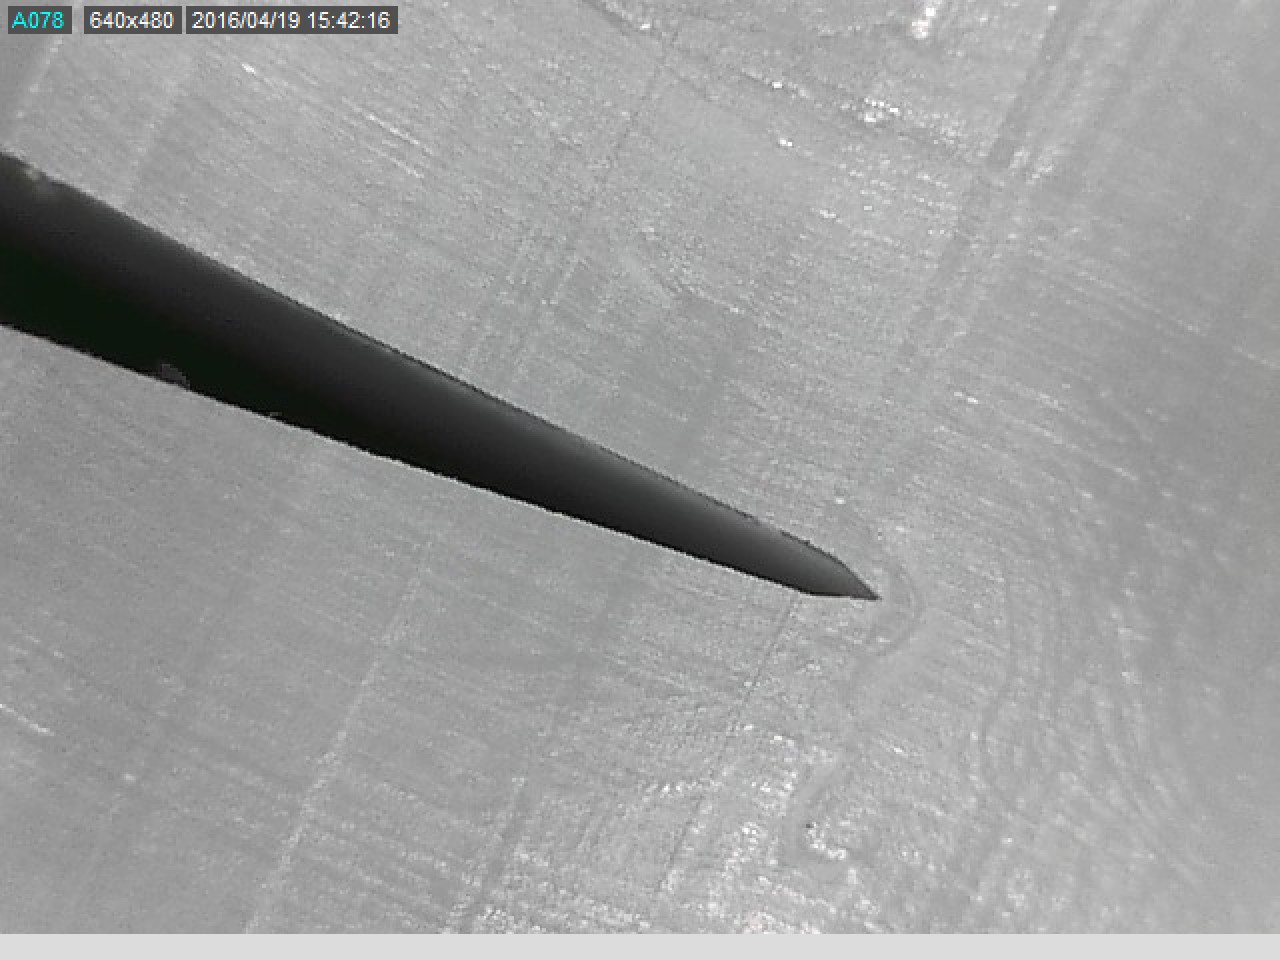
04/19/2016 at 8:04 am #33466Well, I just received Polymorph that I ordered from http://www.polymorphplastic.co.uk/ and did a quick test by just pushing a small bubblegum size amount on the edge and let it harden. I am very pleased with the results.
Frans
Attachments:
You must be logged in to access attached files.
3 users thanked author for this post.
04/19/2016 at 9:01 am #33469That looks great Frans! My batch of ThermoMorph came in yesterday and I’m hoping to try it out today.
-Clay
-
AuthorPosts
- You must be logged in to reply to this topic.
