(Dis)assembling Pro pack 3
Recent › Forums › Main Forum › Welcome Mat › (Dis)assembling Pro pack 3
- This topic has 33 replies, 6 voices, and was last updated 02/16/2017 at 5:15 pm by
tuffy braithwaite.
-
AuthorPosts
-
02/11/2017 at 11:07 am #37263
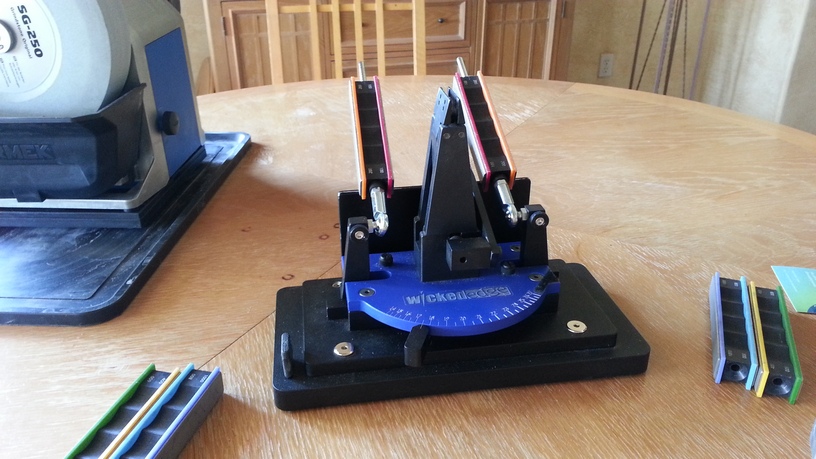
I’ve got a Pro Pack 3 on loan from a local knife store. Due to a problem with my shoulders I need to sharpen my knives at a pretty low level. The PP 3 is pretty high, mainly due to the additional storage it has for stones and other accessories.
So it was my intention to remove this storage and to directly attach the sharpener to the base. So I started disassembling the PP3. It even has the necessary tools.
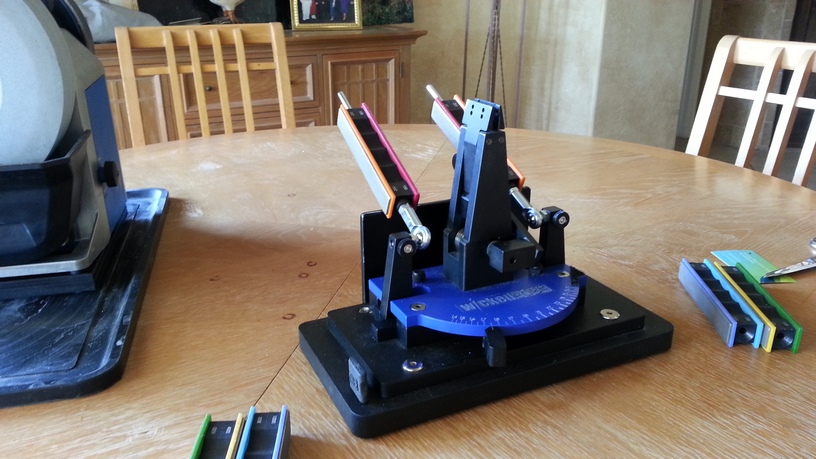
Removing the sharpener was easy. See below.

However, when I wanted to remove the part for stone storage from the base (see below) I ran into major problems.

The screws seem to be made of a different material (black, maybe hard plastic or hard rubber) and the tools didn’t fit properly. In the end I was not able to move any of the screws only a little part.
Is there anyone who can help me?
Molecule Polishing: my blog about sharpening with the Wicked Edge
1 user thanked author for this post.
02/11/2017 at 11:30 am #37264Mark76, I purchased my Pro Pack 3 from WE without the storage rack with a granite base. The flat black base (in your first picture) mounts flat to the granite through the four holes in mine. It doesn’t mount to the base from the storage shelves. Hope that helps.
Marc
Marc
(MarcH's Rack-Its)02/11/2017 at 1:31 pm #37265Hey Mark,
I removed the stone storage from my Gen 3 Pro the first week I had it. I did it because the storage section made the sharpener too high for me when sitting at dining room table or picnic table. I like to sharpen while sitting down, and the sharpener was just too high for me.
After separating the storage unit, I ran into a problem when mounting the top plate to the lower: There is a small protrusion of the sharpener which sticks out from the bottom of the top plate. I placed the plates together as well as I could and moved them around, so as to make a mark of where the the protrusion would be on the top of the bottom plate. I then drilled out a small part on top of the bottom plate, for the protrusion from top plate to fit into. Worked perfectly! I can’t show it to you, as it is covered up when I mounted the plates together.
I made several trips to Ace hardware in order to find the right size and length of bolts to attach the two plates together. I’ve been extremely happy with the results.
The bolts on the bottom require a hex key, same as on the top, but I can’t remember, they may be a different size.
Alan
Attachments:
You must be logged in to access attached files.
02/12/2017 at 6:02 am #37271i too want to lower mine now that i have started using it again. man it is way to high for me…….i have it mounted on really low table that my knees hardly fit under now……i like to sharpen sitting down also and the old WE mounted on granite base was perfect……
.
please continue this post, i need more insight……thanks
02/12/2017 at 1:53 pm #37275Thanks guys.
MarcH, so basically you’re saying the top plate cannot be easily (using the existing bolts/holes) be mounted to the bottom plate?
And Alan, you managed to drill out a small hole in the bottom plate where the protrusion from the top plate fits in, but how then did you attach the top plate to the bottom plate? From your remark on the bolts on the bottom plate I get the impression you removed these bolts and then re-used the holes to mount the top plate, but that is in contrast to what MarcH says (if I understand things correctly).
And does anyone have any idea how to remove the bolts from the bottom plate? The largest hex key supplied with the PP3, which can be used to remove the bolts from the top plate, also seems the right size for the bottom plate. (The other two hex keys supplied with the PP3 are too small.) However, I cannot seem to get a grip on the bolts in the bottom plate due to the material they are made of (plastic or rubber or something similar).
Molecule Polishing: my blog about sharpening with the Wicked Edge
02/12/2017 at 8:05 pm #37279Thanks guys. MarcH, so basically you’re saying the top plate cannot be easily (using the existing bolts/holes) be mounted to the bottom plate?
Hey Mark, Just how yours is pictured in your first top photo is how mine came along with the separate granite base. WE supplied the hardware and all I did was bolt it together. Honestly, I don’t remember if anything protruded below the first smaller plate that would require a notch or depression to be carved into the base you choose to mount it to. I don’t know if the second larger plate can or can not be removed the shelf portion. Hope that clears the confusion.
Marc
Marc
(MarcH's Rack-Its)02/12/2017 at 10:42 pm #37284in one of clays videos he has just what we need sitting on desk
will call monday and find out
.
.
Attachments:
You must be logged in to access attached files.
02/13/2017 at 4:51 am #37288Tuffy, if you have a link to that video, that’d be highly appreciated. And of course we’re interested in what WE has to say.
Molecule Polishing: my blog about sharpening with the Wicked Edge
02/13/2017 at 6:04 am #37289Tuffy, if you have a link to that video, that’d be highly appreciated. And of course we’re interested in what WE has to say.
.
here you go guys
.***********
this guy has one also
.
1 user thanked author for this post.
02/13/2017 at 7:16 am #37291The Gen 3 is next on my list to purchase.
1 user thanked author for this post.
02/13/2017 at 9:43 am #37296Thanks for the vids, Tuffy!
But I’m still curious how the guy from the bottom video managed to remove the bolts from the bottom plate and how he mounted the top plate onto the bottom one
 .
.Molecule Polishing: my blog about sharpening with the Wicked Edge
1 user thanked author for this post.
02/13/2017 at 9:45 am #37297Hey guys,
That second video posted by Tuffy, entitled “WE Pro 3 Modifications” is mine. I posted it about a year ago after receiving my Gen 3 Pro. Hope you guys enjoy!
One thing not yet mentioned in this thread, is that when you remove the shelving section, the plastic back plate no longer fits. In my video you will see that I fabricated a small section of aluminum to take the place of the plastic.
Alan
02/13/2017 at 9:49 am #37300Mark,
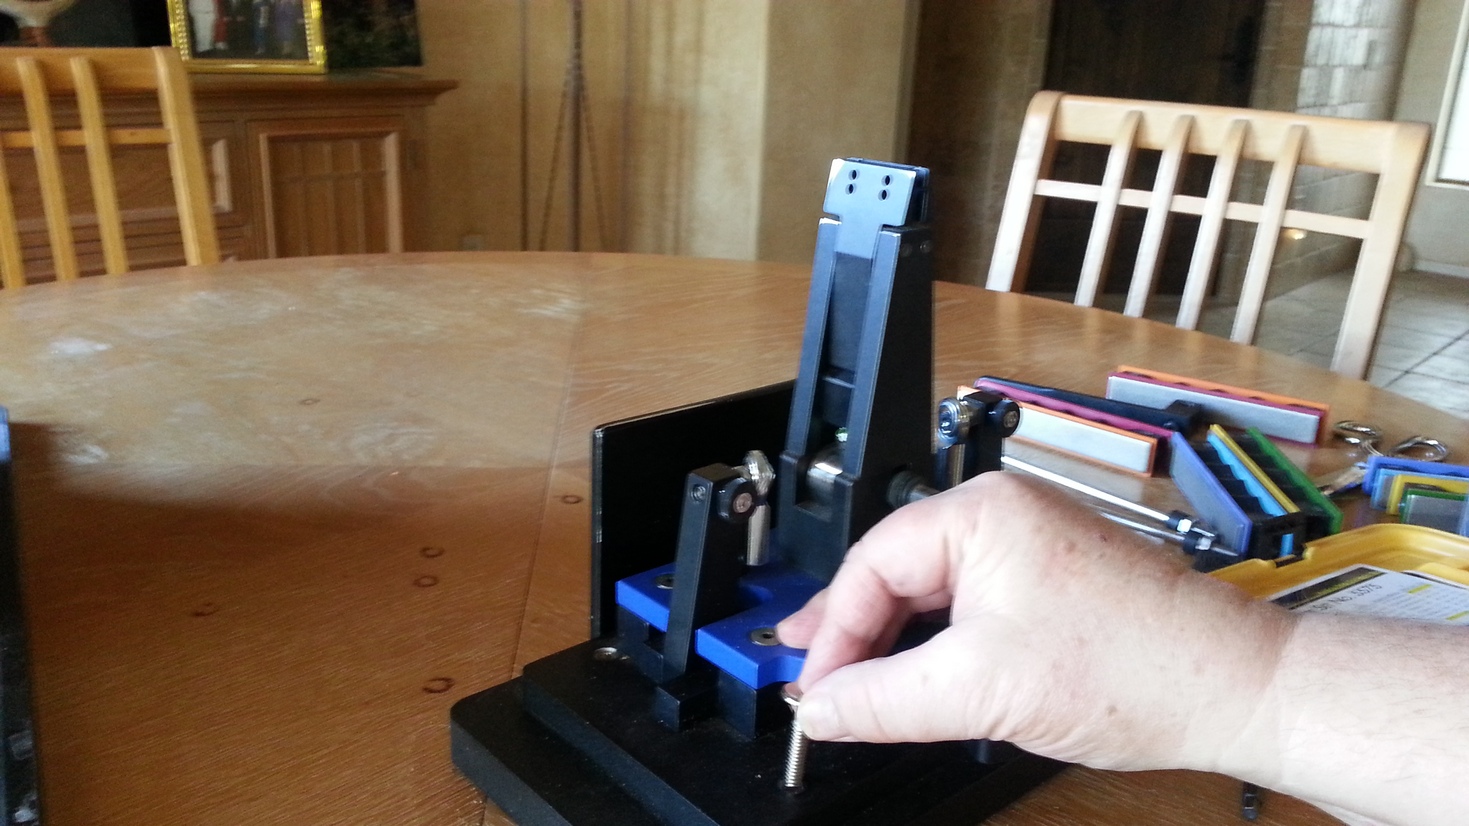
Give me a little time and I’ll detail more clearly how I attached the two plates together. You’ll have to make a trip to the hardware store, as you cannot do it with the supplied WE hardware. I think I spent less than $10 to for the hardware. Stay tuned for a few more photos.
Alan
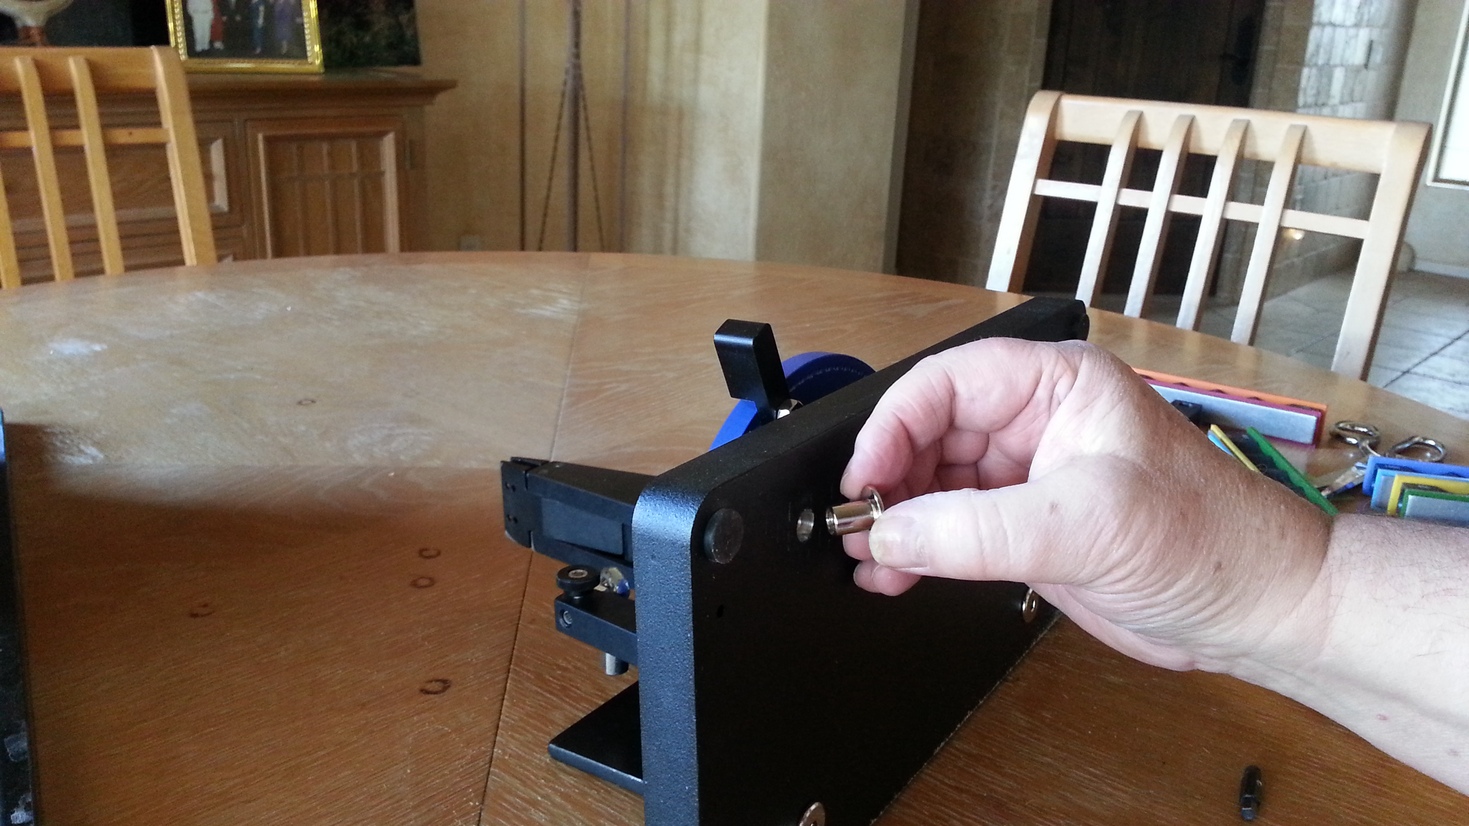
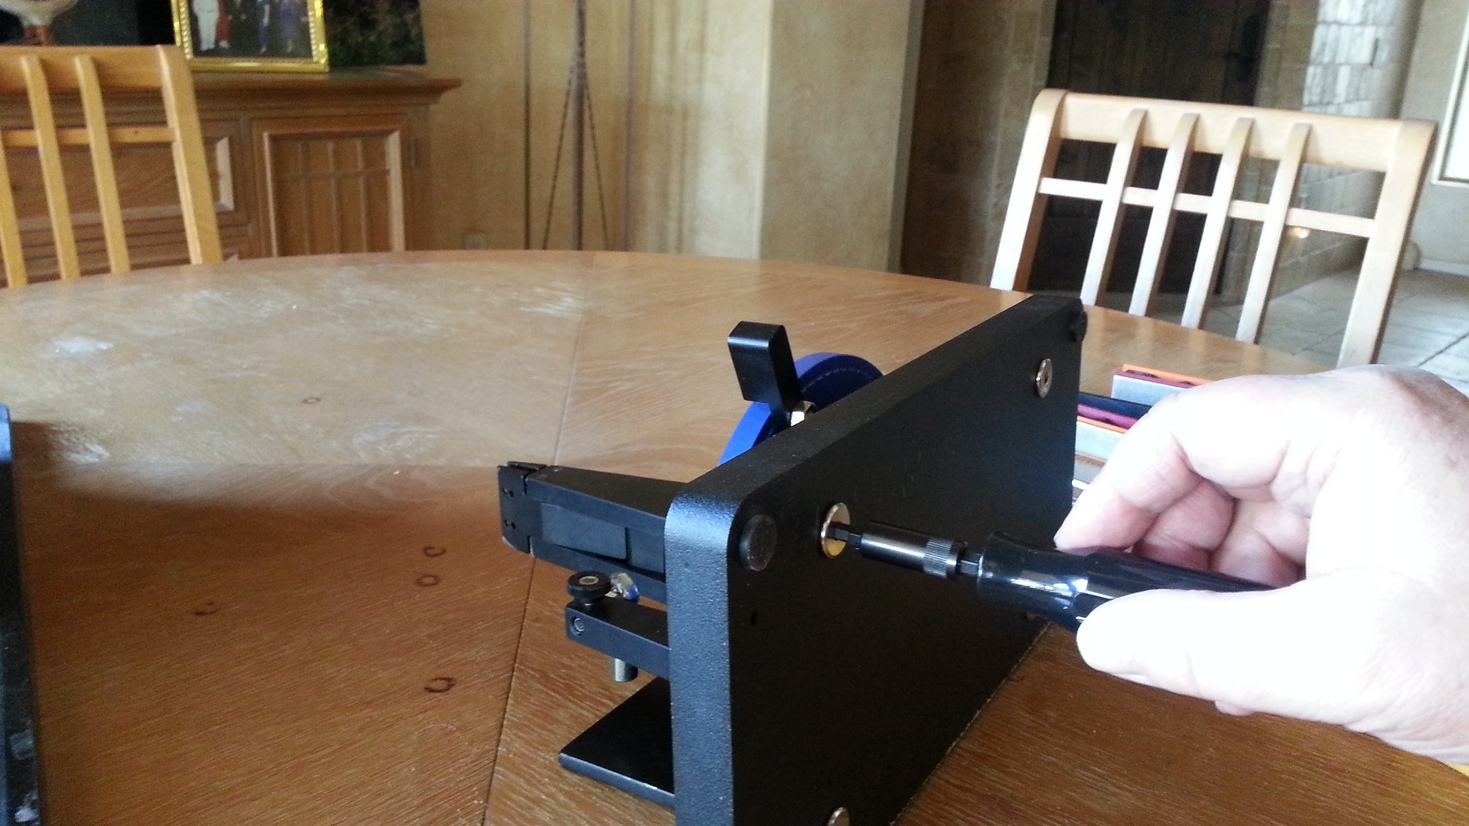
02/13/2017 at 10:49 am #37302Okay guys, first off, you will need to make another back plate, as the plastic WE plate will no longer fit. I guess you could trim down the WE plastic if you wanted to. Here’s a plate I made of aluminum for mine.

Once you remove the WE he bolts, you will find that the threads for these bolts are in the side panels that hold the two horizontal plates. The two plates have threadless holes, four each per plate. At the hardware store, find the type of bolts as in photos, sorry I don’t know what you call them.
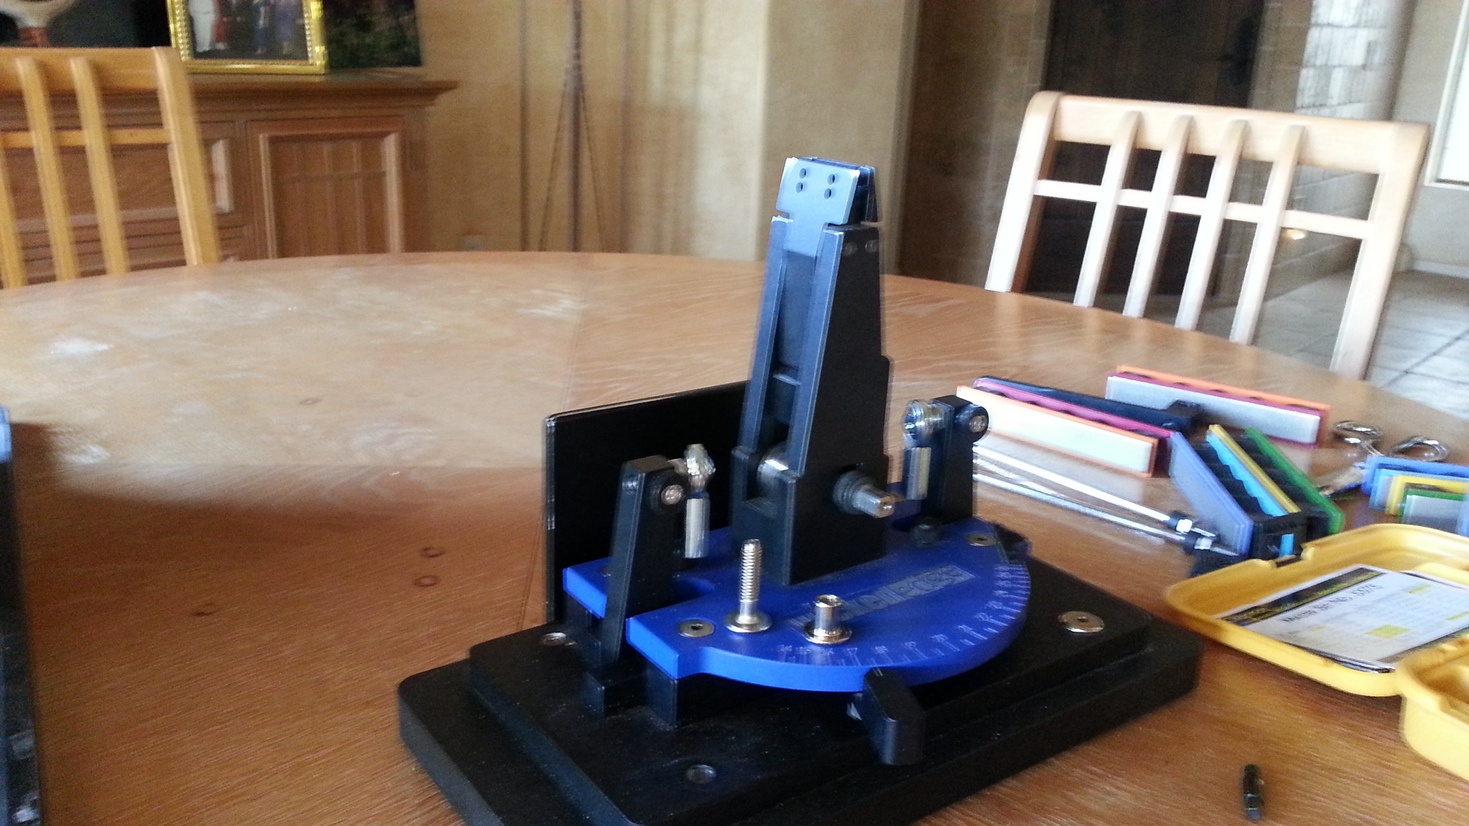

(photo limit reached, continued next post)
Alan
Attachments:
You must be logged in to access attached files.
02/13/2017 at 10:51 am #37307 -
AuthorPosts


- You must be logged in to reply to this topic.