Advanced alignment guide
Recent › Forums › Main Forum › Product Announcements › Advanced alignment guide
- This topic has 189 replies, 22 voices, and was last updated 05/24/2016 at 3:13 am by
 M1rrorEdge.
-
AuthorPosts
-
01/12/2016 at 1:14 am #30565
I am all for it, if it helps with having my knife aligned and clamped in the same spot every time it is better for me and my knife. That’s one of the benefits of the WEPS that I love, I can throw it in the clamp with the ruler on there and know it is in the right spot without having to guess which saves time and removes less steel from the blade. Could I eyeball it without the ruler yeah, but I don’t because it is less precise. And I would print the lines on the grid with a neon green or blaze orange. Something that will really stand out against the knife and any background.
01/12/2016 at 7:33 am #30567Anonymous
Inactive- Topics: 14
- Replies: 427
I thought long and hard before posting this. I still want to qualify my thoughts as not being argumentative, but only in the fact that I don’t understand. With that in mind again if this post is counter productive, please remove it.
Here are my thoughts: There seems to be some concern and specificity on the placement ( the correct placement of a knife within the jaws. forward, back , tilt, etc. So if you don’t know how to place the knife in the jaws in the exact right place, repeating the wrong place to set the knife in the jaws using a guide, would only insure a repeat of the wrong placement… So my question is how do you determine the correct placement ?,, I would like to read how the determination process for that double recurve knife would look like. what the mental consideration would be to correctly place that knife in the jaws, and how to test its correct placement. My point here is if you don’t set it up correctly, a guide to that wrong placement would only insure wrong placement.
Furthermore, where do you place the cube to determine the angle, because any point above the horizontal reference point on the edge will decrease the angle at that point, and anything below the horizontal plan of that reference point ( set point for the cube ) will decrease the angle.
If you actually run the cube across the edge of a knife like this you will see the angle change from tip to heel. IN my opinion the best advantage to minimize the variance in the angle would be to split the difference between high points and low points. of this particular knife.
1 user thanked author for this post.
01/12/2016 at 9:47 am #30568I chose to position that knife so the paddles swept the blade in a perfect arc with an up sweep towards the hilt. This minimized bevel angle fluctuation that could make the bevel height appear thick and thin and wobbly looking like a fun house mirror..
That would be my step #1 to use the “sweep” method that Josh has shown in his video and hopefully everyone have seen.
Step #2 would be to attach the grid and document the knives placement.
Step #3 is actually happening as we speak. The customer has contacted me to redo this knife 6 months later….if I had “grid documented” it is could probably start at 1000 grit and go directly to a mirror polish process from there.
Without it finding the exact same mounting position is very hard and has caused much real world time & frustrations with my own personal collection, notably the Para II.

Attachments:
You must be logged in to access attached files.
2 users thanked author for this post.
01/12/2016 at 10:26 am #30570So, let me reiterate what I use, as I think it’s superior to the grid or even the ABCD strip. I say superior because it’s more accurate and faster in documenting or repeating a clamping position. I simply measure the distance from the back face of the vise to the tip of the blade in millimeters. I record this measurement and which key position is used, high or low. I ALWAYS use both pins in the key to locate the spine, just as WE has been recommending for years. It doesn’t matter if the spine is straight or curved.
To reclamp the blade in its correct position, I use my steel mm ruler to mark the exact recorded position on the blade with a Sharpie. I normally then put a piece of tape at that point to protect the blade and mark the point at which I want the blade to be clamped. Since a knife’s spine is unlikely to ever be modified, I hold the spine against both key pins and with the tape (or Sharpie) mark aligned with the back face of the vise. When it’s in position, clamp it.
Yes, you are somewhat limited in accuracy by the precision of the key, but it sure works for me. The vertical location of the tip will be repeatable because of the alignment of the spine, so it doesn’t need to be recorded. Yes, there are certain instances, as when doing the tip bevels on a Tanto where you need to also record the vertical position of the tip as well, but for the vast majority of blades, it works for me.
Please give this a try and tell me if this isn’t quicker than and at least as accurate as any alignment guide.
01/12/2016 at 10:44 am #30571Anonymous
Inactive- Topics: 14
- Replies: 427
It took me 10 seconds to lay this knife out… 6 months from now, it would take me ten seconds. If the knife dimensions never change , then neither does the lay out.. in this picture using my set up, the vertical line is the center line ( C/L ) . This line is where I put the knife in the center of the jaws. now all I have to do is tilt the knife in the jaws until the horizontal line is parallel with the base.. easy peasy . it will also make the vertical C/L exactly 90* degrees to the base. Note… the center line is 90* degrees to the horizontal line.
 01/12/2016 at 10:48 am #30572
Anonymous
Inactive- Topics: 14
- Replies: 427

 01/12/2016 at 11:20 am #30573
…The customer has contacted me to redo this knife 6 months later….if I had “grid documented” it is could probably start at 1000 grit and go directly to a mirror polish process from there. Without it finding the exact same mounting position is very hard and has caused much real world time & frustrations with my own personal collection, notably the Para II.

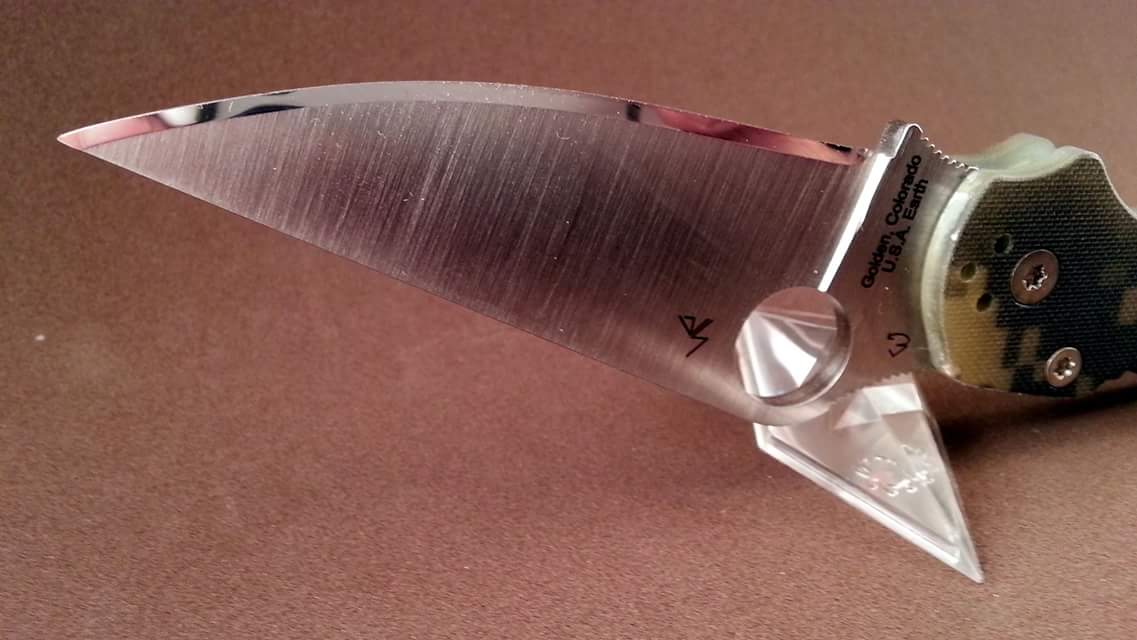
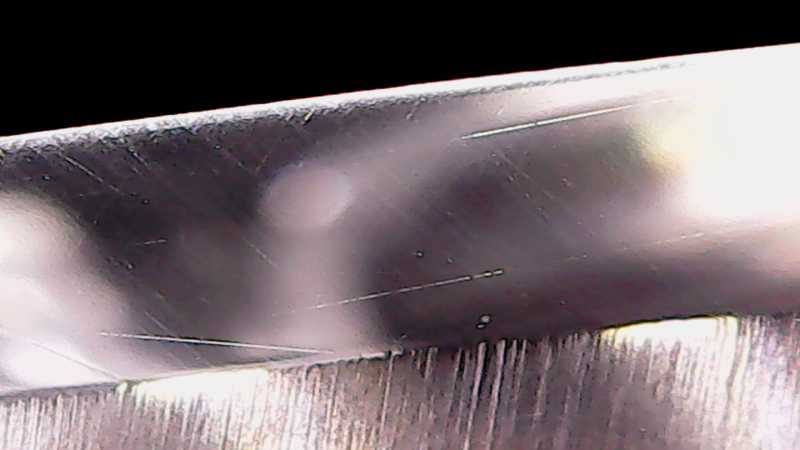
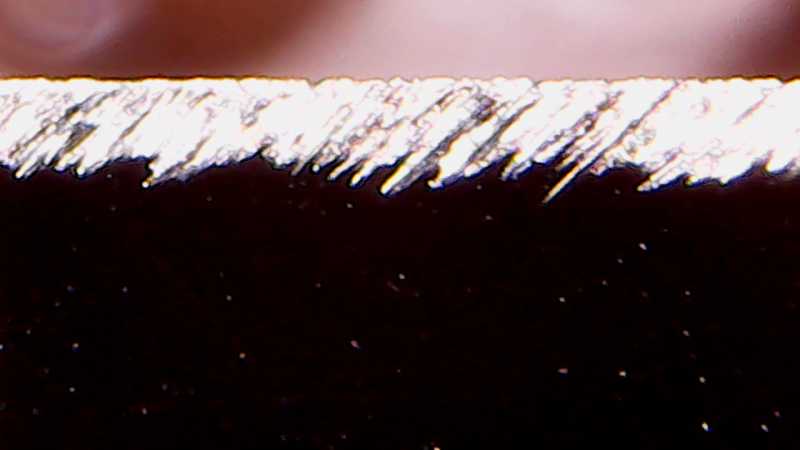
That’s just the scenario I think the card will be helpful for. That’s a great looking edge. Is that a little micro-bevel I see?
-Clay
01/12/2016 at 1:56 pm #30577It took me 10 seconds to lay this knife out… 6 months from now, it would take me ten seconds. If the knife dimensions never change , then neither does the lay out.. in this picture using my set up, the vertical line is the center line ( C/L ) . This line is where I put the knife in the center of the jaws. now all I have to do is tilt the knife in the jaws until the horizontal line is parallel with the base.. easy peasy .
Couple things would get in the way of a 10 second clamp n go approach with this knife…
First this particular Paramilitary II was sharpened at 12 degrees per side. The diamond paddles will bottom out and hit the vice unless an alternative method is used. Also the steel is s30v, and with a bevel width from top to bottom close to 2mm wide, angle matching importance is increased or much time would be spent rebeveling ALOT of fairly ahrd metal.
2nd, as you can see this is a full flat grind knife. I do not have the new self centering gen3 vise so either shims or offset calculations would be needed to center the blade side to side. What I would suggest would be to clamp down on the flat area near the base of the blade by the ricasso and tilt the blade to match the sweep of the stones(as shown in the now infamous Josh Sweet Spot video :)) . I would then document the blade. Perhaps with a convenient yet inexpensive grid overlay?

Third, the verticle(and horizontal) positioning of the blade comes into play. If the verticle clamped position is changed even a little bit, then the radius would change right? You could still angle match at top dead center but at the tip & heel the angles would be slightly different from the first time. Same thing applies for the horizontal. If the blade is tipped slightly more up or down, then originally sharpened, then the angle at those ends won’t be the same, again even if you angle match at top dead center over the vise.
These things may not come into play on a normal “clamp n go” resharpen to 600 grit but when you have spent painstaking hours polishing a blade to .5u using a 400x scope to remove every scratch it matters, it certainly does when you go to revisit the blade.
There is a very good reason why I just keep redoing the micro-bevel on my Para II….its because of the fact that I didnt document accurately the original position it is now physically impossible to determine the exact original placement of the knife without ruining hours of work. I tried multiple times by placing the blade the very closest I could, marking with a sharpie, micro adjusting the angle, etc etc etc etc! You know what it got me? Pain & suffering and a whole bunch of new bevel facets in the flawless face of the edge bevel.

It was a trainwreck of epic proportions on a microscopic level, and it took me slightly longer then 10 seconds to determine this.


Attachments:
You must be logged in to access attached files.
1 user thanked author for this post.
01/12/2016 at 2:35 pm #30581Anonymous
Inactive- Topics: 14
- Replies: 427
I guess, my expectations are different than yours.. sharpening a knife is not rocket science, at least not to me, and I don’t want to appear to be changing the flow of the discussion. I’m just a New guy here, who has learned a good bit over the last month, but what I have learned, for the most part, was self taught. When I’ve asked why ? I have not received a clear answer, one that I could digest. At this point, I do not want or need a clear answer… I am very happy that I have found the Wicked edge system because it corrected the one variable in my former attempts to sharpen a knife over the last 50 years. IN the last 4 weeks, I have made about 40 knives so sharp, they are scary, I’ve done a couple for friends, and every time I see them, they thank me. I do not want to ruffle anyone’s feathers over this so I will not get further involved.. I may have said that earlier in this thread, but returned asking for a clear and précises method to set up a knife in the correct spot and at the right angle.. I’ve also asked how this is computed, and what are the considerations in the set up… how do you calculate the original set up, and insure it is the right set up? because for me, the angle is set up using the cube, no matter how shallow or deep the knife sits in the vice. If you use the guide pins as the point of reference or a locating face for the card, now you have to not only place the card correctly, you also have to place the knife correctly. I think I might be becoming argumentative… IM still loving the results I get with the WE. My ZT tiger 350 S30V

I guess my good enough edge, is good enough for me… IM not a professional knife sharpener and do not aspire to be one. I also respect those of you who have made this interesting and thought provoking.
01/12/2016 at 3:30 pm #30584That’s just the scenario I think the card will be helpful for. That’s a great looking edge. Is that a little micro-bevel I see?
Thanks Clay! Why yes that is a micro-bevel.
 Originally set at 15dps 1000 grit, currently same dps, but down at super aggresive 200 grit like you/we were testing a while back.
I found the 200 grit to be a bit aggressive for my personal taste. Somewhere between slicing thru a truck tire and push cutting a phone book is a happy medium. LOL
01/12/2016 at 3:53 pm #30585Hey Evil Twin:
While your method gets an ‘A’ for consistency, the reason it doesn’t really work is because the angle will change incorrectly as you travel down the blade, especially around the belly toward the tip, and you’ll end up with some very uneven bevels, especially if you reprofile a knife. I’m surprised you haven’t already seen this… one reason might be you’re picking an angle that “best fits” what’s already on the knife…. nothing wrong with that if that’s what you desire, but most who sharpen also reprofile the edge in which case you’ll see some very uneven results.
To give you an example… here’s a knife I set in the clamp using your method…
I marked the edge with a Sharpie, then I set an angle of 18 deg. using the angle cube, and then took a swipe down the blade. Here’s the result…
Notice that as the stone travelled down the blade edge, it started near the edge, but as it approached the tip it moves away from the edge? So the end result… if I went ahead and sharpened the knife, I would end up with a very wide bevel at the tip.
BTW, I also noticed in your photo that you have a double bevel in at least part of the edge…
Notice, especially above the g and i, the reflection shows at least 2 bevels? It seems to trail off as it goes toward the tip, although hard to tell since the curve changes the reflection. Not sure why… wondered about it though.
Anyway… hopefully this answers your question. Your setup will be consistent, but your setup also places the path of the edge outside of the path needed to keep a consistent angle down the entire edge… especially as it curves toward the tip. As Mark and others have pointed out, the angle won’t change along the straight portion of the blade but will change in the curved portion as you approach the tip. Finding the “sweet spot” is setting the blade so that the angle in this area stays as close as possible to the straight area, so that a consistent bevel is obtained (or whatever angle you want at the tip… you could for example set it so the angle was higher giving a stronger tip… etc. One problem at a time though… for now I’d concentrate on consistency).
Hope that helps. Your method can work on some knives, depending on the size and angle you pick, and if it works for you that’s what matters, but overall, it won’t maintain a consistent angle down the edge that most sharpeners like to achieve, especially in a reprofile.
Attachments:
You must be logged in to access attached files.
3 users thanked author for this post.
01/12/2016 at 11:04 pm #30604Sharp as always, Curtis. And welcome back!
Molecule Polishing: my blog about sharpening with the Wicked Edge
01/13/2016 at 8:38 am #30612Nice to see you Curtis!
-Clay
01/13/2016 at 8:40 am #30613For those of you that don’t know Curtis (cbwx34), he’s been a huge help here over the years, as a moderator, answering tech support emails for the company and contributing tons of sharpening experience to the conversations.
Curtis, one of these days you’ll have to stop by and check out out the new place, maybe grab some lunch.
-Clay
01/13/2016 at 4:21 pm #30621Thanks.
I saw that you had moved… was hoping it would be further south.
 Looks good though!
 -
AuthorPosts
- You must be logged in to reply to this topic.


