Super blue steel
Recent › Forums › Main Forum › Super blue steel
- This topic has 54 replies, 8 voices, and was last updated 03/01/2016 at 3:01 pm by
Darragh O’Flaherty.
-
AuthorPosts
-
02/24/2016 at 5:04 pm #3157602/24/2016 at 5:08 pm #31580
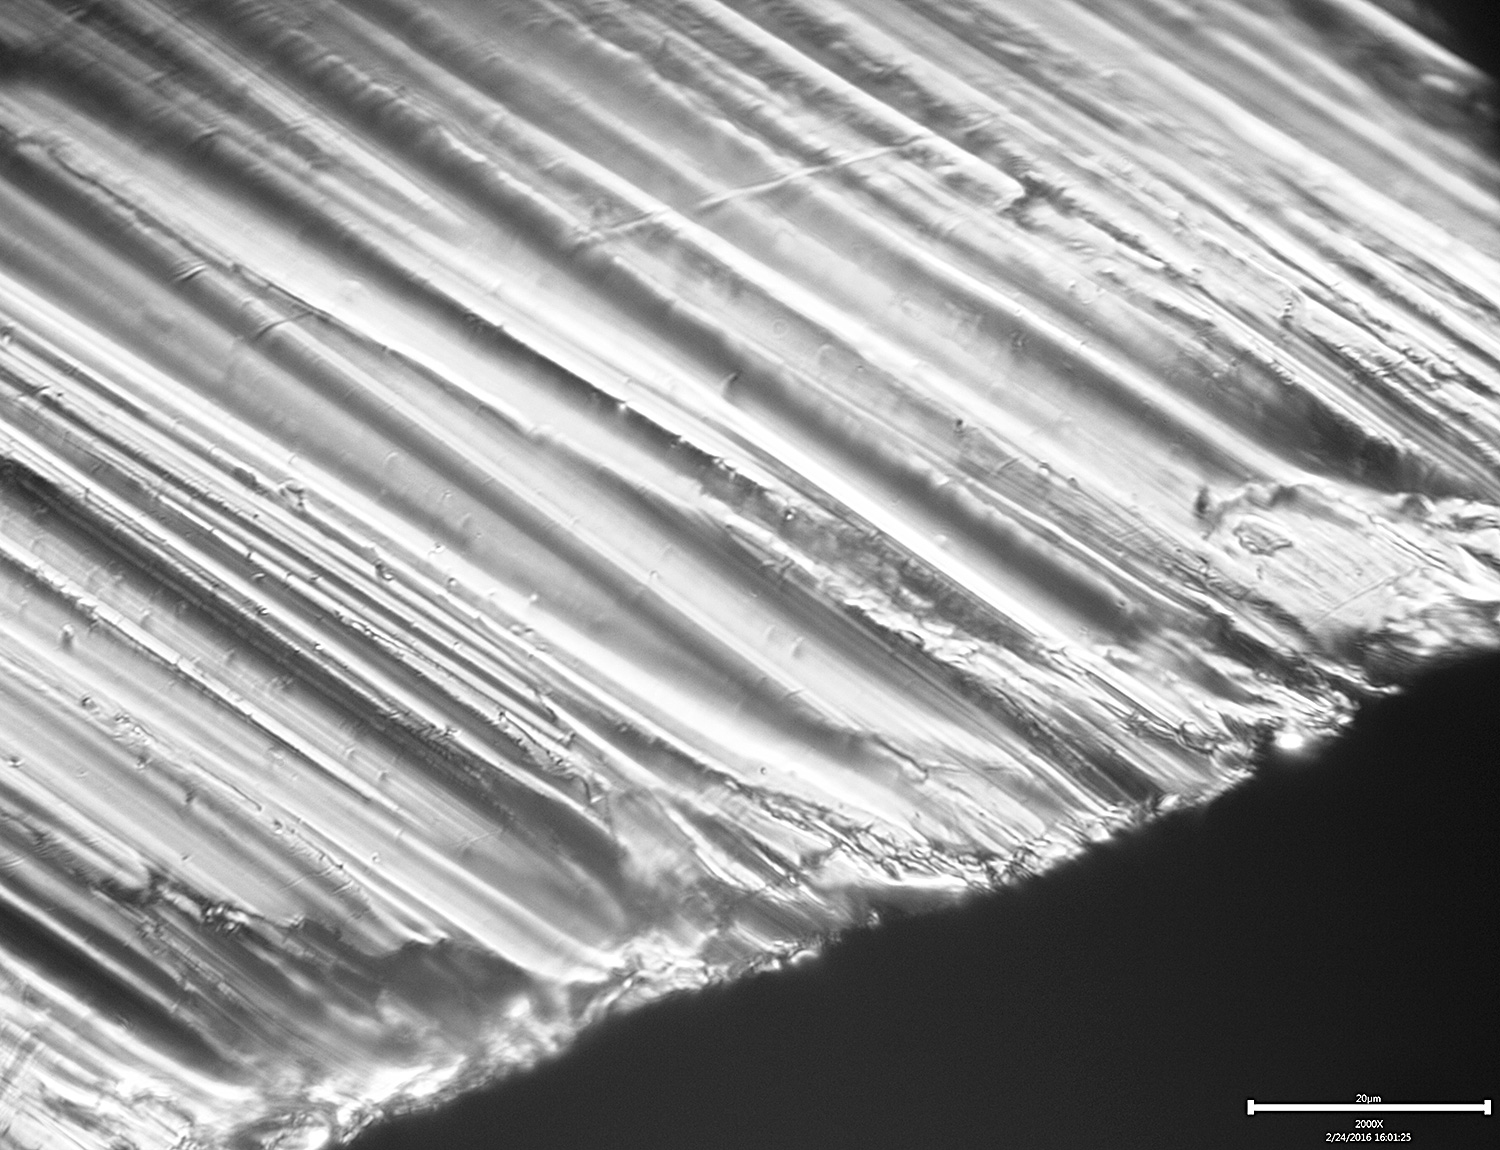
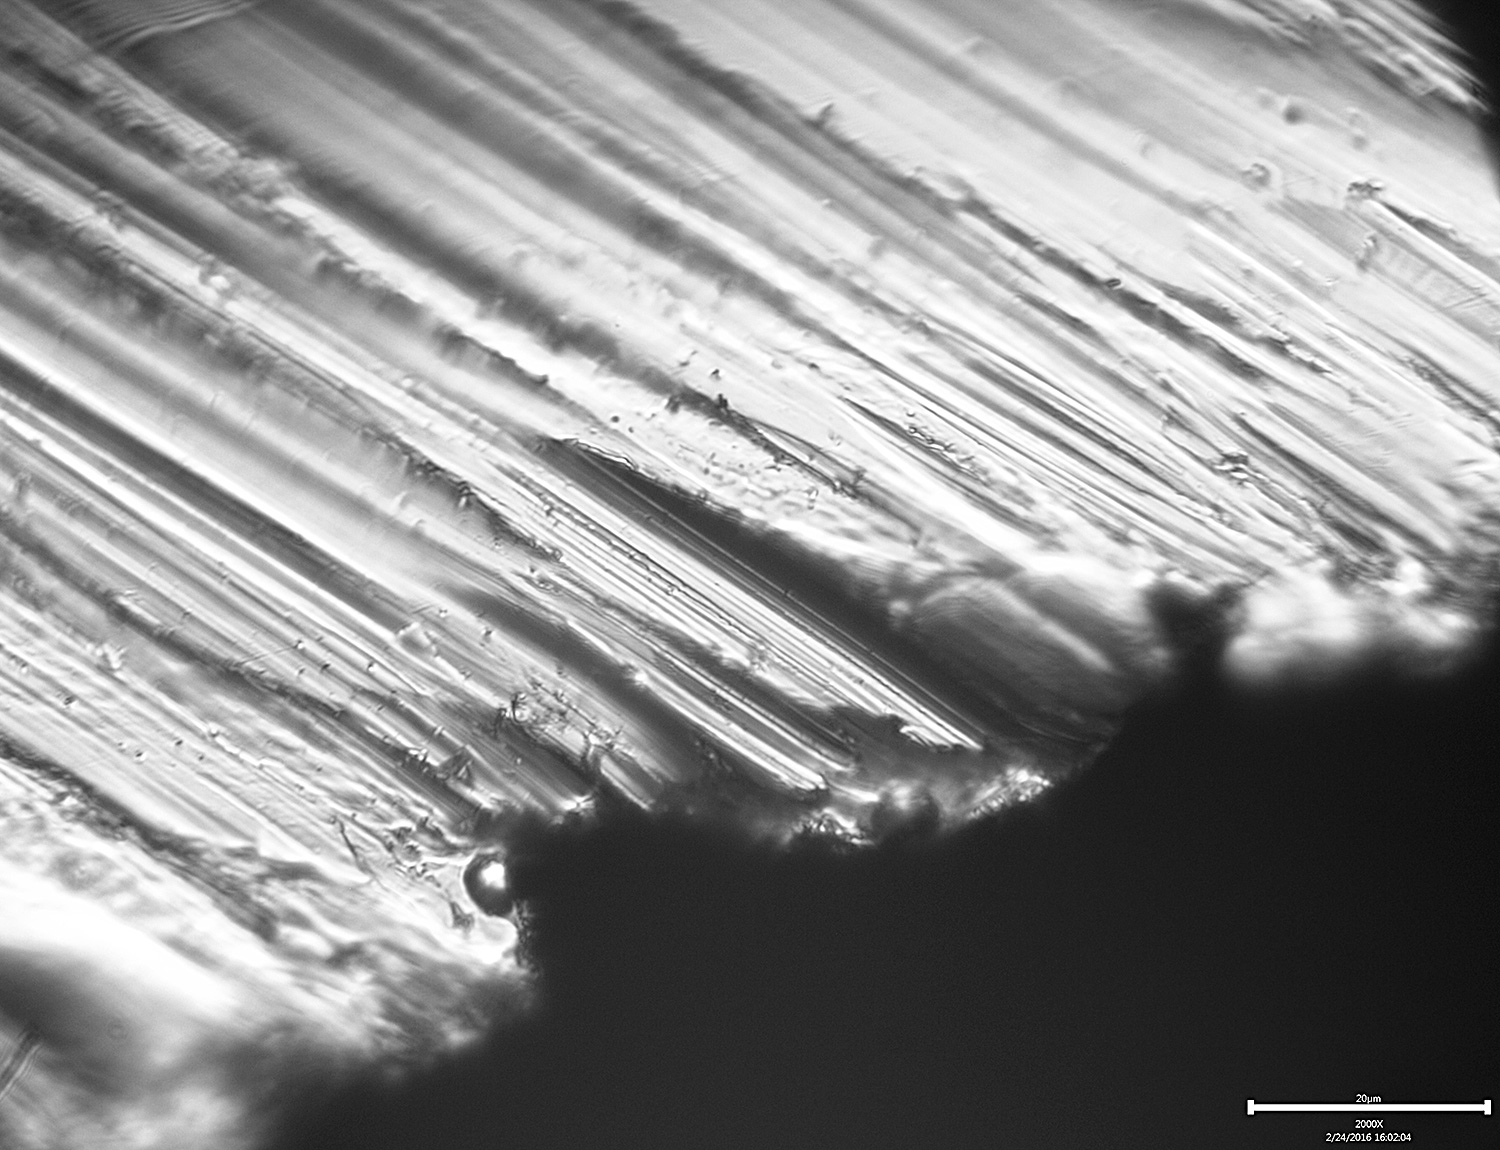
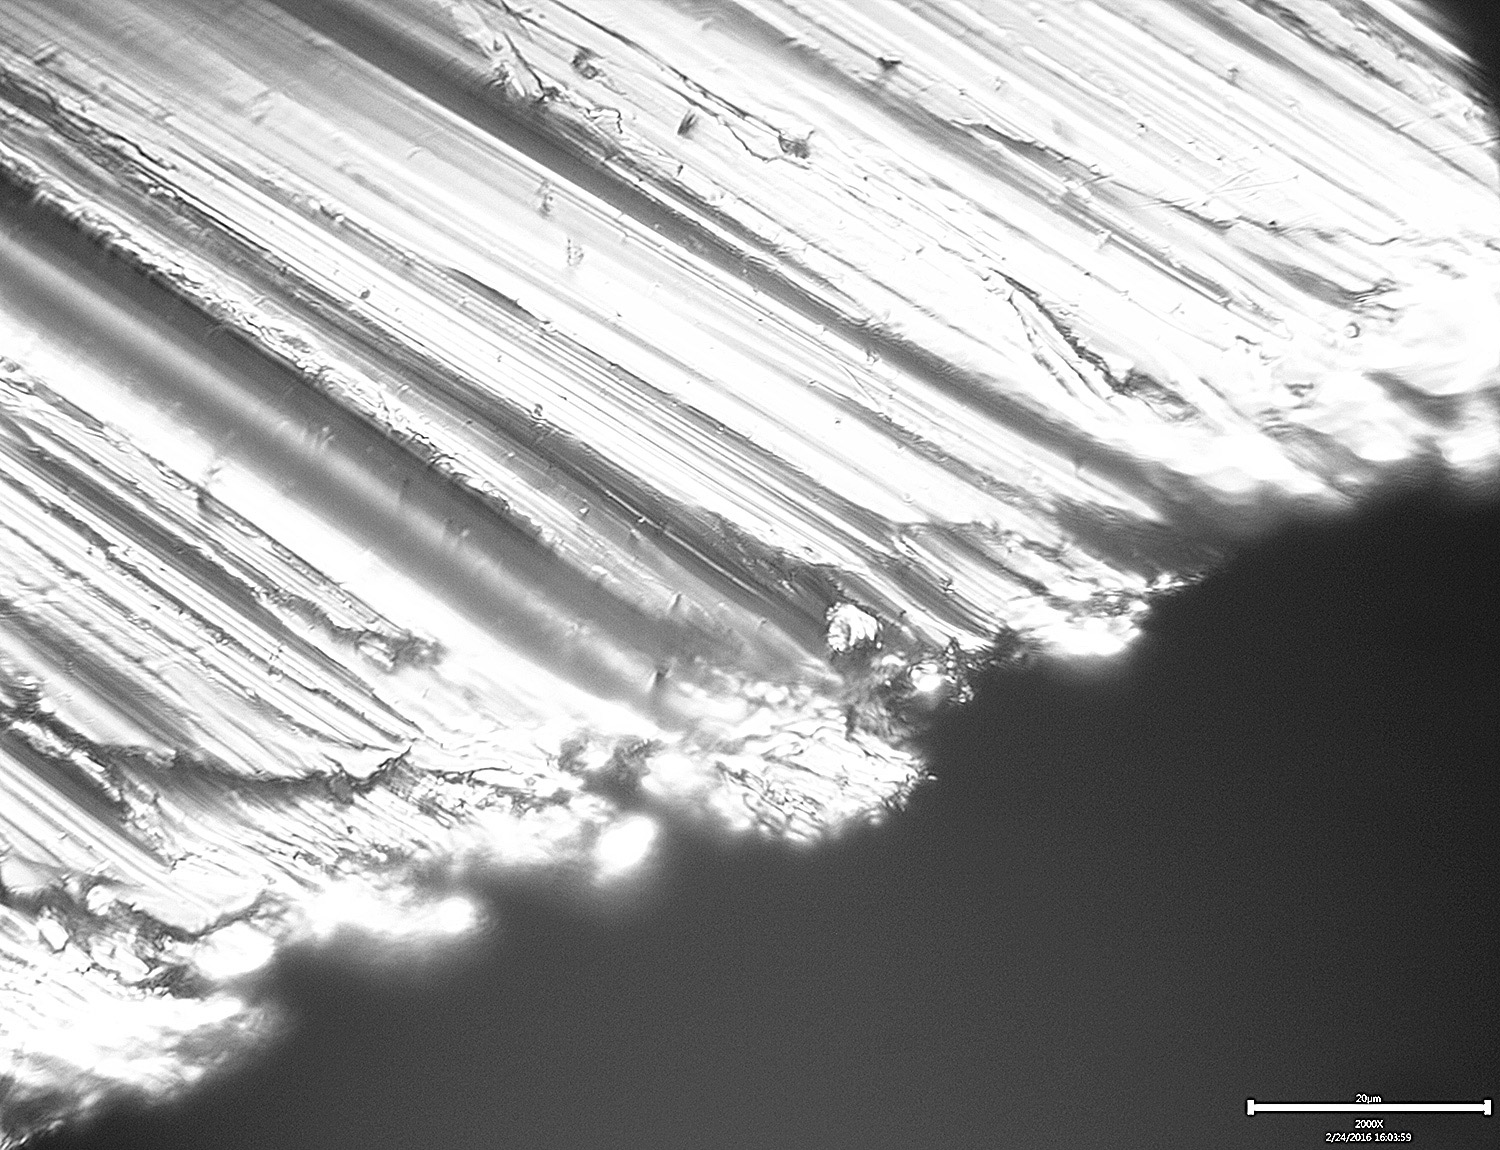
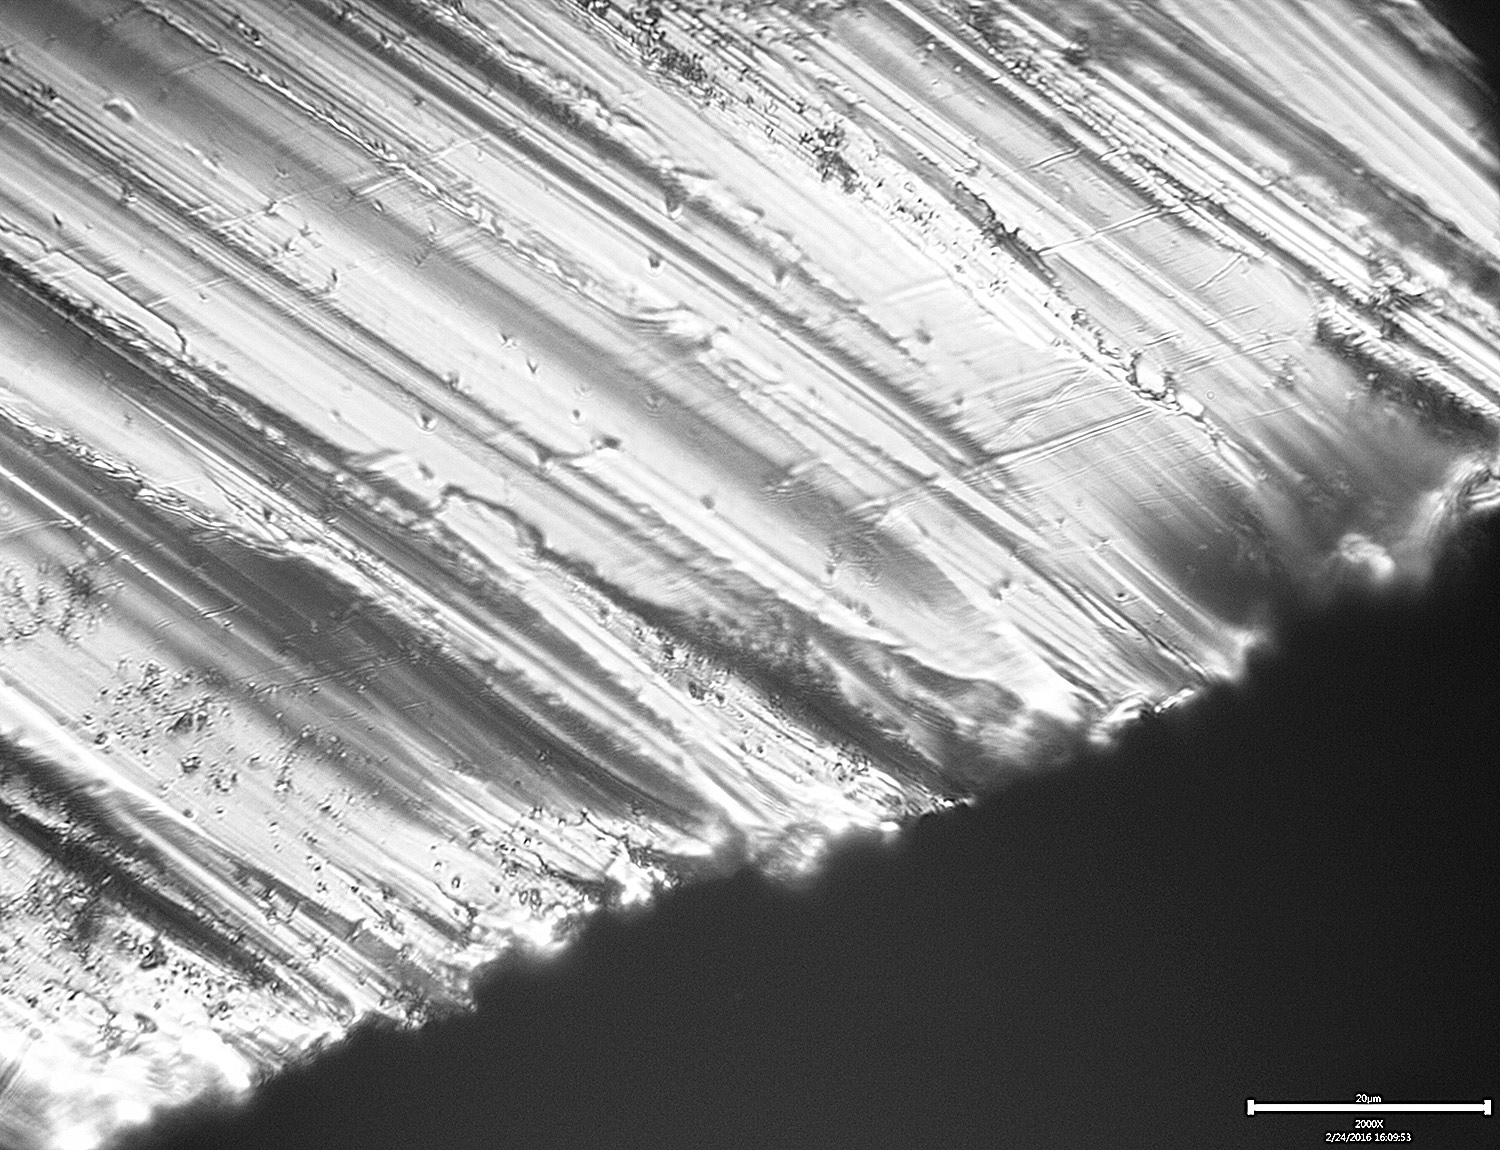
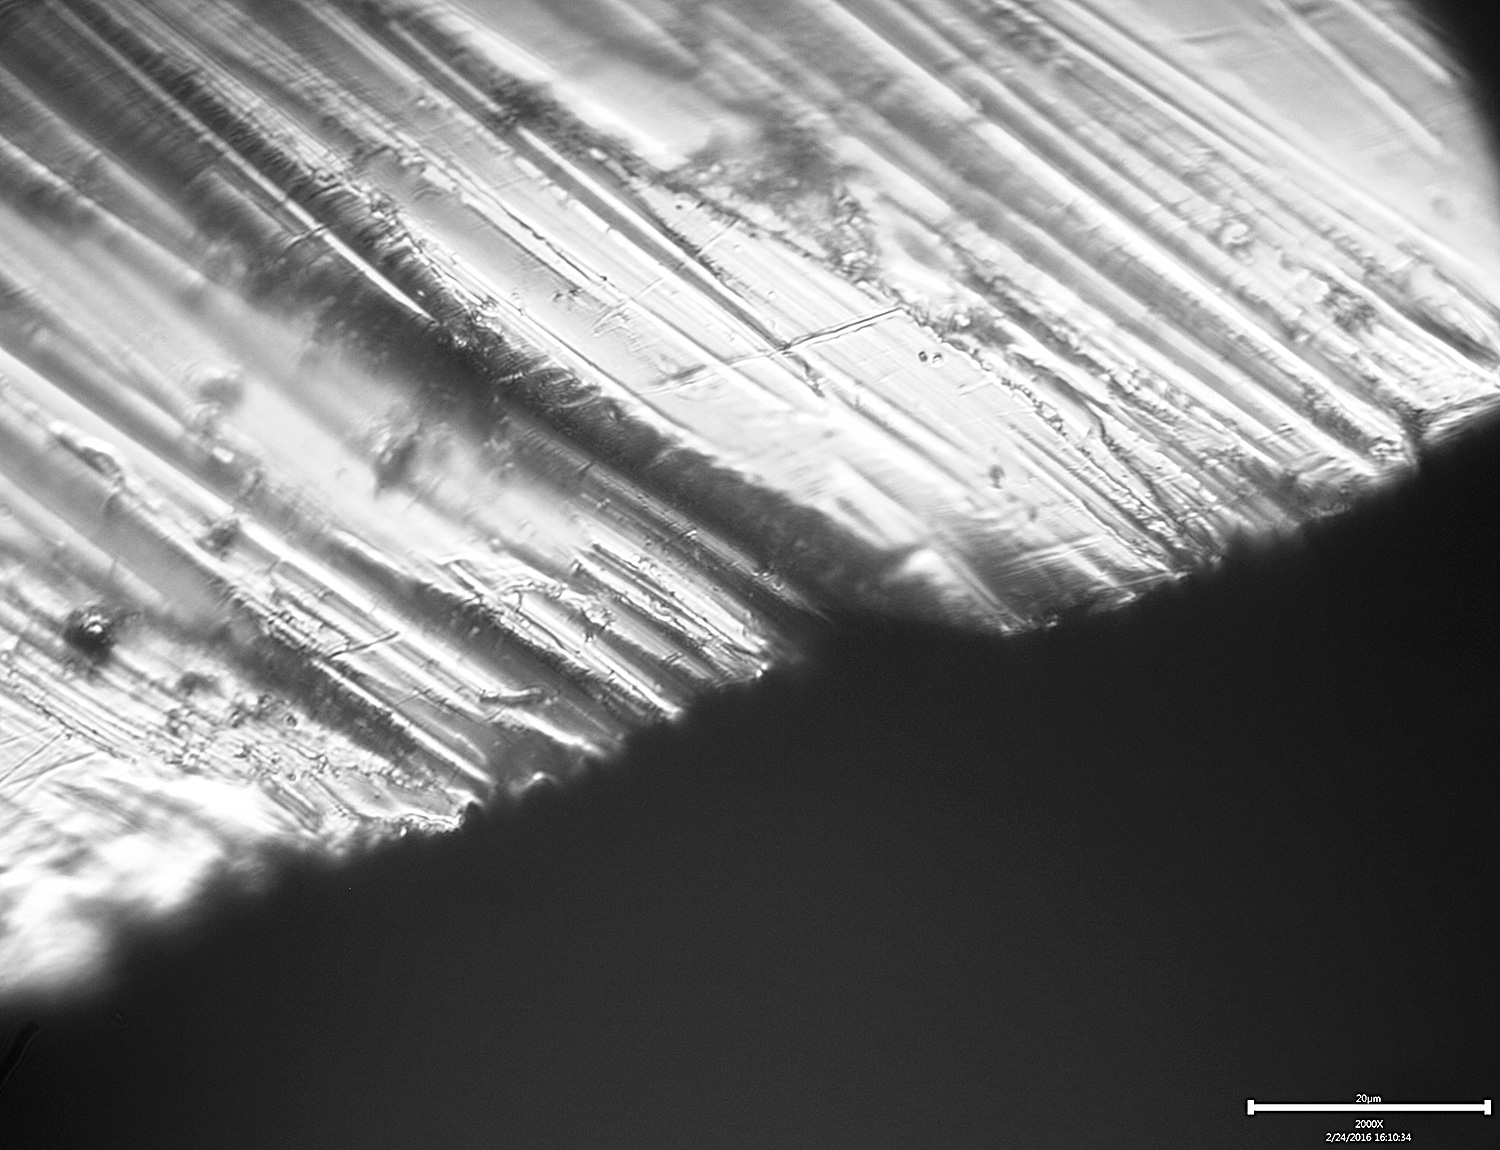
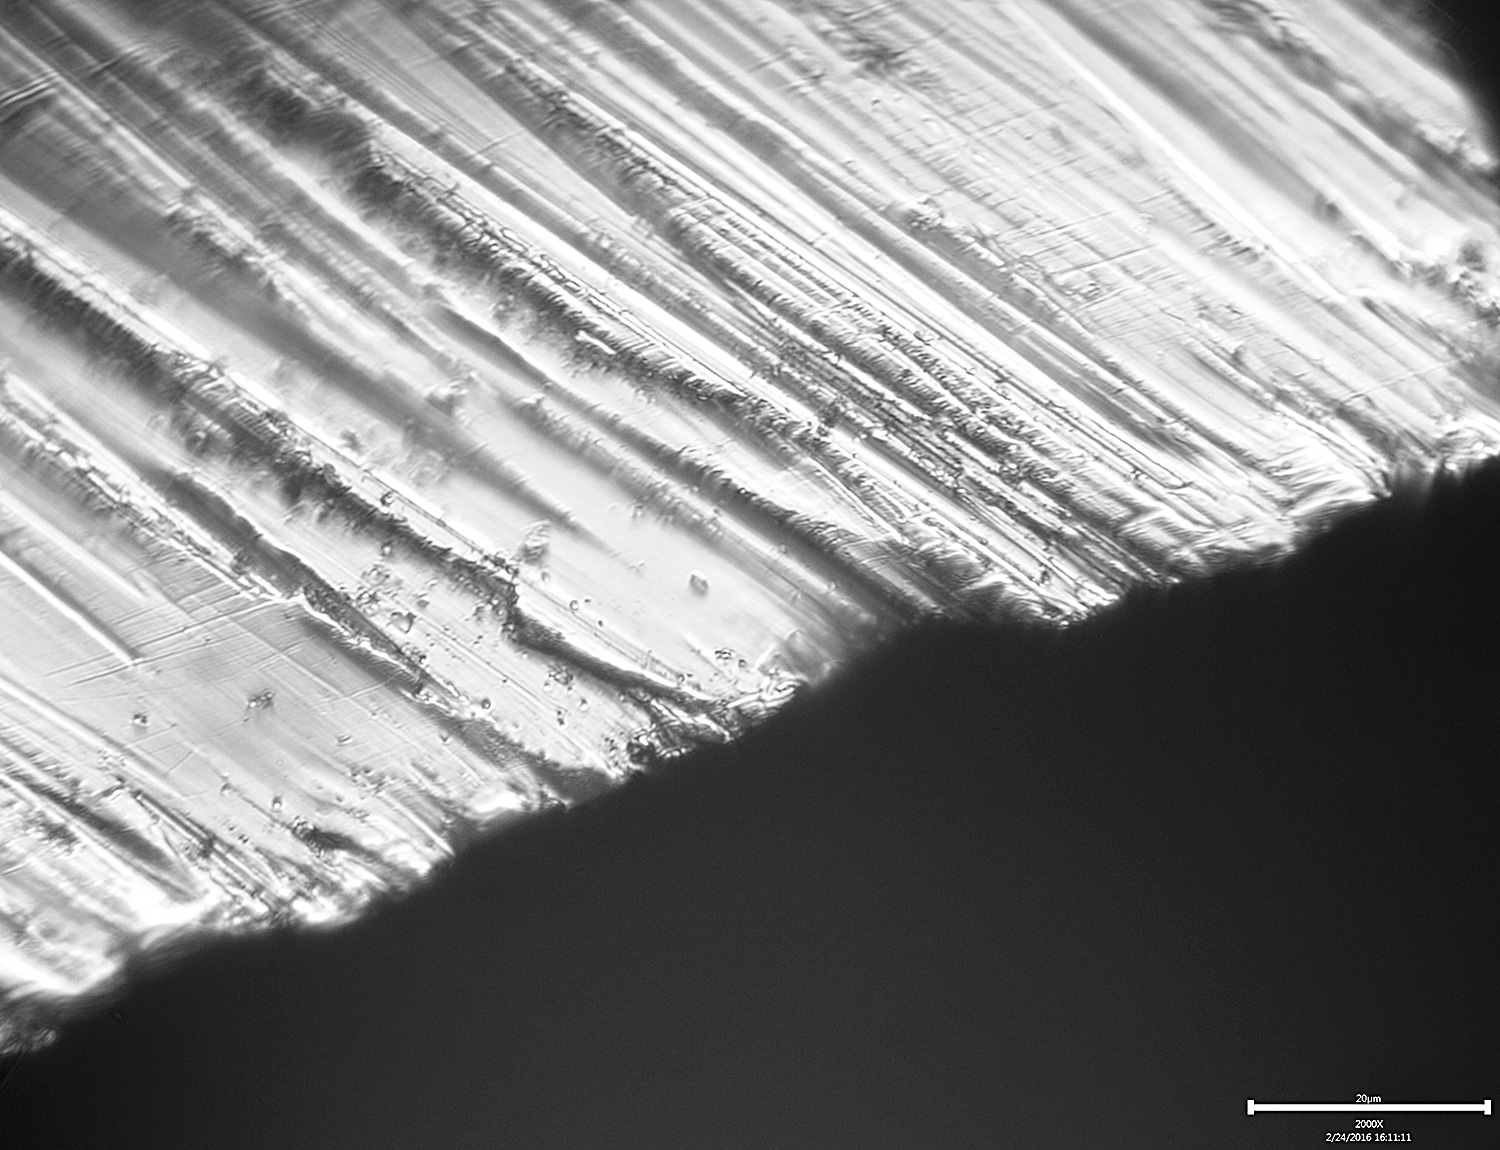
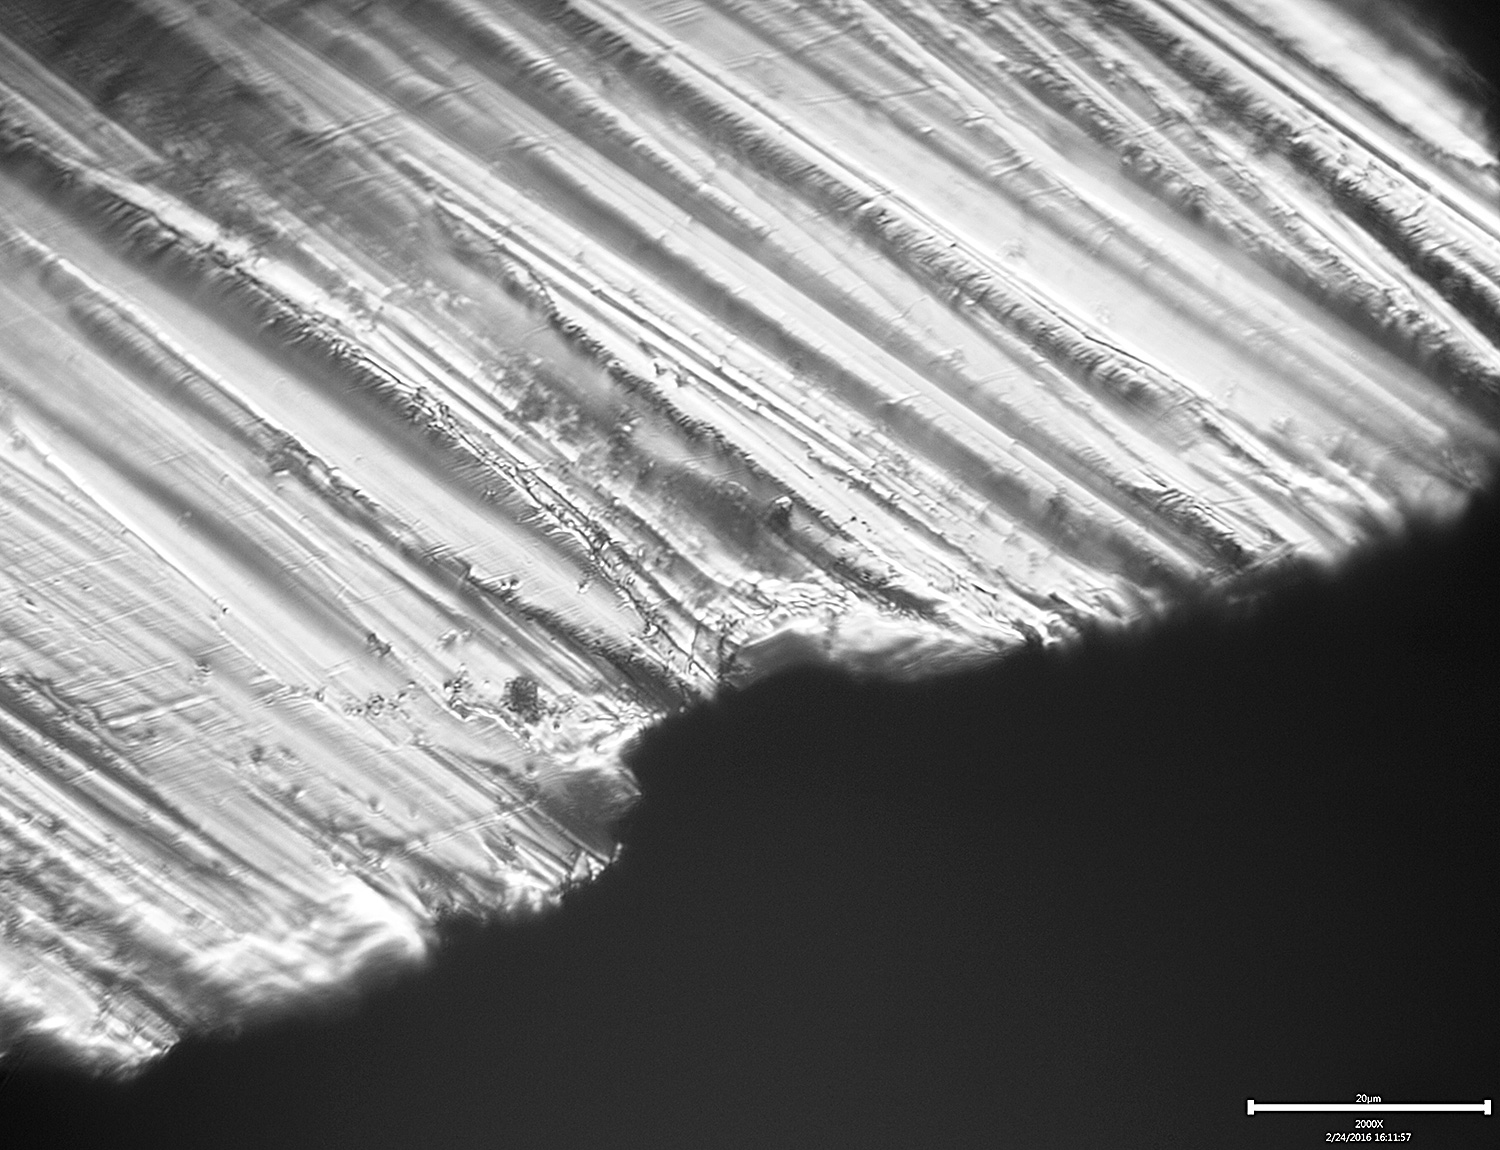
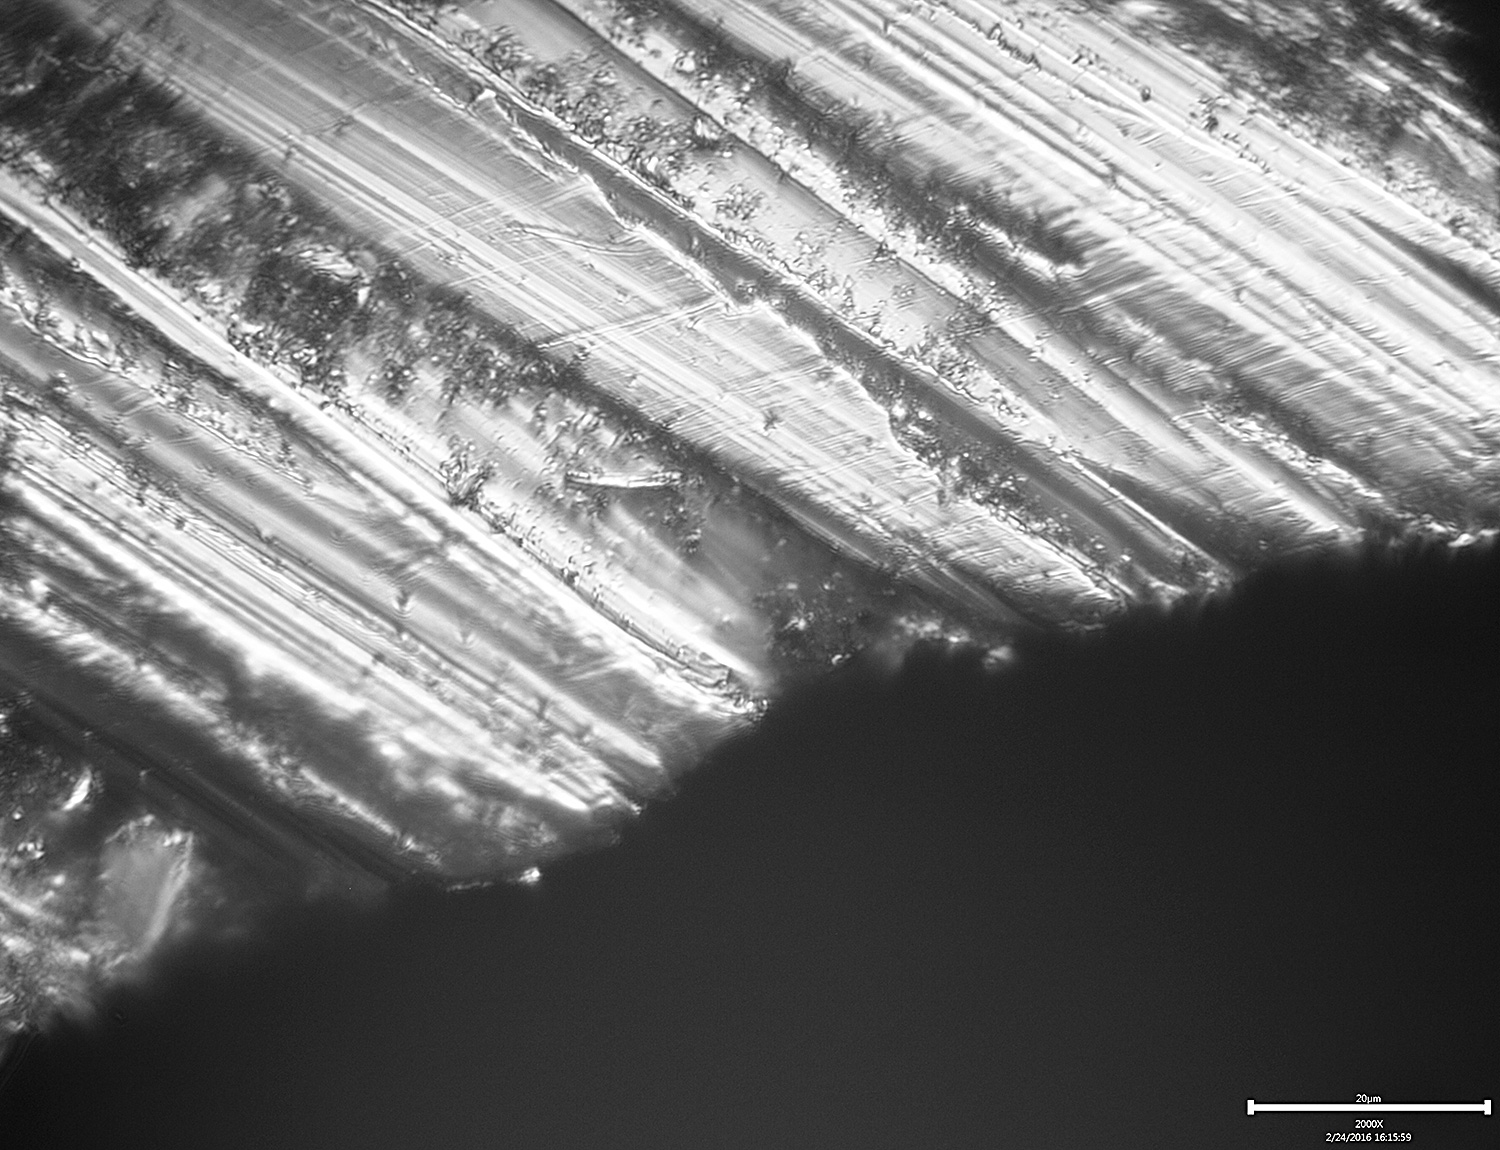
More of the edge trailing strokes all the way to the edge:
This last image is interesting because it shows how much bending and deformation can happen at the edge alongside the abrasion.
-Clay
Attachments:
You must be logged in to access attached files.
02/24/2016 at 5:10 pm #31583So I got curious about edge leading strokes and did a few that way:
-Clay
Attachments:
You must be logged in to access attached files.
02/24/2016 at 5:13 pm #31588Overall, the edge leading strokes leave the edge looking cleaner. There are still big chunks gone, but there is less bending and twisting. This little study is hardly conclusive though; I didn’t rebuild the edge and start with a clean slate before switching from trailing to leading strokes and I didn’t control for pressure or any other variables. Still, our sharpness testing results also indicate a slight advantage to edge leading strokes when finishing a knife. Normally I’ll use trailing strokes when progressing through the grits and then switch to leading strokes at the very end when I’m finalizing the edge.
-Clay
4 users thanked author for this post.
02/25/2016 at 12:07 am #31595Very good and interesting pics, Clay, that show well what the 100 grit stones do to the edge.
An interesting additional question in this case would be (since the OP might have sufferred from chips that could not be removed by the 200 grit stones): will the 200 grit stones (and then the 400, 600, …) clean up this “damage”?
Molecule Polishing: my blog about sharpening with the Wicked Edge
1 user thanked author for this post.
02/25/2016 at 7:29 am #31605Great demo, Clay. It would be interesting to me so see how much work would be needed to remove this damage when you go from 200 to 400, as it is from my experience the most difficult transition. And the one most likely to leave an edge with rough spots – especially where the operator doesn’t have a microscope or other visual aid.
From my experience, it can take a hundred strokes with the 400’s to clean up a 200-grit edge, but (I’m repeating myself) only 10 strokes with each grit thereafter. It took me a long time (more than two years) to break in my 100/200s because I was so reluctant to use them.
I’m focusing on this because it seemed to be the root of Darragh O’Flaherty’s rough edge problem. Maybe we could come up with a device or technique to help in deciding when the rough edge is gone – that it’s time to move on to the 600s.
Just out of curiosity, I once tried to sharpen a ceramic knife with my 400s. After hundreds of strokes and no apparent change, I finally gave up and switched to my 200s. In a single stroke, it was as if the edge exploded. Huge chips popped off and it was clear that the 400s would take many, many hours and possibly never repair the damage. I tossed it in the trash and was happy to be rid of it. Not the first $30 experiment that I’ve trashed.
I was just on the Woodcraft web site and see that they are now selling Wicked Edge stuff. Good to see that the word is getting out there!
02/25/2016 at 6:14 pm #31620Sorry for the long absence today, been in meetings all day. I’ll dive into the progression from 100# to 200# to 400# tomorrow.
-Clay
1 user thanked author for this post.
02/25/2016 at 10:44 pm #31628Clay, these pictures are great. Perhaps you can also use them for the new website. On the old one you also had as set of photographs showing the effects of each grit on the steel (I think), but these pictures are much better. By the way, which scope do you use for these pics?
Molecule Polishing: my blog about sharpening with the Wicked Edge
1 user thanked author for this post.
02/25/2016 at 11:20 pm #31629Anonymous
Inactive- Topics: 14
- Replies: 427
Great shots and good visual aides
Thanks
Bill aka ET
1 user thanked author for this post.
02/26/2016 at 9:11 am #31630Clay, these pictures are great. Perhaps you can also use them for the new website. On the old one you also had as set of photographs showing the effects of each grit on the steel (I think), but these pictures are much better. By the way, which scope do you use for these pics?
We are going to redo all the images on the grit comparison chart with this scope. In the past I struggled to get clean images of the edge at 2000x, but lately it’s been going really well. I could get excellent images of the bevel, just not the edge. I used the AmScope for these images.
-Clay
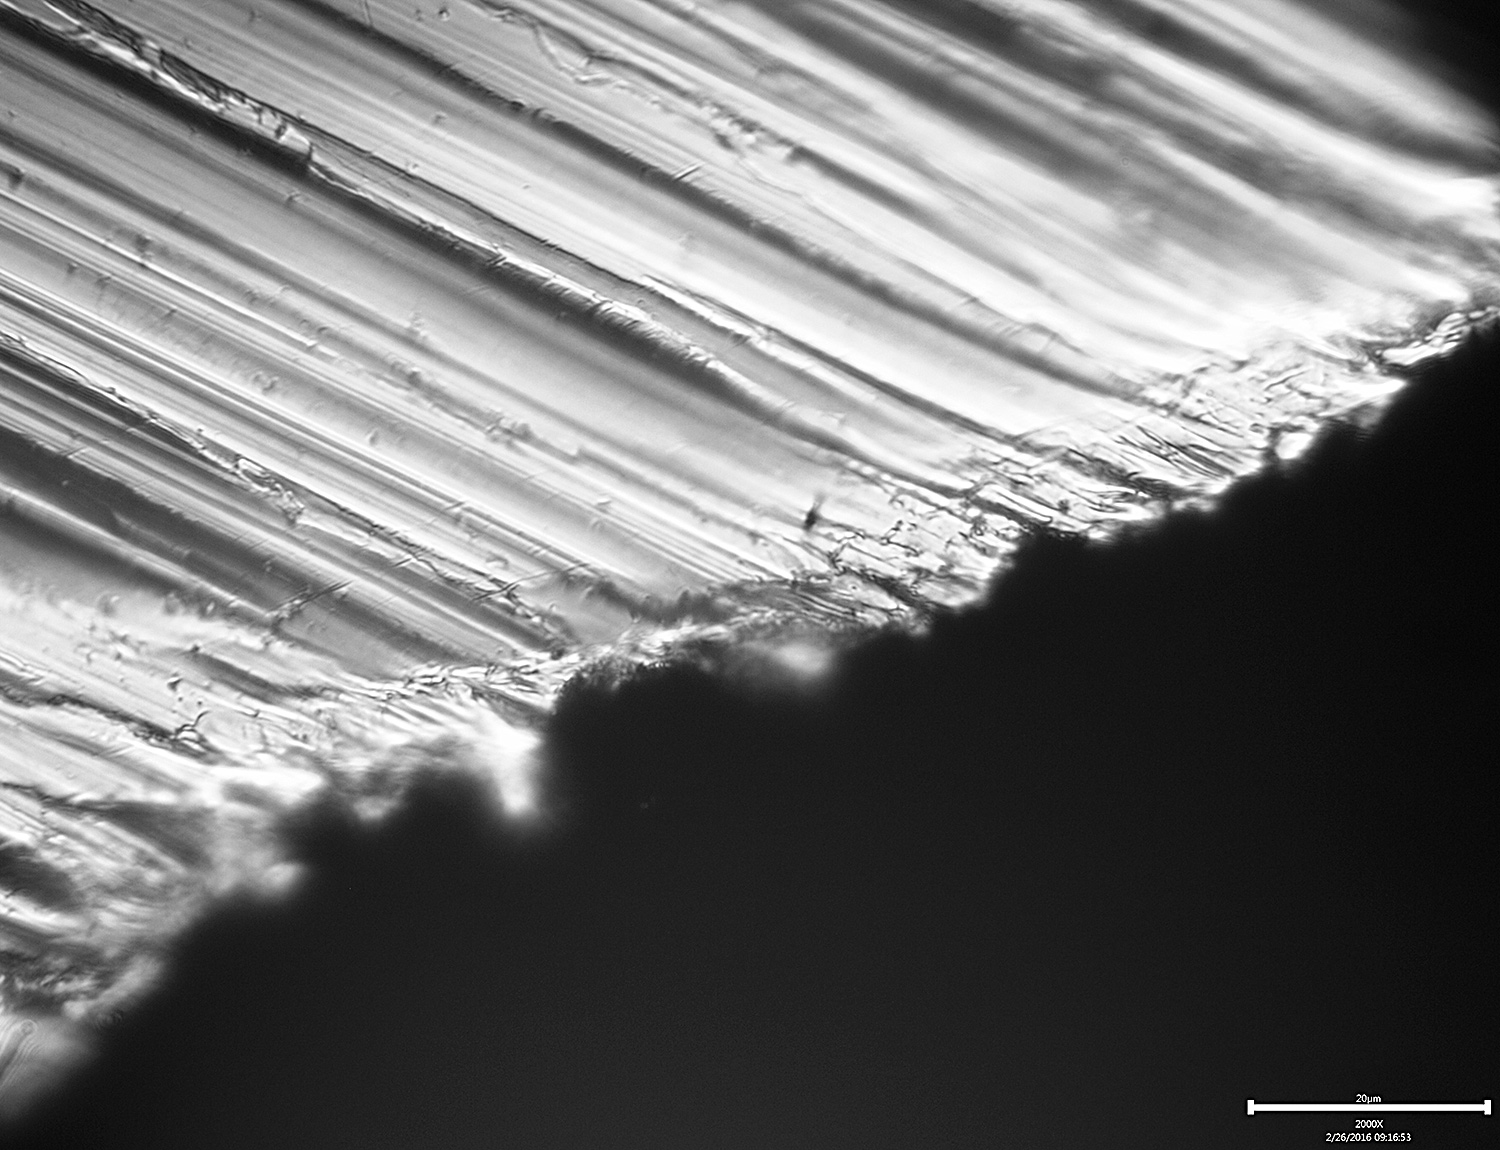
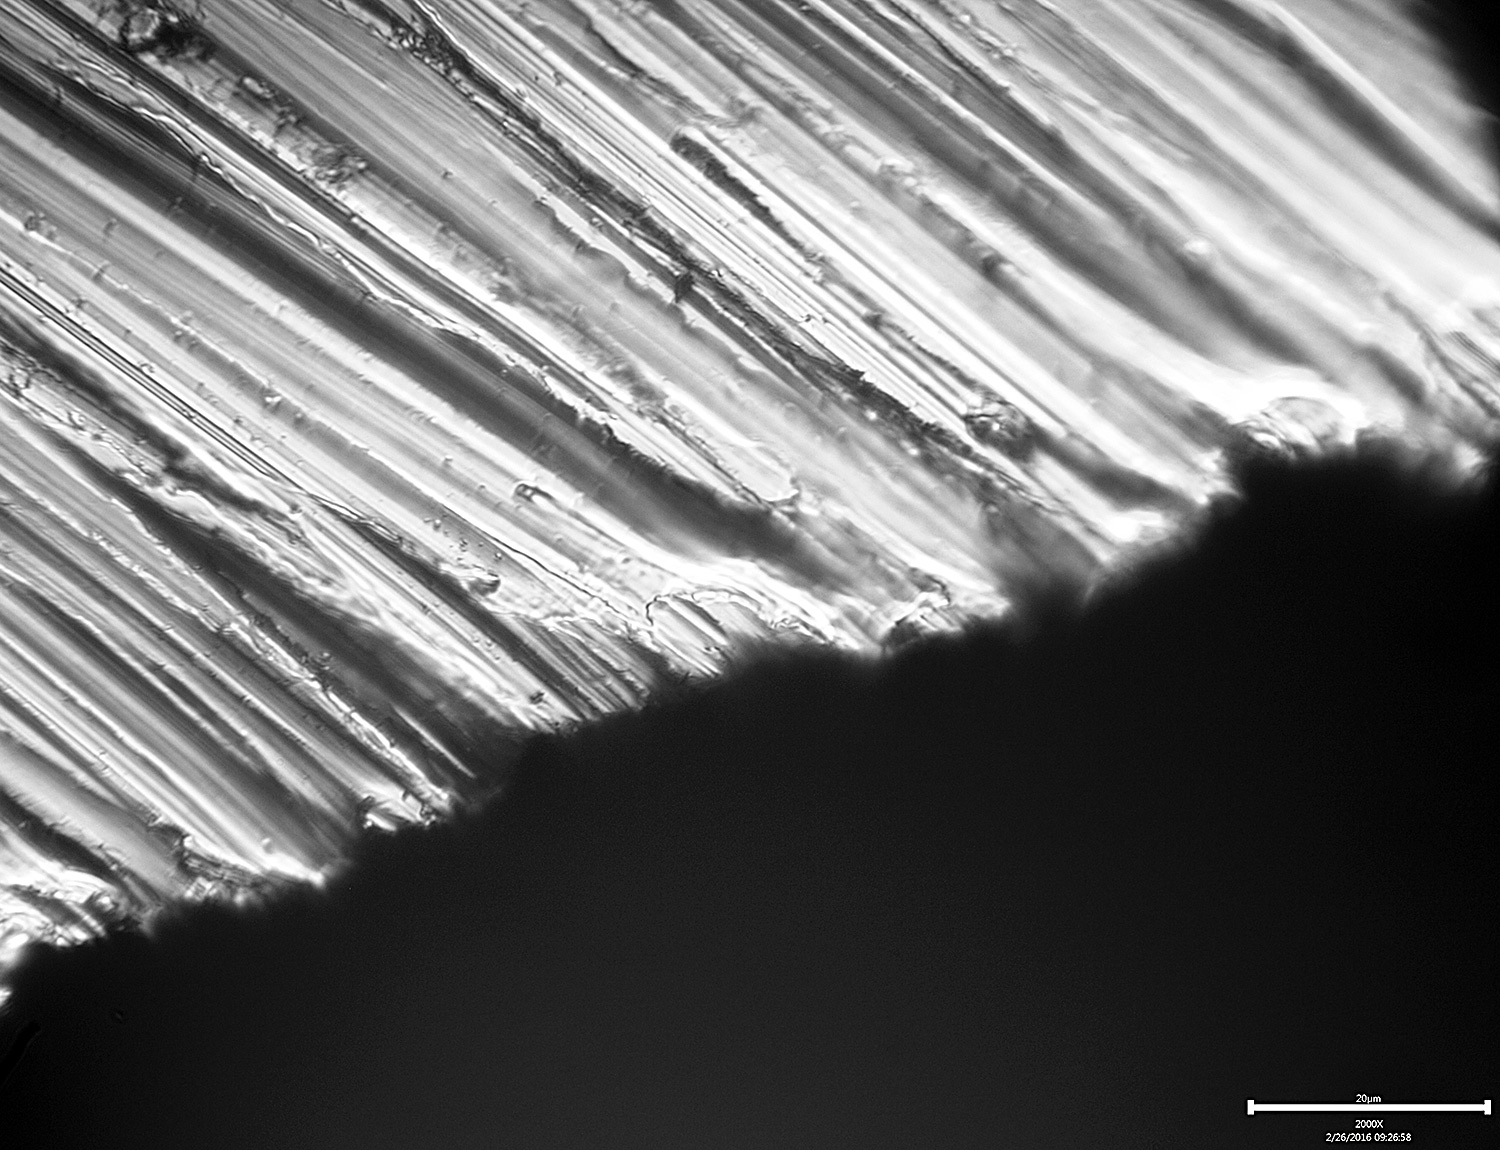
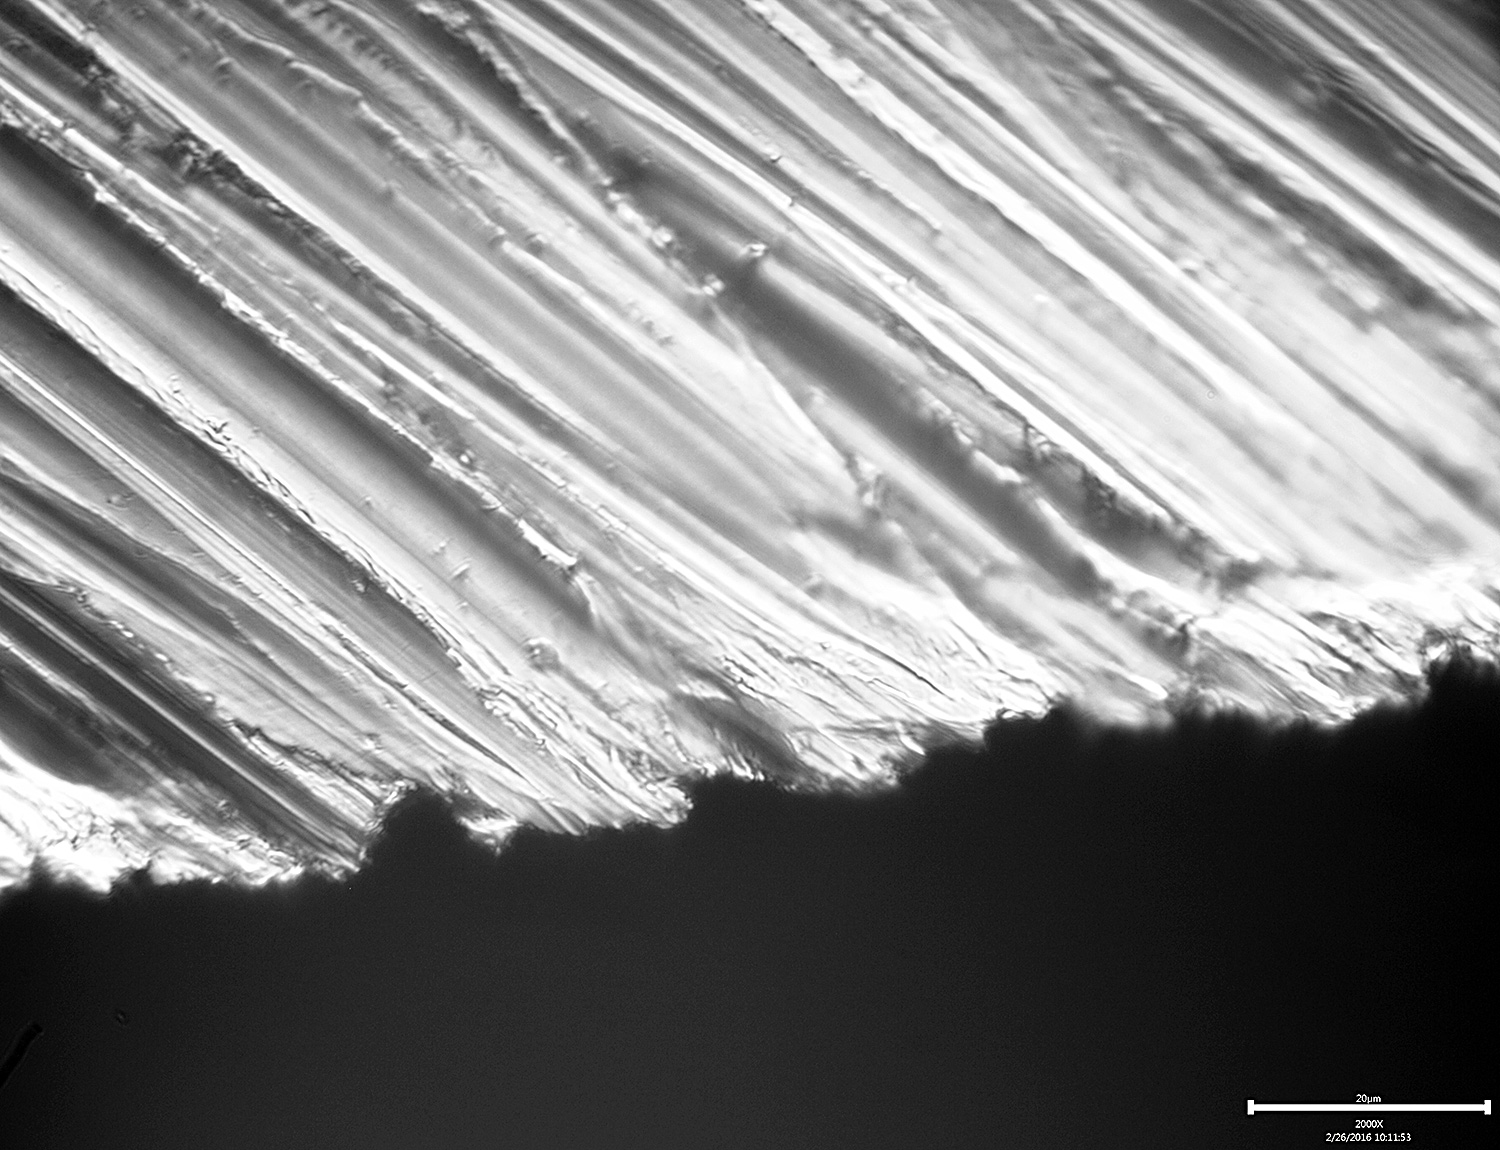
02/26/2016 at 9:58 am #31631This morning I worked on the edge with the 200# stones. First I did 20 edge trailing strokes:
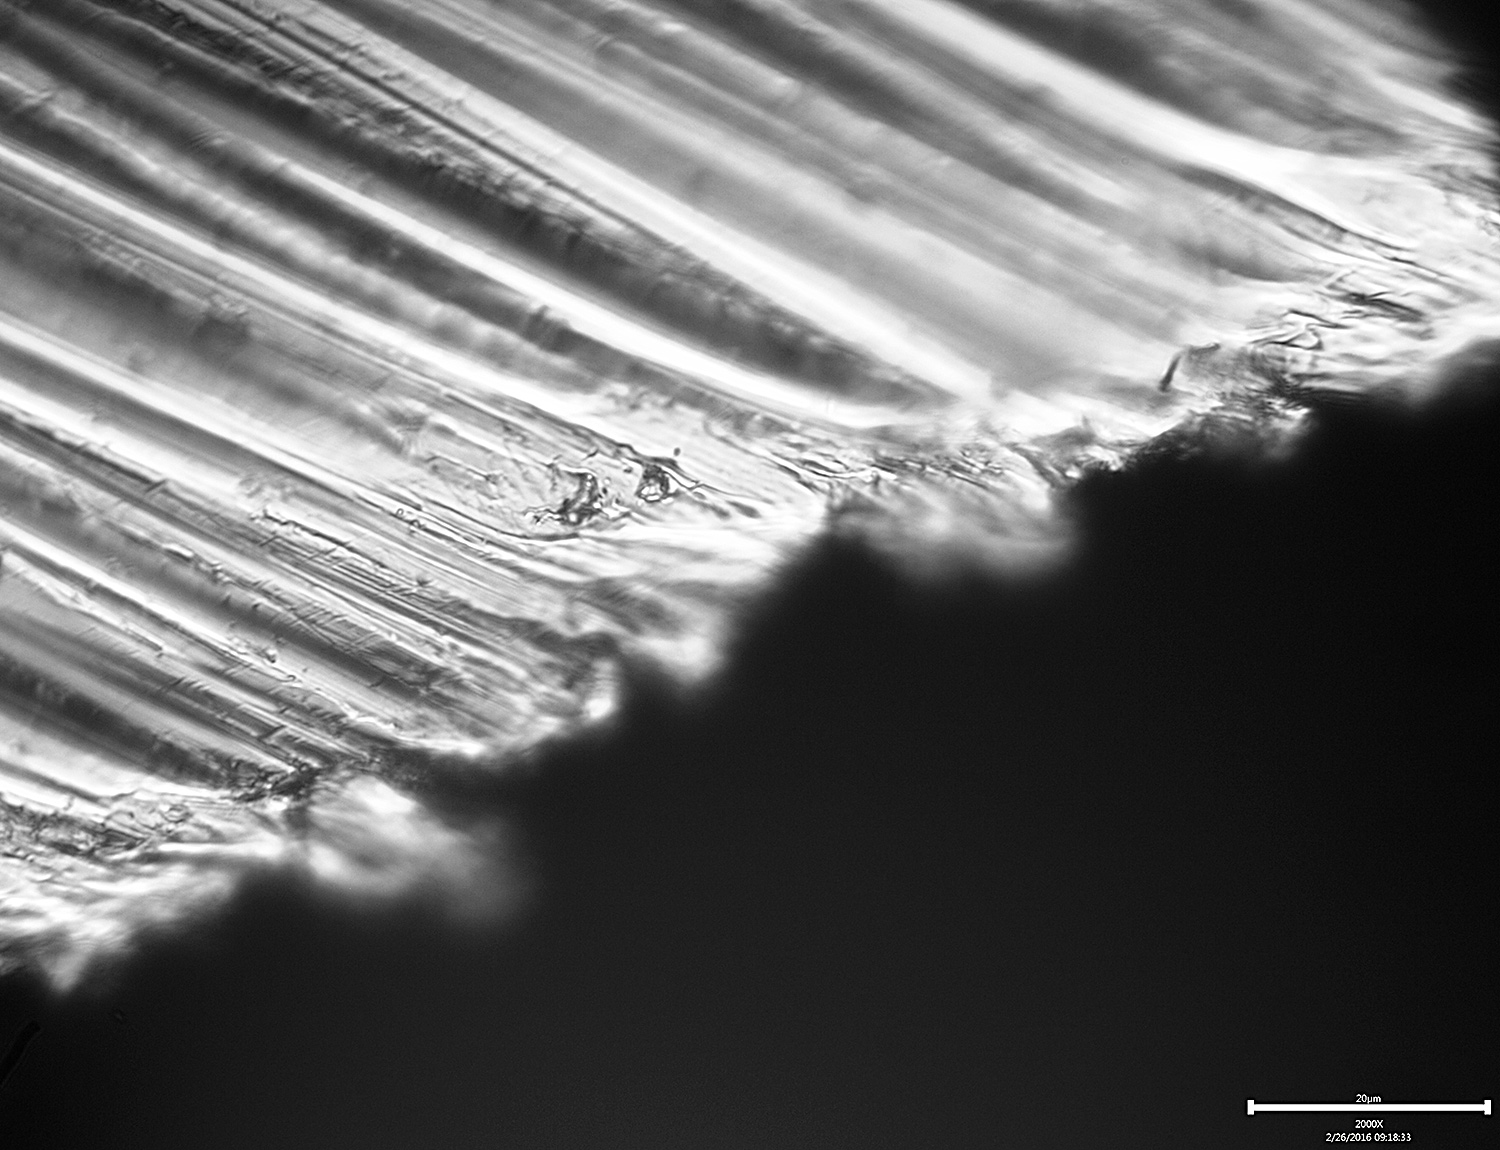
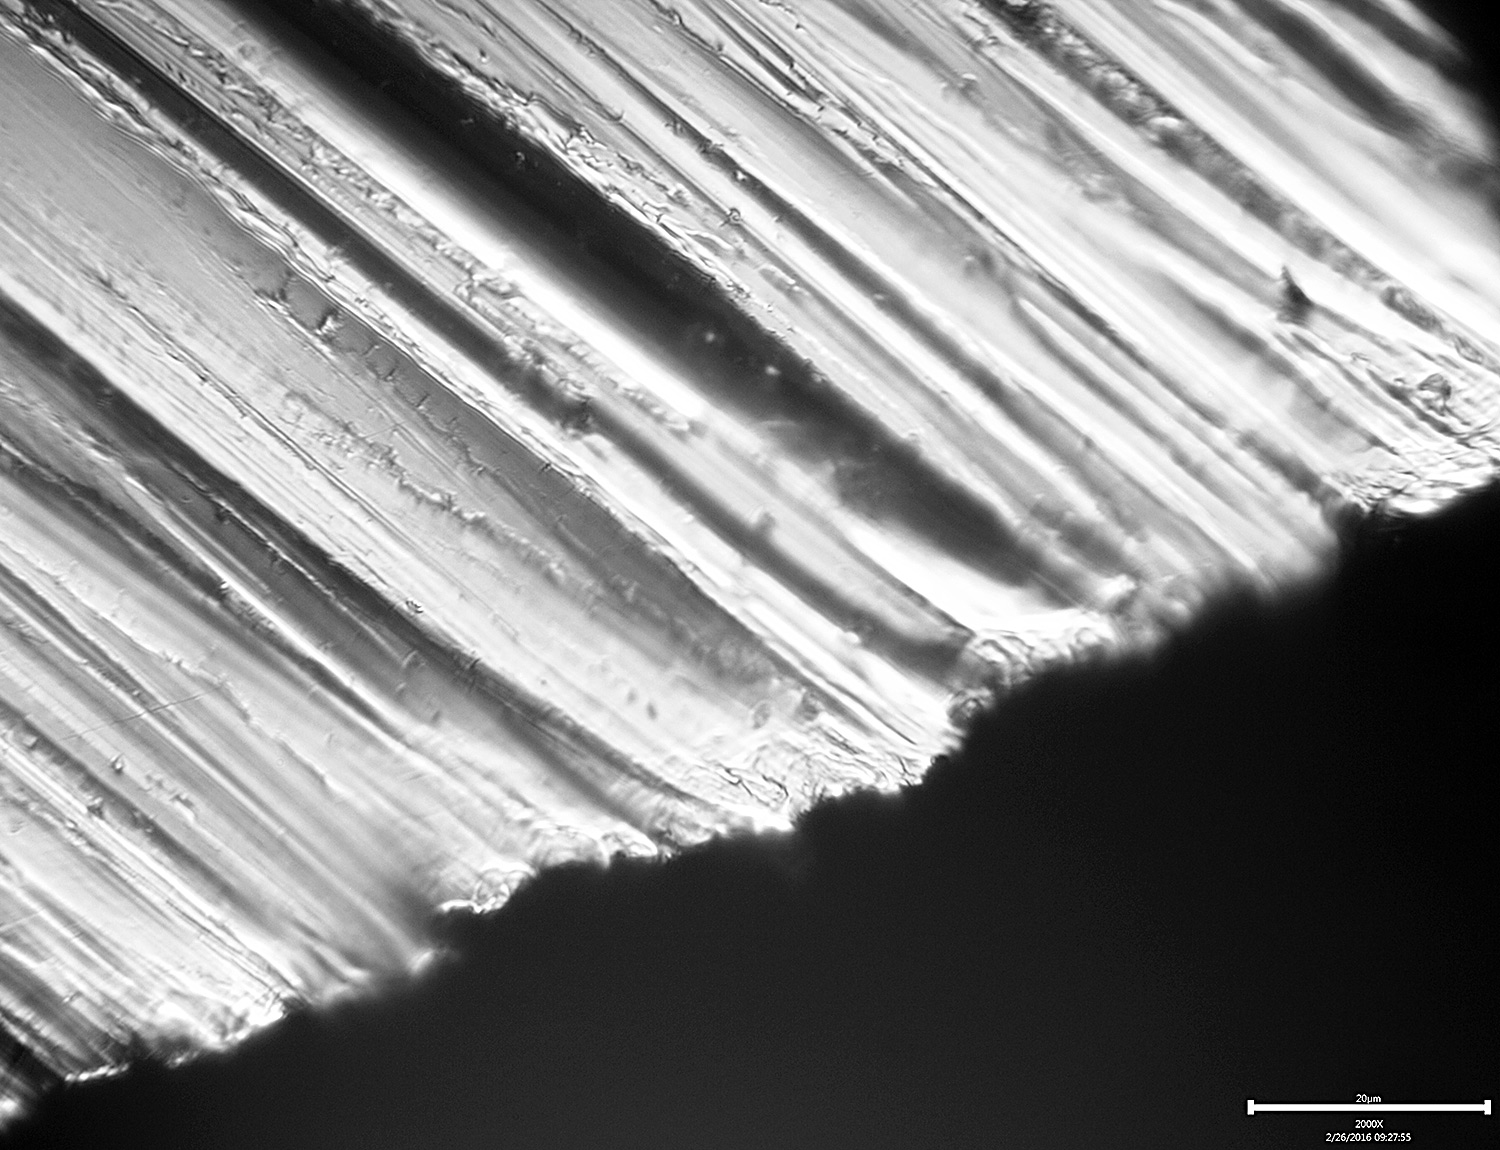
Then I did another 20 edge trailing strokes:
I wasn’t very mindful of my pressure, so I may redo these with light pressure to see what changes.
-Clay
Attachments:
You must be logged in to access attached files.
1 user thanked author for this post.
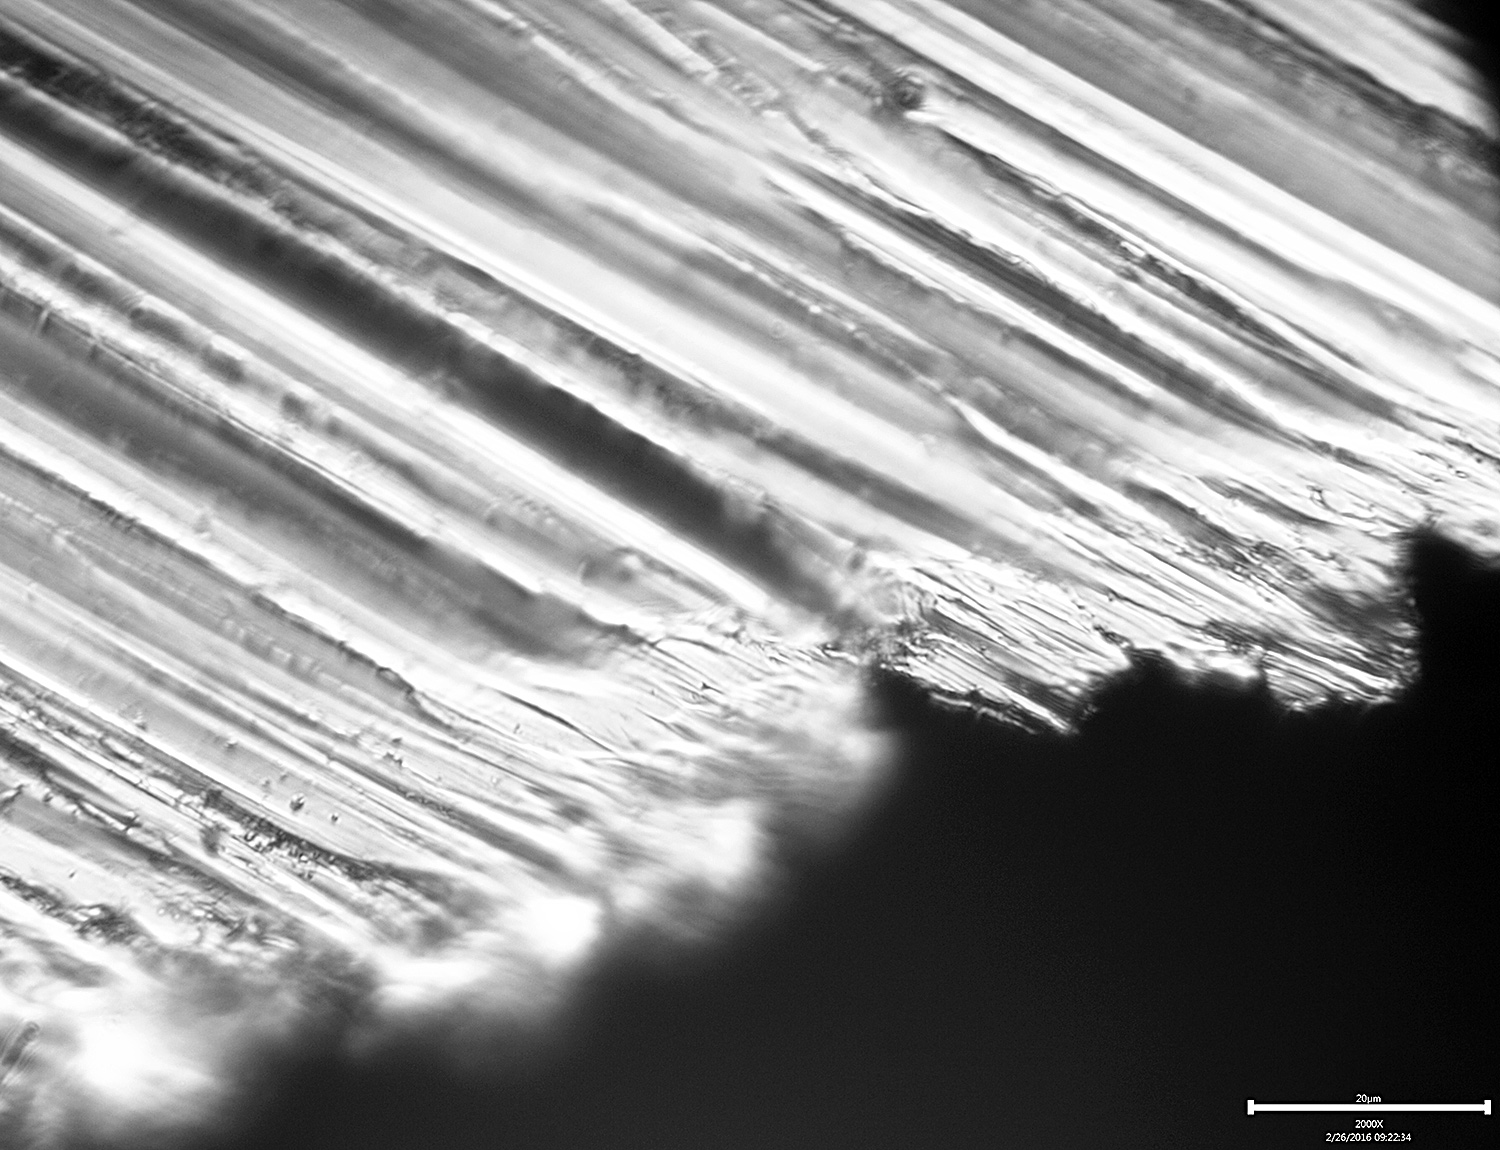
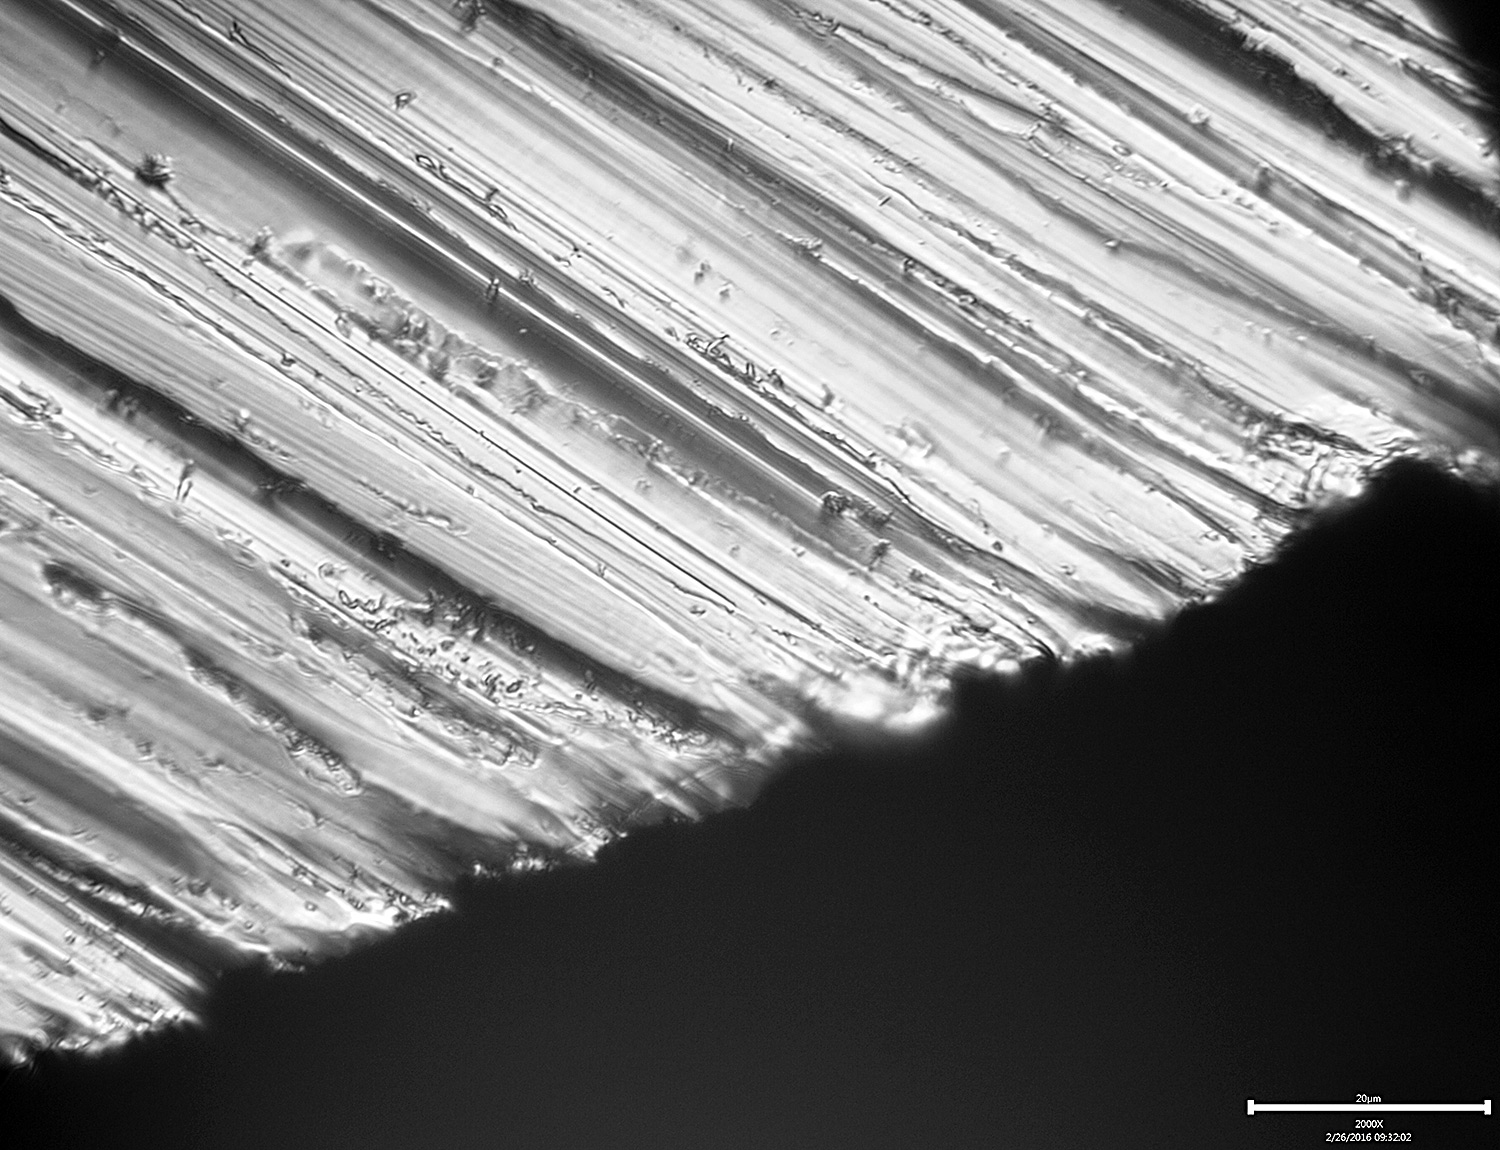
02/26/2016 at 10:05 am #31636Next I did 20 edge leading strokes:
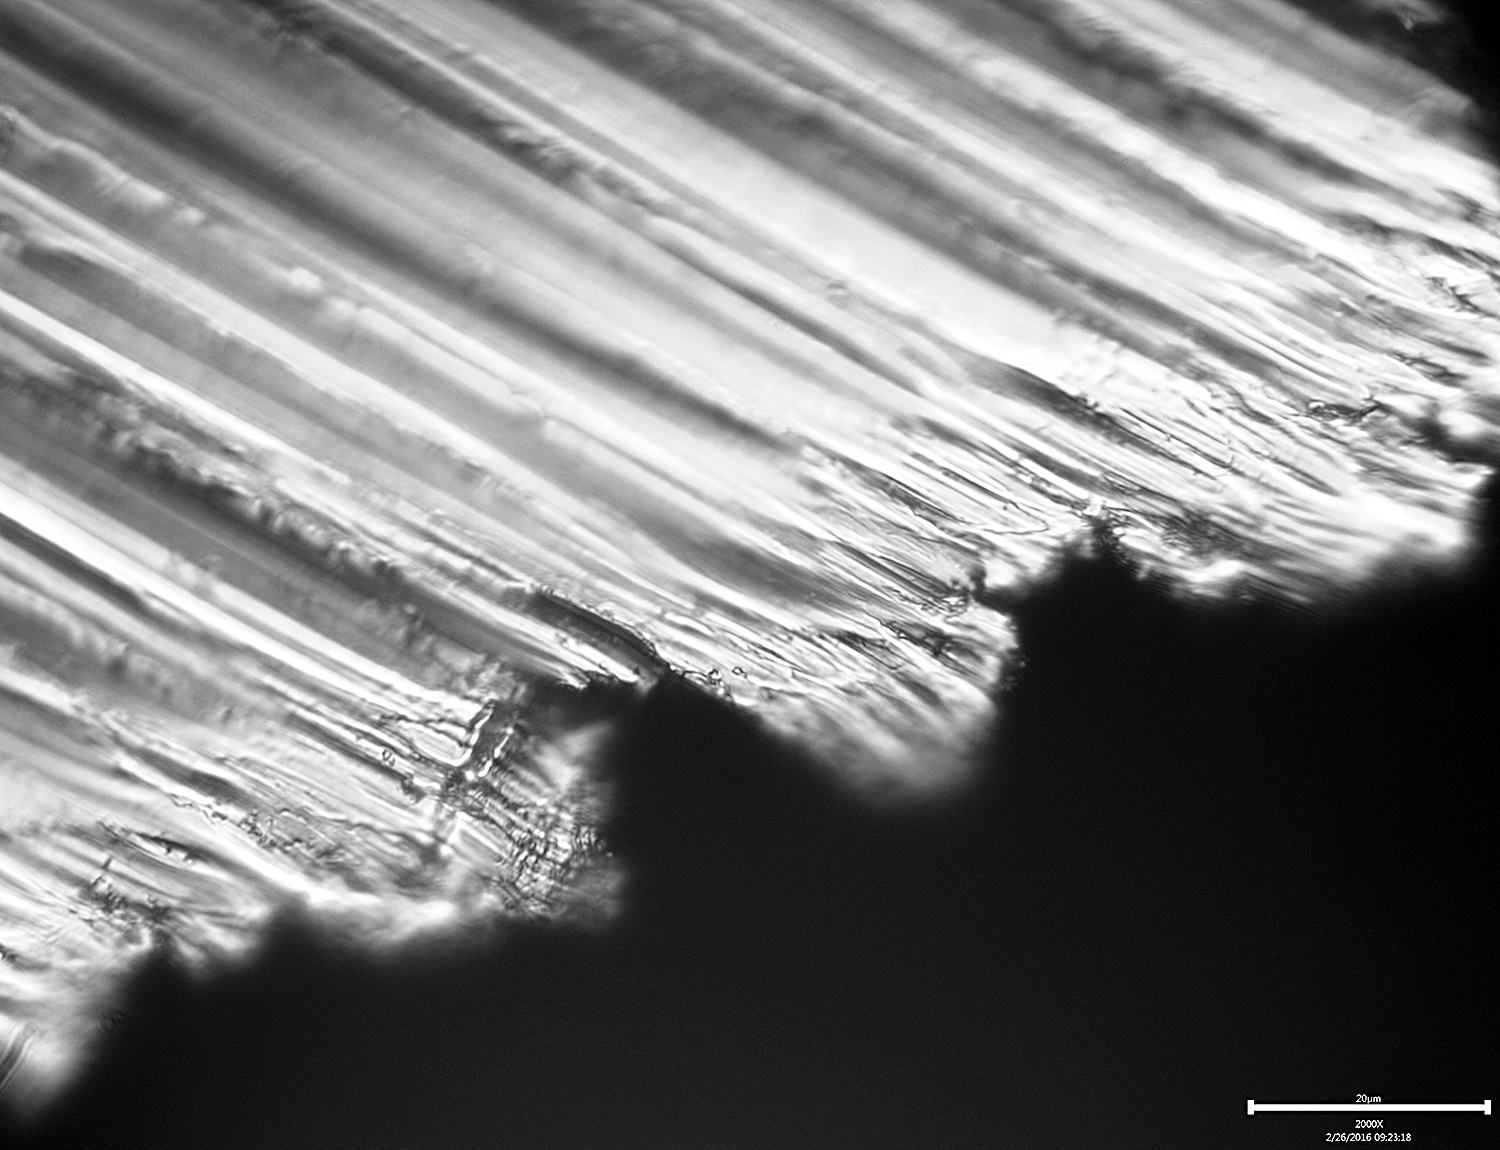
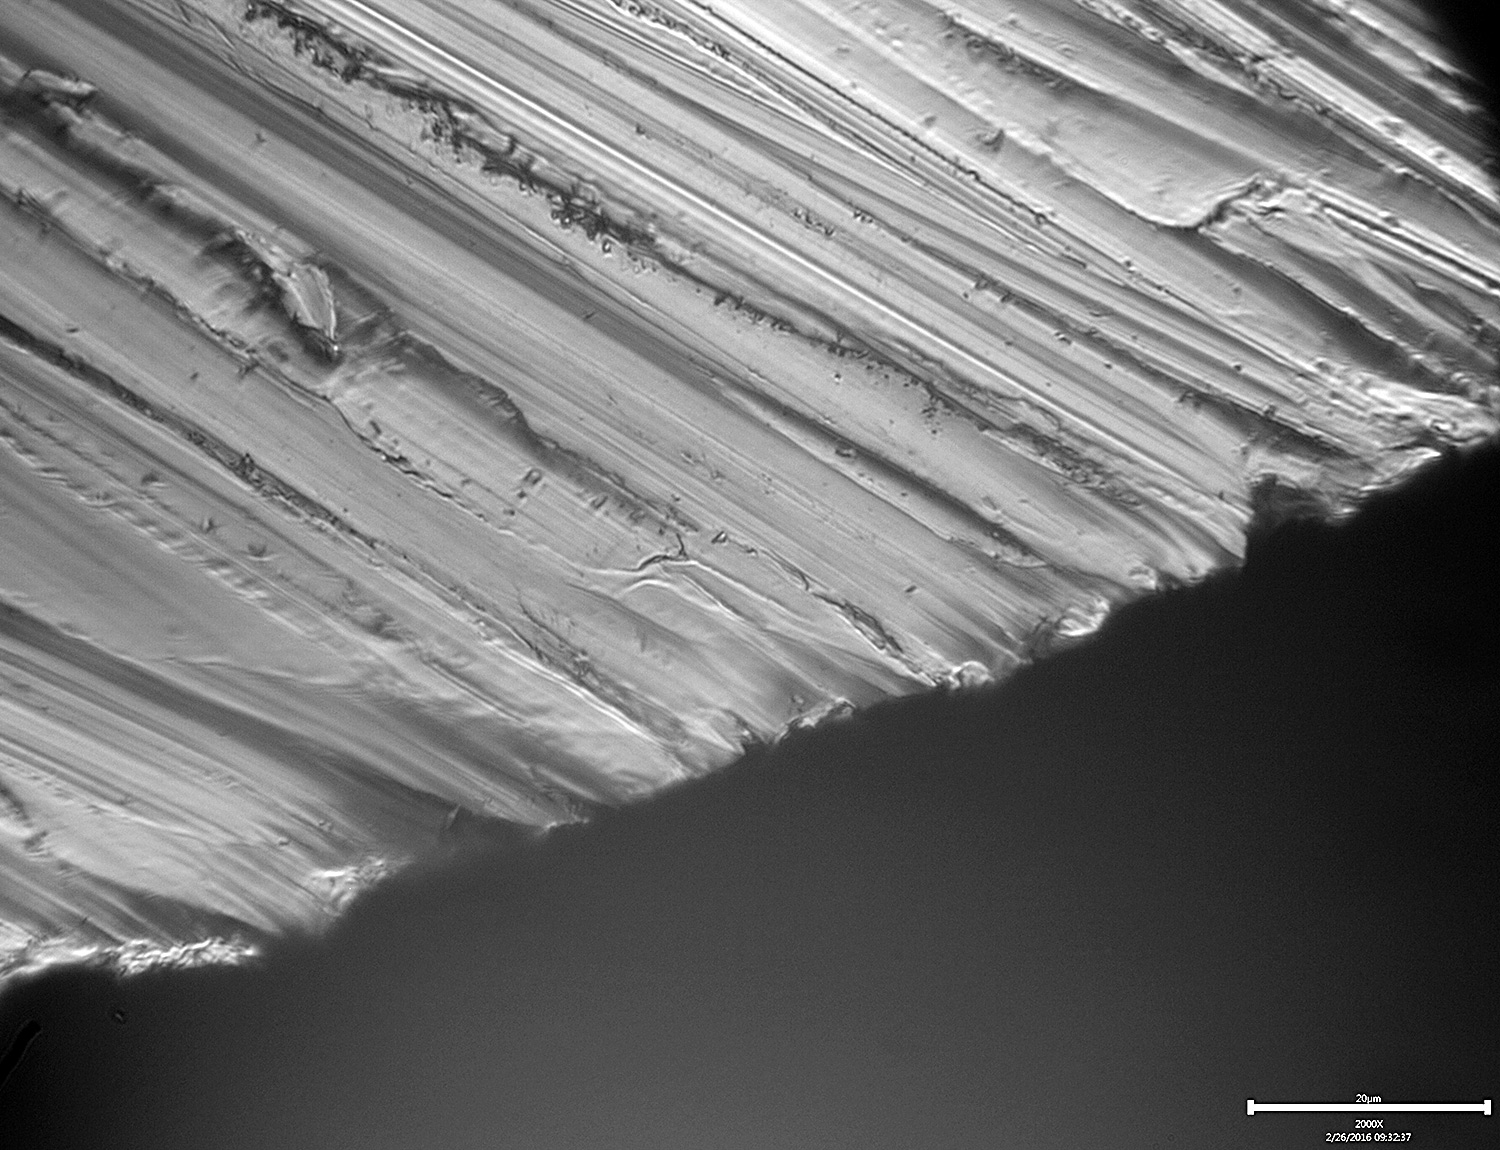
And then another 20 edge leading strokes:
I did very light, controlled strokes for the edge leading series.
-Clay
Attachments:
You must be logged in to access attached files.
2 users thanked author for this post.
02/26/2016 at 10:30 am #31641I did another 20 edge trailing strokes with very light, controlled pressure:
It’s pretty interesting to see the tear out appear again with the trailing strokes. I don’t want to draw too many conclusions until I can find a good way to control for pressure, and also until I start with clean edges for both the leading and trailing strokes, but the difference does seem kind of obvious.
-Clay
Attachments:
You must be logged in to access attached files.
1 user thanked author for this post.
02/26/2016 at 10:47 am #31644Onward and upward to the 400# stones. This time I switched it up and did 20 very light, controlled edge leading strokes first:
And then 20 very light, controlled edge trailing strokes afterward:
-Clay
Attachments:
You must be logged in to access attached files.
1 user thanked author for this post.
02/26/2016 at 11:13 am #31649 -
AuthorPosts
- You must be logged in to reply to this topic.

