Super blue steel
Recent › Forums › Main Forum › Super blue steel
- This topic has 54 replies, 8 voices, and was last updated 03/01/2016 at 3:01 pm by
Darragh O’Flaherty.
-
AuthorPosts
-
02/26/2016 at 2:32 pm #31686
I think you’re right. What happened here is that you’ve been checking your progress at 2000X, which would take forever to examine the entire length of the blade, thus missing damage still there from previous grits. I think your exercise here validates what I’ve been preaching to newcomers about being sure that you’ve removed all the damage before moving on to the next grit. I inspect the entire length of the blade, but at only 50X. At this low magnification, it’s hard to see the type and size of edge damage you’re seeing at 2000X, so I scan the entire length of the blade from directly above and stop to check any suspicious spots. Swinging the ‘scope from side to side, you can usually see slight dips in the edge, but probably not much below 25 microns. Maybe you could inspect full-length with a 200X handheld before dismounting the knife for the 2000X inspection. The improvement in the edge seen with the 6 micron film is amazing. Did you do any grits between the 1000’s and the 6 micron?
I think you have it pretty well nailed. I can even seem most of those little chips with the 60x loupe if I’m diligent.
I did not use any stones in between the 1000# and the 6µ films. Impressive. Especially since they are well used already. For contrast, here are some shots of the blade after the 3µ DMT stones:

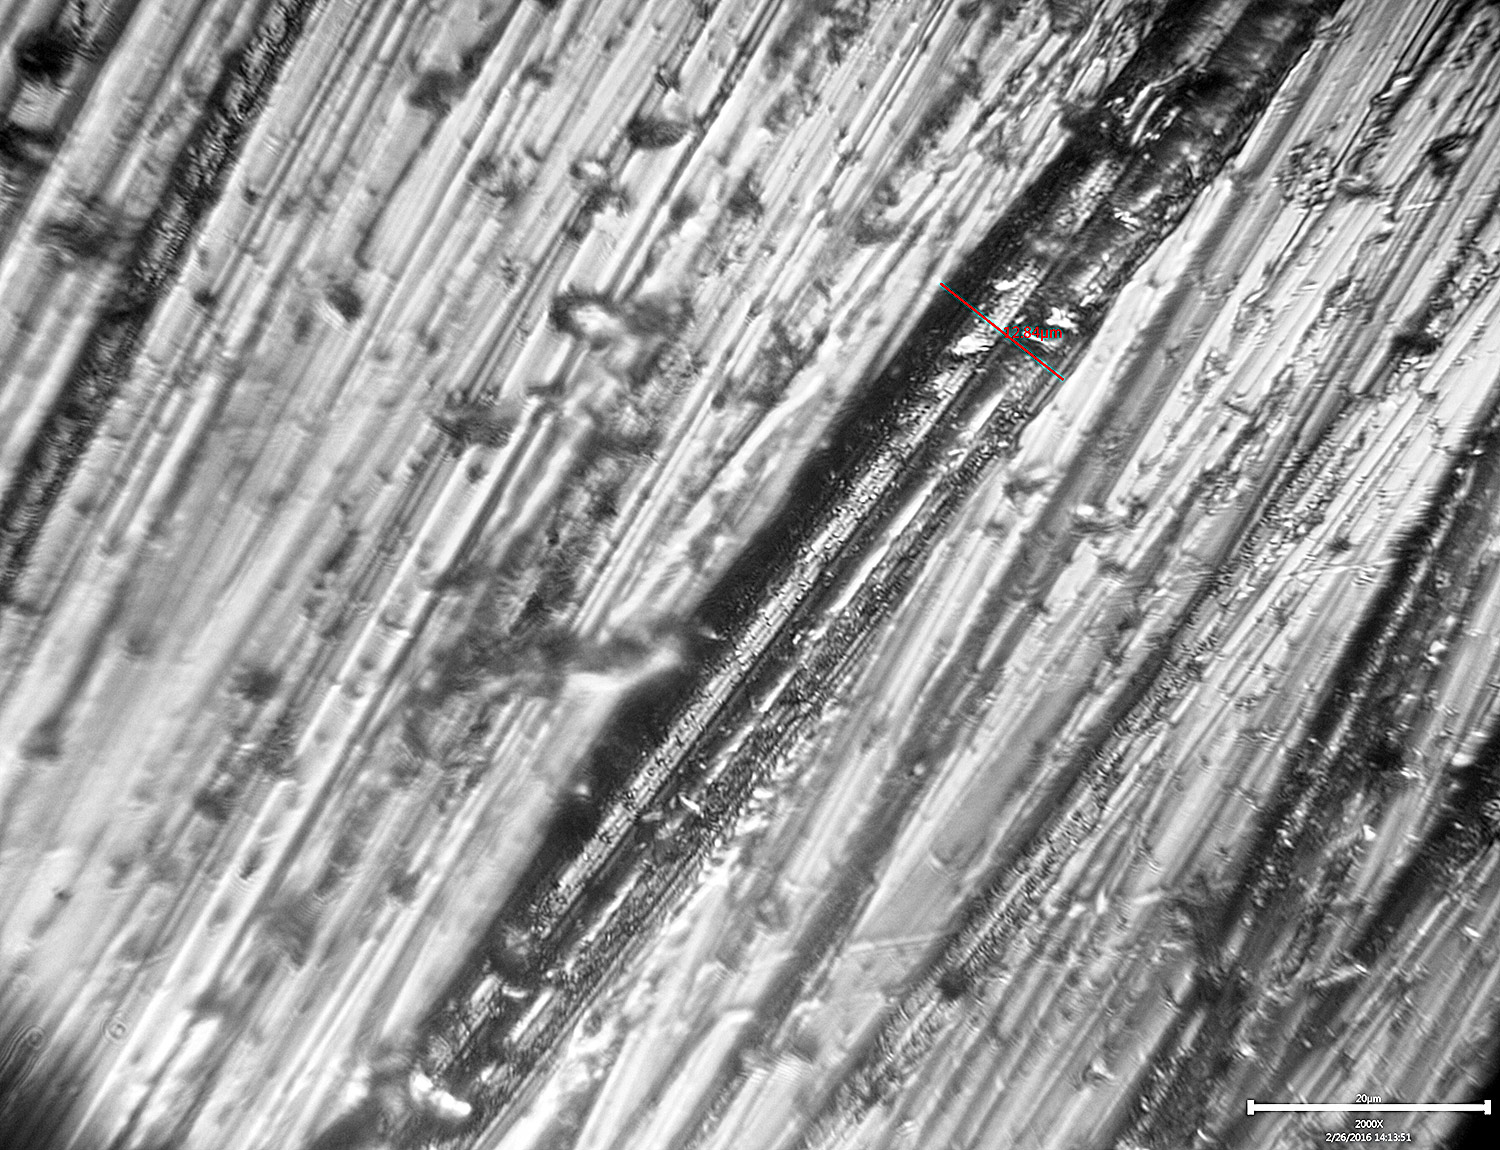

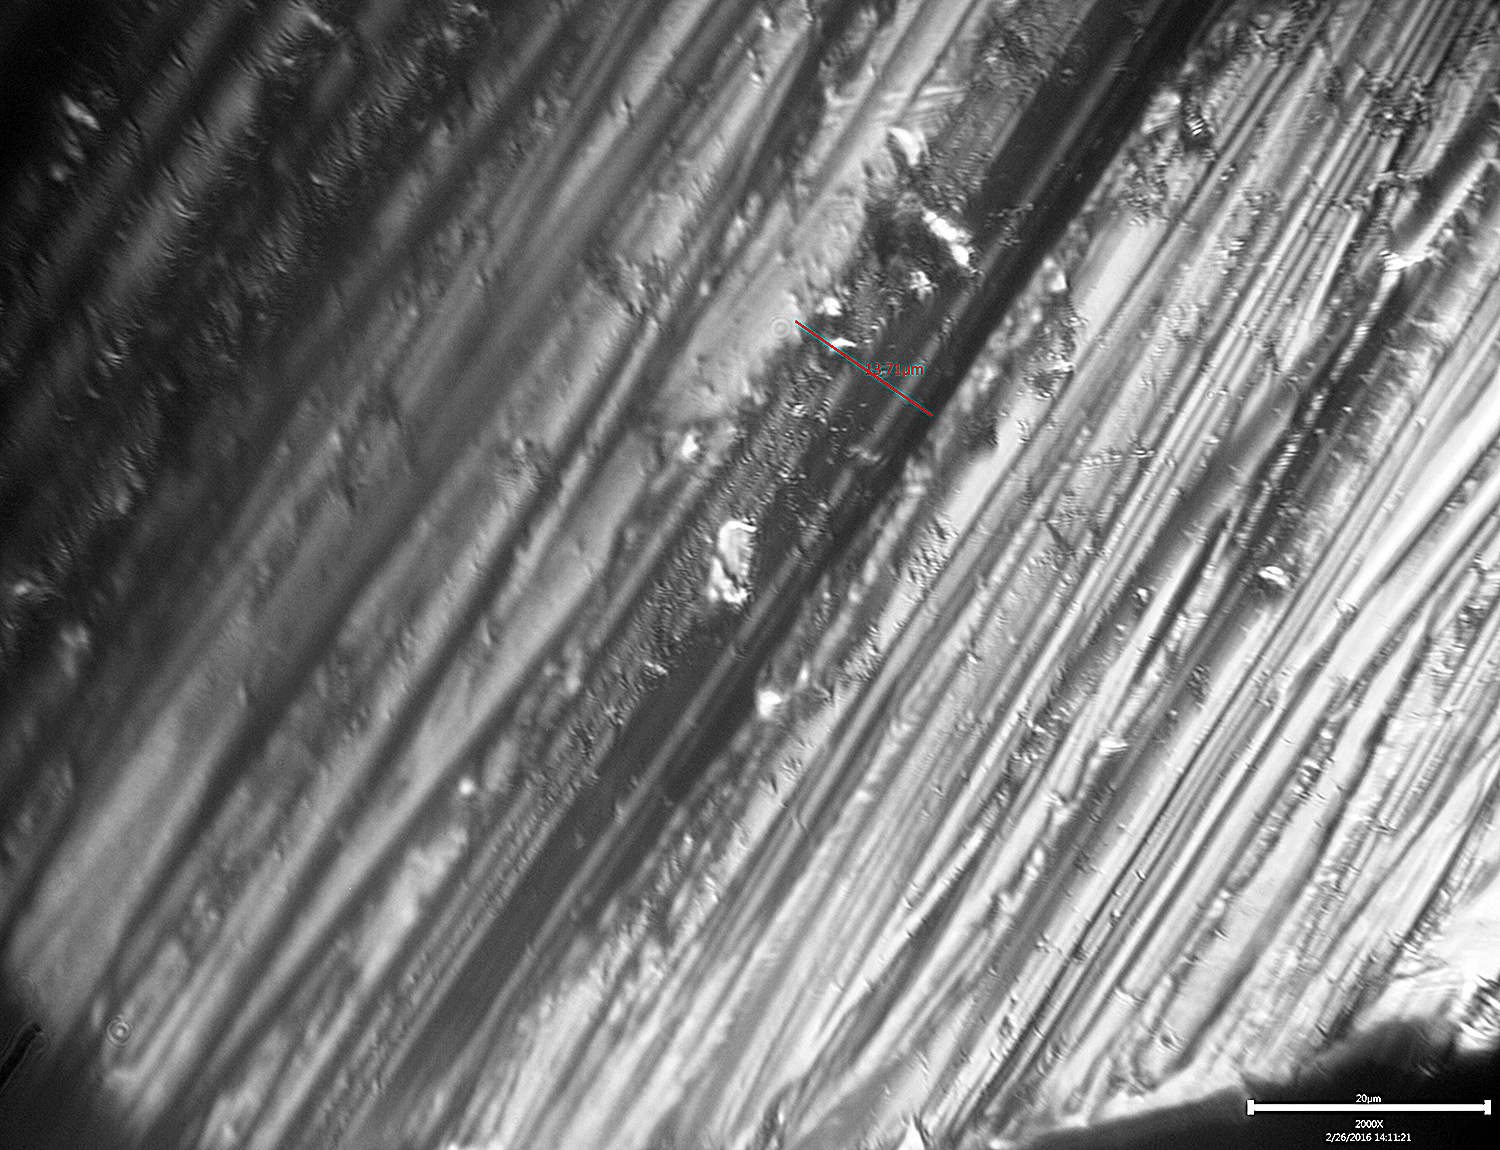
-Clay
Attachments:
You must be logged in to access attached files.
02/26/2016 at 2:37 pm #31691I’d hazard the following guess – the large chunks we saw in the first 600# edge trailing images were leftover from the 200# stones because the size of the chunks fits fairly well. It is possible for a smaller stone to tear out a bigger chunk, especially if the steel is fatigued, so it’s by no means established that the 400# or 600# stones are not responsible, but there is a greater likelihood that the edge wasn’t adequately cleaned up prior to moving on to the higher grits. It does seem clear that edge trailing strokes are good for removing material and that a few edge leading strokes to finish the edge can be helpful.
I agree w/ you and Tom, looks like it’s gotta be! Thanks for doing all this research Clay, it’s neat to see the pics in the progression!
1 user thanked author for this post.
02/26/2016 at 10:10 pm #31697I went ahead with the 6µ diamond films. Man do I love these things: They cleaned up the edge very nicely, very quickly.
I already loved these things. Now I know why…
Molecule Polishing: my blog about sharpening with the Wicked Edge
02/27/2016 at 9:11 am #31707I spent an hour yesterday , starting at 600 finishing on 1000 to try smooth the edge, it is smoother but not much and it’s not sharp!
I am going to start all over and try raise a burr and go again.200 grit OK to start with or 400 be a better option?
02/27/2016 at 9:29 am #31709I don’t think I would start over… if your edge is rough to begin with.
I would double check that you’re at the right angle and reaching the edge… (mark with a Sharpie and make sure it’s getting removed). If you are, I would stay with the finer stones… 400 or higher. (Even if you decide to raise a burr again).
Another thing you can try is alternating the direction of the stroke… if you’re doing edge trailing from heel to tip, you can try edge trailing from tip to heel or edge leading heel to tip, and see if that helps clean things up. It will also show if you’re removing the underlying grind marks, since they’ll now be in a different direction.
Also make sure and keep your pressure on the stones light… let the diamonds do the work.
02/27/2016 at 10:15 am #31710Clay, when you went to the films were you matching the angle? And was it a microbevel angle you were matching or the full bevel width?
I spent an hour yesterday , starting at 600 finishing on 1000 to try smooth the edge, it is smoother but not much and it’s not sharp! I am going to start all over and try raise a burr and go again.200 grit OK to start with or 400 be a better option?
Curtis has some good advise. Also what I do if I have chips in an edge is take my 600-1k stone, w/ the end of it and grind 90° into the edge until I can hit the edge w/ a bright flashlight and make sure I have gotten to the bottom of the chips. When this is done you could start w/ your 400 grit stones and take it from there.
02/28/2016 at 7:46 am #31734Clay, when you went to the films were you matching the angle? And was it a microbevel angle you were matching or the full bevel width?
I spent an hour yesterday , starting at 600 finishing on 1000 to try smooth the edge, it is smoother but not much and it’s not sharp! I am going to start all over and try raise a burr and go again.200 grit OK to start with or 400 be a better option?
Curtis has some good advise. Also what I do if I have chips in an edge is take my 600-1k stone, w/ the end of it and grind 90° into the edge until I can hit the edge w/ a bright flashlight and make sure I have gotten to the bottom of the chips. When this is done you could start w/ your 400 grit stones and take it from there.
I matched the angle and did the full bevel. Of course a micro-bevel would be a lot quicker and easier and I think the films would be a great way to be very efficient. If a person wanted to a nice plan to go from start to finish, it might look like 100# to re-profile, but not quite to the edge. Then work their way to the edge as they go through the rest of the diamonds until the reach 1000#. Then a quick micro-bevel with the lapping films to get the apex and done.
-Clay
02/29/2016 at 11:50 am #31748Hey,
I am just looking at the knife and wondering as its a cladded knife and the parts that are blunt are the ones with no visible core steel behind the edge. will this effect the sharpening? time to thin the knife?
03/01/2016 at 7:09 am #31762Hey, I am just looking at the knife and wondering as its a cladded knife and the parts that are blunt are the ones with no visible core steel behind the edge. will this effect the sharpening? time to thin the knife? http://postimg.org/image/9ttjqzcgb/ http://postimg.org/image/cr1xxvnb5/
I can’t tell from your pictures, but yes, if the steel core isn’t showing, it needs to be thinned.
03/01/2016 at 3:00 pm #31767Everything sorted now, I thinned in out on 220/ 1000 grit waterstones and polished it up pretty good with 4000/8000, also sharpened it up by hand and its like a razor now
 , happy out just haven’t gone near it on the WE since. will post pics soon
 -
AuthorPosts
- You must be logged in to reply to this topic.