Pro Pack II preventative maintenance
Recent › Forums › Main Forum › Sharpener and Accessory Maintenance › Pro Pack II preventative maintenance
- This topic has 7 replies, 6 voices, and was last updated 08/25/2015 at 6:12 am by
 Zamfir.
-
AuthorPosts
-
07/16/2014 at 2:07 am #19456
OK. I got my Pro Pack II yesterday. If you don’t have the upgrade, head over to the “products” section and buy it – it’s worth every penny.
I’ve seen other posts with the same maintenance issues and different solutions. Here’s a variation of the theme:
The ball joint assembly is threaded into the new aluminum blocks and the set screw can damage the threads if overtightened. Once that happens the damaged ball joint threads can damage the softer aluminum block threads, so I chose to run a tap into the block and a die over the threads on the ball joint assembly to clean them up. Then I added thread wax to lube them. Works great, lasts a long time, anyone can do it.
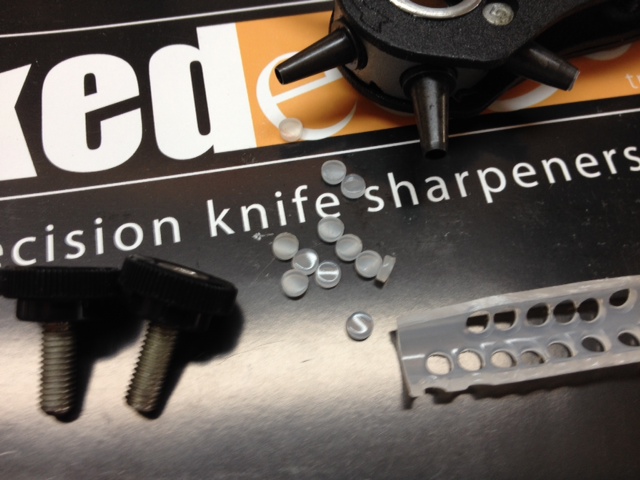
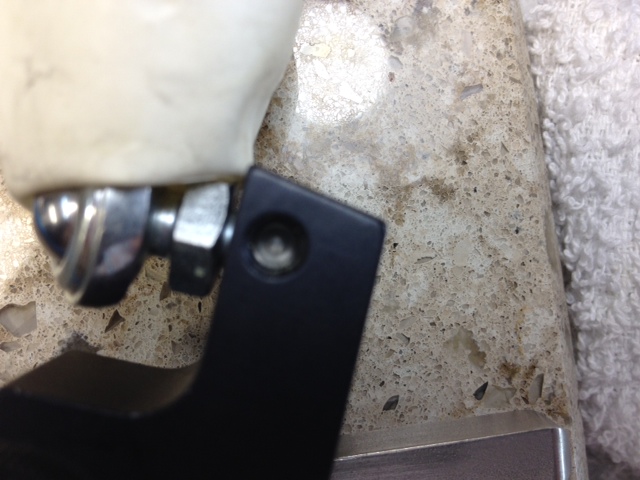
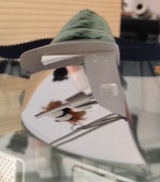
To prevent future damage from the set screw, I ground the set screw flat (it’s truncated or pointed on the end). I had some polyethylene tubing laying around so I punched some “plugs” out with a leather punch and dropped them into the threaded hole. The plug serves to protect the threads of both the ball joint and set screw. See the picture of the plug in the set screw hole. I think the polyethylene will last but if it doesn’t I’ll try leather. We used this concept many years ago when I was in the aircraft maintenance line of work.
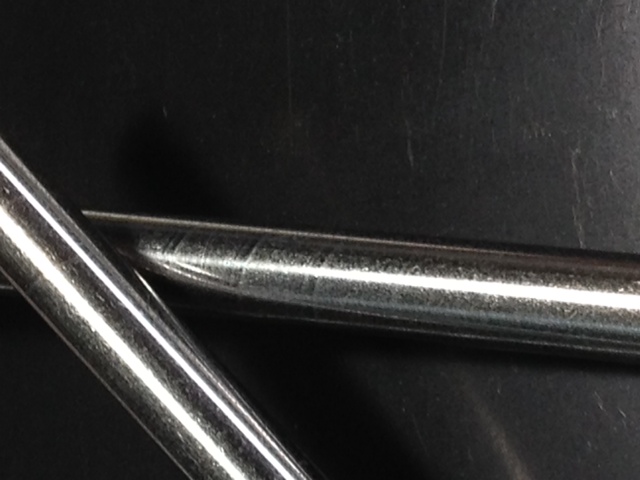
My new rods have a candy cane marking, apparently from the machining process (see the not very good picture). I chucked the rods in the drill press and buffed them with crocus cloth. You can still feel it with a fingernail but I can’t feel it while sharpening.
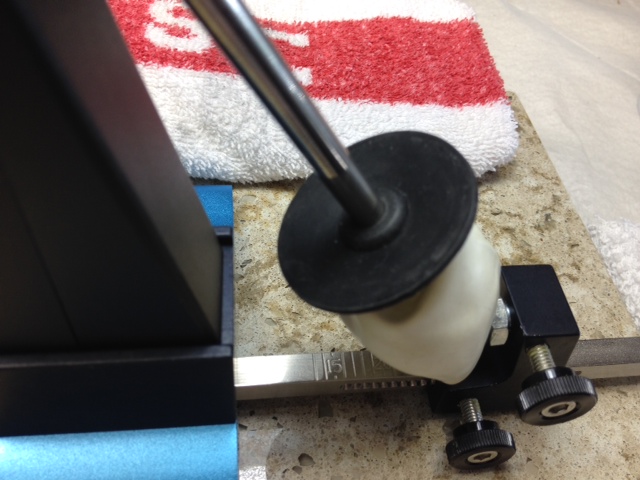
Lastly, I really like the rubber fender washer idea and decided to use a rubber grommet with the rubber fender washer to add stiffness. See picture.
I really like this forum.
UPDATE: The polyethylene works OK but compresses too much I think. So I punched new plugs from an old, thick belt. They work much better. I’ll keep looking for better material and welcome any suggestions.
Attachments:07/16/2014 at 2:39 am #19458very interesting! I can’t say i’ve had any trouble with mine stripping out at all… but I just finger tighten them and then check them once in a while.
to protect the ball joint itself I use the “rubber glove” idea where i cut the tip out of a rubber glove and then made a small hole in it and slid the rod through it all the way down to the joint. then i zip tied it on so it won’t slip. works great!
07/16/2014 at 6:05 am #19469Welcome to the forum. Good ideas.
07/17/2014 at 10:42 am #19472I bought some brass-tipped set-screws but they didn’t give me what I wanted. As you rotate the set-screw, the brass tip is twisted against the micro-adjust’s threads. I’m now using a very small bit of insulation from a wire and compress it against the micro-adjust’s threads with a screw, which I had ground flat. The plastic seems to apply a constant (snug) drag to the micro-adjust, allowing it to be adjusted at will without backing off on the set screw. I would think the plugs you’ve cut from the poly would work just fine – maybe you need to stack more than one of them in the hole.
Tightening the plug(s) against the threads makes the plug assume the shape of the threads – kind of like a “Ny-lok” screw. I think that leather, while it will take the shape of the threads, might eventually loosen up as fibers are shed when the micro-adjust screw works against it.
07/17/2014 at 10:26 pm #19476Your thoughts about micro adjustments is exactly what I’m trying to do. And I agree the leather “plugs” could eventually break down. I will try stacking two poly plugs and see what happens – you may be right that it needs to be thicker.
Plastic is probably the best medium for the plugs, I just need to find the best kind of plastic that doesn’t compress too much, provides some rotational resistance, and still protects the threads.
07/18/2014 at 4:45 am #19477WE has screws with plastic tips/inserts. I called and requested some. Don’t know how long the plastic will last, but they work well. I just hand tighten these and the micro adjust stays put.
08/24/2015 at 11:23 pm #26358Try using a lead “BB” from shotgun shell of the right size. Tighten the set screw very snug to conform to the hole and threads then back off enough to allow you to move the angle adjuster screw with the allen wrench but not move on its own. It lasts for a long time. I’d say to make sure children don’t eat the lead shot, but that is the least dangerous part of knife sharpening.
08/25/2015 at 6:12 am #26361I grabbed a small nylon bolt and carved off the threads so it would fit into the micro adjust tightening screw. Then I cut a chunk off about 3 mm thick and shoved it in there and tightened the real screw back down. I did not do anything to the screw end because it would now not be hitting the threads. Has been working great for a long time. Cheap and easy. When I first got my WE I applied anti seize grease to all the screws from an auto parts store. Just one of them little packets by the register. Cheap and about 5times as much as I needed. Works good lasts a long time.
-
AuthorPosts
- You must be logged in to reply to this topic.