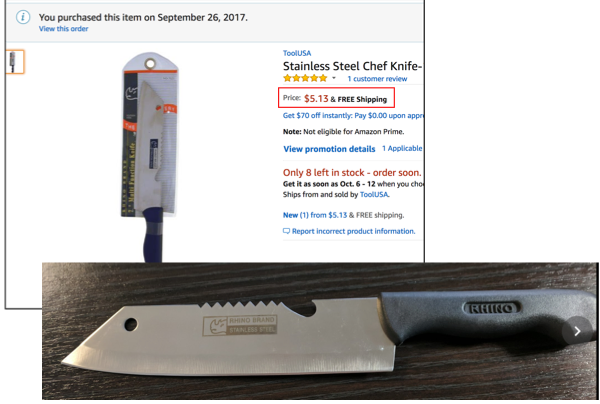
New record for cheap (new) knife?
Recent › Forums › Main Forum › Techniques and Sharpening Strategies › Task Specific Knife Sharpening › Cooking › New record for cheap (new) knife?
- This topic has 5 replies, 3 voices, and was last updated 10/05/2017 at 8:57 am by
 Marc H (Wicked Edge Expert Corner).
-
AuthorPosts
-
10/04/2017 at 4:36 pm #4137110/04/2017 at 5:53 pm #41374
USE IT FIRST! before you just sharpen it. I’ve learned to always get a feel for an edge before I sharpen it. Then I know what my edge compares to. I’m always happy when my edge feels sharper than the edge the knife came with out-of-the-box. If my sharpened edge isn’t better than the original edge I take it as a lesson I need to learn, an opportunity to improve my sharpened edge!
Marc
(MarcH's Rack-Its)10/04/2017 at 10:38 pm #41377So, out of the box it had a kind of sharp edge. About 1 time out of 5 it would cut into the edge of a piece of paper cleanly.
To find the angle, I did the sharpie method. The odd thing was that the left side of the blade was 20 degrees, but the right side I ended up bumping all the way out to 27 degrees before it removed the sharpie from the edge of the blade. I worked a long time with 100 grit, like more than 10 minutes. Then I went through ~ 50 strokes per side with 200/400/600/800/1000/1.0/0.6.
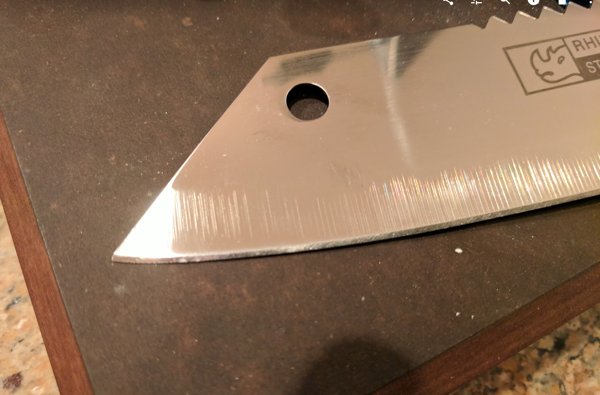
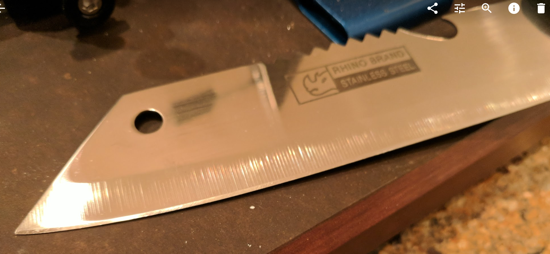
After all of that, I could see a really nice looking edge on the blade! It’s tough for me to get a good picture of it, but wow is it a pretty edge compared to how it was from the factory.
For sharpness, it’s much sharper, but still not as sharp as my other kitchen knives. Maybe that’s because it’s cheap steel, or more likely I’ll just need to sharpen it a couple more times before I get it profiled to be really sharp.
Attachments:
You must be logged in to access attached files.
1 user thanked author for this post.
10/05/2017 at 1:41 am #41380It may sound too easy to miss this, but in the beginning of my sharpening experience, after I had already successfully sharpened a couple of knives I became less attentive thinking I had this stuff down and failed to fully apex the entire edge. I had drawn a burr on one side, then drawn a burr on the opposite side. But I never truly brought the two burrs together using a bilateral, alternating stroke to knock the burrs off and bring both individualized ground bevels together cleanly at the apex. Actually I did this just a couple times before I made it a practice to incorporate these finishing alternating strokes form side to side, bilateral, left side, then right side, then left side, then right side. Always ending with a simple finger feel along the entire bevel to check for sharpness. Still, I do this, every time, at the end of every grit stone before moving on to the next grit. It is so simply but so important to the quality of the sharpness of my edges.
I’m not saying this is what you did, cjb. Just make sure you have apexed your edge across the entire bevel each stone you use. Some will say they don’t do this for every stone and try to save steel by only doing this with the finishing stones. I find my results are best when I do this for every grit stone.
I don’t necessarily draw a full burr along the full length of each side, individually. Then repeat the process again fully drawing the full burr along the entire length of the opposite side bevel, folding metal in the opposite direction. I am able to save a little metal here because I now know how it feels just as I start or approach the burrs and also I visually inspect my edge scratch pattern with the USB microscope. I do always insure the two sides are drawn together at the center apex along the full length of the bevel with alternatingly, bilateral, strokes, followed by a finger feel sharpness test!
Marc
(MarcH's Rack-Its)10/05/2017 at 2:49 am #41383USE IT FIRST! before you just sharpen it. I’ve learned to always get a feel for an edge before I sharpen it. Then I know what my edge compares to. I’m always happy when my edge feels sharper than the edge the knife came with out-of-the-box. If my sharpened edge isn’t better than the original edge I take it as a lesson I need to learn, an opportunity to improve my sharpened edge!
I think this is a very good tip and worth stressing. I nowadays do exactly the same for exactly the same reasons. And the knives I sharpen most often are Japanese kitchen knives of good steel which usually come out of the box pretty sharp already, so it’s no punishment to use them.
I don’t necessarily draw a full burr along the full length of each side, individually. Then repeat the process again fully drawing the full burr along the entire length of the opposite side bevel, folding metal in the opposite direction. I am able to save a little metal here because I now know how it feels just as I start or approach the burrs and also I visually inspect my edge scratch pattern with the USB microscope.
Is this (the bold text) purely because you want to try to repeat the original edge and to save metal, or is there another reason, too?
Molecule Polishing: my blog about sharpening with the Wicked Edge
10/05/2017 at 8:57 am #41396It’s bold just to stress I don’t draw a burr across the entire bevel side then repeat it on the other side, to save wasting metal. It is also to emphasize that with experience and employing a technological/digital visual aid, the USB Microscope, I can see in the scratch pattern just the moment when I have finally reached the apex and I no longer need to roll the burr to be able to physically feel the burr proving the edge was apexed.
Marc
(MarcH's Rack-Its)1 user thanked author for this post.
-
AuthorPosts
- You must be logged in to reply to this topic.


