Chosera stone maintenance
Recent › Forums › Main Forum › Sharpener and Accessory Maintenance › Chosera stone maintenance
- This topic has 112 replies, 13 voices, and was last updated 08/08/2013 at 11:15 pm by
 wickededge.
-
AuthorPosts
-
06/14/2013 at 11:06 pm #12350
I’m thinking more in terms of diamonds, but it is apparent on the ceramic- they lose their points, and gain more surface area. Depending on the position and shape of the particle, it may become very wide after some time.
From what I’ve read, this happens in finishing, not so much later in use. I wasn’t sure which way you intended that to read, so just trying to clarify (in my own mind 😉 ) I doubt you’ll see much change in the surface presented, over time and usage, as the ceramic is much harder than the steel
How much effect the size of these “plateaus” makes I don’t know but I’d guess ‘not much’ except to make the ceramic less aggressive.
Ken[/quote]
Right, Ken B – With Clay’s micrograph, I would say the surface of that sample has been lapped, giving it the large flat plateus. That would happen over time on any ceramic stone, and the wear rate from actual sharpening will depend on the strength of the binder. For example, the 8K and 15K Shaptons are actually noticeably “softer” than the 5K and 30K. The surface texture lasts for a few knives, for sure, but the Shaptons are also no where near Spyderco hard.
Keep in mind, too that the scratches from the diamond plates don’t influence the overall surface of the stone in terms of the grit – remember the white stuff is the abrasive the preceding pictures. 🙂 As Ken S mentioned, we’d also need to zoom in a couple of magnitudes on Clays micrograph to see what is actually happening on the surface of one of those plateaus to better see what really happens.
06/15/2013 at 4:51 am #12352Thanks Phil for correcting my words. You’re right that texture differences don’t transfer to the edge. I guess I couldn’t find a better word. I even had to laugh about Ken’s statement on transfer functions. (I studied signal processing at college, a subject I hated by the way…).
And of course texturing a ceramic stone with a diamond plate doesn’t create particles. That’s why I put the word between brackets. I don’t know whether “ridge†is a better word. According to my dictionary, a ridge is a long and narrow elevation. What would be better? Elevated spots?
Molecule Polishing: my blog about sharpening with the Wicked Edge
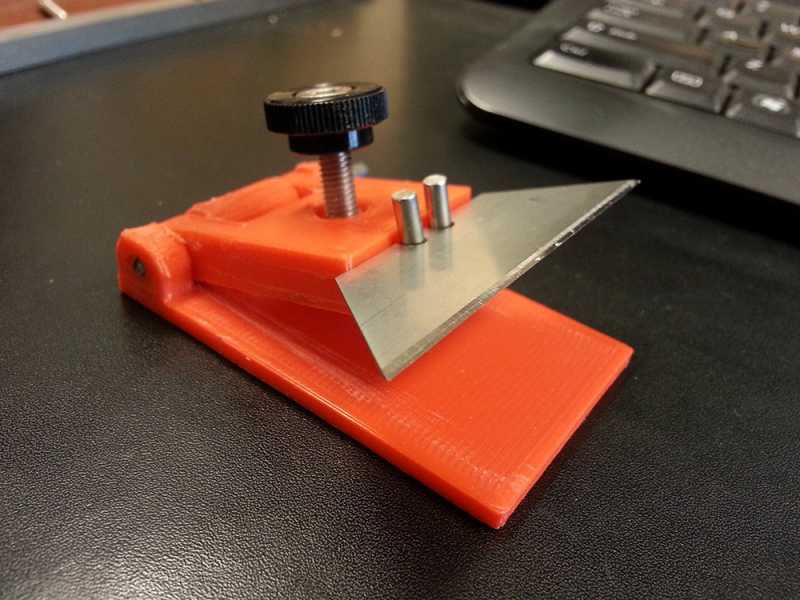
06/15/2013 at 9:39 am #12368Starting next week I should be able to get back into experimentation and microscopic imaging. I’ll be able to texture some stones and then image the effects they have on the metal. I can’t hit the super high magnification of and SEM but should be able to get to 2000x. Today I printed a new microscope stage that allows me to adjust the angle of the bevel very precisely in relation to the lens so I can choose to focus on the very edge, bevel or shoulder by adjusting a screw. I’ll eventually get one made at the machine shop but this one is working great for now:
It’s a little rough looking – I’m still learning how to use the printer to its fullest potential but it does work exactly as designed and for that I’m grateful. To all those folks who dreamed up 3D printer: thank you! It’s wonderful to take a problem, dream up a solution, draw it, model it and print it right at your desk. Very cool!
Attachments:-Clay
06/15/2013 at 12:33 pm #12369Awesome, Clay!!
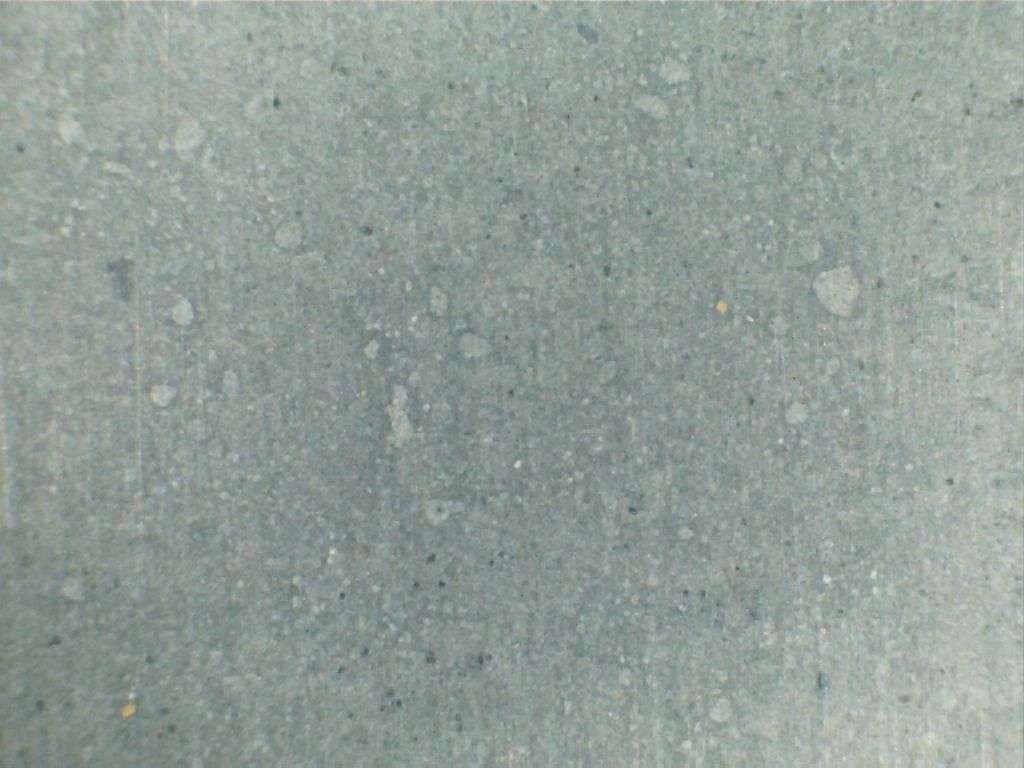
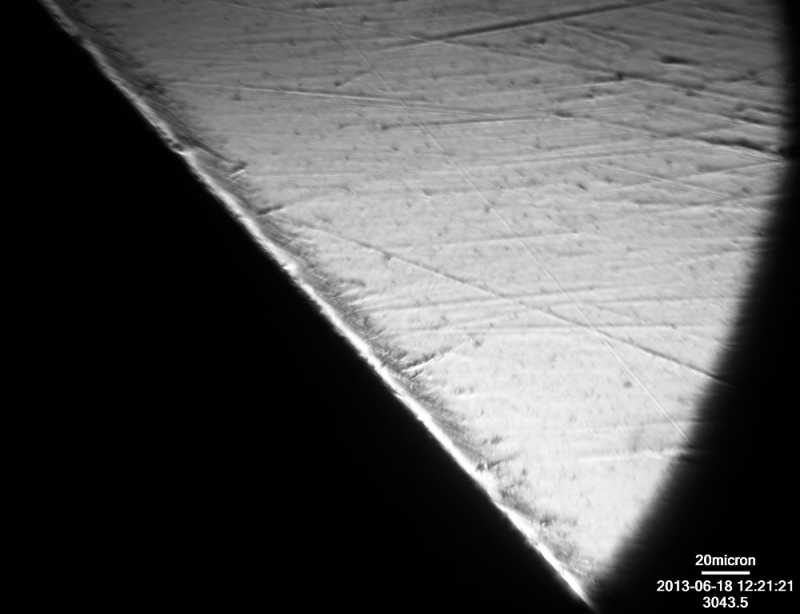
Here’s more surface texture. Up next is the 5K Shapton Pro, using the same lapping methods on the 140,400,600 and 1200 Atomas. Image size is 1mm x .75mm
We can see that the depth of scratch is not nearly as deep as the 8K Shapton was, hinting at a more solid binder (you could also attribute some variation in lapping technique) Note the shape of the clusters, not that it means anything! 😆
The 400 Atoma scratches are very clear and consistent. This is an acceptable grit to lap the stone with and corresponds with the Shapton Diamond Glass Lapping Plate (DGLP), which is approx 325/375 grit.
This is the 600 Atoma. It’s what I personally prefer to use on my 5K. The 5K Pro is a polishing stone which, by definition, could/should use the 1200 Atoma, but because the 5K is the workhorse of the critical leap on the Shapton Pro series, I like it to be slightly more aggressive.
1200 Atoma on the 5K is faintly visible at this magnification. Note how the surface has “craters” of abrasives – this is what Ken S was talking about with greater magnification needed in order to see what was happening at the individual particle level.

I will get some macro level shots at each level to show how what we see on the surface of the stone with our bare eyes corresponds to the micro images. Next up is the 5K Chosera, though.
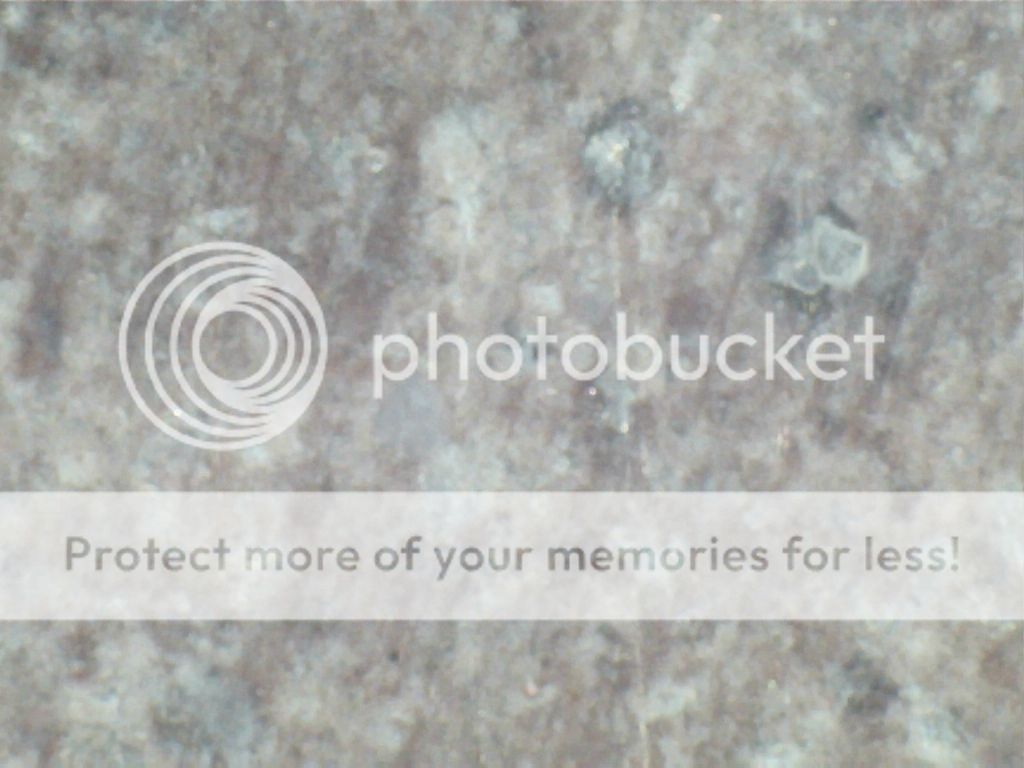
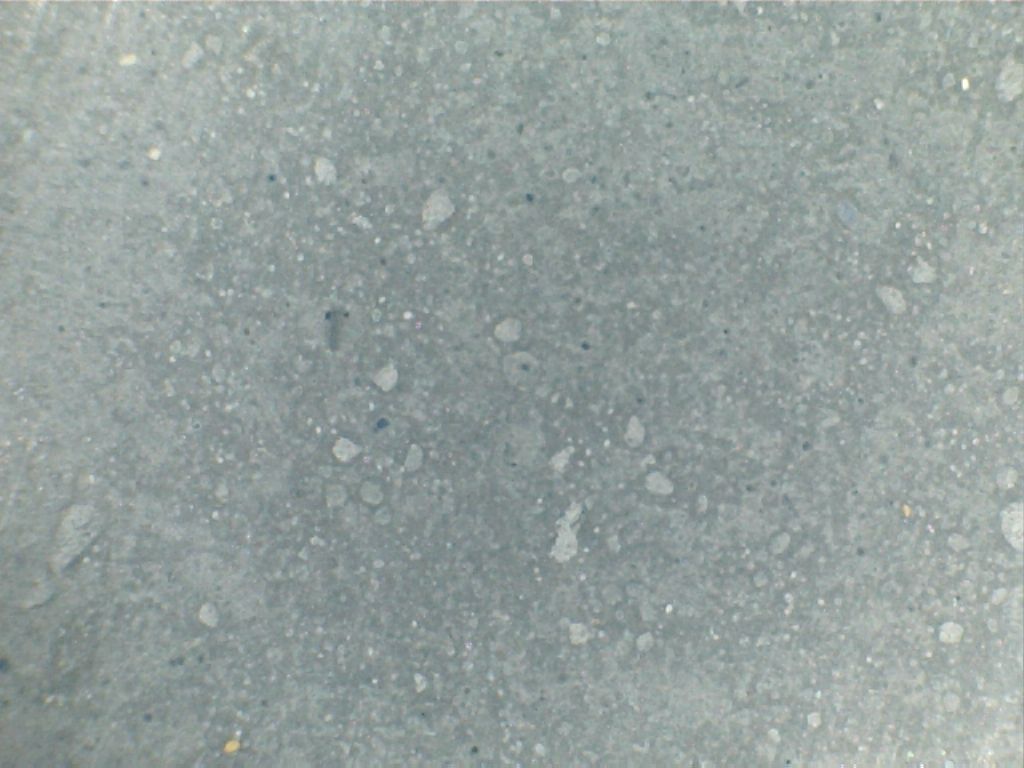
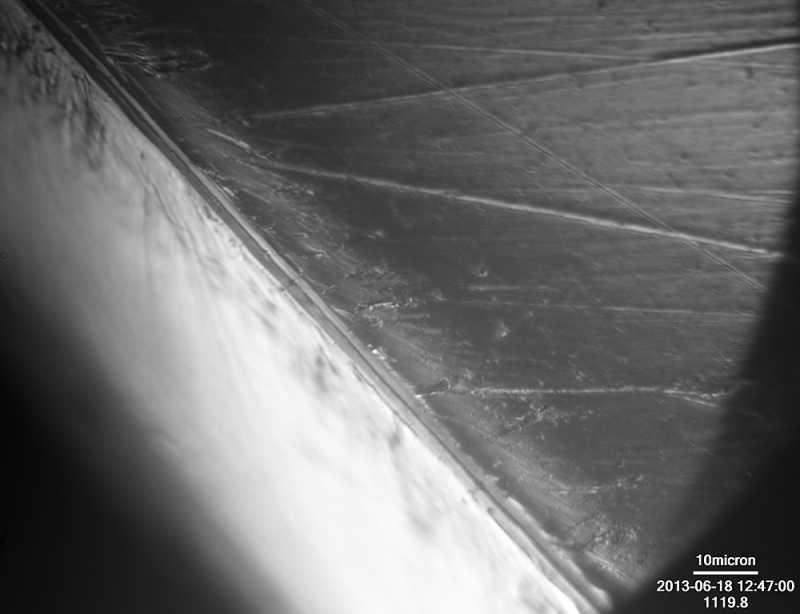
06/15/2013 at 12:48 pm #12370Here is the 5K Chosera with the #140 Atoma. We can see scratches more clearly than on the 10K – part of this lack of clarity can be attributed to the self cleaning that occurs on the lapping plate – the slurry from the stone actually does build up on the diamond plate a little, and creates a layer of 5K slurry between the diamond and the stone. This happens even faster on the 10K.

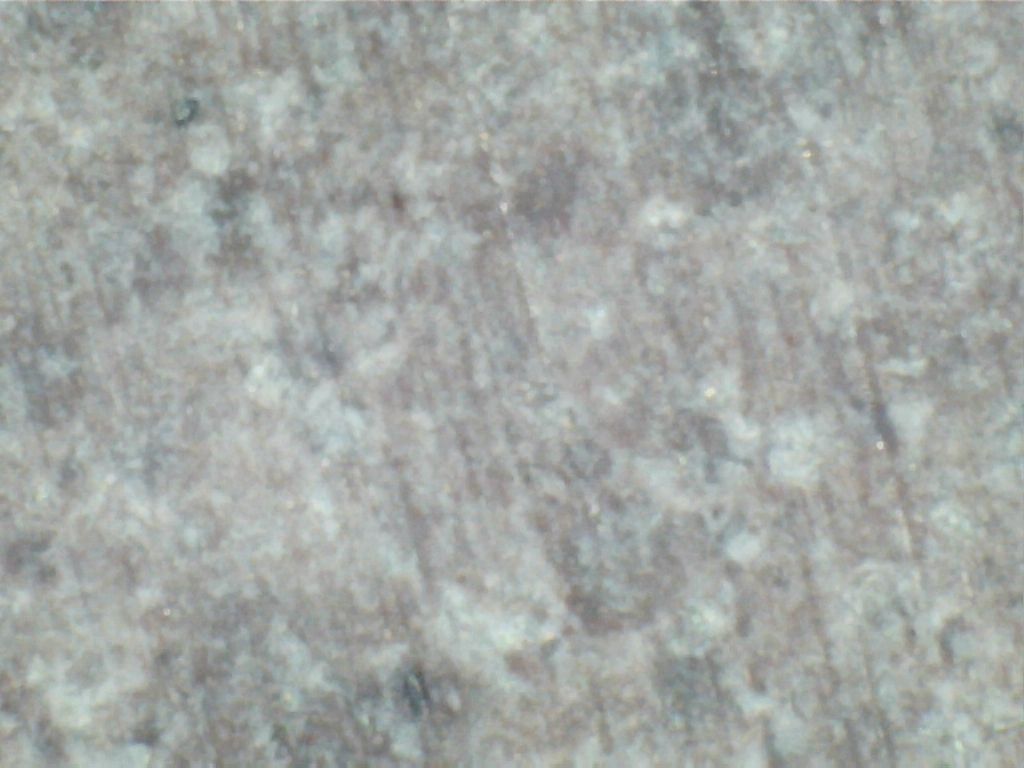
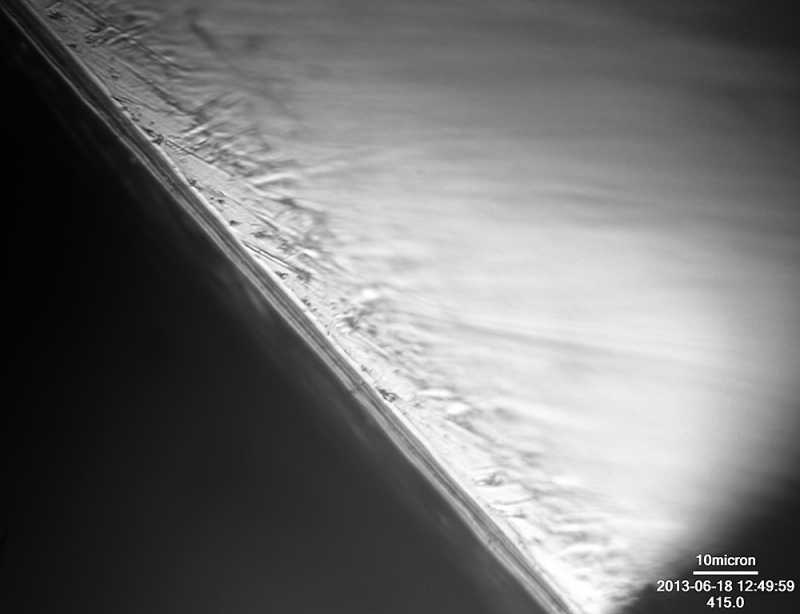
The 400 Atoma leaves the surface looking like the moon. the scratches essentially run through clumps of abrasive (which is white). You can see how this makes the stone more aggressive, since it will essentially split the peaks of the mounds, creating more peaks, thus more initial cutting power.

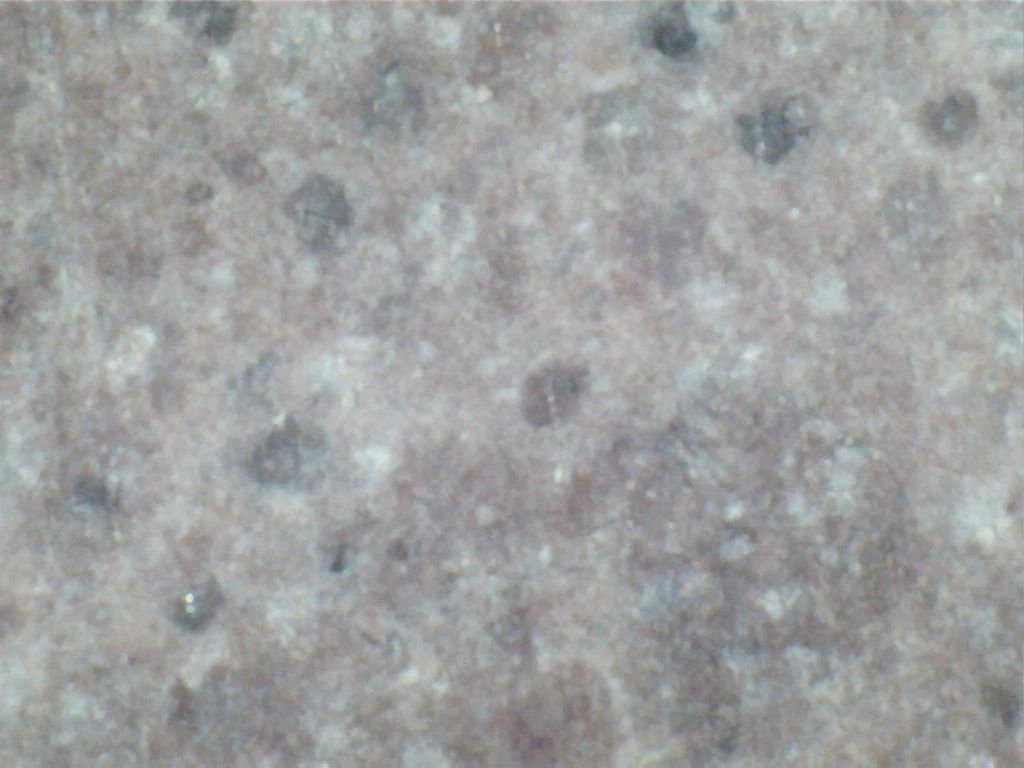
The 600 Atoma leaves the surface relatively smooth at this magnification, and just like the 5K Shapton, is my preferred lapping grit for this stone.

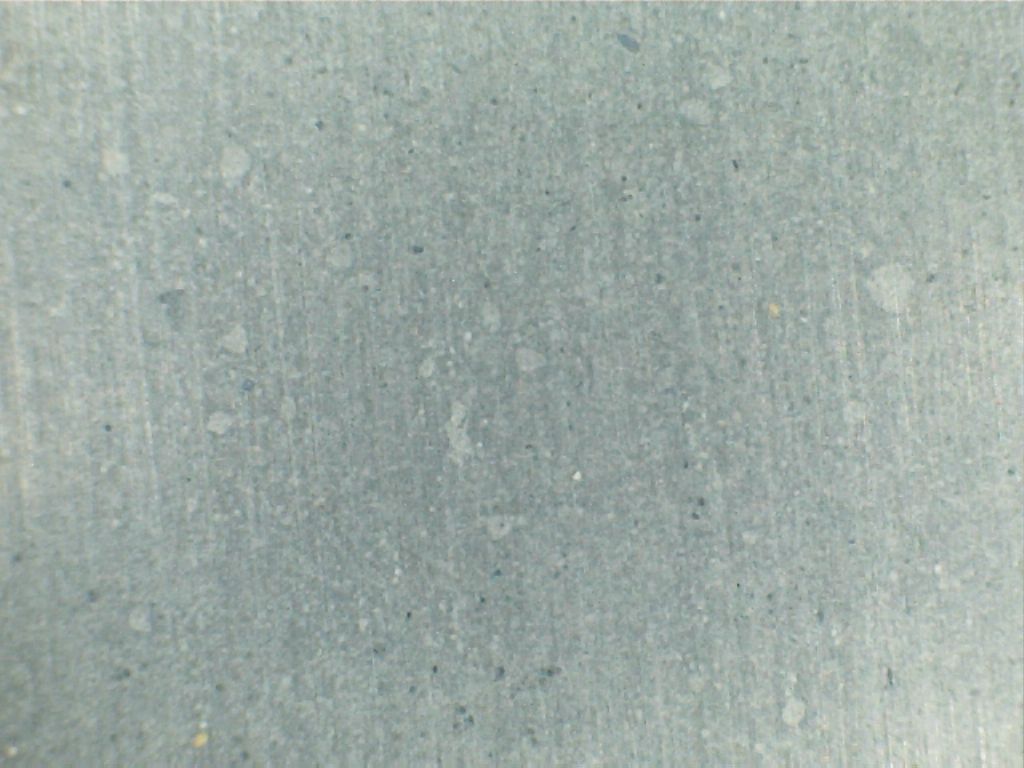
The 1200 leaves the surface very smooth and clean:

I will go back an do a macro set of shots at each grit.
06/15/2013 at 1:12 pm #12371Starting next week I should be able to get back into experimentation and microscopic imaging. I’ll be able to texture some stones and then image the effects they have on the metal. I can’t hit the super high magnification of and SEM but should be able to get to 2000x. Today I printed a new microscope stage that allows me to adjust the angle of the bevel very precisely in relation to the lens so I can choose to focus on the very edge, bevel or shoulder by adjusting a screw. I’ll eventually get one made at the machine shop but this one is working great for now:
It’s a little rough looking – I’m still learning how to use the printer to its fullest potential but it does work exactly as designed and for that I’m grateful. To all those folks who dreamed up 3D printer: thank you! It’s wonderful to take a problem, dream up a solution, draw it, model it and print it right at your desk. Very cool!I am so jealous… very.. very…extremely, jealous !!!:woohoo:
06/15/2013 at 1:20 pm #12372Here is the 5K Chosera with the #140 Atoma. We can see scratches more clearly than on the 10K – part of this lack of clarity can be attributed to the self cleaning that occurs on the lapping plate – the slurry from the stone actually does build up on the diamond plate a little, and creates a layer of 5K slurry between the diamond and the stone. This happens even faster on the 10K.
I will go back an do a macro set of shots at each grit.
Can we equate the tops of those peaks to the *ridges* that I talked about..
This is for Mark.I am not an expert in the English language… but I do OK.
What else would be good as a description for the ..often (at least sort of) V shaped peaks of the scratches (in this case highly dependent on the shape of the abrasive) that are longer than they are wide. and tall.. between the similarly shaped valleys…??
06/15/2013 at 3:24 pm #12375peaks, ridges, grooves, valleys, highs and lows are all interchangeable here… Mark will just have to keep his international dictionary for sharpeners handy 😉
06/15/2013 at 6:16 pm #12377OK this is the last picture progression – sorry for hogging the thread! :whistle:
I’m only putting the 5K Chosera macro pics up because it shows what the scratches actually look like on the stone with more or less the naked eye.
5K Chosera on Atoma 140
5K Chosera on Atoma 400
5K Chosera on Atoma 600

5K Chosera on Atoma 1200
I think we’ve more than proved the point that scratches in the stone surface from texturing do not transfer directly onto the blade, and that you can use texturing to somewhat control the aggression of a stone.
And We’ve opened up a new can of worms about what is really happening at the sub-micron level, which my scope can’t handle… :dry:
06/15/2013 at 6:25 pm #12378I took one of Tom’s pics – the Shapton 5k stone texturized with the 600 grit Atoma – and did a bit of image processing to bring out the scratch pattern a bit more to see the scratches more clearly. I cropped an interesting area of the image – in the right quadrant, the lower left portion of it.
overview:

Cropped closeup image:

—
Ken06/15/2013 at 10:19 pm #12379Starting next week I should be able to get back into experimentation and microscopic imaging. I’ll be able to texture some stones and then image the effects they have on the metal.
Ah… saved me some typing. 😉
Seems to me, this is what actually matters.
Today I printed a new microscope stage that allows me to adjust the angle of the bevel very precisely in relation to the lens so I can choose to focus on the very edge, bevel or shoulder by adjusting a screw. I’ll eventually get one made at the machine shop but this one is working great for now:
 06/17/2013 at 1:57 am #12422
Awesome topic, guys! This is definitely not just the Wicked Edge forum, but also the forum where the most experienced sharpeners, people who aren’t afraid to ask “dumb†questions about sharpening and people who love to experiment come together. And where your ass doesn’t get kicked when try you upset the apple cart.
Clay, that’s a very revealing photograph, the SEM image of the ceramic stone. I can now really imagine how texturing a stone like that (particularly such a polished one) with a diamond plate would change the texture of this ceramic stone: by creating ridges/high spots of abrasive material. And how the way a ceramic stone like that is textured would change the finish it leaves on the edge.
And this would not be the case with a waterstone. Tom has nearly proved this. (Just waiting for Clay’s images of the impact on the edge…) In the case of a ceramic stone, lapping with a diamond plate may change the size of the abrasive spots (not particles, not even between quotes, thanks Phil 😉 ), whereas in case of a water stone this is not the case. In the case of a water stone, the abrasive things (particles) keep their size.
At least, that’s a hypothesis. I completely agree with you guys (Ken phrased this well for the case of the ceramic stone) that it is only a hypothesis.
It would be great if you’d have the time to do some experiments, Clay. I remember from the time when you introduced the 1.4/0.6 mu stones that you gave the advice to lap them with a diamond stone and I’ve always wondered why and whether that would have any effect.
Molecule Polishing: my blog about sharpening with the Wicked Edge
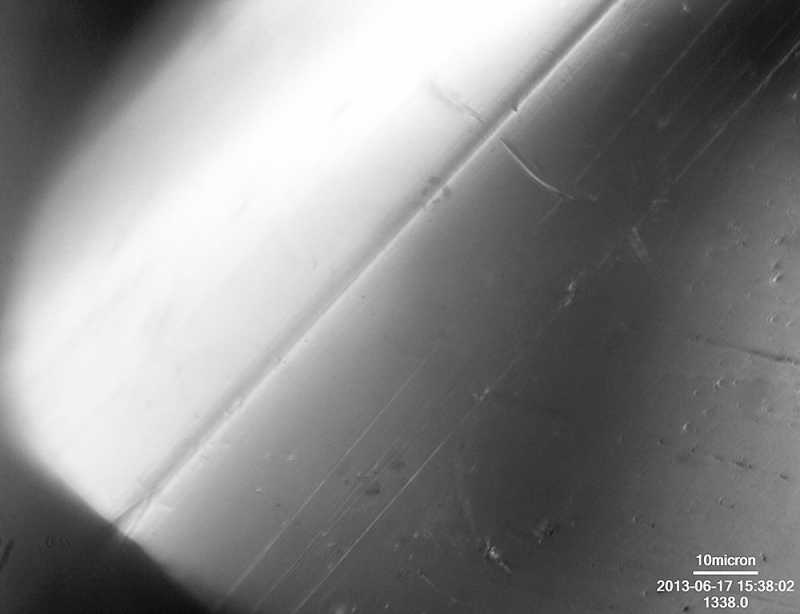
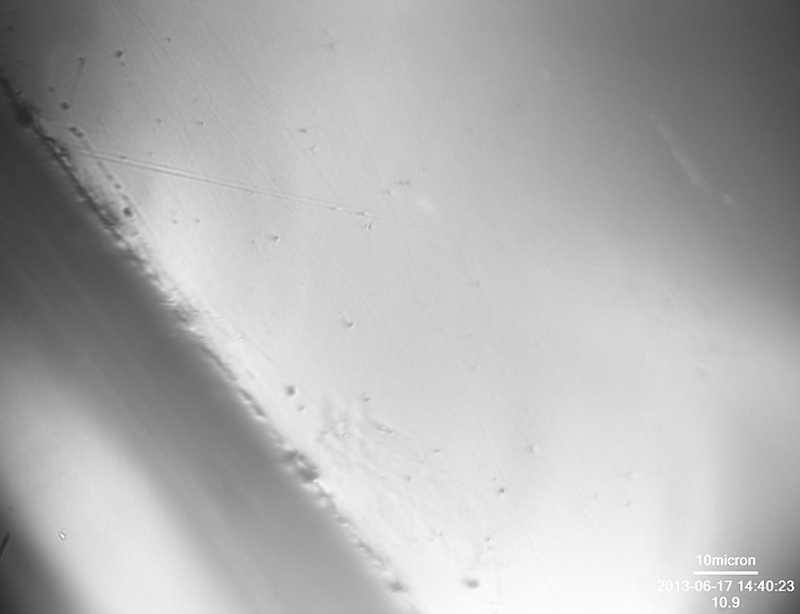
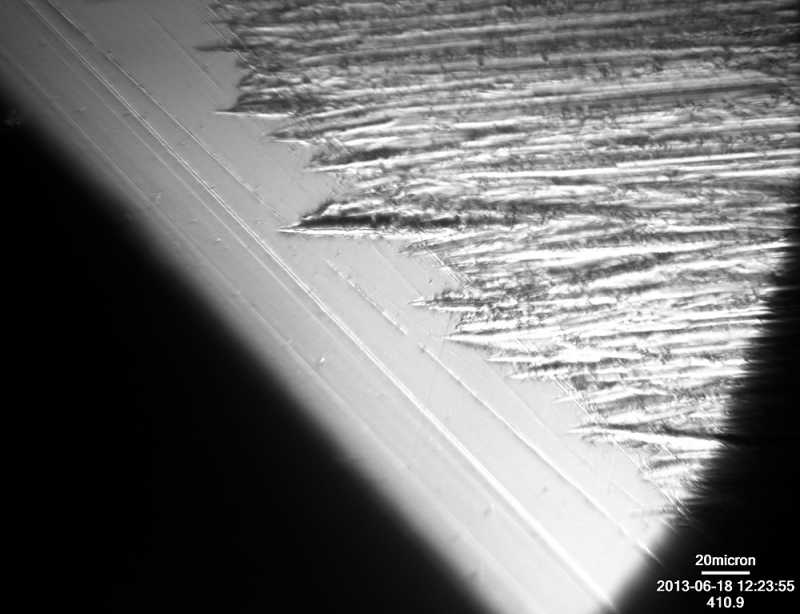
06/19/2013 at 5:06 am #12503Finally got the new microscope stage set up and got my Micro-Fine ceramic stones prepared. I textured one set with a new 50# diamond plate and I lapped the other set through all the diamond plates and down to 3 microns on a big DMT plate I have (we’ll be carrying the DMT 3 micron stones soon.) There is a very noticeable difference between the two sets of stones now. I started with a fairly well polished set of blades. Here is a sample before applying the Micro-Fine ceramic stones:
This sample is photographed at 13 degrees from horizontal to match the bevel I’d put on. At 2000x with immersion oil, you get a reflection of the bevel (I think it’s a reflection though it’s remotely possible that we’re actually seeing the other side of the edge. I believe I can test this at some point by altering the other side slightly and verifying whether we can see the alteration.) The line down the middle of the image is the edge and bevel is to the right of that line.
Next I raised the angle significantly to look down on the edge a little more:
-Clay
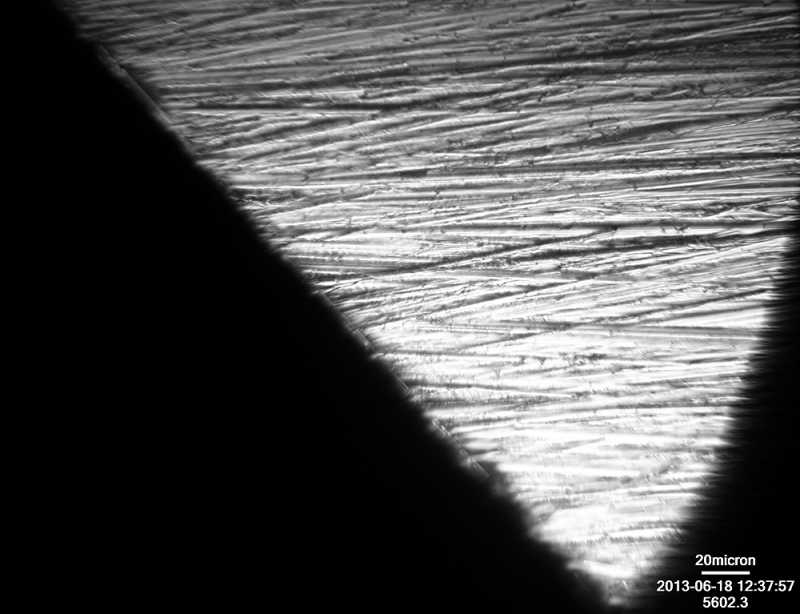
06/19/2013 at 5:08 am #12508Here is a blade after using the finely lapped Micro-Fine stones:
This first image is at 13 degrees and 800x magnification.
This image is at 13 degrees and 2000x.
This last image is at a much steeper angle and at 2000x.
Attachments:-Clay
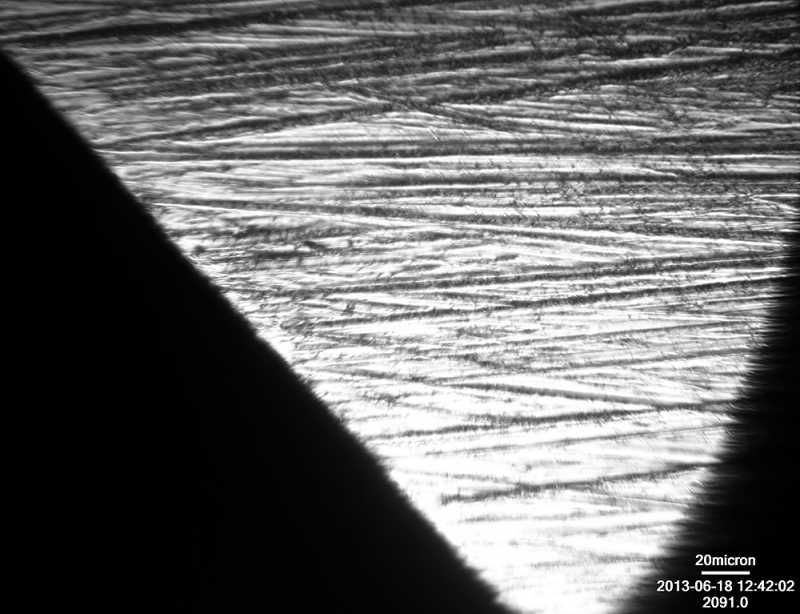
06/19/2013 at 5:09 am #12512Here is a blade after using the textured Micro-Fine stones:
I saw when I put it under the scope that I hadn’t reached the edge… Image is at 13 degrees, 800x.
Closer to the edge, almost there. 13 degrees and 800x.
All the way to the edge finally. 13 degrees and 800x.
Attachments:-Clay
-
AuthorPosts
- You must be logged in to reply to this topic.