Advanced Search

advanced alignment guide pro3 2017 manix 2

Recent Forums Main Forum Getting Started advanced alignment guide pro3 2017 manix 2

Viewing 4 posts - 1 through 4 (of 4 total)
  • Author
    Posts
  • #50482
    cmyhero
    Participant
    • Topics: 10
    • Replies: 26

    Using the advanced alignment guide in a 2017 pro 3 what should be the address for the manix 2 including upper or lower hole placement?

    #50487
    Marc H
    Moderator
    • Topics: 74
    • Replies: 2735

    Here’s the link to the W.E. users sharpening settings submitted for their knives: https://wickededgeusa.com/pages/knife-sharpening-settings-submitted-by-customers

    Click the search, (magnifying glass far right-top and enter “Manix 2” for those submitted listings.  It appears that most of the listing were made with the original standard alignment tool.


    Marc
    (MarcH's Rack-Its)

    1 user thanked author for this post.
    #50503
    cmyhero
    Participant
    • Topics: 10
    • Replies: 26

    Here’s the link to the W.E. users sharpening settings submitted for their knives: https://wickededgeusa.com/pages/knife-sharpening-settings-submitted-by-customers Click the search, (magnifying glass far right-top and enter “Manix 2” for those submitted listings. It appears that most of the listing were made with the original standard alignment tool.

    Marc..I do not have anything than the advanced guide..how does it compare to original ?

    #50504
    Marc H
    Moderator
    • Topics: 74
    • Replies: 2735

    Here are the alignment guides superimposed to give you a comparison.  As you see the original alignment guide is just a ruler labeled A,B,C, & D with hash mark indicators for 1/2 units. It is interpolated for smaller divisions.  This compares with the Advanced Alignment Guide, (AAG) with a capital letter for each 1/4 unit corresponding to the original alignment guide.

    Alignment-Guides-Comparison

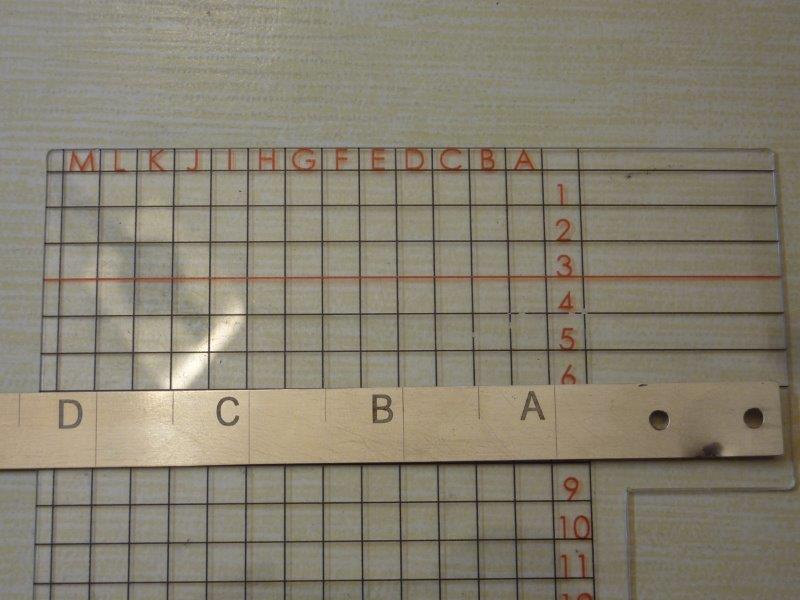
    The user’s submitted suggestions were B.25 with the original guide in the bottom key holes.  This would translate to E-1/2 on the AAG, for the horizontal or “X” axis and the vertical height on the line under 6 and above 7, on the “Y” axis.  Again using the depth key positioned in the bottom holes.  There were no more specific mounting instruction so I would clamp the blade as vertical as possible.  Then check the sweet spot with a marker, which is the ultimate indication for proper clamping position.

    Marc
    (MarcH's Rack-Its)

    Attachments:
    2 users thanked author for this post.
Viewing 4 posts - 1 through 4 (of 4 total)
  • You must be logged in to reply to this topic.