I’m going on a backpacking trip along a 100 mile stretch of the Continental Divide Trail soon. A friend and I have been planning it for over a year and these last couple of months have been full of preparations, thoughts and discussions on exactly what gear to take. Since we have to carry 10-11 days worth of food, other gear needs to be kept at a minimum to keep the weight down. For that reason, I decided to take only one knife. The knife I chose is the Fällknieven F1. I like it because it’s very strong, lightweight (weighing in at 6.8 ounces) and extremely ergonomic. Once I pick it up, it seems to not want to leave my hand. I also like the blade design and the way the steel takes and holds an edge. It’s VG10 so we might expect a lot of chipping but I’ve been pleasantly surprised about how well it’s holding up. The people at Fällknieven must do a good job with their heat treatments. So, this is my one knife, how best to prepare it for all the tasks it will face each day of the journey?
The edge needs to be keen enough to help with first aid if needed, cut easily through paracord and rope, able to carve and split wood and, hopefully, field dress a grouse or snowshoe hare. It has to do some or all of those things on a daily basis. The wood cutting/prep tasks will be the hardest and take the biggest toll on the edge.
The knife comes from the factory with a convex grind all the way from the spine. The edge itself is a small v-grind microbevel at 19 degrees per side. It was sharp and very toothy when I first got it and the edge held up well for a good long time before I even touched it. I wondered if I could improve on it…
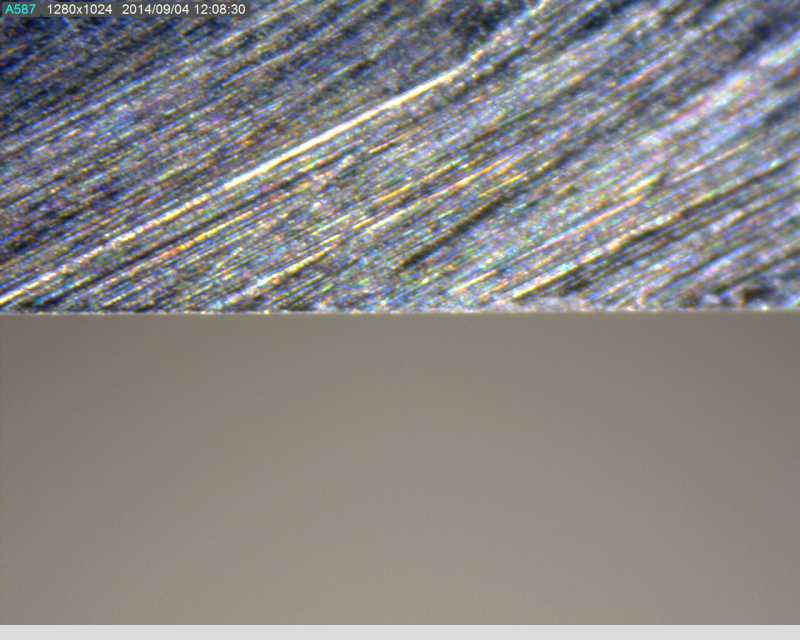
The first thing I did was to match the 19 degree microbevel and finish with the 1000 grit stones. I lowered the angle one degree, made a few strokes with the 1000 grit stones, lowered the angle again and repeated. I wanted to thin the shoulders back just a tiny bit. I took it camping in the Pecos Wilderness with this preparation and used it pretty hard for three days batoning and shaving wood, cutting cord and opening packages. It was still shaving sharp when I brought it back. Here’s a video I took on my next little outing:
[center]https://www.youtube.com/watch?v=tmvTkTiCnJw&list=UUQV1s4Uqe9ZrtjxWxtnQ00w][/center]
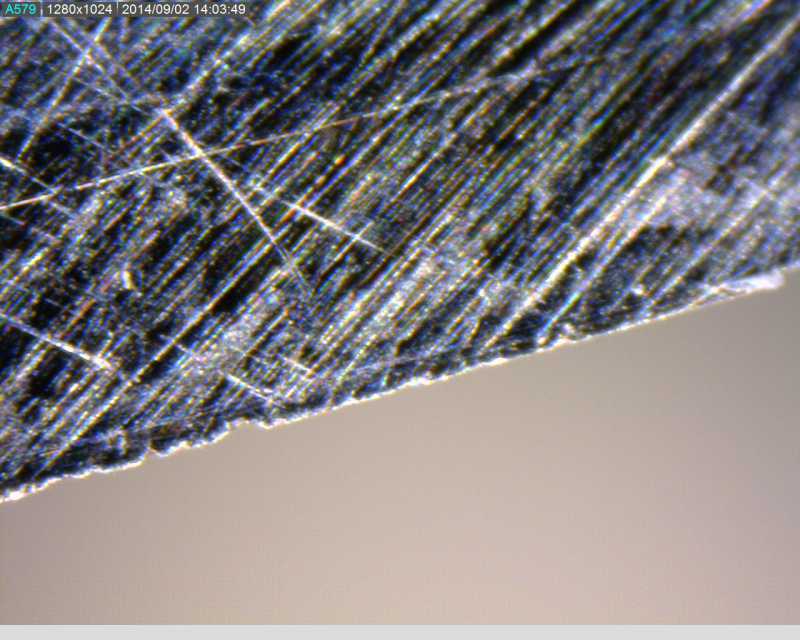
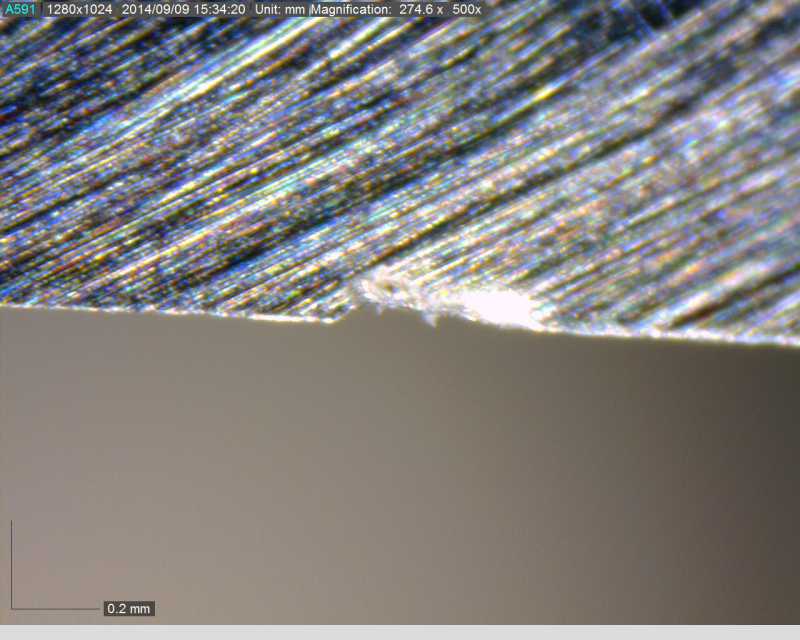
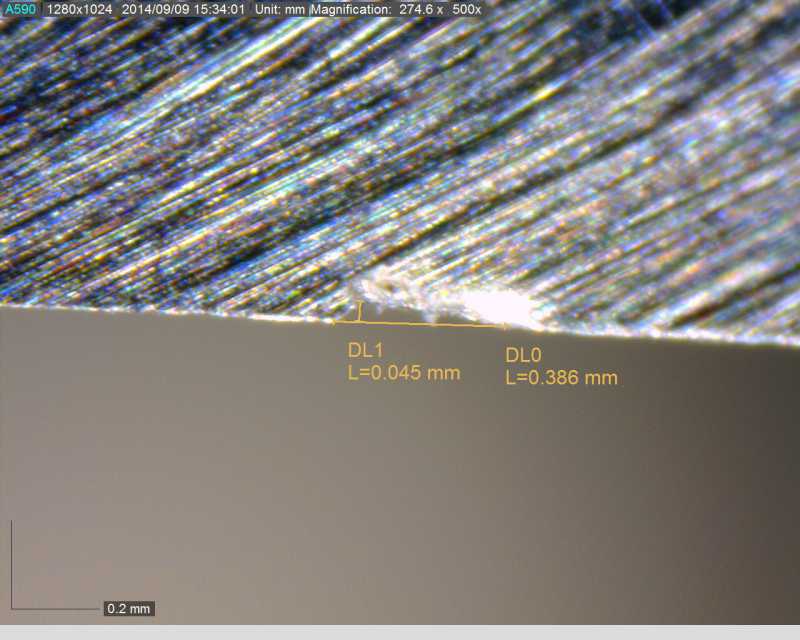
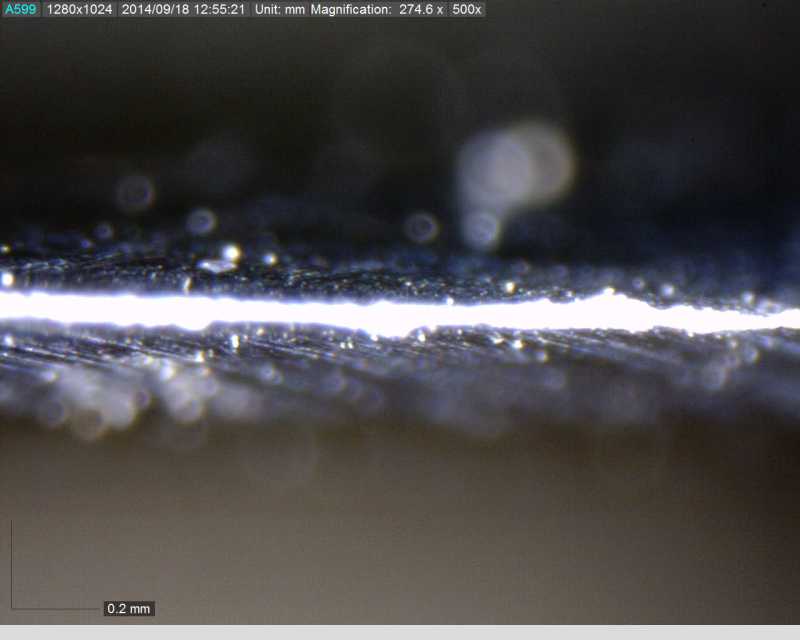
Once I had the knife back in the shop, I looked at it under the microscope and considered my next move. There was some micro chipping as well as about 1/16" of the tip broken off. To be fair to the knife, the broken tip came from my selection of an elk femur as my baton. That’s an incredibly hard bone and there is no give to it so all the energy of the blow was transferred right to the fragile knife tip. In the above video, I show how I repaired the tip and touched the knife back up. Initially I decided to keep the same angle and just repair the edge with the 800/1000 grit stones. After further tinkering, I decided to strop the edge with the 14 micron strops at edge angle minus 2 degrees i.e. 17 degrees per side. I love the result of that bit of stropping. The knife instantly became much sharper but was still very aggressive. I took a few more images under the microscope and put the knife in the sharpness tester. Here are the images:
The edge after three days hard use. 500x magnification.
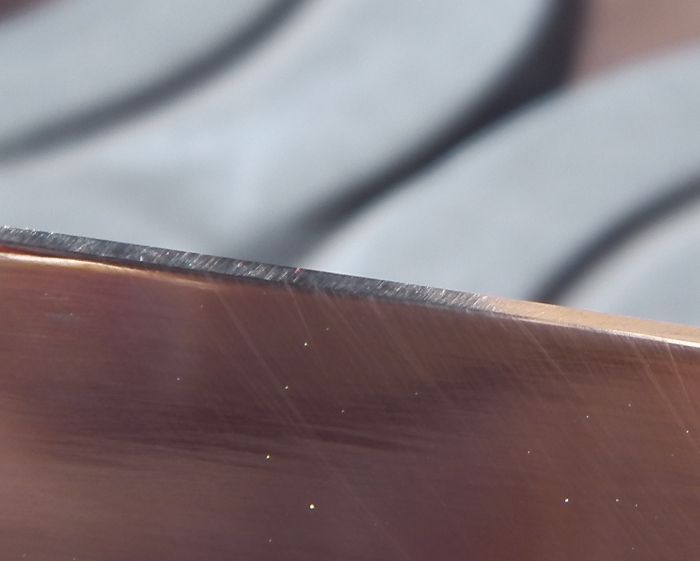
1000 grit finish. 500x magnification.
14 micron strops. 500x magnification.
The knife scored a 219 in the sharpness testing machine - that’s 219 grams of force required to rupture the membrane which is pretty good for 1000 grit at 19 degrees per side.
Part 2 coming up…