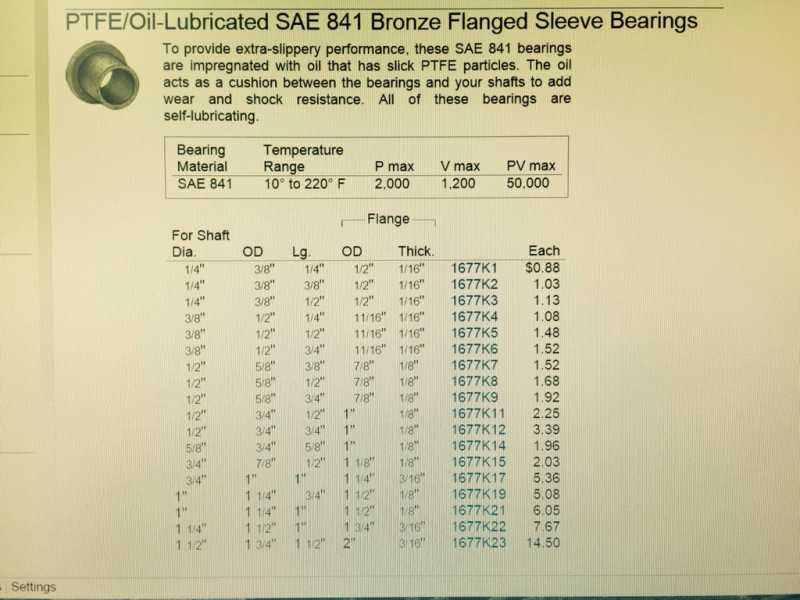
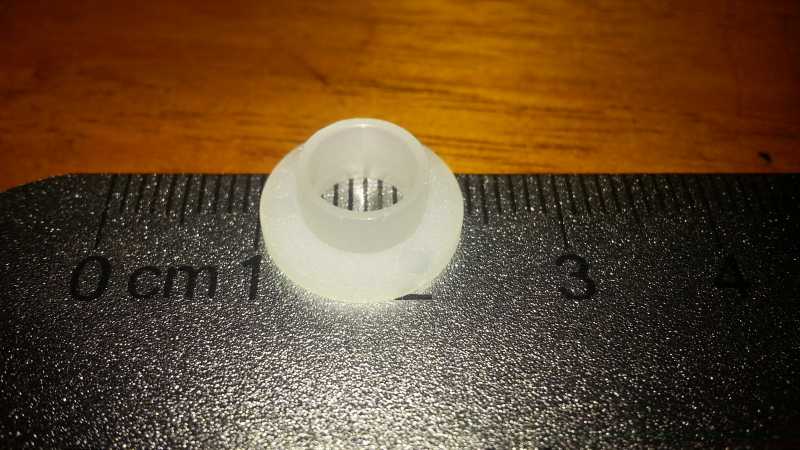
I think these will work great. They will self lubricate, thus avoiding me having to put any grease on them. Now I just need to figure out what size to get. I much bigger than the rod to actually get???
Sent from my iPhone using Tapatalk
Attachments:
I think these will work great. They will self lubricate, thus avoiding me having to put any grease on them. Now I just need to figure out what size to get. I much bigger than the rod to actually get???
Sent from my iPhone using Tapatalk
[quote quote=“lwaller1980” post=21506]I think these will work great. They will self lubricate, thus avoiding me having to put any grease on them. Now I just need to figure out what size to get. I much bigger than the rod to actually get???
[/quote]
Good find, man! Please let us know if/when you order them.
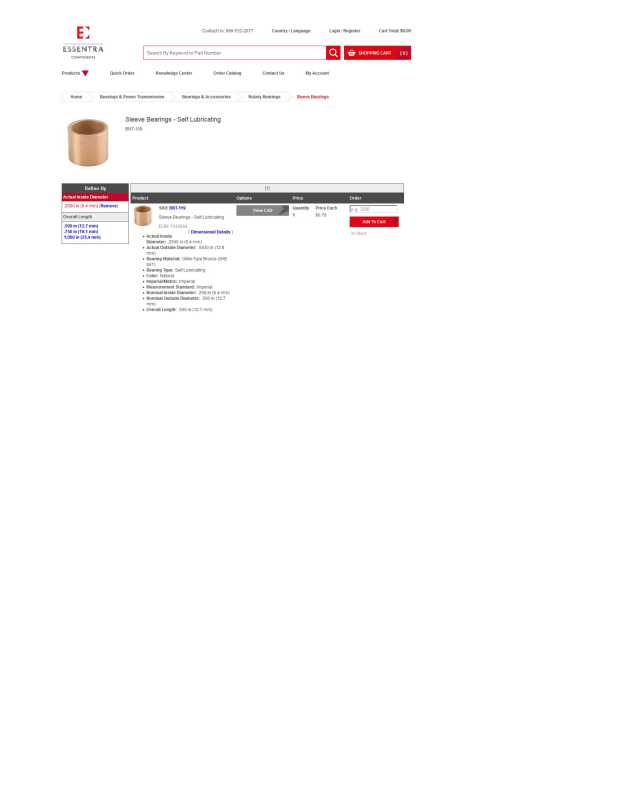
Here is another source: http://www.essentracomponents.com/product/BNT-108/1400030/fl/4294815498
A Google search for:
bronze sleeve bearings
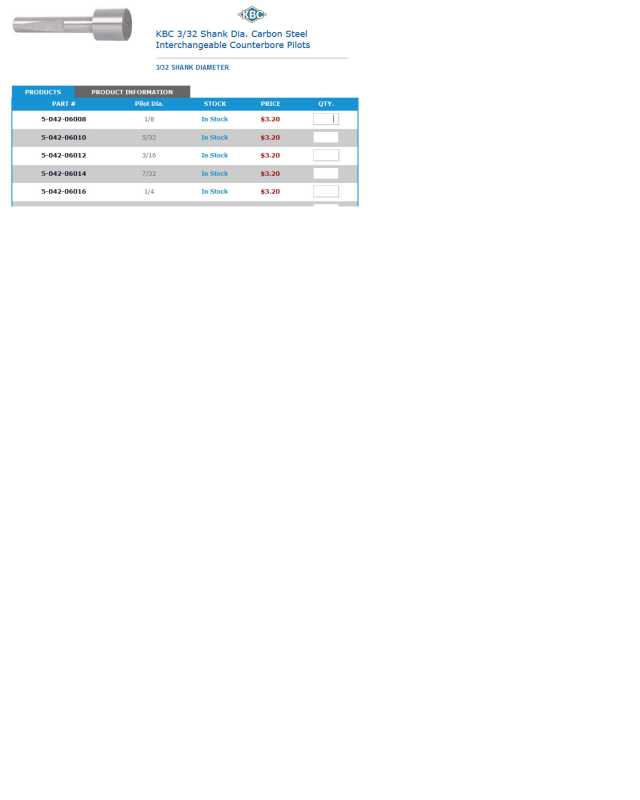
will fetch lots of choices. You don’t need the collar if you counter-bore the plastic of the paddle. A piloted counter-bore is probably your best choice of getting the bushings as close to perfect alignment as you can.
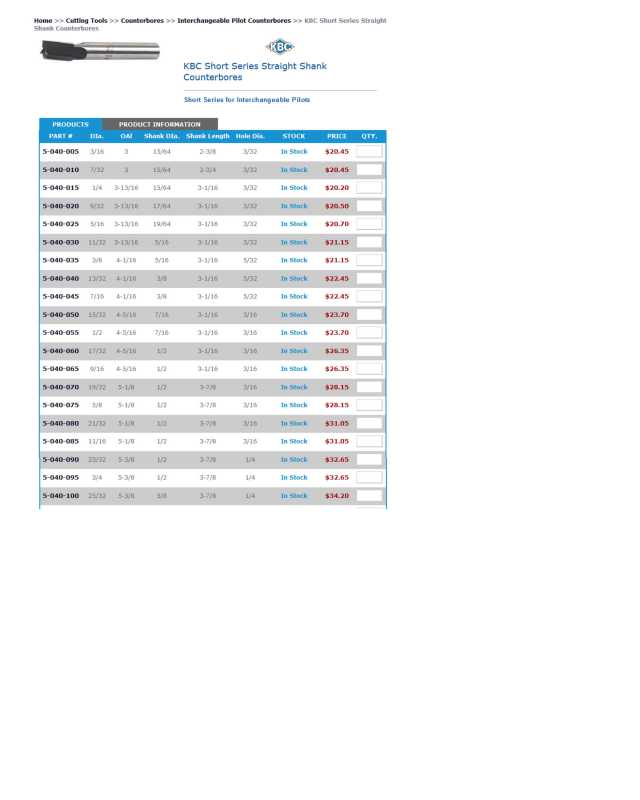
http://www.mscdirect.com or http://www.kbctools.com are a couple of sources for counter-bore tools at fairly reasonable prices and they also have bronze sleeve bearings.
If you go with the bronze bushings, be aware that they are sized according to inside diameter, outside diameter and length. I believe you would want the .2500" ID instead of the larger clearance. Most of the choices are made to press fit into a standard hole.
Then you want to make sure you have the bores for the new bushings lined up as perfectly as possible; no small task without some expensive machinery.
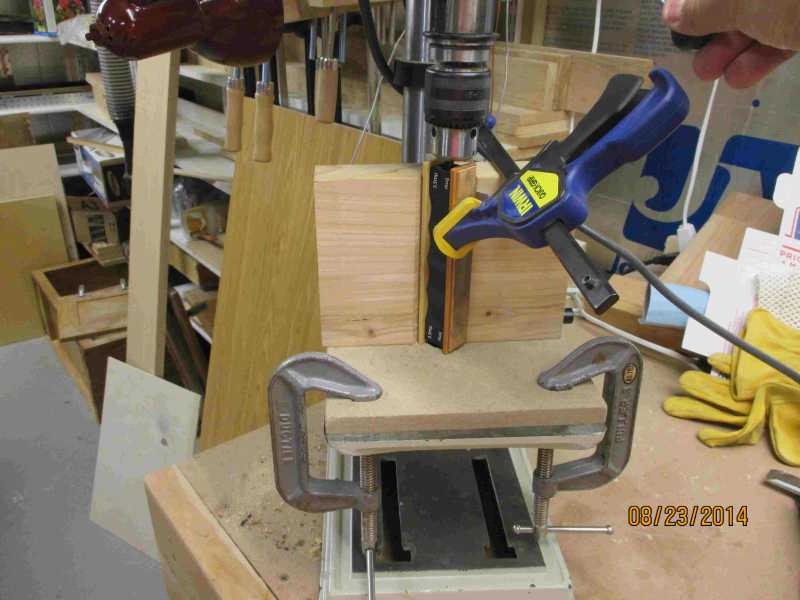
I bushed one pair of paddles and figured that the effort and possibility of ruining the paddles wasn’t worth it using just a drill press. To align the paddle with its original bore, I ran a 1/4" rod through it and chucked one end in the drill press. Then I fiddled around with a drill press vise and the table to clamp the paddle straight with the long rod going through the center hole of the table, making sure the rod didn’t bind. Then I clamped the vise to the table and removed the rod through the bottom so that the original hole was axially aligned with the drill press spindle. Then when I turned the paddle end for end with the vise still clamped, I had to shim the stationary jaw with a piece of paper to align it.
In other words, the paddles are not perfect and that is to be expected with mass produced plastic parts that are reasonably priced.
So my solution was to find some oversized rod. I managed to find some stainless that measured .2540" +/- .0005 in my barrel of similar stuff. It wasn’t as straight as I wanted, but I managed to straighten it. It isn’t as hard as I would like, but I had it on hand. I used an adjustable die to thread the ends and I made them about 5 inches longer than stock [I can always cut them off].
The oversized rods worked perfectly except for two sets of paddles that had holes slightly curved along the length. I made a poor man’s adjustable reamer made out of some 1/4" tubing cut with a moto-tool parting disk and an expansion mandrel made out of a welding rod. I marked my limits on the tube with a sharpie and inserted it from one end and expanded it inside the hole with the mandrel to counter bore the middle section of the paddle.
Just my 2 cents: All in all the oversized rods are a lot easier solution to the wobble and I got longer rods in the process.
–Gregg
Allow me to throw in my alternative…
For those (like me) uncomfortable with drilling out your paddles, I found a far less invasive solution: aluminum shims. Basically a thin sheet of aluminum that I cut down to match the circumference of the bore hole through the paddle.
I purchased 1100 Aluminum Shim Stock, SAE-AMS-DTL-22499/QQ-A-250/1, 0.016" Thick, 12" Width, 12" Length, 0.002" Laminate Layers on Amazon.Based on my measurements, I decided on the 0.016’’ thickness sheets. It arrived as a multi-layered sheet, which gave me more than enough for my 20 or so paddles.
The process is pretty self evident.
Peel off a layer of aluminum.
Calculate circumference of bore hole (trial and error works!)
Cut to fit.
Mold the shim into a cylinder around one of the guide rods.
Insert into the bore hole.
Done!
When you peel the aluminum up, the sheets will curl rather than lay flat. I reverse-rolled the sheets to get them to flatten, though I had somewhat dubious results here: Wrinkles in the aluminum being the biggest problem.
You do not have to be exact in cutting fitting the shim. As long as it’s close (and smaller) than the bore hole circumference, it will work – but the closer you get to matching the bore hole circumference, the “tighter” the paddle will fit to the guide rod.
After molding the shim around the guide rod, you will probably need to mildly “crush” one end of the shim to get it to start sliding into the bore hole. Since the aluminum sheets were longer than the length of the paddle, I always had to cut the excess at one end, so if you get overzealous with the crushing, that’s the end you slice off.
Since the paddle bore holes varied in diameter, I found one or two case where I used two layers of aluminum. But in the end it made the paddle fit so tightly on the rod, I could barely slide it. So it ended up being one layer on every paddle. I also found that I did not need any adhesive. The shims want to expand, so once inserted, they stay tight. This means they can be easily removed and/or replaced. If you find you really need an adhesive, I recommend purple loctite since it can be removed – but try it without first!
-Pie
Just picked these up since the only flange bearings available had 3/8 OD, which means reaming too much from the handles.
I’ll let you guys know what my verdict is after I play around with them a bit.
A concern that comes to mind is what could be used for bonding?.. Thoughts?
~Steven
As you may know, I put bushings in almost all of my blocks. There’s is one issue that you need to pay attention to. The bore (rod) needs to be parallel to the faces of the stones. If it isn’t, you won’t get a flat bevel face. I made a fixture which I used much as described by Greg above to find the center. The diff is that my fixture locates the bore relative to the faces of the blocks. After you do one end, you just flip the block over and do the other end. My blocks have turned out to be parallel within 0.002".
I use the bronze Oilite bushings from McMaster.com, part no. 6338K412 They are 1/4" ID, 3/8" OD, 3/8" long with flange.
You don’t need to be that fussy with the diameters, I ended up using a hand drill to open up the bushings until they slid smoothly on the rods.
If you do not hit the center perfectly between the faces (within maybe 0.01"), you may need to use the VSTA’s to compensate for the differences. That was by far the most difficult issue.
As my stroke technique improved, I found that there is little difference in edge quality between the blocks with bushings and those without. I do notice however, that I can hear the “click” when the unmodified block goes from below the edge to above it. The click is the rod switching sides of the bore when my finger pressure crosses the pivot point. This simply doesn’t happen with the modified blocks.
Send me a PM with your e-mail address and I’ll share my process with you, but know that I don’t think there’s all that much to be gained. Just soothing an “anal” itch.
Thank you, TC.
I’m beginning to think the shim idea that EatingPie had might be a better alternative for those, like myself, who pretty much have zero access to the tools and/or knowledge necessary to pull off this mod successfully… Attempting to bore out the ID of the paddles makes my stomach turn for a few reasons, one of which is keeping parallel faces.
Earlier this evening I actually began playing around with the 4 different thicknesses of brass shims I posted above. That being said, so far the 0.002" thick stock cut right at 1.2" wide and 0.5" long works pretty well. With the width being 1.2" the 0.002" stock wraps around the guide rod 1.5 times.
C = (pie)(d)
C = (pie)(0.25)
C =0.785
0.785/0.50 = 0.393
0.785 + 0.393 = 1.178 or ~ 1.2"
I just need to find a CLEAN way to bond the rolled up shims and mount them to the handles. Thoughts?
If I understand your intent correctly, you plan to line the bores at each end with a piece of shim stock to tighten up the rod-to-bore clearance. Correct? I’d keep it simple and use super glue. First, wax the hell out of a length of .250" rod. Place the rod in the bore. Slide the curled-up section of shim stock onto the rod and toward the block. When the shim is near the block place one or two drops of super-glue onto the outside of the shim stock. Then, with the tip of your fingernail or something with an appropriate tip, quickly and smoothly slide the shim into the bore of the block. After about a minute, remove the rod. If the rod seems glued into place, give it a good twist and it should come free. If it still seems glued in place heat the rod.
If it works, it looks like it could be a very good answer. I don’t think that 1.5 wraps is going to be easy, but you never know until you’ve tried it.
You might test the workability of the wax and the super-glue ahead of time.
BTW, the parallelism turned out to be the least of my problems. The fixture pretty much guarantees parallelism. The main problem is if you miss the centerline in the other axis. Off by 0.010" and the bores miss by double that. But the accuracy of the block isn’t effected by cross-direction misalignment. It’s just a pain to fix.
Back to the straw idea…perhaps if you get a straw that is a tad smaller diameter than the rods, split it down the middle so that it could be wrapped around a rod, put the paddle on it and if that rids the majority of play, then just either glue or rubber band at the bottom of the rod real tight the straw to keep it from sliding off? seems like a better solution that doesn’t permanent alter the unit or accessories, and would work for more than just Subway straws.
Again BS factor may be in play.
I will try this and report back.
I may have a low cost solution I was actually just working on when the topic came up last few days…
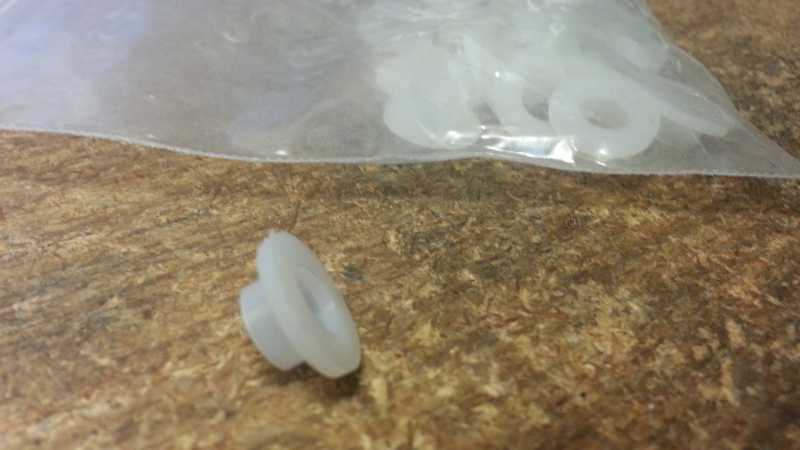
One of the side jobs I do is refelting pool tables and the rail kits come with a small bag of these nylon washer thingys that just happen to be the exact fit for the rod without being too snug so I super glued them in place.
Rods still slide free with significantly decreased wiggle & no permanent damage to paddles…
Cliff. Can you give us a part # or dimensions so I can pick some up?
Sent from my iPhone using Tapatalk
Also, what about shrink wrap material folks use for electronics? Those plastic tubes that shrink when a hair dryer is applied?
Well, I tried some of our daughter’s very thin straws and split them and put over the pole and then put on a paddle. The paddle was too tight and wouldn’t move up and down hardly at all, so I think the tolerances are tight enough for me.
I’d say the wall of those shrink tubes will still be too thick. I have an average of .02" slop between my rods and handles. Not sure shrink tubing would work.
As far as the straws are considered, I believe that mod oh applies to first generation WEPS.
Thinking back to the straws again, perhaps I cut one in half so the gap is filled only on one side of the rods vs all the way around. I think that would really help. If it removes slack and remains rather easy to work the paddles, I will figure how to adhere it to the rods temporarily.
I’ll report back.
[quote quote=“KnifeKnerdAtX” post=21642]I’d say the wall of those shrink tubes will still be too thick. I have an average of .02" slop between my rods and handles. Not sure shrink tubing would work.
As far as the straws are considered, I believe that mod oh applies to first generation WEPS.[/quote]
Sent from my iPhone using Tapatalk
[quote quote=“lwaller1980” post=21632]Cliff. Can you give us a part # or dimensions so I can pick some up?
[/quote]
I just Googled 1/4 nylon flange sleeve to see what’s out there. Many choices, some expensive. I’m betting mine are not since they throw a bag of them in ever rail set you buy. I can say they are an excellent fit without binding.
I would bet they are common hardware store variety & would even think if you took a rod down to the store you could find something that works well by test fitting there.
Aloha,
Cliff
If you try the soda-straw method, you might trying to cut a slit on one side. When you glue it in place, orient the slit to be at ninety degrees from the faces. This will place the tightest fit in the best possible place.
I really like Cliff’s nylon flange sleeve idea. I wonder if you could shape the base to the cone-shaped recess. Cliff: Can you post the dimensions of the little critter?
I think the heat-shrink tubing may be impractical because of its coefficient of friction.
I’m going to play around a bit with some thin aluminum stock I have.
Add it to the great List of Things I Want… a micrometer.
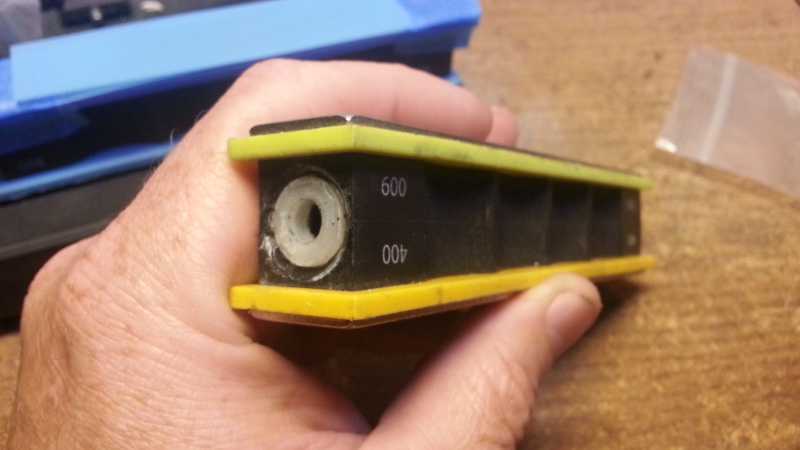
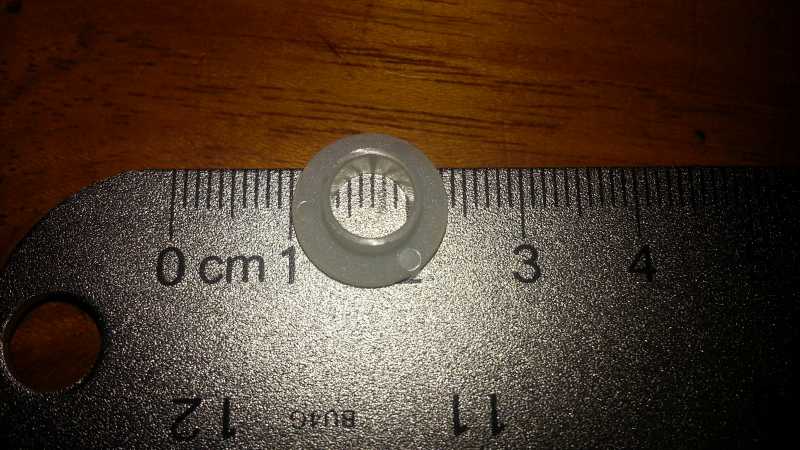
Here’s the pics and I’ll do my best with measurements below:
The height top to bottom is 5mm
The outer lip thickness approx 1.5mm
The sleeve height approx 3.5mm
Lip diameter 13.5mm
Sleeve ID fractionally over.25in
Again these don’t appear or be of high cost. I did have to trim 1mm of the sleeve height so it would drop in and set flush in the taper at end of the bore. Hope that helps some… I could probably contact the pool table rail set manufacturer and get a reference to their supplier.
That’s what I was interested in; Would you need to cut the sleeve length down a bit.
I bought a 12" length of high-tolerance ground and polished 0.250 rod, although I think your WE rods would be fine I’d insert the rod in the block, then slide on the sleeves and super-glue them into place. Do all this while the block is sitting on a horizontal surface and on one of its stone faces, so the rod lies as close to parallel with the face as possible. Wax the rod ahead of time to keep it from adhering to the sleeves.
They are kind of self centering as they settle into the end. Yes I did trim a tiny bit off the sleeve, kept the rod vertical however, and watched that the inset was sitting correctly in the hole as I glued & applied a bit of pressure to it. That’s good enough for this country kid. No slop, smooth stroke, call it a day and move on to abrasives research at the micron level…