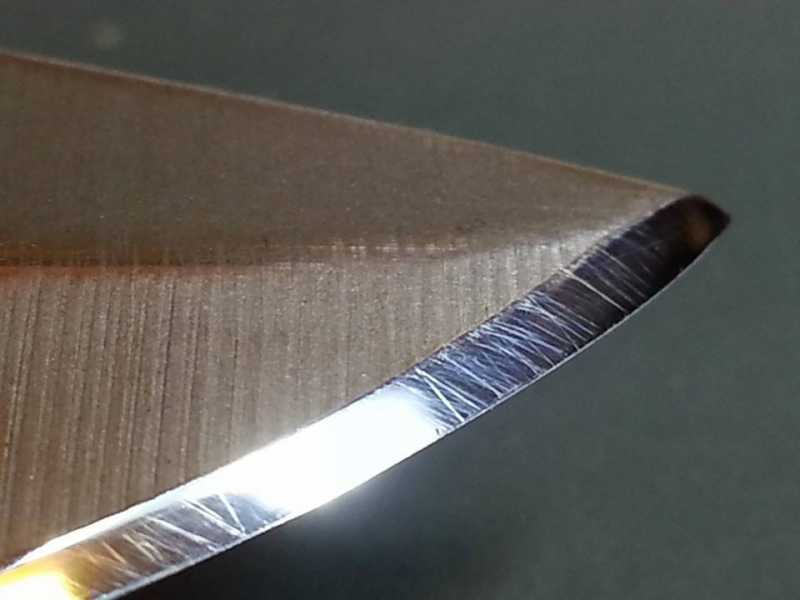
To explain further, “lapping” in our application is where you use a very flat, hard abrasive surface to flatten a softer stone which has become dished by repeated uses in a small area. If your super-fine ceramic stones become “dished” you might flatten them by rubbing them on the face of a larger diamond stone. Of course, this means you remove the material which is higher than the lowest “dished” point of the stone. You should try to keep the thickness of the stones equal at both ends. A 0.010" difference in height (between the top of the stone and the top of the rod running thru the bore) from one end to the other will cause about a 0.1 degree error in angle. Since we don’t really use the full length of the stones, the error is actually less.
In other applications, lapping one surface to fit perfectly against another is accomplished by rubbing the two surfaces together with a semi-liquid media known as “lapping compound” brushed on one or both of the surfaces. For instance, gunsmiths might use lapping compound to create a tight, but smooth fit between the slide and the frame of an automatic pistol.
Technically, the diamond paste WE supplies for use with strops is a form of “lapping compound” and can be used as such.
One other comment - and please correct me if I’m wrong - If you lap a super-fine ceramic stone with a 100 grit diamond stone, that super-fine ceramic will still have its same super-fine grit rating. I don’t believe there is a need to go to higher lapping grits. The grit of the ceramic is homogeneous and unaffected by the lapping stone’s grit..
One other comment - and please correct me if I’m wrong - If you lap a super-fine ceramic stone with a 100 grit diamond stone, that super-fine ceramic will still have its same super-fine grit rating. I don’t believe there is a need to go to higher lapping grits. The grit of the ceramic is homogeneous and unaffected by the lapping stone’s grit..[/quote]
That is correct. But it just MIGHT effect the way the stone provides feedback to your hand. (I do not know since I never used the lower grit) It may feel rougher even though it is not physically removing more material or being “rougher” on your edge. I am sure my stones were removing the material the same way as before but they just felt strange to me. Now they “feel” better when using them so the feedback works better for me. I did all my lapping on the fine and there was a lot of lapping to be done to get rid of the grooves and such that were there for some reason.
My point i the standard ceramics will give you the mirror look until you put them under micro scope, or look at them in a very oblique angle. Then you can begin to see the fine serrations and scratches that remain. To call them a mirror polish is a bit of a misnomer. It gives you the mirror effect, but it has not really been polished down sufficiently.
this is the 2nd half of a knife post i made else where looking specifically for a mirror polish. Trying to explain the limits of such a thing.
[quote]Here is the knife after. Re profiled to 20.20 or 40.40 inclusive. Flat bevel. I have not put a micro bevel on it yet.
Near the base of the knife.
The more middle of the cutting edge.
This is the area where i had the first bit of damage. It caught the light a bit better than the other photos.
These are where i had the more heavy damage
Tiny micro chip from trying to over polish.
This is the top of the flat spot at the tip.
The tip re profiled.
So how does it look not under magnification, just like this. It looks like a mirror polish.
[/quote]
Yeah, sufficiently is rather subjective. Light and magnification reveal what is hidden and invisible to the naked eye. If grit size and magnification were infinitely accessible, then what? How could you even begin to use the word?.. Don’t get me wrong, I’m not judging. I’m really picking on myself. Sometimes I have to tell myself, “STOP! Or you’ll go crazy!”
One of the things I find satisfying about achieving the mirror edge is very similar to the process of sanding wood I experienced when I did that type of work earlier in my life…
Many times (early on) I would be finishing up a wood piece like a kitchen table with say 400 grit and in the final sanding phases these ghastly 80 grit orbital marks would be revealed clearly. Obviously I hadn’t sanded them out completely with the 100 or 200 grit, but suddenly they would really pop out for all to see at the 400 grit level.
What this taught me, and the exact same thing applies to “sanding” the edge of a knife…To be thorough and double check my work at each grit stage to make sure ALL remnants of the courser grit sanding marks have been removed. If not many times it can be several grits later that the marks show up clearly. And who likes to go back and redo several grit stages just to remove a few deep scratches?
The mirror finish is also interesting because the better it gets the more it reveals the scratches that are left. For me it seems to look much worse before it gets better. Here is an example of a very early attempt. You can see its getting highly reflective but you can also clearly see where I missed many deep scratches early on and WOW do they show up now!
When I was first attempting to achieve a true “chrome-like” mirror finish, I used another technique I picked up from woodworking, which is to alter the direction of the strokes when changing grits. That way under magnification I can easily see if the marks are angled going heel to tip, or tip to heel, and I will alternate like that all the way down the rabbit hole with a good degree of confidence that I wont have to backtrack several levels. Doesn’t hurt to do a bit more then the bare minimum to remove the scratch lines as you go too! :whistle:
Sorry a very bad habit, I was referring to a set of terms used in the auto detailing world. Where the abrasives are diminishing, meaning they start out at x grit and finish down to y point. I view that action the same way we are now changing stones. As a form of continually diminishing abrasives. (Typing this on my phone so bear with me)
The issue in the detailing world is when you think you have achieved one finish but do not verify with the correct lighting or 60x micro. With my photos above I simply was trying to illustrate the difference between a mirrior like finish versus a mirror polish. Which really should be verified via secondary sources, Ie oblique lighting or a microscope.
I also wanted to illustrate that the 1300/1600 stones are not fine enough by their own to finish down sufficiently to a mirror polish.
Personally I use several styles hand movements to try and remove those deep imbeded scratches. Am I the best at it no, just bringing comparable knowledge from a different skill set as a way to validate and verify the work produced.
For me that is oblique lighting and stereo microscope. These to validate the method, the motions, and the stone choices I use. In the short term it shows me mistakes before I carry them to far. In the long term it makes that learning curve of this skill set a lot less steep.
Yeah, after watching/listening to Josh and many others, I do my best to create a crosshatch pattern with the grind lines. Bob from Oldawan briefly mentions crosshatching in one of his WEPS product vids. From what I understand laying down new grind grind lines that are perpendicular (or as close to perpendicular as possible) to the previous grind lines helps to bettter erase them than if they’re done parallel.
This is directly contradictory to my present understanding of the nature of the ceramic stones. I believe they are essentially solid ceramic, and though they have an inherent grain it is largely subordinate to the finish that is applied to the stones. I believe that although lapping with a 100 grit diamond plate will not replicate a 100 grit surface as there will not be full abrasive penetration, it will nevertheless produce a much coarser stone than the original super-fine finish.
As a point of reference it has been stated that the Spyderco Fine and Ultrafine ceramics are the same material; only the surface finish is different.
This is directly contradictory to my present understanding of the nature of the ceramic stones. I believe they are essentially solid ceramic, and though they have an inherent grain it is largely subordinate to the finish that is applied to the stones. I believe that although lapping with a 100 grit diamond plate will not replicate a 100 grit surface as there will not be full abrasive penetration, it will nevertheless produce a much coarser stone than the original super-fine finish.
As a point of reference it has been stated that the Spyderco Fine and Ultrafine ceramics are the same material; only the surface finish is different.[/quote]
I have a set of fairly new micro ceramics(never lapped) that arent seated correctly and will need to be returned, seems like a perfect pair of test subjects for quick side by side lapping comparison…Say one lapped with 100 grit diamond & 1 lapped w/ 1000 grit? Then test them both on a mirrored edge under microscope? :unsure:
This is directly contradictory to my present understanding of the nature of the ceramic stones. I believe they are essentially solid ceramic, and though they have an inherent grain it is largely subordinate to the finish that is applied to the stones. I believe that although lapping with a 100 grit diamond plate will not replicate a 100 grit surface as there will not be full abrasive penetration, it will nevertheless produce a much coarser stone than the original super-fine finish.
As a point of reference it has been stated that the Spyderco Fine and Ultrafine ceramics are the same material; only the surface finish is different.[/quote]
I lapped my super fines and could tell a tremendous difference right after I lapped them. They performed horribly for a few knives until they smoothed back out. I finished lapping them with the 1000 grit stone and they didn’t polish at all. Just left a weird film on the blade. And I can confirm. The super fine and micro fine are not the same material. I have lapped them both and gotten below the surface and the micro fines are waaaaaay harder than the super fines. The super fines have little honeycombs in them and are powdery. The micro fines are completely smooth all the way through
Ok guys, I did not know what to expect & figured it could go either way… I took 2 never before lapped micro ceramic paddles, marked one with blue tape(to avoid confusion) and lapped that one on both sides with a new 100 grit paddle. The other one was lapped on both sides with a well worn 1000 grit paddle.
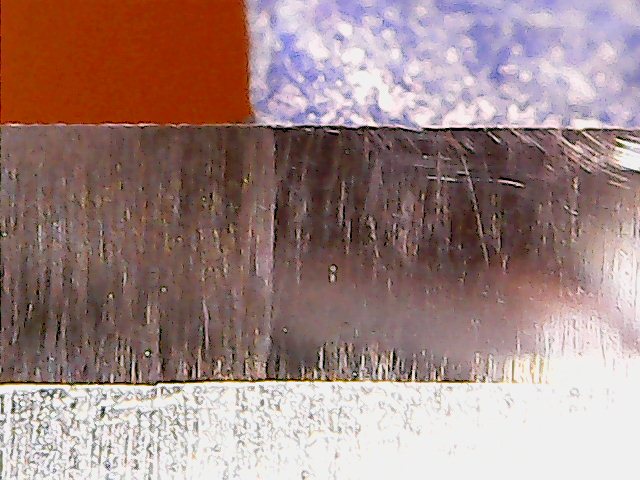
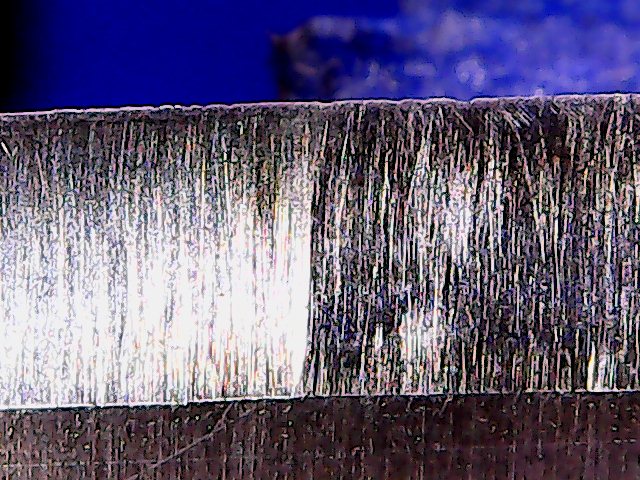
For each test I taped off half the blade and applied 50 smooth vertical strokes with the 1000 grit lapped ceramic, moved the tape to cover the fine area and repeated right next to it with the 100 grit lapped ceramic. I repeated this test for both the course side and the fine side of the ceramic paddles and took photos with my $18 usb scope
Side by side comparision of course micro ceramic with 100 grit lapping on left & 1000 grit lapping on right:
Side by side comparision of fine micro ceramic with 100 grit lapping on left & 1000 grit lapping on right:
Although probably not up to laboratory standards for a scientific conclusion, the results were obviously way better with the finely lapped stones. To the hand & the eye the difference was striking! :woohoo:
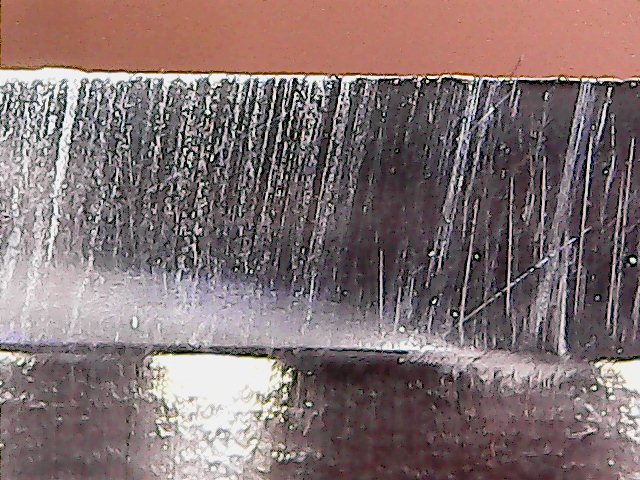
As a follow up, and keeping with the thread topic of mirror edges, I pulled out a p2500 strip and repeated:
p2500 sandpaper strip on left / Fine micro ceramic lapped with 1000 grit on right:
The scratch pattern above may look worse on the left but I found its of a uniform depth and started to buff out quickly with 5u/3.5u strops, while the ceramic side showed some residual deeper scratches but overall appears to be of a slightly lower grit judging by the residual marks left after stropping.
Not the best photos but working with what I got before bed and wanted to get this up. I am now excited to do some side by side comparisons on more sandpaper strips and the stropping end of the deal to streamline the process…yet again(and again). :whistle:
[quote quote=“CliffCurry” post=21531]Ok guys, I did not know what to expect & figured it could go either way… I took 2 never before lapped micro ceramic paddles, marked one with blue tape(to avoid confusion) and lapped that one on both sides with a new 100 grit paddle. The other one was lapped on both sides with a well worn 1000 grit paddle.
For each test I taped off half the blade and applied 50 smooth vertical strokes with the 1000 grit lapped ceramic, moved the tape to cover the fine area and repeated right next to it with the 100 grit lapped ceramic. I repeated this test for both the course side and the fine side of the ceramic paddles and took photos with my $18 usb scope
Side by side comparision of course micro ceramic with 100 grit lapping on left & 1000 grit lapping on right:
Side by side comparision of fine micro ceramic with 100 grit lapping on left & 1000 grit lapping on right:
Although probably not up to laboratory standards for a scientific conclusion, the results were obviously way better with the finely lapped stones. To the hand & the eye the difference was striking! :woohoo:
As a follow up, and keeping with the thread topic of mirror edges, I pulled out a p2500 strip and repeated:
p2500 sandpaper strip on left / Fine micro ceramic lapped with 1000 grit on right:
The scratch pattern above may look worse on the left but I found its of a uniform depth and started to buff out quickly with 5u/3.5u strops, while the ceramic side showed some residual deeper scratches but overall appears to be of a slightly lower grit judging by the residual marks left after stropping.
Not the best photos but working with what I got before bed and wanted to get this up. I am now excited to do some side by side comparisons on more sandpaper strips and the stropping end of the deal to streamline the process…yet again(and again). :whistle:
Aloha,
Cliff[/quote]
Aaaaaaaand that’s why I followed Clays lead and lapped them up to 1000 grit. Huge difference.
Thank you. Have you used the Spyderco Fine or Ultrafine? [strike]It is my understanding that these are similar to the WEPS Super Fine stones in composition, and the Micro Fine are something new apparently.
[/strike]
this postCorrection: From reading it is clear that the Spyderco stones are closer to the WEPS Micro Fine than Super Fine, but distinct nonetheless.