All of my knives are currently spydercos which means I’m getting the choil issue sharpening the little bit next to the choil where the stones can’t reach. I see wicked edge simply recommends grinding the offending plastic on the stones down, Anyone actually done this? any issues?
Also I decided to strop the first knife I did, the scratches just laughed at the paste :lol: It was extremely sharp though, push cut phone book paper before stropping, did it even easier after.
I believe Josh at RazorEdgeKnives said he’d “removed the offending plastic.” Maybe he’ll chime in here. Haven’t heard from Josh for a while. Hmm…
I have only a Delica 4, and it doesn’t show the problem, so I haven’t felt the need. Seems to me that grinding the plastic edge back would compromise a certain amount of safety, allowing the tips of your fingers to be slightly more exposed. Has anyone mentioned the idea of reducing the amount of “choil” extending beyond the edge?
I can’t help myself… I jus’ gotta say something here. I think that the part of the Spyderco blades that you (and others) refer to as “choil” is actually a ricasso. A ricasso is a section of the blade which is full thickness where the blade enters the handle and becomes the tang. Yes, some knives have ricassos which are large enough to use as choils. I don’t think that applies to any Spydercos.
By my definition, a choil is a groove or recessed area along the handle or blade which is provided for the user to grip with their finger or fingers. Note the choil on the skinner depicted in my avatar. In the case of my avatar, the choil tapers from cutting edge to tang thickness along its length, making it technically both choil and ricasso.
Great photos, Victor!! I especially love the last one - the bird was a great idea.
I think you’ve been asked this before, but me being too lazy to search for it, what camera are you using?
With the beautiful polish jobs you do on the primary grinds, one doesn’t even notice the bevels at the edge.
For those who might consider modifying their blades like Victorf, you should note that he extends his cut forward into the factory edge, just enough to avoid having his stones cutting into the radiused plunge line. Well done!
BTW, for those who are interested, “choil” is pronounced with the “ch” sound as in “church.” I mispronounced it as “coil” for about 30 years, until I was set straight on one of the knife forums.
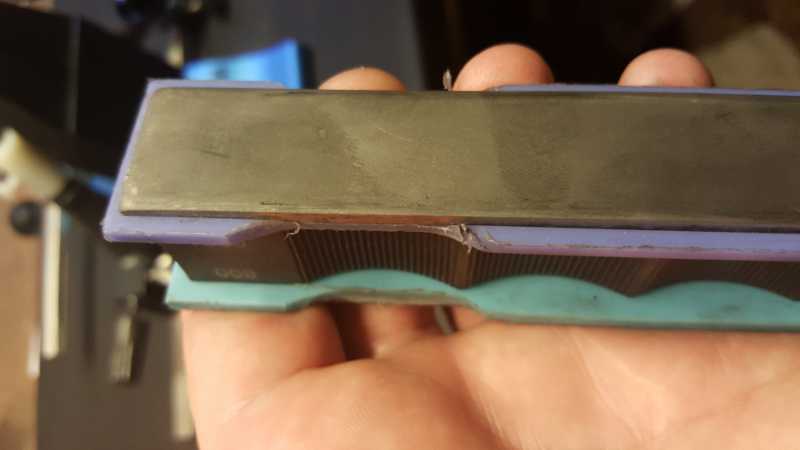
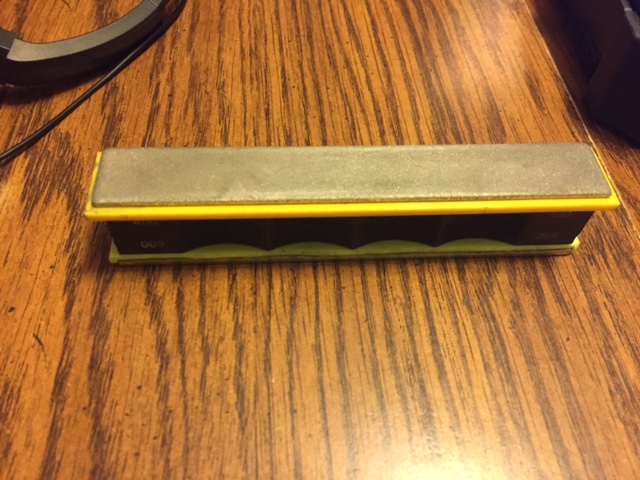
hell yeah I did. But you only need to do it on one side. Then do it on the opposite side of the opposite stone. That way you support everything well still and have full range of the stone. then when you flip to the other grit, that side is ready to go. you just have to slide the handle on the rod the right way to start with lol.. I did this to all of my handles. Every single one.
I need to get my project done. Then this would go away :evil: Yes Clay, Sorry Man. I did not forget!
They are not stones but steel plates with diamonds on them. You will not nick them. I was careful with the ceramics. I used a belt sander. Sanded them off till they were real close but not all the way. Then I used an exacto blade to whittle the last little part down keeping the blade angled way from the top working surface. I used the bottom edge as a guide instead.


