Vintage Straight Razor Restorations
Recent › Forums › Main Forum › Off Topic › Vintage Straight Razor Restorations
- This topic has 8 replies, 5 voices, and was last updated 12/04/2015 at 6:52 pm by
Anonymous.
-
AuthorPosts
-
09/24/2015 at 8:50 am #28994
I was pretty excited and had to share. Even tho the work wasn’t don’t directly on the WE, it wouldn’t have been possible without all that I’ve learned from this forum over the past year.
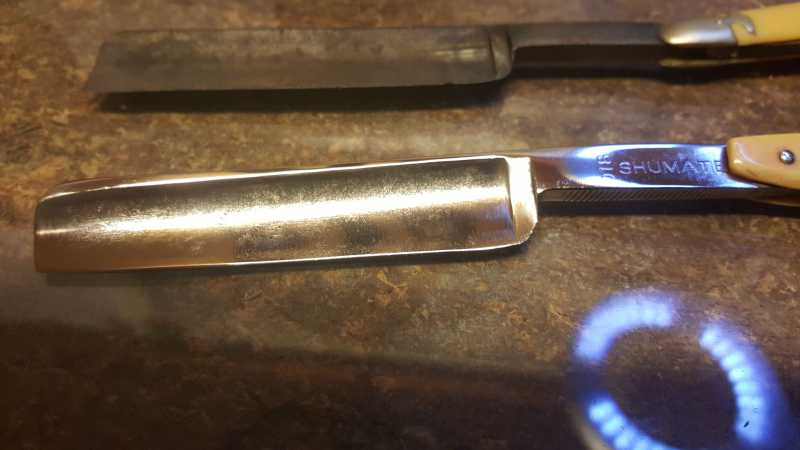
Work was completed using a combination of a 1×30 sander with +1000 grit belts, a buffer with coarse, medium, & fine wheels, a really cool fiberglass scratch pen tool for the nooks n crannies, and all the sharpening was done with micron films on glass. The concave blade face was resurfaced using a hand drill chucked with a large sandpaper wrapped wooden dowel.
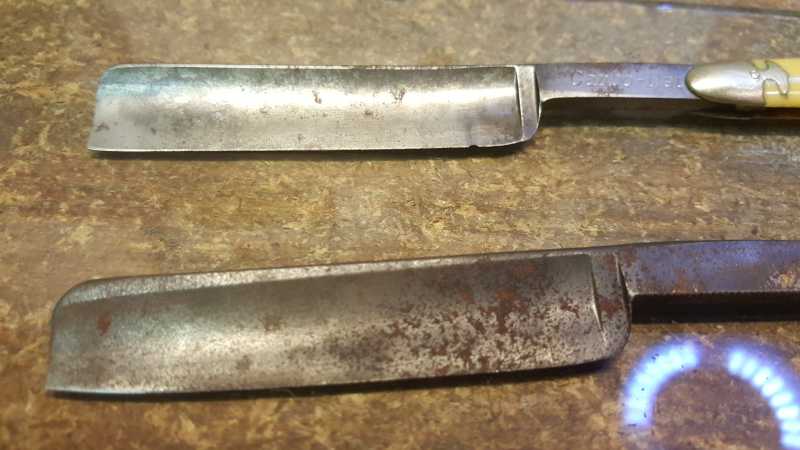
Because they were so old and thin I couldnt refinish the blade face as far as I would have liked to remove all the “spider web” corrosion but I was totally surprised how well they came back to life!
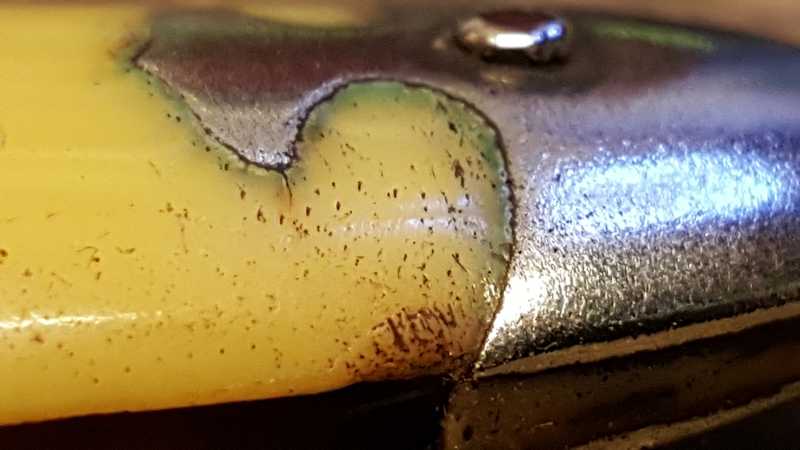
Closeups of before and after with with fiberglass pen. $7 on amazon.
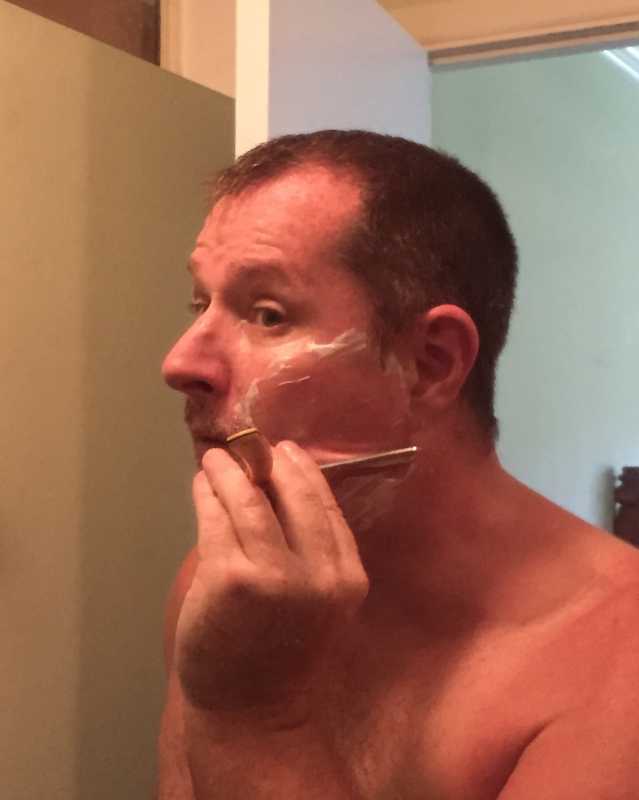
And finally in a bold move I decided to test them on myself. First ever razor sharpening so why not make it a first ever straight razor shave(after watching youtube ofcourse). :cheer:
Smooth baby smoooooth! :whistle:
09/24/2015 at 11:22 am #28995Really nice, Cliff! My barber (who doubles as a straight razor seller) does the same. He uses a dremel and of course some stones.
I assume you had to take the knife apart?
Molecule Polishing: my blog about sharpening with the Wicked Edge
09/24/2015 at 11:47 am #28998Thanks Mark 🙂
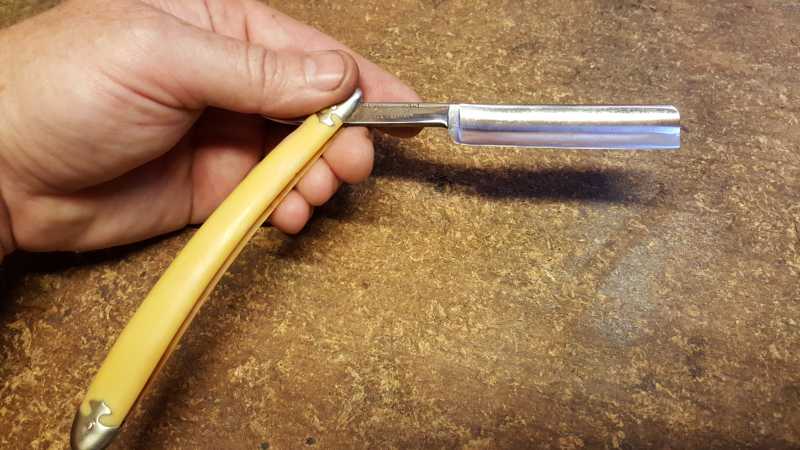
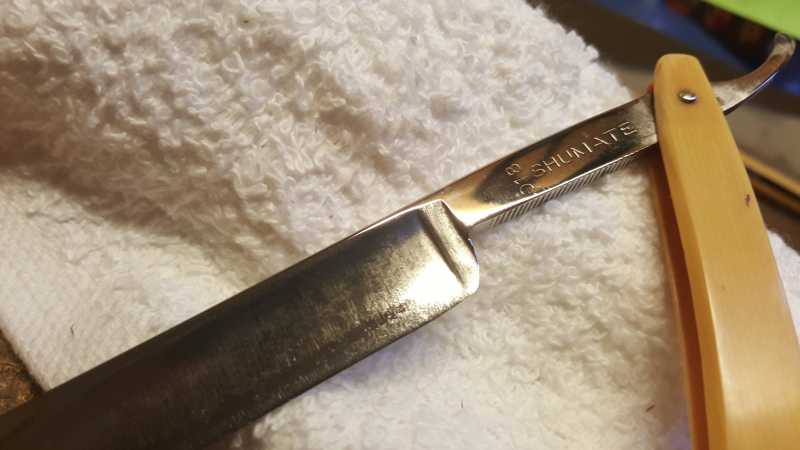
I didn’t pop the pins to disassemble the scales for a couple reasons. Mostly I was too chicken that I’d damage them. It was my first go around and I’ve never removed pins like this before, didn’t have replacement pin material on hand, and most importantly I’ve read that especially with older ones the scales can break from getting brittle or something.
This was for a customer so I chose to error way on the side of caution since these were his grandfathers. I’m thinking I’ll pick up a used one for myself to experiment with in the future.I was really torn because I wanted to take it apart so bad for a full polish but couldn’t risk damaging irreplaceable history in the existing scales.
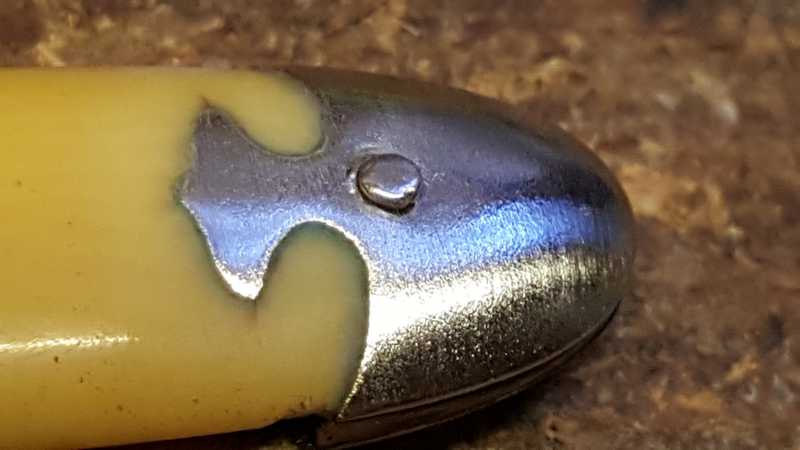
09/24/2015 at 12:37 pm #29002How then did you remove the rust around the pin? The razor looks great everywhere.
Molecule Polishing: my blog about sharpening with the Wicked Edge
09/24/2015 at 9:17 pm #29010Very nice Cliff!! Looks awesome!!
I have a razor that I have to re-pin… gonna be interesting, I will try to post up pics. It’s my own razor so no fear of something going wrong hehe. I am going to be putting in a removeable pivot this time though. For some reason it’s missing a pivot washer and the tension isn’t adjusted correctly.
09/24/2015 at 9:21 pm #29012I have a razor that I have to re-pin… gonna be interesting, I will try to post up pics. It’s my own razor so no fear of something going wrong hehe.
Please do! I also have my own straight razor that requires refinishing. The only thing that’s holding me back is that I think it also requires removing the pin.
Molecule Polishing: my blog about sharpening with the Wicked Edge
09/25/2015 at 1:50 am #29016I’ve watched a few videos on re-pinning. It seems straight forward enough with a light touch of the ball peen hammer and proper pins & washers?
Delicate work for sure! :dry:
09/27/2015 at 2:57 am #29044Killer job Cliff!
Came back as good as it can given the pitting and age.
Nice detail work.12/04/2015 at 6:52 pm #29686Anonymous
Inactive- Topics: 14
- Replies: 427
I was pretty excited and had to share. Even tho the work wasn’t don’t directly on the WE, it wouldn’t have been possible without all that I’ve learned from this forum over the past year. Work was completed using a combination of a 1×30 sander with +1000 grit belts, a buffer with coarse, medium, & fine wheels, a really cool fiberglass scratch pen tool for the nooks n crannies, and all the sharpening was done with micron films on glass. The concave blade face was resurfaced using a hand drill chucked with a large sandpaper wrapped wooden dowel. Because they were so old and thin I couldnt refinish the blade face as far as I would have liked to remove all the “spider web” corrosion but I was totally surprised how well they came back to life! Closeups of before and after with with fiberglass pen. $7 on amazon. And finally in a bold move I decided to test them on myself. First ever razor sharpening so why not make it a first ever straight razor shave(after watching youtube ofcourse). :cheer: Smooth baby smoooooth! :whistle:
Not sure why you are posting attchments instead of just embedding the actual photo or photos. Posting attachments requires individual click to each link, wait for it to open, then click the back button to go and view the next attachment,,,, tell me why the below method is not the best way to post a bunch of photos without having to make one click let alone have to click 14 times to view 7 photos. my method is also good when you are trying to compare several photos together, by just scrolling up or down.


-
AuthorPosts
- You must be logged in to reply to this topic.