System Passaround
Recent › Forums › Main Forum › Pass Around and Buy / Sell / Trade › Pass Around › System Passaround
- This topic has 18 replies, 5 voices, and was last updated 07/03/2014 at 9:52 pm by
 Josh.
Josh.
-
AuthorPosts
-
03/21/2014 at 8:13 pm #17878
I will be doing a system passaround if interested : http://www.cliffstamp.com/knives/forum/read.php?10,26928
My rules are very simple :
-you have to be willing to report all findings in public, good and bad
-you have to be willing to discuss your results critically (i.e. engage in peer review)
that’s it basically.
03/21/2014 at 10:19 pm #17883Very interesting cliff! I will be following that thread as I’m sure others will
Edit: I just watched the video and appreciate your honesty! Clay has always taken criticism extremely well and I have never seen him get upset about it. +1 for clay!
Josh
03/21/2014 at 10:55 pm #17888Nice initiative, Cliff! I will be following as well.
Molecule Polishing: my blog about sharpening with the Wicked Edge
03/21/2014 at 11:24 pm #17890Hi Cliff,
Include me as well in watching this thread. I have purchased 5 knives from CKTG. But have never had any contact with Mr Richmond? Your review of him is enough to make me shy away! I think I will look for the maker of the knife some place else first.
On the other hand? I could not agree more about Clay and WEPS! I would say it is fair that I have been on the WE forum everyday for over a year. In that time frame I have seen people who instead of contacting WE and try to resolve their problems go public and only review a one sided issue.
I have never seen or heard of Clay not doing his absolute best to make the person happy with the outcome. I have even seen him do it where he obviously lost money just do make the person happy!
I understand your feeling of wanting to buy his product just cause?
I just meet Clay at the 2014 SHOT Show for the first time. Clay was busy doing what he was doing and stopped everything just to spend some time with me and give me the personal tour. He has won me over for life and if there is a way for me to endorse him or his product I will be first in line!
Eamon Mc Gowan04/17/2014 at 8:25 pm #18306This has arrived, I will likely be able to use it this weekend. If there are specific things anyone would like to see addressed let me know.
04/18/2014 at 4:26 am #18309This has arrived, I will likely be able to use it this weekend. If there are specific things anyone would like to see addressed let me know.
Did you end up getting any strops?
Josh
04/18/2014 at 10:48 pm #18328Yes, I have a strop kit.
—
I had a friend stop over and asked him to try it (a person who never sharpened a knife before).
This is the basic procedure I use to introduce people to sharpening, there are refinements to this if you want to advance sharpening, but this gets you past almost all factory and even a lot of custom knives :
-cut the edge off on a stone so you can clearly see it reflect light
This just means make 1-2 passes as if you were trying to cut the stone in half, it just grinds a small flat on the edge, removes any localized stress and sets a base of quality steel to work from.
-set the jig/setting angle at a lowest angle to provide relief, cutting ability and ease of sharpening
-grind with the lowest grit stone using light force until you can’t see the edge reflect light
-increase the setting to 17 dps
-jump to the finest stone
-5-10 pps alternating sides, very lightThe reason I use 17 dps is that it is below most fixed jigs (20-22) and it makes it easy for people to touch up. Again there are refinements to this, this method is just a way to introduce sharpening which is supposed to be basic and simple.
Using this I watched someone with NO experience take a k390 knife and they thought it was ridiculously simple to make a knife shave easily and slice newsprint like it wasn’t there.
—
A few details :
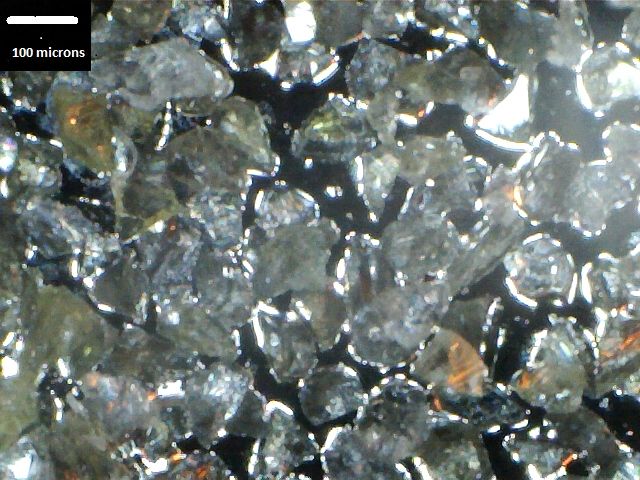
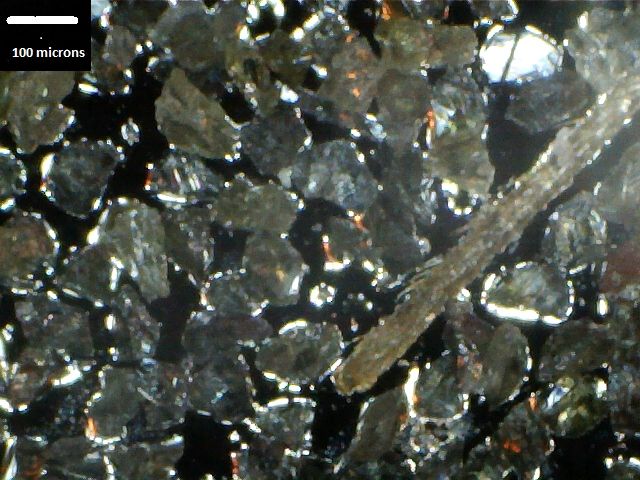
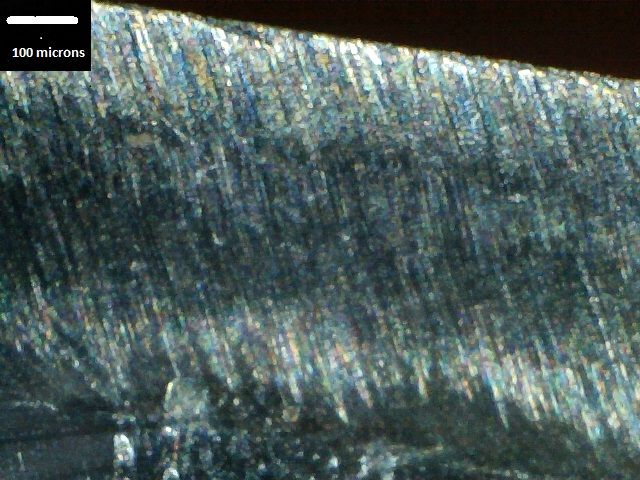
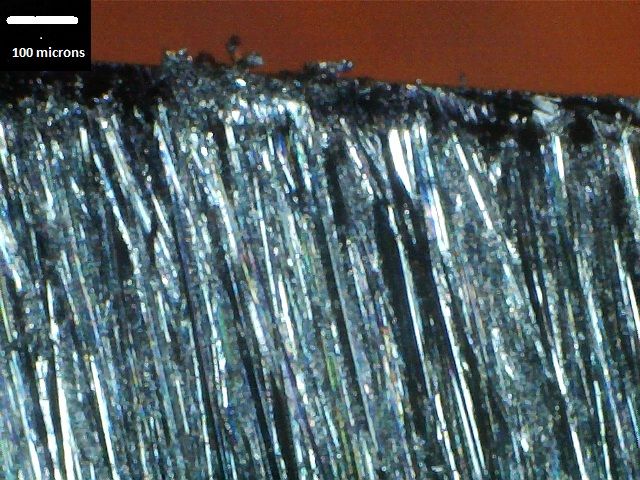
That is the 100 grit stone, here is the 200 :
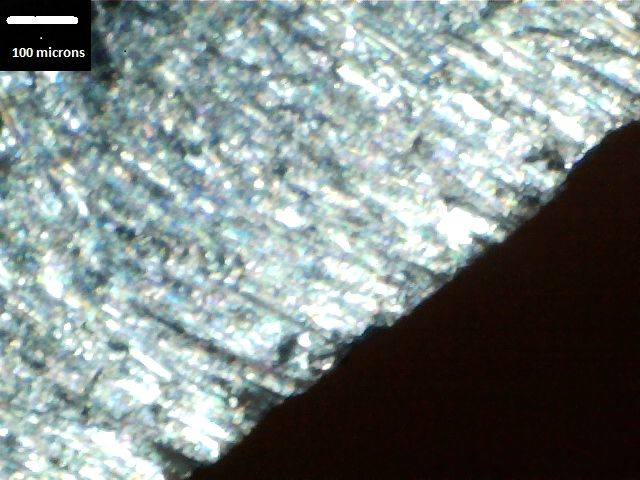
Here is the edge of a CPM 154 CM PM knife at 13 dps :
Note the pieces knocked out of the edge this produces ones of the immediate refinements to the above method which is to not apex at the first grit but stop when the edge starts to show a reduction in light reflecting and then work up in grits. How many grits you want to use before apexing is just dependent on how much steel you want to conserve.
—
A few negatives :
-the hasps/latches on the case are plastic, I have concerns about how long they will last with repeated opening/closing
-the tape used on the bags over the hones is clear and not easy to see and remove
Ok this looks like a very petty complaint, however if an opaque tape was used which was folded on the ends then it would be much easier to remove without damaging the bags which are very nice to keep the stones in and keep the diamond stones from rubbing together.
A question / possibility :
I played around with using lower settings and it looked to me like the obvious reason why you can’t go very low as that you will grind into the actual clamp. However if the clamp could open wider and you could clamp on the handle it looks like that problem would be gone and you could use this to grind to very low angles. I just need to pick up a longer screw to see if that is possible.
04/19/2014 at 12:41 am #18329This is what I use for small knives and other knives that are not too long.
http://www.tormek.com/en/jigs/svm00/index.php04/19/2014 at 2:11 pm #18336I played around with using lower settings and it looked to me like the obvious reason why you can’t go very low as that you will grind into the actual clamp. However if the clamp could open wider and you could clamp on the handle it looks like that problem would be gone and you could use this to grind to very low angles. I just need to pick up a longer screw to see if that is possible.
I thought about that too cliff, but the issue you will run into is that the bases of the guide rod arms will bump into the blue base and not allow you to move them in for lower angles… at least, not with some modifications.
04/19/2014 at 2:12 pm #18337I played around with using lower settings and it looked to me like the obvious reason why you can’t go very low as that you will grind into the actual clamp. However if the clamp could open wider and you could clamp on the handle it looks like that problem would be gone and you could use this to grind to very low angles. I just need to pick up a longer screw to see if that is possible.
I thought about that too cliff, but the issue you will run into is that the bases of the guide rod arms will bump into the blue base and not allow you to move them in for lower angles… at least, not with some modifications.
do you have any pics of the edge when jumping right from the 100 grit to the highest stone with your microbevel? i am curious how well it cleans up the deeper scratches… =)
04/21/2014 at 2:49 am #18358… the bases of the guide rod arms will bump into the blue base and not allow you to move them in for lower angles
Yes, however if you clamp on the handle the edge is far ahead of the base so you should not come near it.
As an update :
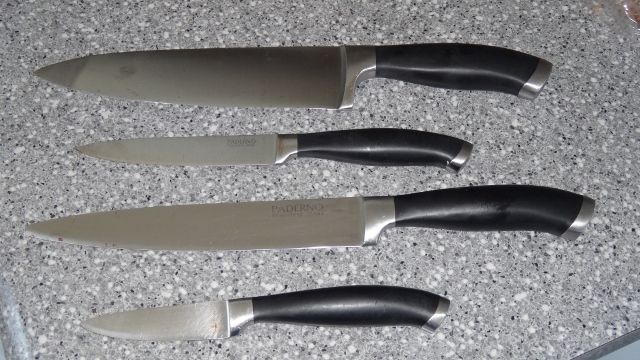
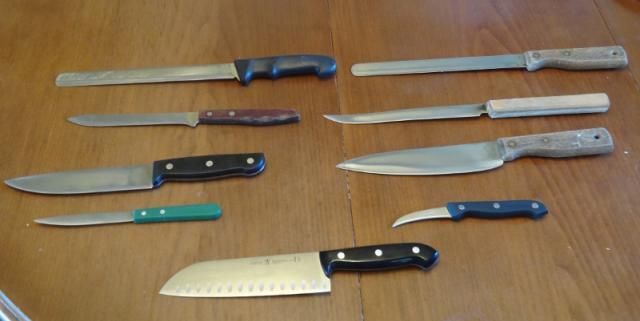
These are a set of knives from Paderno, a few observations :
-full height flat grinds
-edges are <0.005" but not consistent (bevel can often double along the edge)
-not dishwasher safe (will rust readily)
-edges tend to chip more so than deform
-all tips were broken off to some extent, little plastic deformationIn short :
-decent ergonomics
-high cutting ability
-low to moderate corrosion resistance
-edge durability, low to moderate (no rippling of the primary)It is likely they were under soaked, and the steel was not well normalized and the quench was not extended. These are expensive, but you are paying for the brand name.
However of interest here was the sharpening :
Paring knife :
-edge bevel is between 15 and 20 dps, uneven
-cut the edge off with two passes into a cheap stone
-125 pps on the 100 grit, evenly set the bevel to 20 dps
-25 pps on the 1000 grit, edge was cleanly finishedUtility :
-edge bevel is between 15 and 20 dps
-cut the edge off with two passes into a cheap stone
-25 dps setting (major damage on the edge), 75 pps/100 grit to grind some of it away, edge was apexed
-30 pps/1000 grit, edge was cleanly finishedFor knives like these, I generally do a few finishes and then the next time I sharpen them I see how it worked out and then modify the edges accordingly to work on finding the optimal bevel. As what is best depends on user skill/scope it takes a few tries to figure out what works best. However any sharpening that you do greatly improves the performance so friends/family are pleased even while you are experimenting.
Again, I did one of them, a family member who never sharpened a knife did the other one, no issues and followed the same very basic system :
-cut the edge off
-reset the edge to the relief angle until it doesn't reflect light
-micro-bevel to finishEasily makes an edge push cuts newsprint and is far sharper than anything they have seen.
do you have any pics of the edge when jumping right from the 100 grit to the highest stone with your microbevel?
I will take some shortly, I have to regrind a XM-18 .
04/29/2014 at 2:15 am #18465Here is an edge in CTS-XHP / 63 HRC this is Carpenters steel which is designed to offer the hardness/wear of D2 blended with the corrosion resistance of 440C ( http://cartech.ides.com/datasheet.aspx?&I=101&E=343 ) these are loose promotional descriptions, not strict materials properties. In any case this is thus currently a middle of the road steel in regards to grindability considering the modern use of extreme alloys.
This it the as-boxed edge, multi-faceted with a decent polish.
The edge is < 15 dps on one side, < 20 dps on the other side, so will take a bit of work to clean up regardless of how it is to be sharpened. I used the 100 grit stones and set the bevel to 13 dps. In order to avoid grinding into the base that means for the first part of the edge you have to short stroke on the bottom of the hones.
This is after 1000 passes per side on the 100 grit stones. I am using light force, I will measure it the next time, but based on what I have seen in videos I am using less force than most. You can grind with heavier force, however it does rapidly wear abrasives and in general I would always advise using a more coarse grit and less force.
At this point the remaining bevel is less than a mm wide and very difficult to even tell there is any of the original bevel left without magnification. At this point for practical purposes it is time to switch the abrasives and slightly increase the angle, there is no benefit to apexing on the shaping grit for reasons that will be apparent later. But for the sake of experiment, lets continue.
This is after another 1000 passes, at this point the bevel is so small (the original edge) that if you use a marker it looks like it is all removed in a pass. There is still some of the original bevel left under magnification but it can't be seen by the naked eye. There is really no productive point to keeping going with the shaping grit at this stage – but lets continue anyway.
This is after another 2000 passes, so 4000 total. The edge has now been formed with the shaping bevel. However if you look closely you can see there is going to be a problem when you go to refine the polish. The edge looks straight but there are divots knocked out of it periodically. To make this really clear here is the edge after just 10 passes per side with the 1000 grit stone at a slightly elevated angle :
Note that almost immediately with just a small increase in angle (13 dps to 17 dps) the 1000 grit stone starts to eliminate the very harsh 100 grit scratch pattern but when it does it reveals what happens to the edge in those parts that the 100 grit stone has took those pieces out. In order to make the edge perfectly uniform that edge has to be ground back the depth of that divot.
In short :
-the 1000 grit stone can very quickly remove the 100 grit scratches by using an elevated bevel
-if you apex on the 100 grit stone it is going to be wasteful
-the 40 grit stones are likely of strong benefit if you reset angles on low grindability steels
However while this seems like a lot of work, this was :
-A D2 class steel at 63 HRC
-the bevel was taken down from 15-20 dps to an even 13 dps (4" blade)
-using very low forceI would in general advocate something more practical such as :
-use the 40 grit at the shaping stage
-stop when you can not see the original bevel any more
-slightly elevate and increase the gritsRepeat the last step until sharpened. With some thought to angles/finishes you can work out a way to grind efficiently in both time and steel consumed.
Of course if you don't care at all about the steel used then no big deal but given the prices of some modern knives, it might be of consideration/value.
04/29/2014 at 10:23 am #18466Thanksalot, Cliff! Very insightful.
Also a nice demonstration of the effect for which Tom coined a name, which I forgot: a fine stone revealing imperfection that a coarser stone left (but which were not clearly visible after the coarser stone).
Molecule Polishing: my blog about sharpening with the Wicked Edge
07/01/2014 at 3:22 am #19303Update, using the WE and the Sharpmaker with the new CBN rods to clean up a bunch of heavily used kitchen knives :
-ref thread : http://www.spyderco.com/forums/showthread.php?63254-CBN-Rods&p=953436&viewfull=1#post953436
Here are a few things which are starting to stand out to me :
a) There should be a lubricant with the kit given its nature as being comprehensive. Dry honing is problematic for a lot of reasons, and the lubricant could be as simple as a glass cleaner or similar (commonly used) or an actual cutting agent as Trend sells (which is insanely expensive).
b) The standard kit should include the really coarse stones because even the 100 grit ones can take quite a while to take down an edge which needs an angle reset or to remove visible damage. In general the very coarse grits would keep the force low which is what you want for many reasons.
c) It would be nice if there was a small booklet of standard sample paper included which was easy to obtain. That way in videos where people show the sharpness they could all use the same paper which would to some extent make the comparisons a bit more useful.
d) The system will struggle with very narrow blades and low angles, this is a pretty serious problem especially given the cost of the system and how people in that price range tend to be a bit more interested in optimizing performance. A very simple solution to this is to just allow the clamp to open wide enough to clamp on the handle of blades and thus they are further out on the system and thus at low angles the abrasive doesn’t hit the holder.
e) It would be nice if the arms were marked L/R and UP/Down. This seems stupid, but one of the common problems that people will struggle with if you ask them to use it is how that goes and they will fiddle with it long enough that they could have had a blade sharpened already.
f) Add a small stiff brush to clean off the diamond hones. This sounds silly, you can just cut the handle off of a used tooth brush, but again consider the price of the kit and this would make it more complete and get people focused on the maintenance as the stones can load up a little, especially if you use a lubricant, and especially if it isn’t just water (which can cause corrosion problems).
g) This one sounds really silly, black cases freak people out. If I have this in the front seat and people see it they always think gun or similar. It makes no sense that black cases/handles/blades freak people out so much but they do. But also it isn’t that nice to have a black case if you are taking this outside as it becomes invisible if you put it on the ground and it gets low light.
07/01/2014 at 3:45 am #19305Hey Cliff! thanks for the update! Maybe I can help out on a few of these points w/ my experience (for what it’s worth lol).
a)I use water a decent amount and then let it air dry and have had no issues w/ corrosion to date… I also use a 50/50 solution of windex/rubbing alcohol sometimes, but I have really been enjoying the water lately.
b) do you think it would be beneficial to have a certain course waterstone cut for the WEPS paddles that would be much more efficient of a cutter for the heavy re-profile work? I know there are shaptons and choseras out there already… any recommendations?
d) this is an interesting point and one that would not be too difficult IF you could move the pivot point out in front of the vice to where the blade would be. I shall attempt to do this in the near future, stay tuned =) I am working on having a part made that would allow this very thing. Keep in mind that it wouldn’t work on all blades, but it should work on a decent amount of them (i.e. it wouldn’t work on one with a heavily contoured handle).
f) I find that it doesn’t ever load up if I have a bowl of water in front of my weps and then just “paint” the stones w/ water every time I alternate… are you having a different experience?
g) If you send it to me I can cerakote it pink for you!
that should put ppl’s mind at ease! seriously though, I don’t think Clay had this in mind when he got it… I think people in New Mexico and ppl in Canada view the issue of guns slightly different
-
AuthorPosts
- You must be logged in to reply to this topic.

