Convex with Micro-Bevel
Recent › Forums › Main Forum › Techniques and Sharpening Strategies › Convex with Micro-Bevel
- This topic has 16 replies, 5 voices, and was last updated 04/05/2012 at 4:59 am by
 wickededge.
-
AuthorPosts
-
03/28/2012 at 6:01 am #2217
I took a little time to sharpen a knife today and create the kind of edge I described above – highly polished, convex bevel with a semi-toothy micro-bevel. I chose my Benchmade 9500 Mini Stryker for the project, which I had previously sharpened to 15 degrees per side. I had used the knife very little, if at all with narrow bevel and when I inspected it, I discovered that the edge was damaged, which wasn’t too surprising since the steel is CPM154. Here are some images of the edge at 15 degrees per side before I went back to work on it:


The above images are taken at 510x magnification.
Next I created a nice convex bevel, spanning from 16-20 degrees with the usual method of creating micro-bevels and then strops. The work was easy since the edge had already been relieved down to 15 degrees. I opted to just use the 800 through 1600 grit stones and then the following progression of strops: 14µ> 10µ> 5µ> 3.5µ> 1µ> .5µ
Here is a shot of the convex bevel at 510x and .5µ polish:

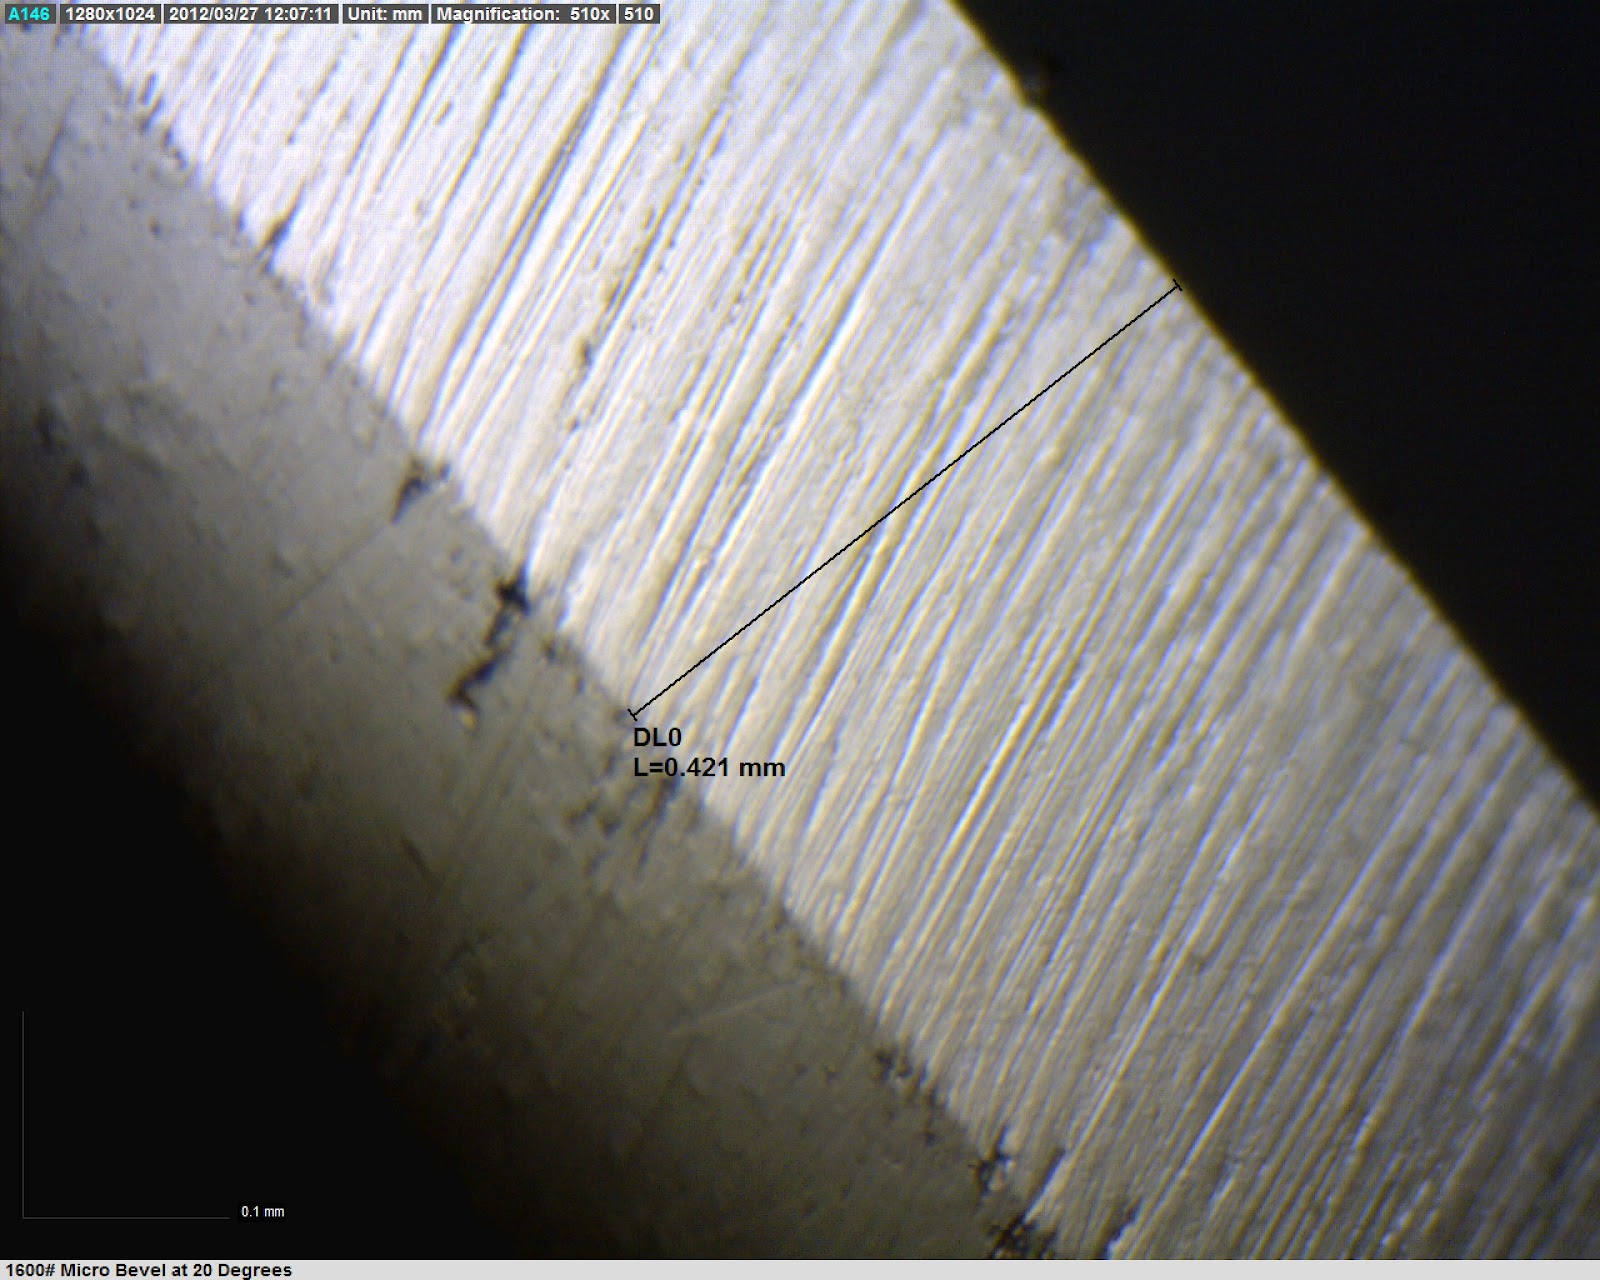
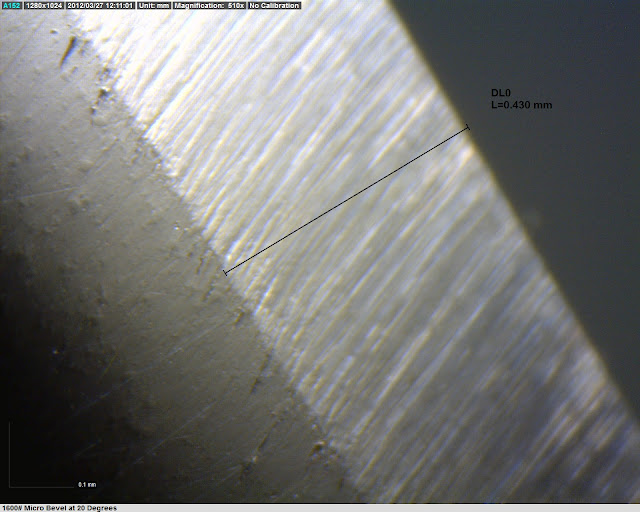
Next I created the micro-bevel at 20 degrees per side with the 1600 grit ceramic stones:


For the above image, I adjusted the focus to highlight the edge.
In the image above, I focused on the shoulder to show the transition from polished bevel to toothy micro-bevel.The following images are some shots with a regular camera:


-Clay
03/28/2012 at 7:16 am #2220That’s very cool, what a great response. THANK YOU! You already had a customer for life (and salesman for that matter) but I think your really going beyond customer service. Now that’s what I call a man passionate about knives! That’s the cool thing about forums, sure you have to remember a user name and password for like 10 different sites but you find people that are just as enthusiastic as you are! I should have joined sooner!
Ok back to discussion,
For that convex edge you used for this project when you got up to the 1600 grit ceramic you put on the following angles 16,20,19,18,17,16? Then stropped at 16 with the rest of the compounds? I just want to make sure I get the process! I dig the concept and would love to try it out. Are there any steels that a convex edge is not that useful or doesn’t work that well?Thanks again!
03/28/2012 at 11:26 am #2226That’s very cool, what a great response. THANK YOU! You already had a customer for life (and salesman for that matter) but I think your really going beyond customer service. Now that’s what I call a man passionate about knives! That’s the cool thing about forums, sure you have to remember a user name and password for like 10 different sites but you find people that are just as enthusiastic as you are! I should have joined sooner!
Ok back to discussion,
For that convex edge you used for this project when you got up to the 1600 grit ceramic you put on the following angles 16,20,19,18,17,16? Then stropped at 16 with the rest of the compounds? I just want to make sure I get the process! I dig the concept and would love to try it out. Are there any steels that a convex edge is not that useful or doesn’t work that well?Thanks again!
You’re welcome, it was really fun to do. You’re right about the facets created w/ the stones. For the strops, I did it a little differently this time. In stead of stropping at only sixteen degrees, I stropped it through the range of angles, going up through each angle with one grit and then down w/ the next and so on until I go to the .5 micron level. It took a little longer to do it that way, but I wanted a really clean result that we could examine.
In general, convex edges have a complex set of pros and cons. They tend to be stronger, though not for the reason that most people think. The main argument I hear in favor of them is that they are more durable due to extra metal behind the edge, adding lateral support to the wire edge. I don’t really buy into that belief. I do think they receive a lot of benefit from their shape due to having broader shoulders just behind the edge that carry the majority of stress so that the actual cutting edge has only to cut a little bit of material that is already under tension from the wedging effect of the shoulders pushing into the cut. This is different than the lateral support that is often cited. A convex edge on a knife works the same way convex edges work on an axe; the very apex initiates the cut, followed immediately by the shoulders which start spreading the cut open wider and making less work for the edge itself. Cutting with convex edges is less precise than cutting with V grind bevels because the knife is more prone to deflection. Convex edges have slightly less drag than V grind bevels because there is not a sharp corner to over come as the blade penetrates. In my opinion, a convex shoulder with a small V grind micro bevel is a great option because you get the best of both worlds; rounded, polished shoulders to ease the blade deeper into the cut while relieving some of the pressure on the edge and a crisp, precise edge for exact cutting. The fun thing about the Wicked Edge is that you can design all kinds of edge configurations and finishes and test them out easily. You can then modify your bevel further once you start seeing the results. You might thin the shoulders back or add a slightly wider micro-bevel or change finish levels on the entire bevel or maybe just on the edge… making the changes is easy and usually fairly quick. As far as steels go, I think the softer the steel, the more you might want to consider a convex or some kind of modified convex edge. For super hard steels, you might not need to worry too much about building in support.
-Clay
1 user thanked author for this post.
03/28/2012 at 6:28 pm #2241Great edge, Clay! And great pictures! 510x magnification, good focus and good lightning…
Have you got a new microscope? Could you tell us which one you have used?
Molecule Polishing: my blog about sharpening with the Wicked Edge
03/28/2012 at 6:55 pm #2245Thank you Clay! :woohoo: You just confirmed what I always thought…an edge with a convex shoulder with a small V grind micro bevel does indeed give you the best of both worlds. I now do all my knives this way. They cut like razors and they retain their edges longer too.
But the neat thing about the WEPS is that you can experiment with all kinds of different edges and angles and when you find what you like, it is repeatable providing you keep some good notes.
Good stuff mate!Cheers
Leo03/28/2012 at 11:48 pm #2256Great edge, Clay! And great pictures! 510x magnification, good focus and good lightning…
Have you got a new microscope? Could you tell us which one you have used?
Nice Job Clay. I am going to have to try that!
I too am interested in what kind of new microscope setup that you are using. Especially the software. I like the notation of resolution and magnification and the measurement tool as well.
Phil
03/29/2012 at 1:15 am #2258Great edge, Clay! And great pictures! 510x magnification, good focus and good lightning…
Have you got a new microscope? Could you tell us which one you have used?
Nice Job Clay. I am going to have to try that!
I too am interested in what kind of new microscope setup that you are using. Especially the software. I like the notation of resolution and magnification and the measurement tool as well.
Phil[/quote]
It’s the Dino-Lite 413 T5 which I picked up on Amazon: Dino-Lite 413 T5
-Clay
04/04/2012 at 11:41 pm #2483Hey guys, I decided to split this post off into its own thread so we can go on examining this geometry. Anyone who wants to fool around with convex to micro-bevel edges and post here would be most welcome. I’m hoping to do some some cut testing on the Benchmade today, just informal tests to see how the new edge cuts and holds up.
-Clay
04/05/2012 at 1:05 am #2486I ran the first little cutting test with the knife, 1st use after sharpening:
- Shave arm hair easily – Pass
- 10 slices through copy paper – Pass (cut easily, some minor fraying at the edge of cut, able to cut curves)
- 10 cuts through heavy duty cardboard – Pass (cardboard is 44 lbs/in edge tested, 10″ cuts)
- 10 cuts through plastic straps – Pass (plastic straps from Uline order)
- 10 slices through copy paper – Pass (still cutting easily, similar fraying edges)
- Shave arm hair easily – Pass (if anything, the shaving was actually easier after the cutting…)
510x – Micro-bevel after cutting test 1
510x – Micro-bevel before cutting test 1
Attachments:-Clay
04/05/2012 at 1:13 am #2488Round 2 of cutting tests – repeat of round 1:
- Shave arm hair easily – Pass
- 10 slices through copy paper – Pass (still cutting easily, fraying slightly increased)
- 10 cuts through heavy duty cardboard – Pass (cardboard is 44 lbs/in edge tested, 10″ cuts)
- 10 cuts through plastic straps – Pass (plastic straps from Uline order)
- 10 slices through copy paper – Pass (still cutting easily, fraying slightly increased)
- Shave arm hair easily – Pass (still shaving well, slightly more difficult than after 1st round)
510x – Micro-bevel after cutting test 1
Attachments:-Clay
04/05/2012 at 1:45 am #2490Round 3 of cutting tests – repeat of round 1:
- Shave arm hair easily – Pass
- 10 slices through copy paper – Pass (still cutting easily, fraying slightly increased)
- 10 cuts through heavy duty cardboard – Pass, last cut began to fray (cardboard is 44 lbs/in edge tested, 10″ cuts)
- 10 cuts through plastic straps – Pass (plastic straps from Uline order)
- 10 slices through copy paper – Pass (more fraying with some snagging)
- Shave arm hair easily – Pass (still shaving nicely)
510x – Micro-bevel after cutting test 3
Attachments:-Clay
04/05/2012 at 2:21 am #2492Round 4 of cutting tests – repeat of round 1 – interesting results!
- Shave arm hair easily – Pass
- 10 slices through copy paper – Pass (more fraying with some snagging)
- 10 cuts through heavy duty cardboard – Pass. No fraying, improved cutting after 4th cut (cardboard is 44 lbs/in edge tested, 10″ cuts)
- 10 cuts through plastic straps – Pass (plastic straps from Uline order)
- 10 slices through copy paper – Pass (cut easily and cleanly)
- Shave arm hair easily – Pass (still shaving nicely)
510x – Micro-bevel after cutting test 4
The edge actually seemed to clean up a little more through the process. Just after the 4th cut into the cardboard, the cutting got much easier and the paper cut much more easily after the cardboard and plastic straps. I’m guess that the edge got some honing effect from the cardboard. I’m running out of time to do experiments today, so I’ll execute a lot more reps on the next one to see what happens to the edge.
Attachments:-Clay
04/05/2012 at 2:45 am #2494Round 5 of cutting tests – repeat of round 1 with 4x repetitions:
- Shave arm hair easily – Pass
- 10 slices through copy paper – Pass (cut easily and cleanly)
- 50 cuts through heavy duty cardboard – Pass. No fraying, performance dropping off after 12th cut. All cuts completed but force required to make cuts increased throughout. Nearly a fail at #50 (cardboard is 44 lbs/in edge tested, 10″ cuts)
- 50 cuts through plastic straps – Pass (plastic straps from Uline order)
- 10 slices through copy paper – Pass (some fraying but still cut easily)
- Shave arm hair easily – Pass (barely shaving, nearly a fail)
510x – Micro-bevel after cutting test 4
Overall, I’m very impressed both performance and durability of the edge. The cardboard I chose is extremely tough stuff and to still be able to shave and slice paper easily after 90 10″ cuts through the cardboard along with all the other cuts is impressive.
I’d like to hear from people about how much they use their pocket knife in a week and what they’re cutting with it. If you can keep loose track of your usage, we could design a test to see if a specific geometry and finish will give you the performance you want throughout the week.
One of things that’s very exciting about this little test is that to restore the knife to pre-test condition, I’ll only need about 5-10 quick strokes per side, just hitting the micro bevel.
Attachments:-Clay
04/05/2012 at 2:51 am #249604/05/2012 at 3:15 am #2497Larger images of the edge are available on my blog: Sharpening Techniques
-Clay
-
AuthorPosts
- You must be logged in to reply to this topic.