Who can guess what this is?
Recent › Forums › Main Forum › Product Announcements › Who can guess what this is?
- This topic has 70 replies, 18 voices, and was last updated 04/10/2014 at 3:57 am by
 cbwx34.
-
AuthorPosts
-
05/23/2013 at 9:10 am #11596
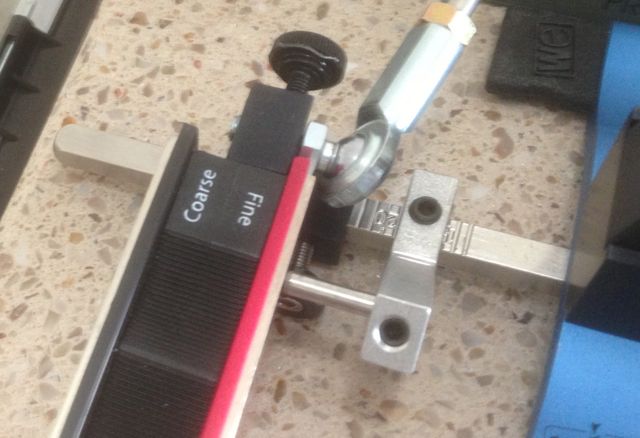
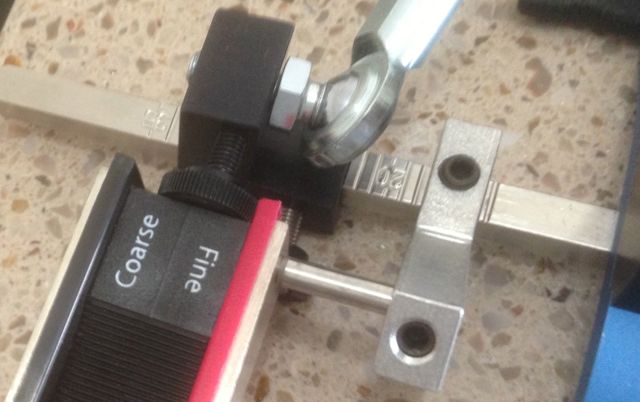
The idea is to use the little collar attachment (in between the guide rod assembly and the blue base) as a positive stop to be able to use stones of differing thickness and repeatedly hit the exact same angle without having to use an angle cube. The basic procedure is as follows:
- Slide the stop collar (SWAT Jig as named by Curtis) onto the degree bar in between the blue base and the guide rod assembly.
- Set the angle with the thinnest stone you plan on using.
- Take the stone off the guide rod and rest the inside of one of the plastic trays against the inside edge of the guide rod assembly (you would use the inside of the Blue Collar if you’re using the Basic Kit or Pro 1 and you would use the inside edge of the upper portion of the L-Bracket if you’re using the Pro 2 set up.)
- Slide the stop collar over until the pin makes contact with the face of the stone.
- Lock the stop collar in place.
To change stones and keep the same angle, loosen the guide rod assembly, align the inside of the plastic tray to the inside of the guide rod assembly, then slide the stone and guide rod assembly over to the stop collar until the surface of the stone contacts the pin on the stop collar. Lock the guide rod assembly in place. You should now have the exact same angle as you did with the previous stone, regardless of thickness…
Haha… SWAT (Stone Width Adjustment Tool) growing on you? 🙂
You actually don’t need the thinnest stone to set it… you can use any stone… once you set the angle it stays the same no matter what… thinner or thicker. There’s actually a couple of scenarios you can use… for example you could set it with the stone/strop you want to end with, tie it in to a “divot” on the angle bar, then when you need to do a touch up, just set the angle like normal. A couple of other things worth noting… it’ll work better with the angle screw on the side without the divots… an unattended benefit that the bracket has threads on both sides (now I’ve probably confused everyone) :S and the micro adjustment won’t be used, once the initial angle is set and the stop collar is locked, the adjustments will be made by moving the entire assembly.
Glad to see there’s an interest in this! I think people will find it valuable, especially as the variety of stones continues to grow.
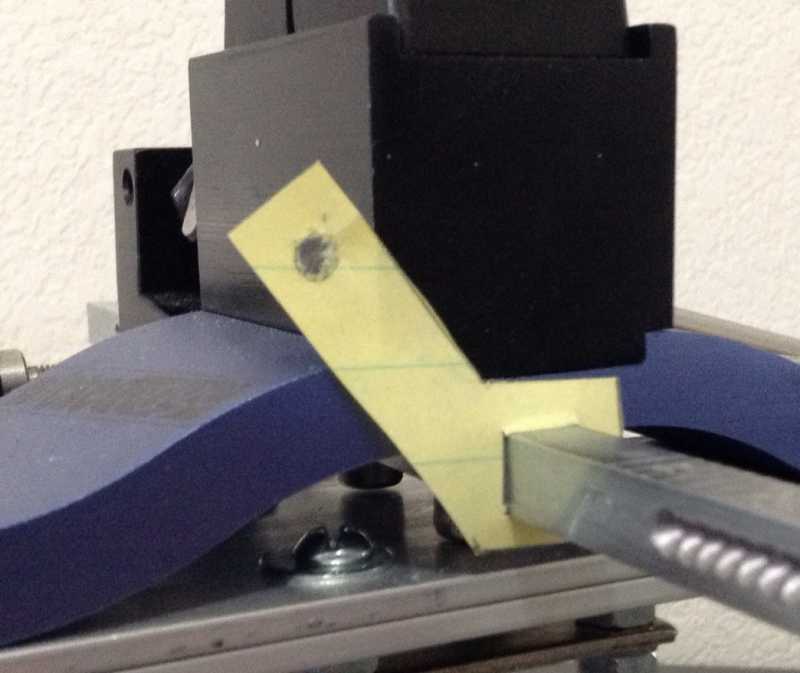
Here’s my high tech design….
Hey Clay, make this!… 😆
3D printer… we don’t need no stinkin…. :side:
(Hope this makes up for breaking the serrated prototype.) :whistle:
Attachments:05/23/2013 at 10:28 am #11610Clay,
So the big question, any ideas on approximately when this accessory will be available? Put me down on the waiting list NOW!
Thanks,
Mark
05/23/2013 at 10:34 am #11611Clay,
So the big question, any ideas on approximately when this accessory will be available? Put me down on the waiting list NOW!
Thanks,
Mark
I have a couple of small changes to implement (already incorporated into the drawings) that I’ll want to test when the new 3d printer comes in. Assuming I like the changes, lead time should be about 2-3 weeks, so sometime before the end of June.
-Clay
05/23/2013 at 10:52 am #11614Thank you, please put me on the waiting list!
05/23/2013 at 11:55 am #11634I have a couple of small changes to implement (already incorporated into the drawings) that I’ll want to test when the new 3d printer comes in. Assuming I like the changes, lead time should be about 2-3 weeks, so sometime before the end of June.
That’s incredibly fast! Are we allowed to vote for what should be next? I’m dying for the low angle attachment…
Molecule Polishing: my blog about sharpening with the Wicked Edge
05/23/2013 at 12:03 pm #11637That’s incredibly fast! Are we allowed to vote for what should be next? I’m dying for the low angle attachment.
Don’t do that Mark… I would miss you. There is a way around that. Sensory deprivation, you lose track of time. Warm liquid at body temp, no light, no sound. Have somebody drag you out then the attachment is ready to ship…
:ohmy:
👿06/17/2013 at 6:28 am #12451I use the drill stop on my Edge pro and since all the stones vary in thickness particularly with use it is invaluable – the only time I cannot use it if for sharpening scissors(Edge Pro has a dedicated table attachment for scissors but the angles are much larger so the stone variation thickness does not change the angle appreciable : but on smaller angles the drill stop collar comes into its own(without it the angles would change markedly between differing stones). I have just placed my order for the WE June 12th and hope that they will be ready for purchase before my order is despatched since I will certainly add them to my order.
07/28/2013 at 5:26 pm #13669Clay,
Would you please post a picture with a handle/stone in place, being gauged by the swat device? I’m trying to figure out how the plastic handle is placed on the upper part of the L bracket (pro 2). The tightening knob on the L bracket gets in the way. It appears that the handle must be placed perpendicular to the degree bar so that the Pin on the Swat can contact it. What am I missing? Or is my early production Pro 2 different from what you show in the picture (the knobs on mine are black plastic)
thanks,
Cliff07/28/2013 at 9:33 pm #13674Clay,
Would you please post a picture with a handle/stone in place, being gauged by the swat device? I’m trying to figure out how the plastic handle is placed on the upper part of the L bracket (pro 2). The tightening knob on the L bracket gets in the way. It appears that the handle must be placed perpendicular to the degree bar so that the Pin on the Swat can contact it. What am I missing? Or is my early production Pro 2 different from what you show in the picture (the knobs on mine are black plastic)
thanks,
CliffI’m not Clay, but he gave me a prototype to play with, so maybe this’ll help.
There’s no real rules on using this, the key is to find two consistent points. So, for example, you could move the Micro Adjust “holding” screw to the back side, and use it like this…
… or leave the screw in the front and use it like this…
… (a way I’m actually finding to be a little more accurate for me). You could also just tighten the micro adjust down so it can’t turn, and take the holding screw out completely, since you probably shouldn’t need to use it in combo with the SWAT jig.
(BTW, I think the picture at the beginning of the thread is a CAD drawing, which is why it looks a little different?).
Attachments:07/28/2013 at 10:01 pm #13677Any idea how close this is to being available?
Seems like it would be a whole lot easier than constantly fiddling with the angle cube.
Have you compared how close using the swat comes to duplicating the angle cube per the angle cube?07/28/2013 at 10:09 pm #13679Any idea how close this is to being available?
Seems like it would be a whole lot easier than constantly fiddling with the angle cube.
Have you compared how close using the swat comes to duplicating the angle cube per the angle cube?Should be close… he told me the other day he got some in… I’m not sure if that’s some to sell, or to check how they’re coming out… either way, it shouldn’t be long. (My guess anyway).
You still (in case not everyone knows) have to set the initial angle (with the cube or someway), but once set up, switching between different width stones, which is what the SWAT jig is made for…. from my testing, keeps it at the same angle… you’ll see a .10 or .20 difference, but some of that could even be measuring errors…. it will cleanly swipe the marker off the bevel between stones (another way I checked for accuracy).
07/28/2013 at 10:44 pm #13680Sounds great
07/29/2013 at 4:48 pm #13694Thank you Curtis, this helps.
07/30/2013 at 11:57 am #13715Can’t wait !!
08/14/2013 at 11:06 pm #14152Any updates for us anxious minions?
Thanks -
AuthorPosts
- You must be logged in to reply to this topic.