New Guy from NY with a Gen 3 Cover Mod
Recent › Forums › Main Forum › Sharpener and Accessory Maintenance › MODS › New Guy from NY with a Gen 3 Cover Mod
Tagged: Gen 3 Cover Mod
- This topic has 8 replies, 7 voices, and was last updated 01/09/2017 at 6:15 pm by
Cimo.
-
AuthorPosts
-
01/06/2017 at 7:13 pm #36539
Hi Guys, new member here and proud owner of a Gen 3 sharpener. Absolutely love it, but the grit getting in the cam locking mechanism bothered the home shop machinist and mechanic in me after a few knife sharpenings. I tried to come up with the best all-around method to seal it up I could. Below is the result. The covers are made from .030″ 316 Stainless Steel, simply clipped (by the holes and dimples) together – no screws or fasteners. The shaft seal is a modified Honda Civic caliper bolt seal.
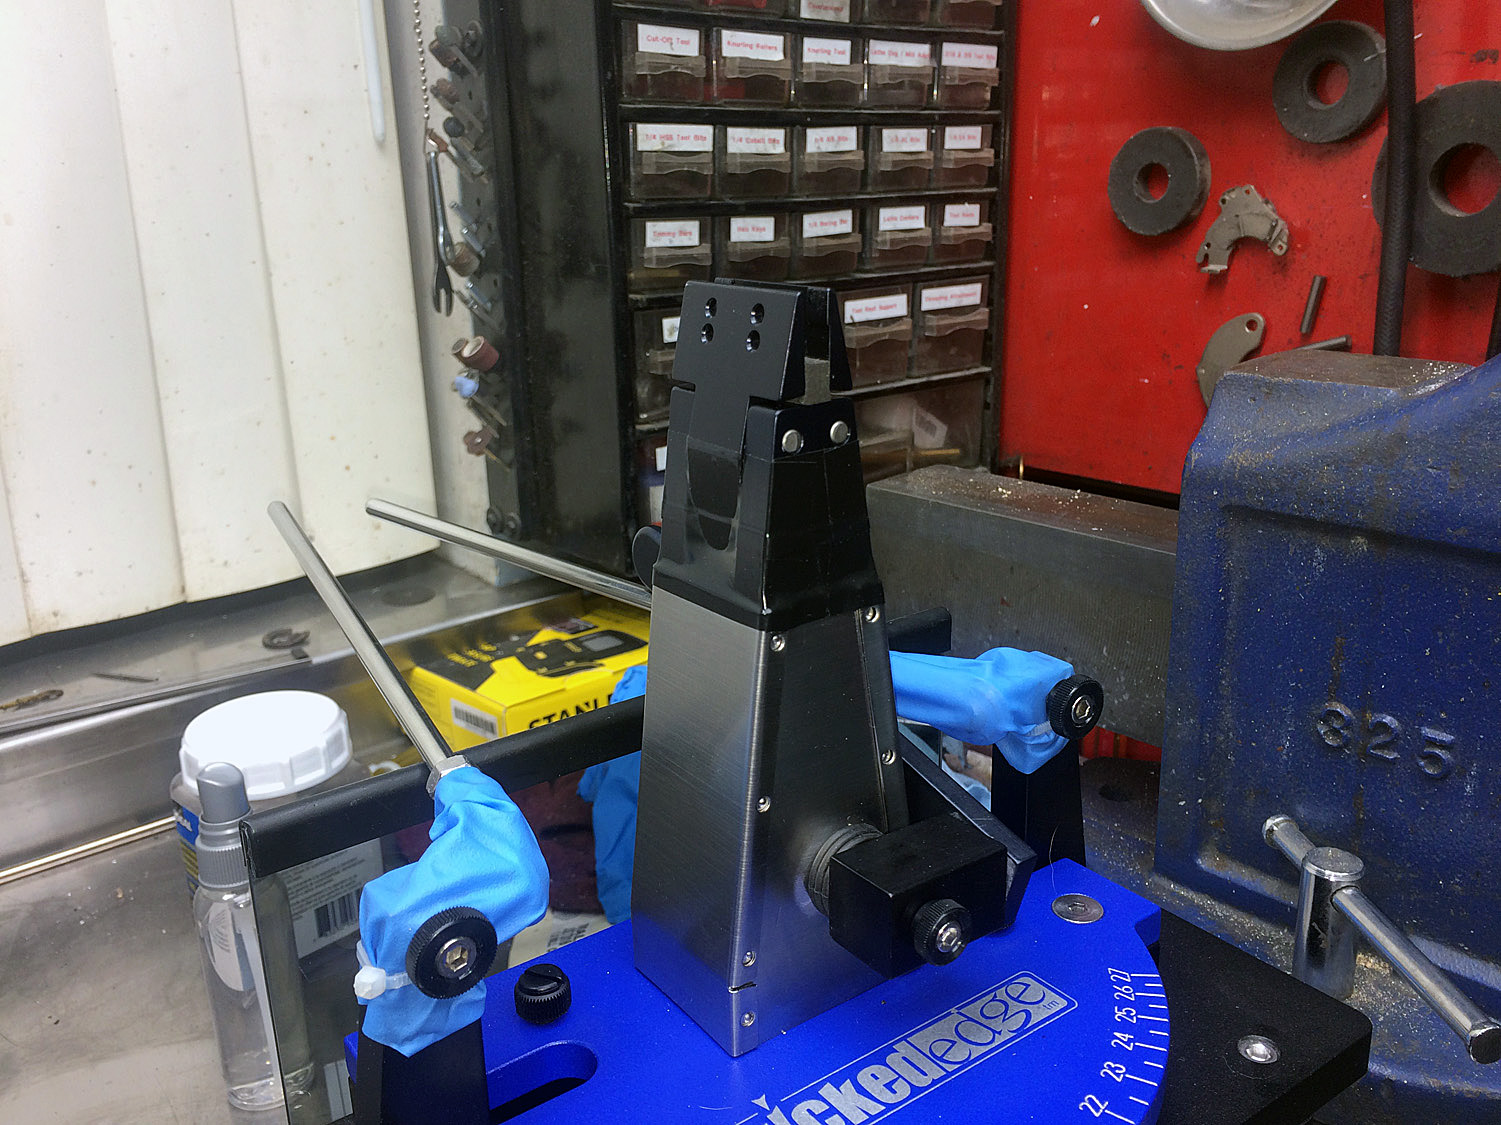


I hope the attachments show up okay. I actually modified the base of the Gen 3 for these covers (cut the corners off), but there’s no reason you couldn’t adapt them to the original design with some minor changes (just make the two sides shorter).
I have to say that once everything was cleaned up and all pressure points were lubricated with high pressure grease (not recommended without covers), the clamping mechanism is an absolute pleasure to operate – very smooth, no grinding. I highly recommend it.
If anyone is interested in making this mod for their sharpener, I will gladly share the CAD drawings I made up for these covers and the how too’s (and reasoning behind the design if you choose) about fabricating them. I’ll even modify the drawing to fit an unmodified Gen 3 if anybody wants that as well. I did not include them here to keep it relatively short (too late I guess) as I’m not sure anybody would be interested in this mod.
Please keep in mind there was no sheet metal shear or brake used on these covers (just hammer and scrap steel for dollies), so there are some marks in the covers as a result.
Thanks for looking.
John
Attachments:
You must be logged in to access attached files.
2 users thanked author for this post.
01/06/2017 at 7:38 pm #36543Wow, that’s really nice!
1 user thanked author for this post.
01/06/2017 at 11:26 pm #36544Very nice, how did you get those nice bends without using a brake ?? I am from northern NJ, how far North are you in NY ?
01/07/2017 at 5:45 am #36549Thank you for the compliment. Firstly the sheet metal had a protective plastic layer on it which prevents surface scratches. Then it was clamped with C-clamps between two pieces of square edged steel stock on the bend line in a vise (in the background of first photo). Note that the the one you are bending over must have a good clean square edge, the other is not that critical, just flat. Then with a third piece of scrap steel (I used a piece of 2″ x 3/4″ square stock) placed on the sheet metal (as a dolly to protect the sheet metal from hammer marks), hammer the bend over. Finish with a body hammer (directly on the sheet metal) to square off the corner. You’d be surprised just how clean and accurate you can work with sheet metal this way.
Below are some photos of the covers in progress. In the first photo you can see the square stock I used (on the left side holding the side cover up) as a dolly to fold the edges over.
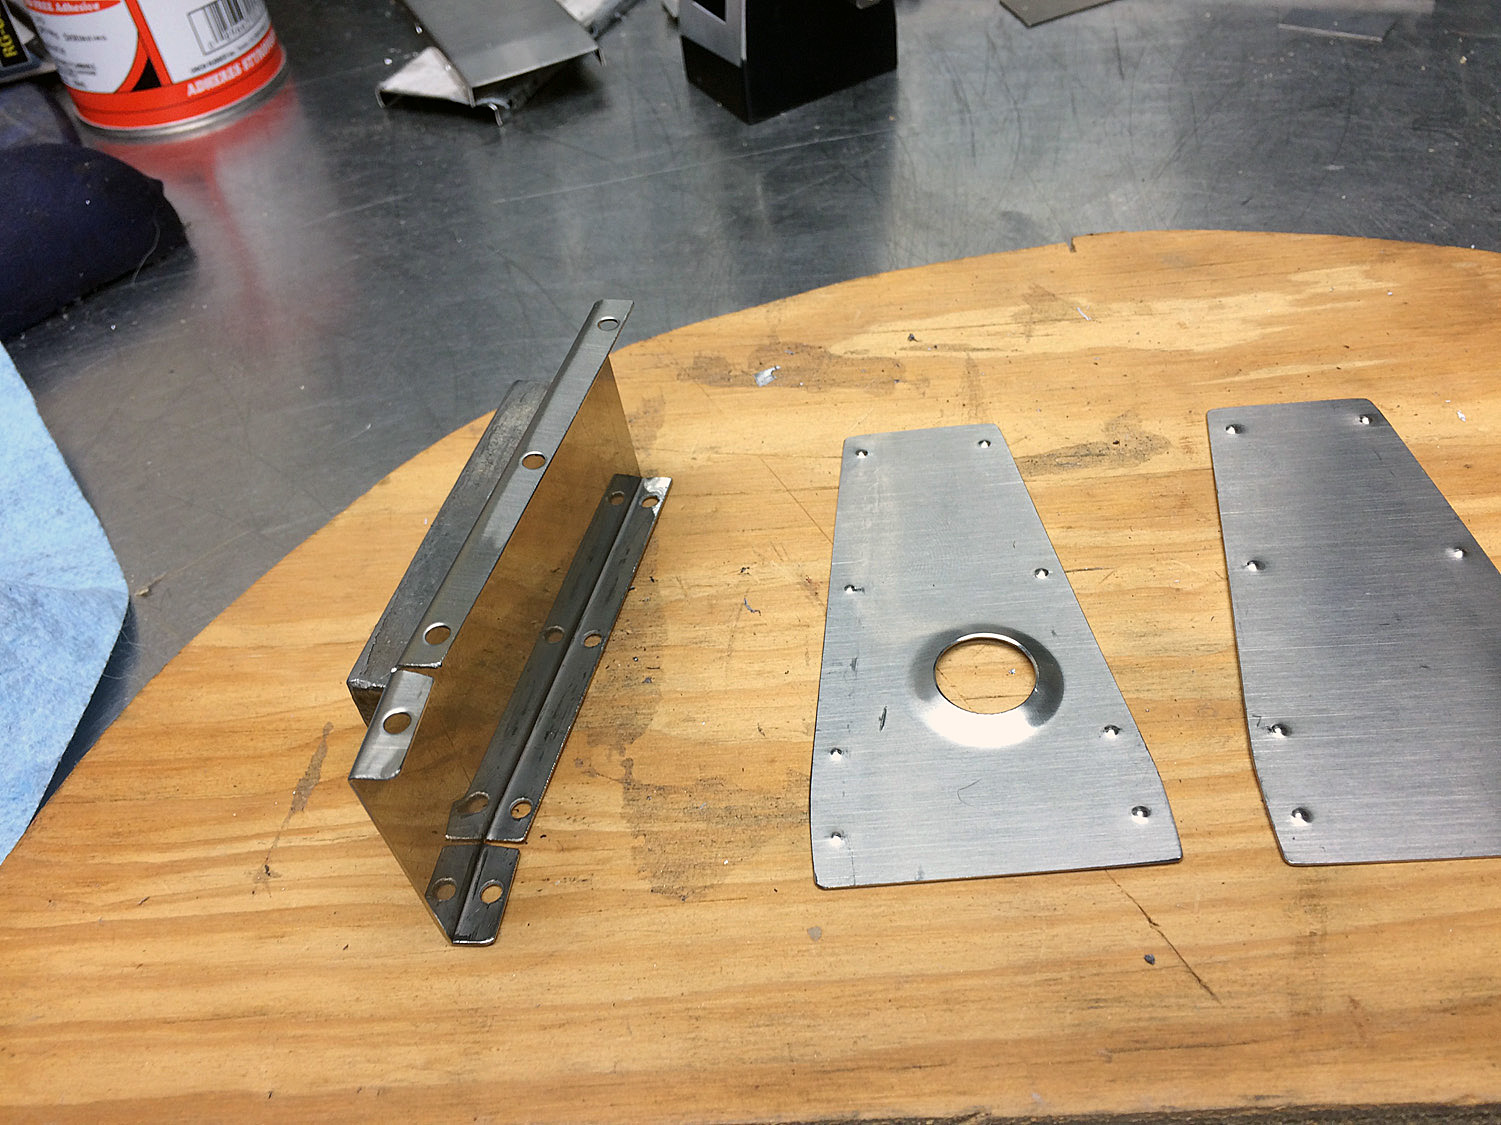


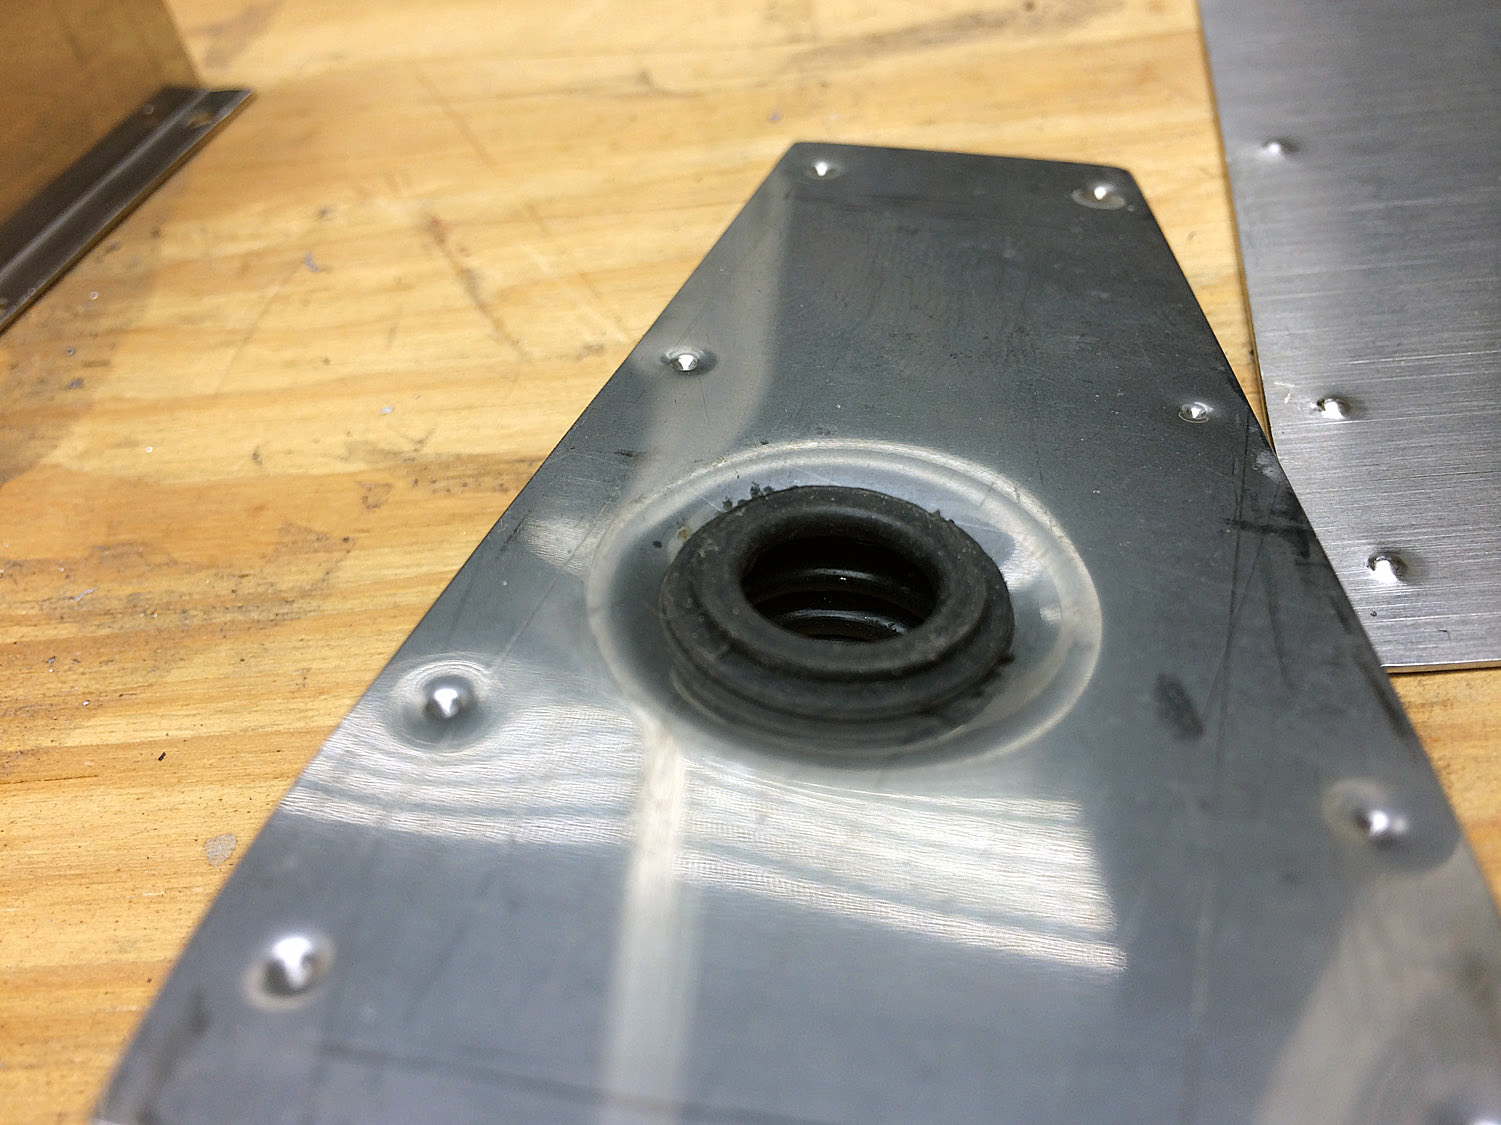
I also included photos of the front & back covers to show how I formed the opening of the shaft hole (with two sockets and a vise) to better fit the shaft seal. You can see from the back view the seal is held in place by one of the bellows (sheet metal ends up between the first two bellows of the shaft seal), and the end of the bellows is slightly higher than the sheet metal surface making for a tight seal against the sharpener surface when in place.
I’m located out by Ronkonkoma (middle Suffolk), but work by the Queens / Brooklyn border so we’re not really that far apart.
Attachments:
You must be logged in to access attached files.
1 user thanked author for this post.
01/07/2017 at 8:14 am #36555John, You won a Mod of the Year Award!

1 user thanked author for this post.
01/07/2017 at 10:05 am #36558Agreed. Very impressive work.
1 user thanked author for this post.
01/07/2017 at 1:04 pm #36563Yup, really nice work!
Molecule Polishing: my blog about sharpening with the Wicked Edge
1 user thanked author for this post.
01/09/2017 at 1:40 pm #36585
 Awesome!
-Clay
01/09/2017 at 6:15 pm #36587Thanks for all the compliments and kind words guys.
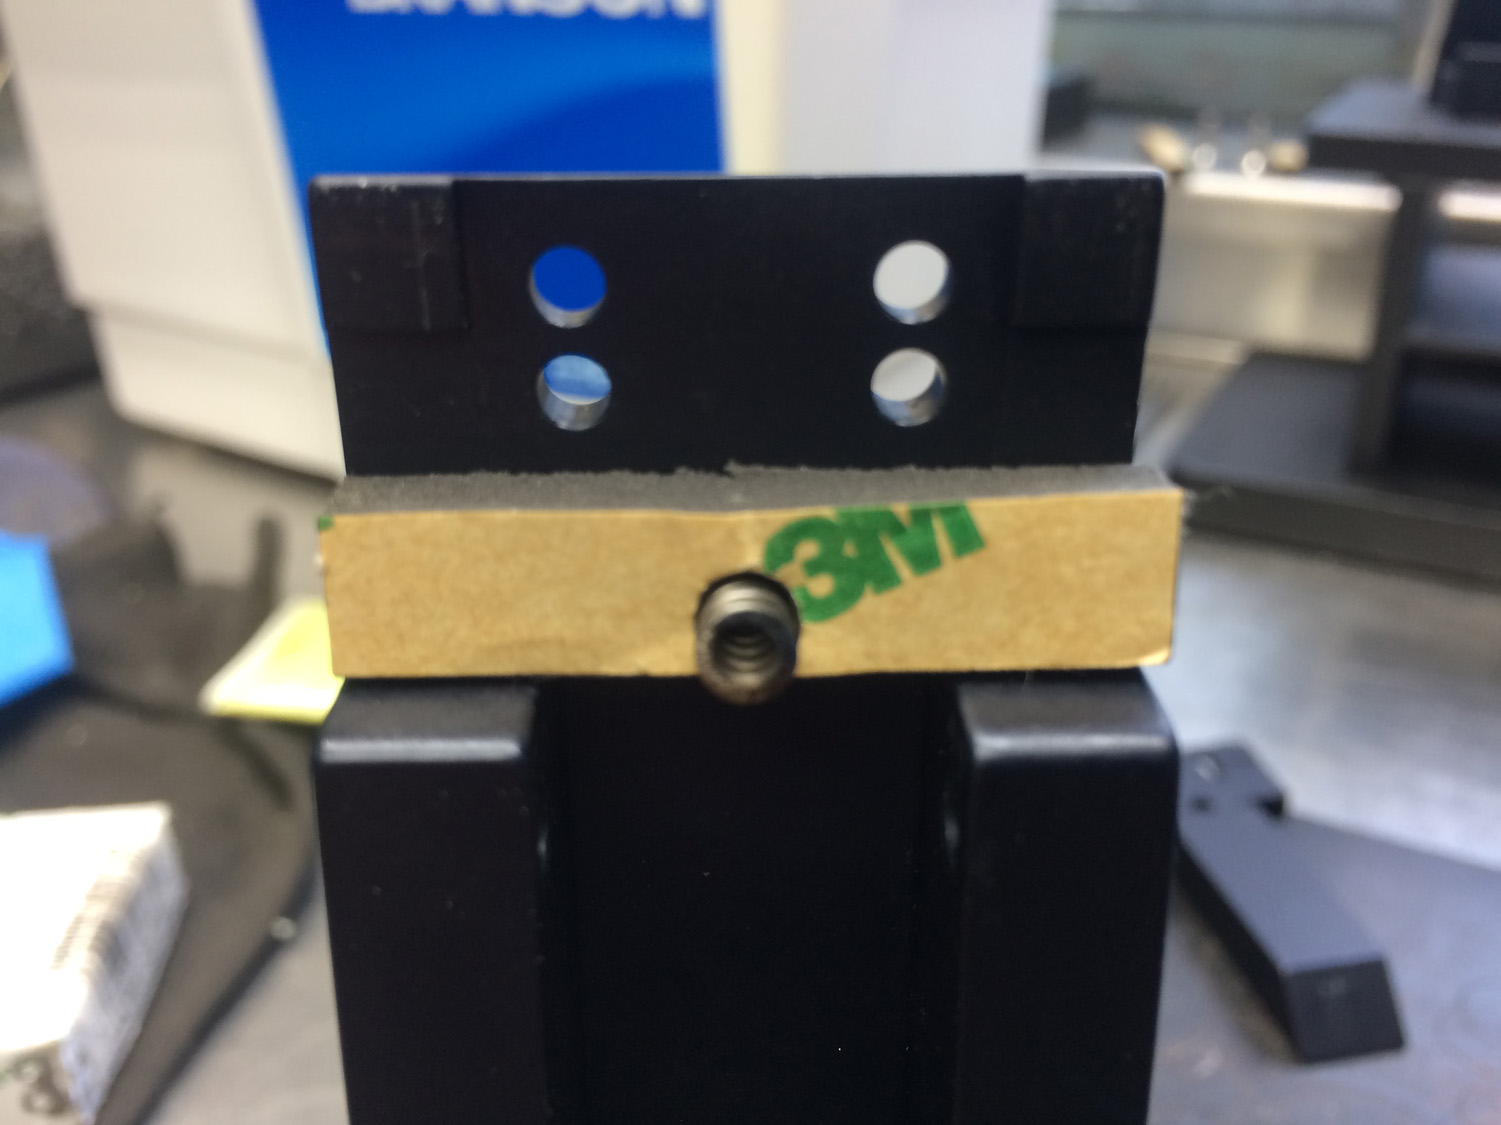
I found some 3M Super 88 electrical tape that comes in 1-1/2″ wide rolls to finish off the top of my covers. I used two strips of standard 3/4″ electrical tape to make the top “seal” in the photos – all I had at the time.
It works out that is the exact width of the sides of the Gen 3 vise, meaning you could tape the side openings with one piece on each side, and being semi-gloss black, would blend in inconspicuously instead on going the way I did with the steel (or like the masking tape I used at first). A piece on the front (with a hole punched in it for the shaft) and piece on the back. That should seal it up pretty good and still look good as well.
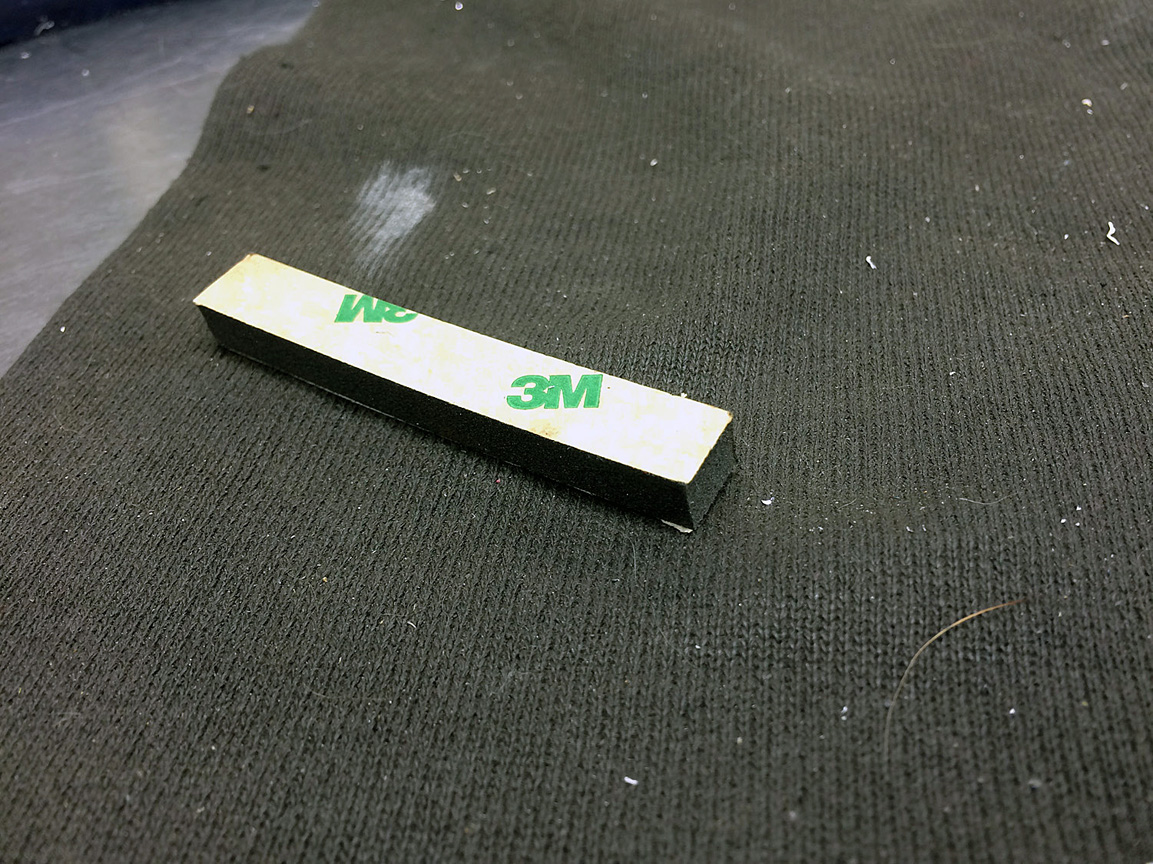
Another place the grit was getting in is between the vise jaws: it falls between the jaws and the blade, right on top of the ram (for lack of better words). I found some 1/4″ thick x 3/8″ wide dense foam rubber mounting strips with double-sided tape on both sides that I had laying around from an old job that fit the job perfectly. Just punched a hole for the spring to fit through and it seals both sides and bottom most effectively. Finished product can be seen in the first photo, in progress below:
Attachments:
You must be logged in to access attached files.
1 user thanked author for this post.
-
AuthorPosts
- You must be logged in to reply to this topic.