MODS!!! Lets see em!!
Recent › Forums › Main Forum › Sharpener and Accessory Maintenance › MODS › MODS!!! Lets see em!!
- This topic has 290 replies, 53 voices, and was last updated 11/28/2023 at 9:26 am by
Micheal Fuller.
-
AuthorPosts
-
04/19/2019 at 4:50 pm #50248
Here you go Marc,the clip was dealing with capturing metal dust, but he is also talking ( a bit) about the 70/30 edge https://www.youtube.com/watch?time_continue=18&v=XF-cuE16U_0
04/19/2019 at 8:17 pm #50249Here you go Marc,the clip was dealing with capturing metal dust, but he is also talking ( a bit) about the 70/30 edge https://www.youtube.com/watch?time_continue=18&v=XF-cuE16U_0
Thank you tcmeyer, it does help a lot. I am ordering a few bits and bobs from RAM this weekend.
04/19/2019 at 11:54 pm #50252If it helps, I can get you the part numbers/links of the RAM stuff I used.
1 user thanked author for this post.
04/20/2019 at 7:09 pm #50260I appreciate the offer @tcmeyer but I couldn’t wait and I ordered what I thought I’d need last night. I will know in a couple of days or so if I messed up or not.
Cheers,
T
04/24/2019 at 3:34 am #50289A while back, I bought one of the Carson USB ‘scopes, to replace the 5MP Celestron ‘scope I’ve been using for about seven years. I especially liked the Celestron for the very tight adjustment wheel, which helps to keep the image in focus. The impetus for the change has been the positive talk by a couple of our more savvy forum-mates here. The short DOF on the Celestron has always been a disappointment and I was really hoping for an imrovement in that area. In short, the Carson delivered, but unfortunately, it suffers from the loose focus wheel syndrome. To make things worse, the wheel is too close to the bottom of the camera, giving me only a very small area to grasp with my meat-hook fingers. Moving my grip to the area above the wheel only made it more likely that the focus wheel would be accidentally moved. I also found myself accidentally hitting the touch-sensitive capture button on the top of the cylinder.
So I succumbed to the dreaded impulse to modify everything I touch and fabricated a collar with a flange. The idea was to give me good control without the danger of bumping the focus wheel. So far, I’m very happy with the results.
I had a block of 2″ X 2″ ABS lying around and cut off a piece about one inch long. Having recently obtained a chintzy band saw from my late brother, I set out to cut the profile shown in the photos below, but not before drilling a 1-3/16″ through-hole. For this, I bought a Forstner bit, ($15 at Amazon) which worked quite well. A 30 mm bit would work just as well. Some file work and a little sanding finished the profile and I added an 8-32 clamping screw, in case it needed it.
If your following this sequence, you’ll note that I have a band saw, a small drill press, a 8-32 drill/tap, and an assortment of files. The ABS was left over from another WE job, where I made a replacement for the blue mounting base. Hey, I had two vises and only one blue base. It was one of the easiest mods I’ve ever made.
Other than the time spent waiting for the Forstner bit, it only took about 2 hours to finish. It’s a real pleasure to pick up the ‘scope and touch it to an edge, knowing it’s going to be focused perfectly. It also made use at the high magnification setting less frustrating. Before this mod, every time I used the ‘scope it took both hands. One to hold it in place and the other to tweak the focus. No more.
The flange for the clamping screw was originally planned to be the “handle” to grasp with my aforesaid meat-hook fingers, but the size limitation (materials on hand) made that idea a little less workable. I find it easier to hold the ‘scope by the perimeter of the collar. The 1-3/16″ hole fits quite snugly and the clamp screw probably isn’t necessary, but it does clamp very securely.


5 users thanked author for this post.
04/24/2019 at 5:54 am #50290Nice Idea Tim! I tried tape which does work but, not all that well. Is the collar squeezing the soft focus ring or just pushed up against to to create friction? Would think a standard hose clamp would work but they are not very nice to hold on to..
04/24/2019 at 6:38 am #50291Hi All, So I’m the proud owner of a new WE130 system. I’ve got two knives under my belt, they’re not scary, hair-popping sharp, but they’re a hell of a lot better than with any other system I’ve tried! With practice and using finer grits, I’m very confident I’ll master sharpening using the Wicked Edge. Before I started sharpening, I wanted to implement a few mods I’ve seen here, as well as one or two of my own. The first are the RC car dust covers. They’re a must in my opinion. I had some trouble in the beginning with them, as they were so stiff – I’ve ended up cutting off the somewhat inflexible base, and just using the flexible top half. It covers joints adequately and doesn’t hinder their movement at all.
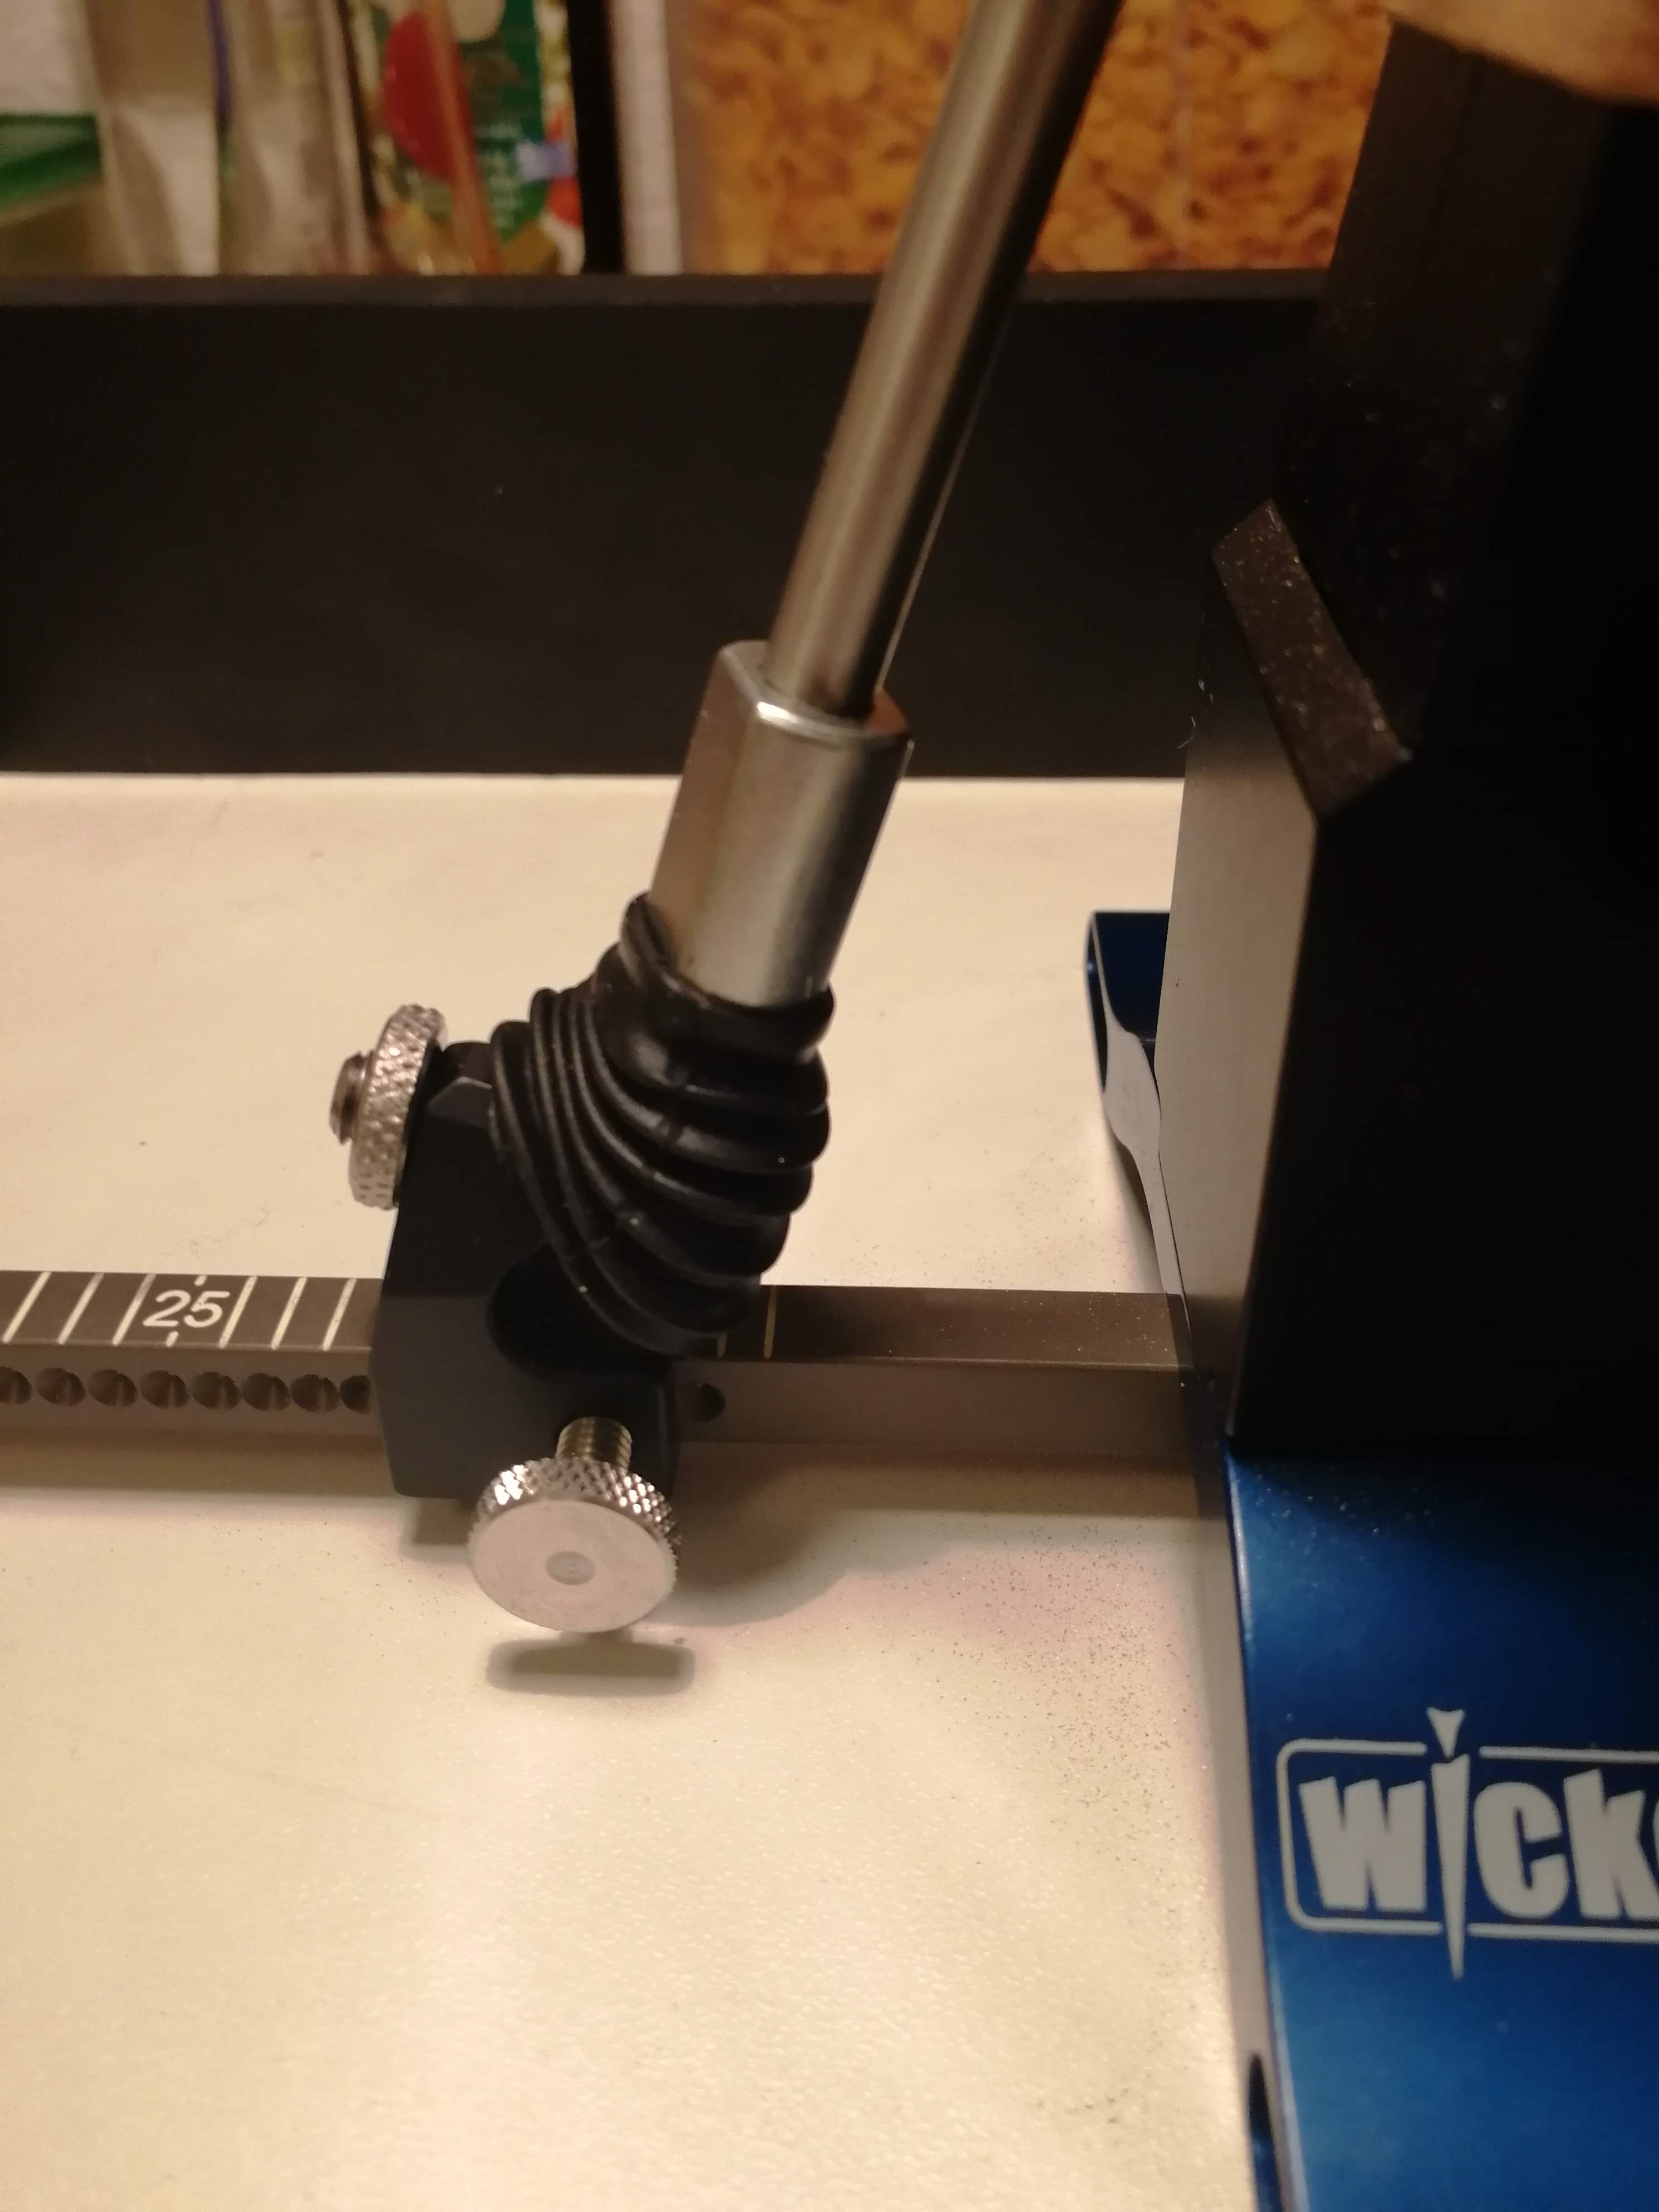 I also put another of the flexible covers over the pivot of the cam mechanism, to prevent dust getting inside. Judging by the amount of diamond dust and metal shavings landing on it, it seems like a good decision!
 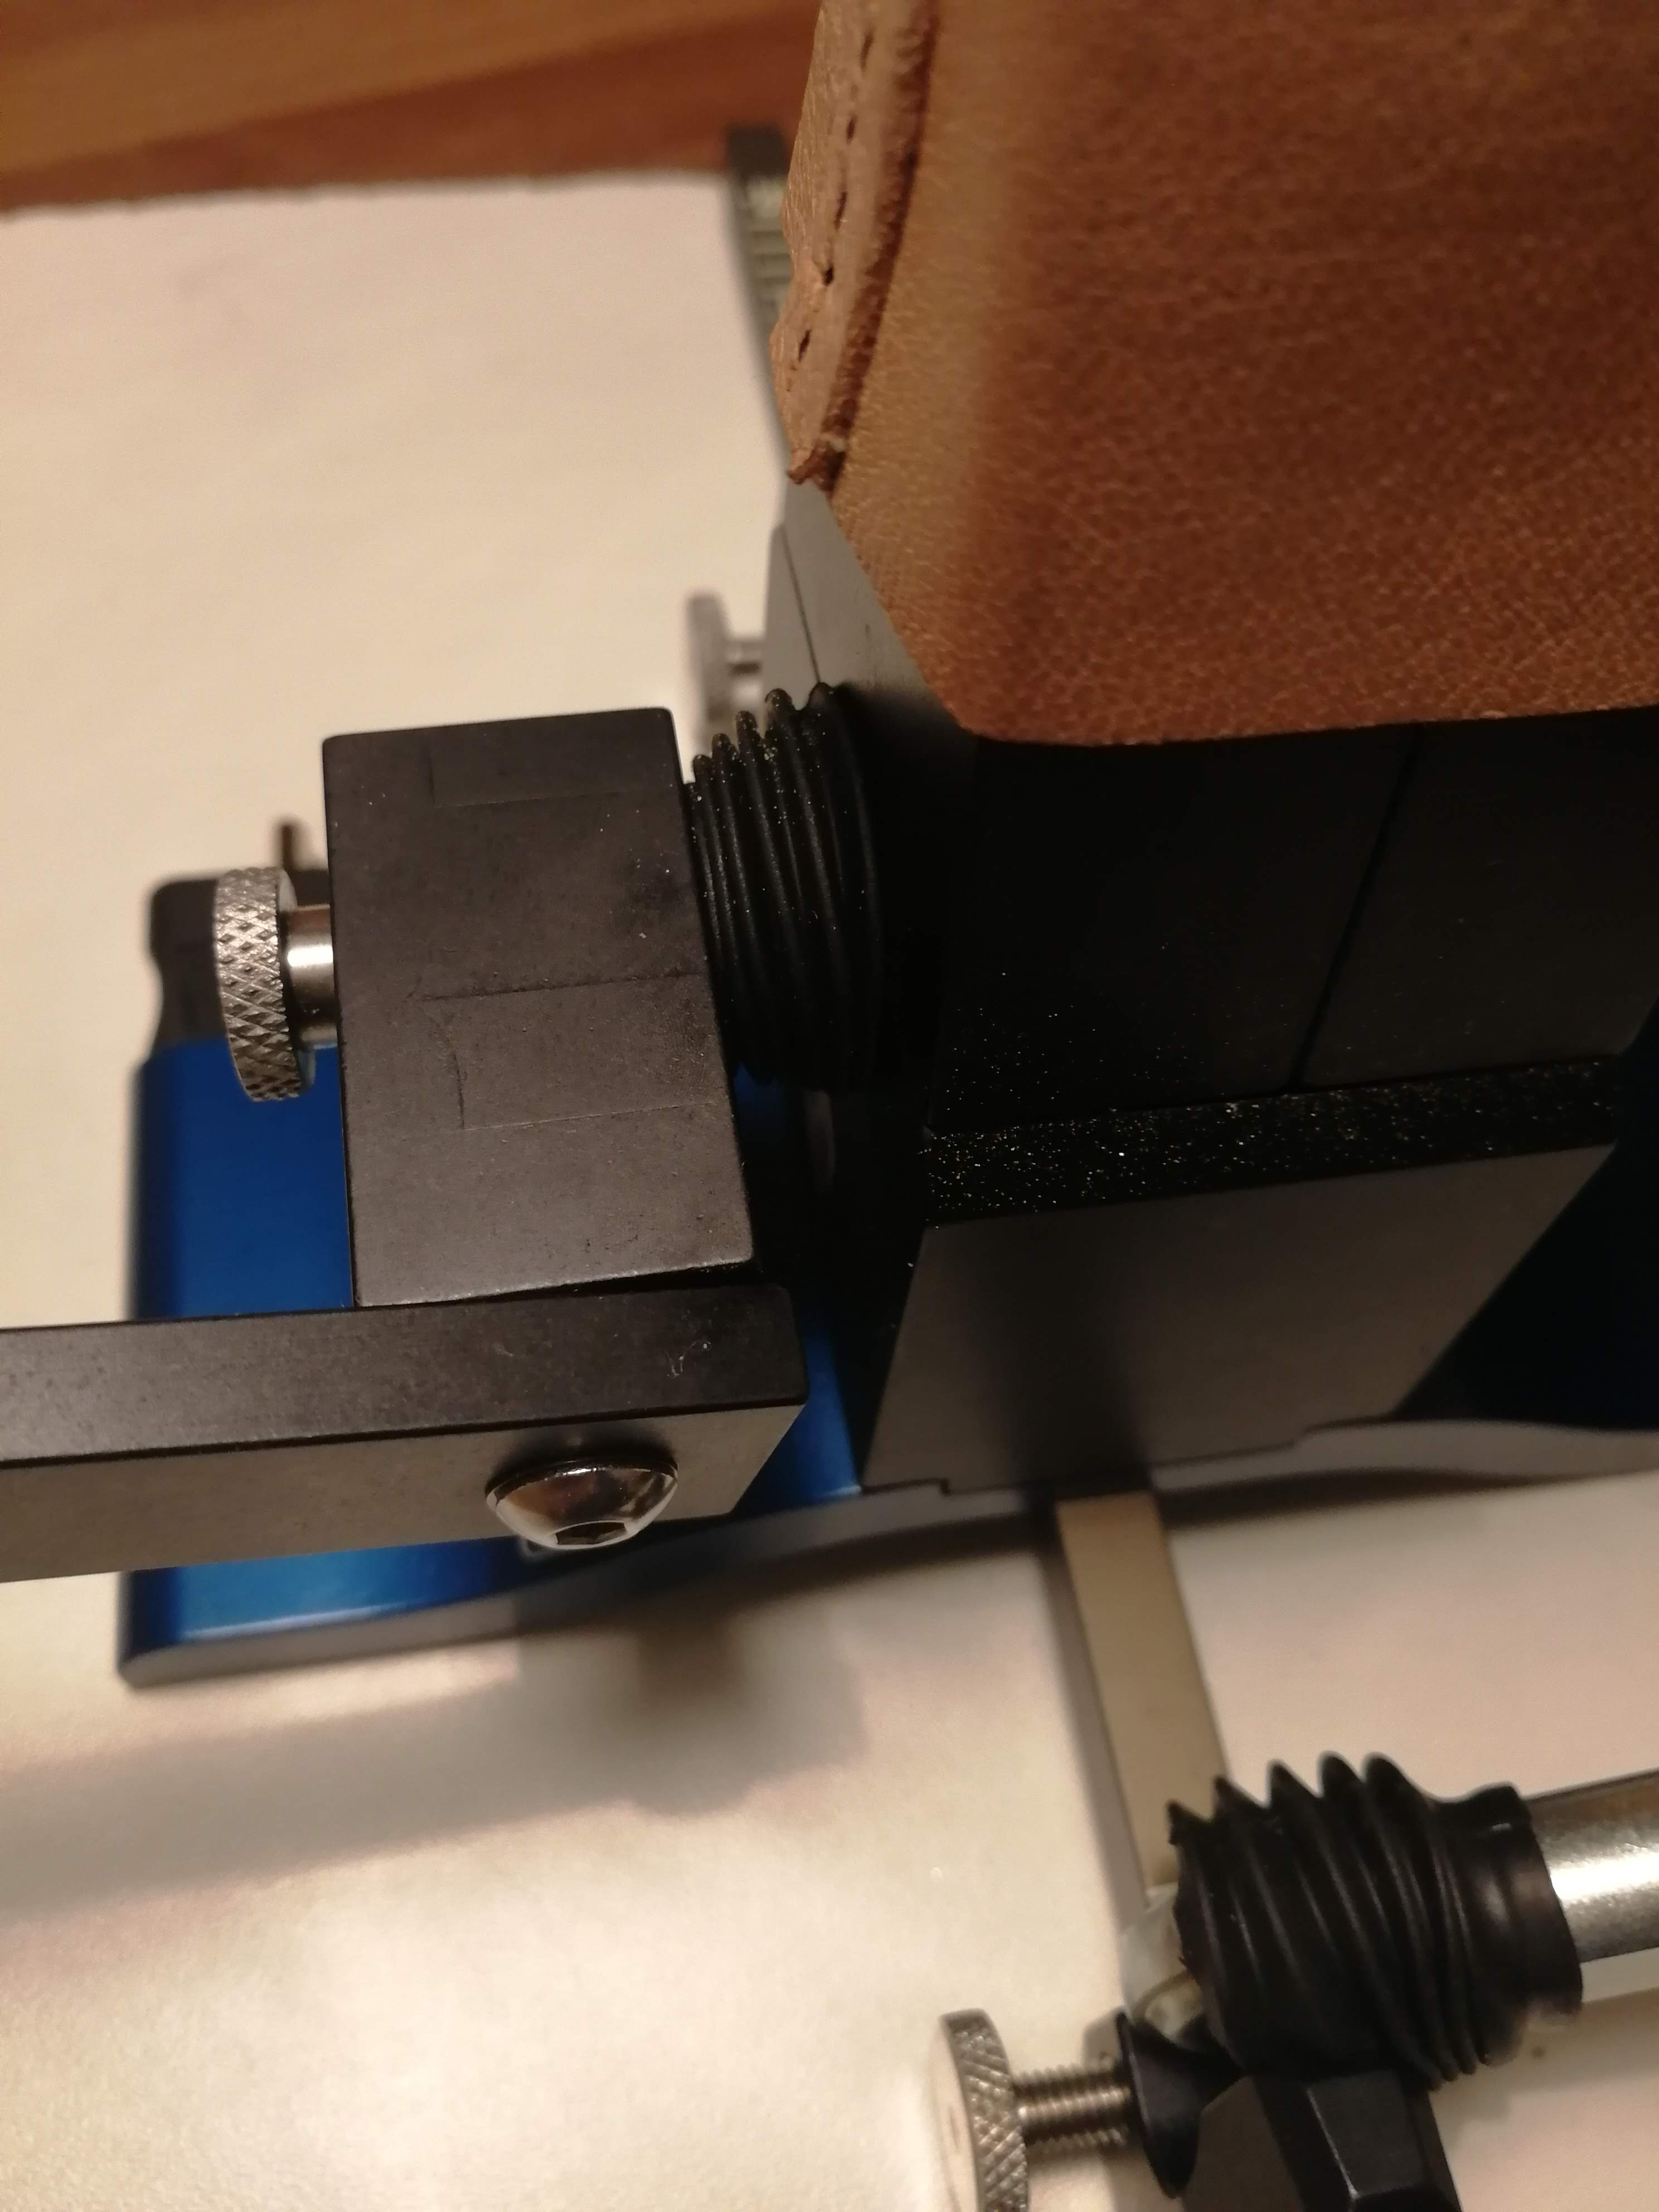 Another thing which was bothering me, was that the height key and the allen key, which fit into the base, were very loose. To remedy this I placed a small piece of tape inside where the tools sit; this is sufficient to grip the tools enough that they don’t slip out under gravity.
  Lastly, I wanted to make a cover, a shroud of sorts, for the jaws and the vice, to help keep then clean and most importantly stop dust from entering the cam mechanism from the sides. I’ve seen a mod here, or somewhere online, where the user created a cover from sheet metal. I’ve made mine from leather, for three reasons:
- As a budding leatherworker I’ve got some material lying around, and thought it a good opportunity to do some leatherwork.
- It might be somewhat easier for certain users and involve less tools to create a cover from leather, than from sheet metal.
- Many people in the forums have mentioned using chamois leather to hold their knives more securely. A shroud made from leather therefore serves this purpose, in addition to keeping the dust out.
I made a mock-up from paper first, to test the measurements, before marking out and cutting up the leather.
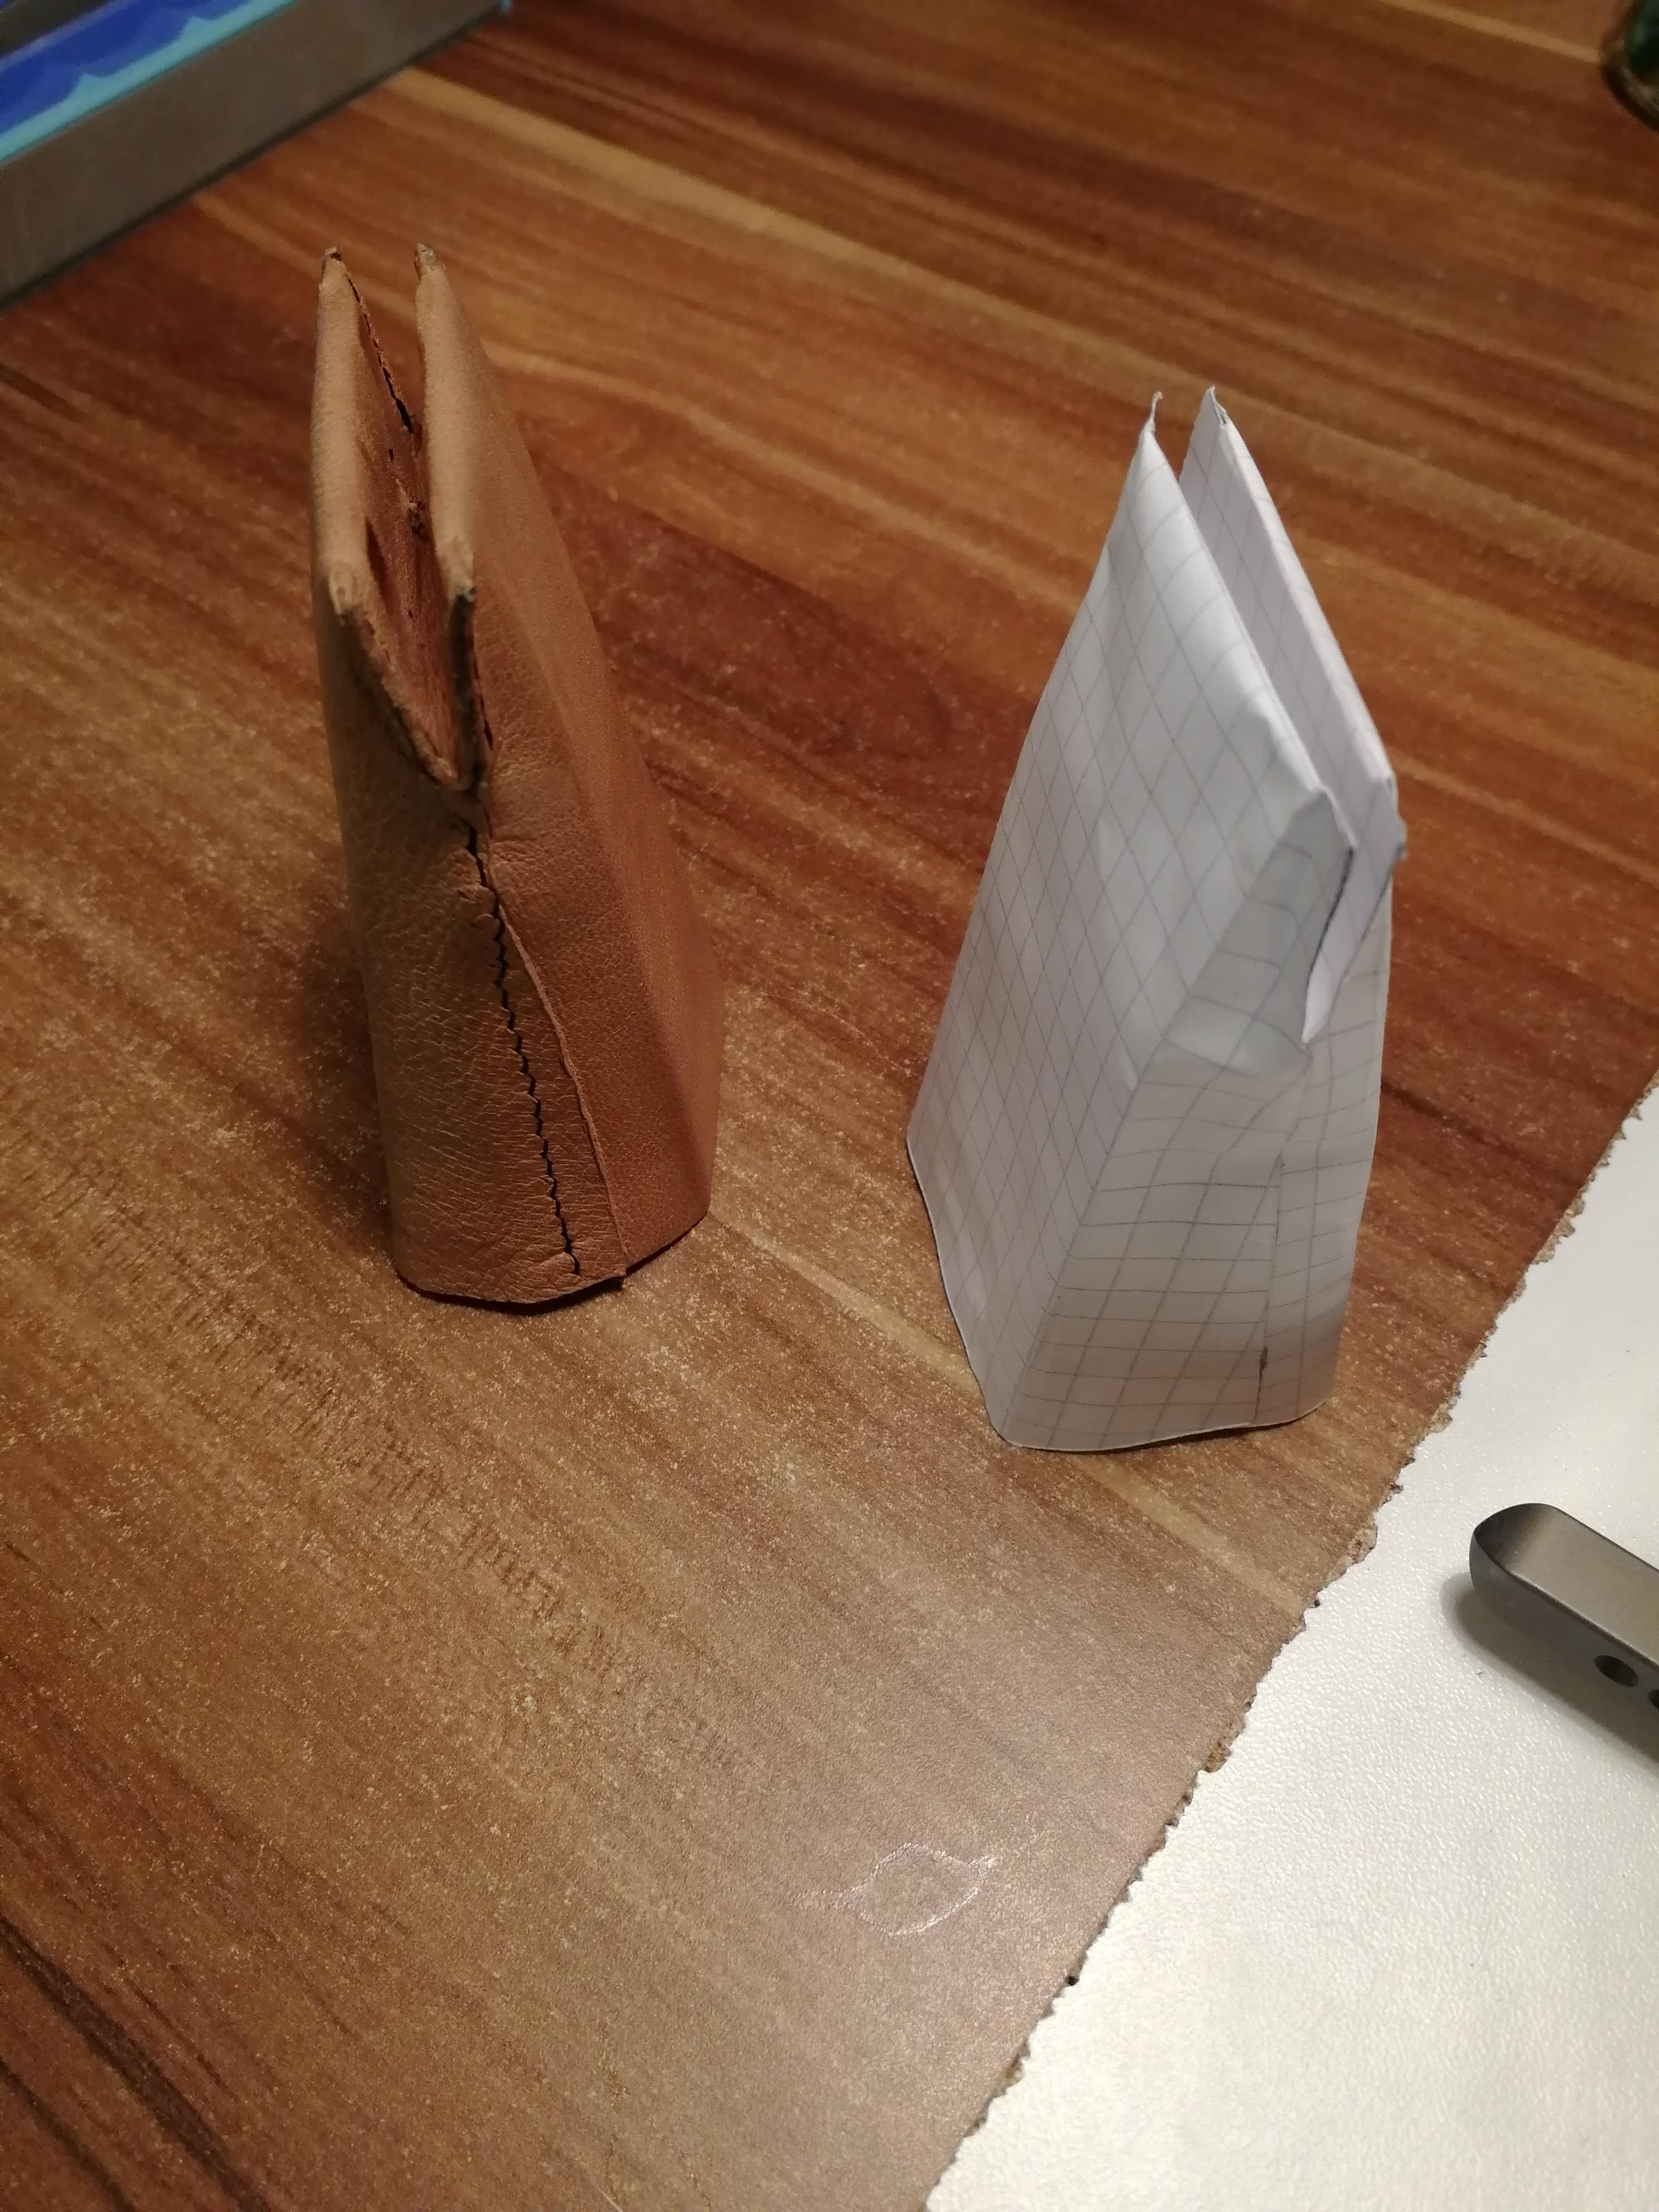 This mod is for the Generation 3 Cam-Lock Split Jaws. I’ve got a template available as a PDF, which I’ll upload in case anyone would like to create their own.
Interesting mods you did here. But for a tip for others to see before they cut the skirt off and possible re-use their RC covers if they ever upgrade their WE system by keeping the longer boot on it affords more protection. The suggestion to use the RC boots I saw in past threads before I picked my boots up, showed a simple cutout on the boot skirt relieves their unflexibility. See photo:
Attachments:
You must be logged in to access attached files.
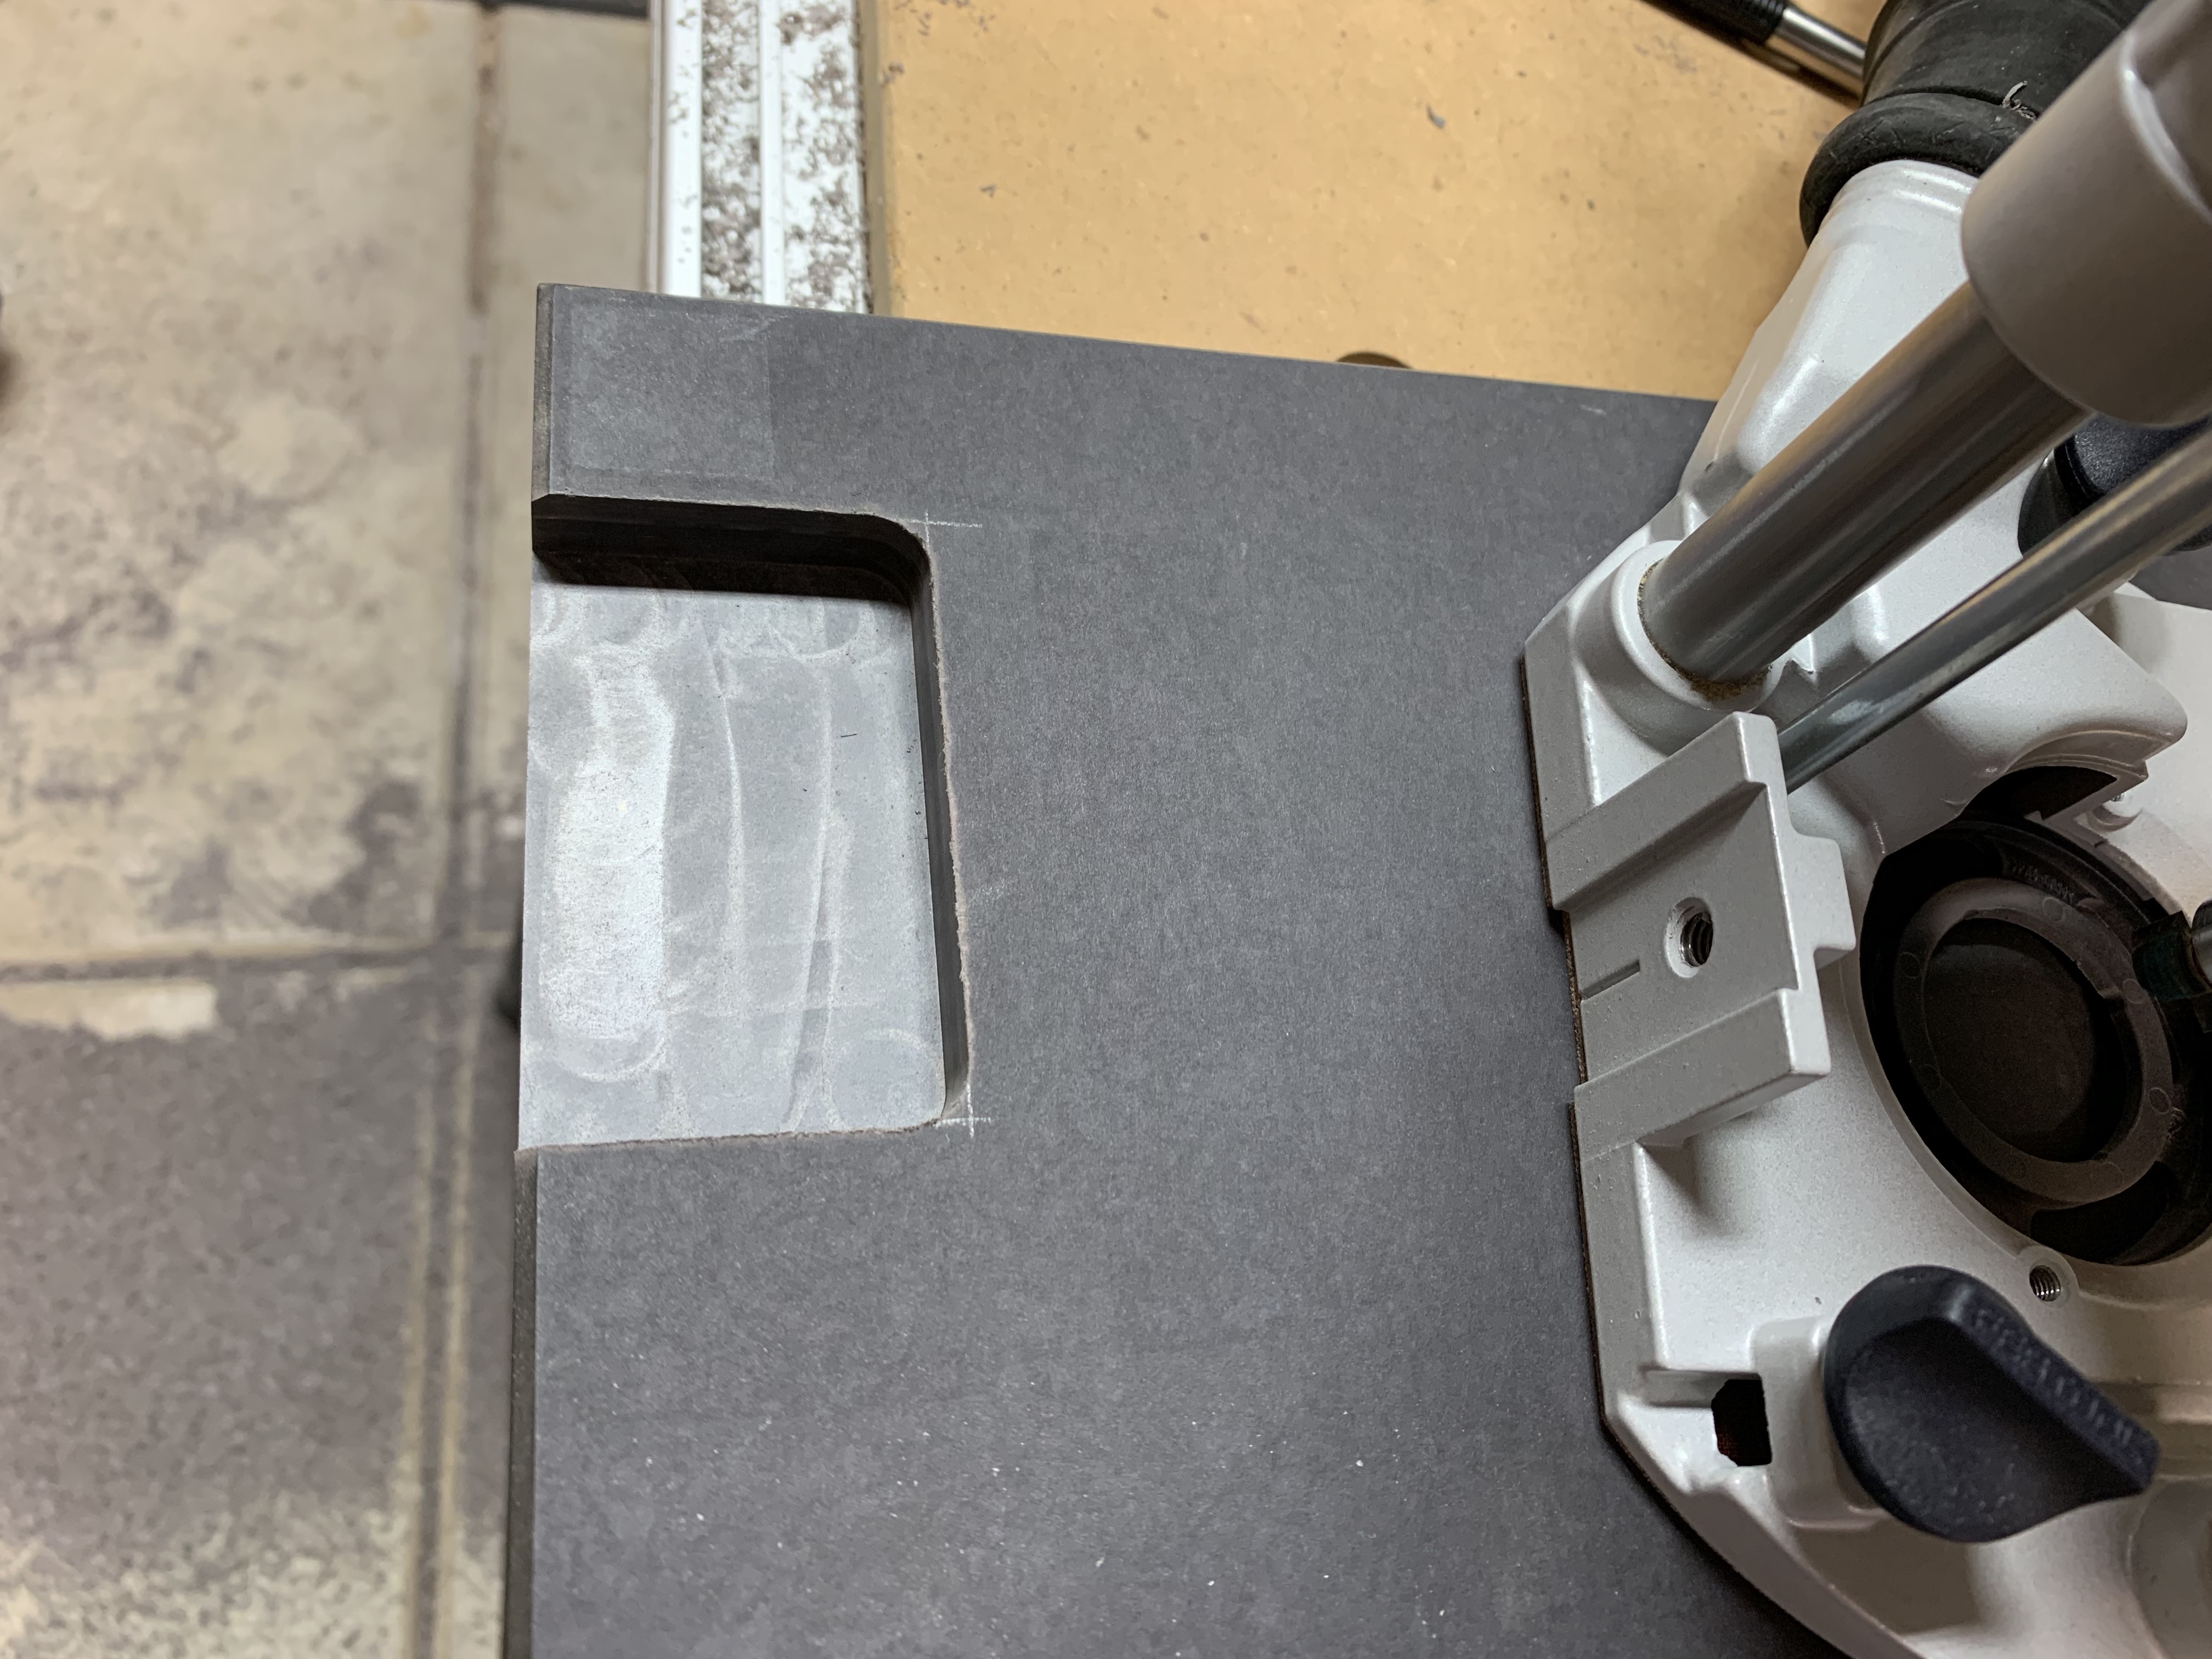
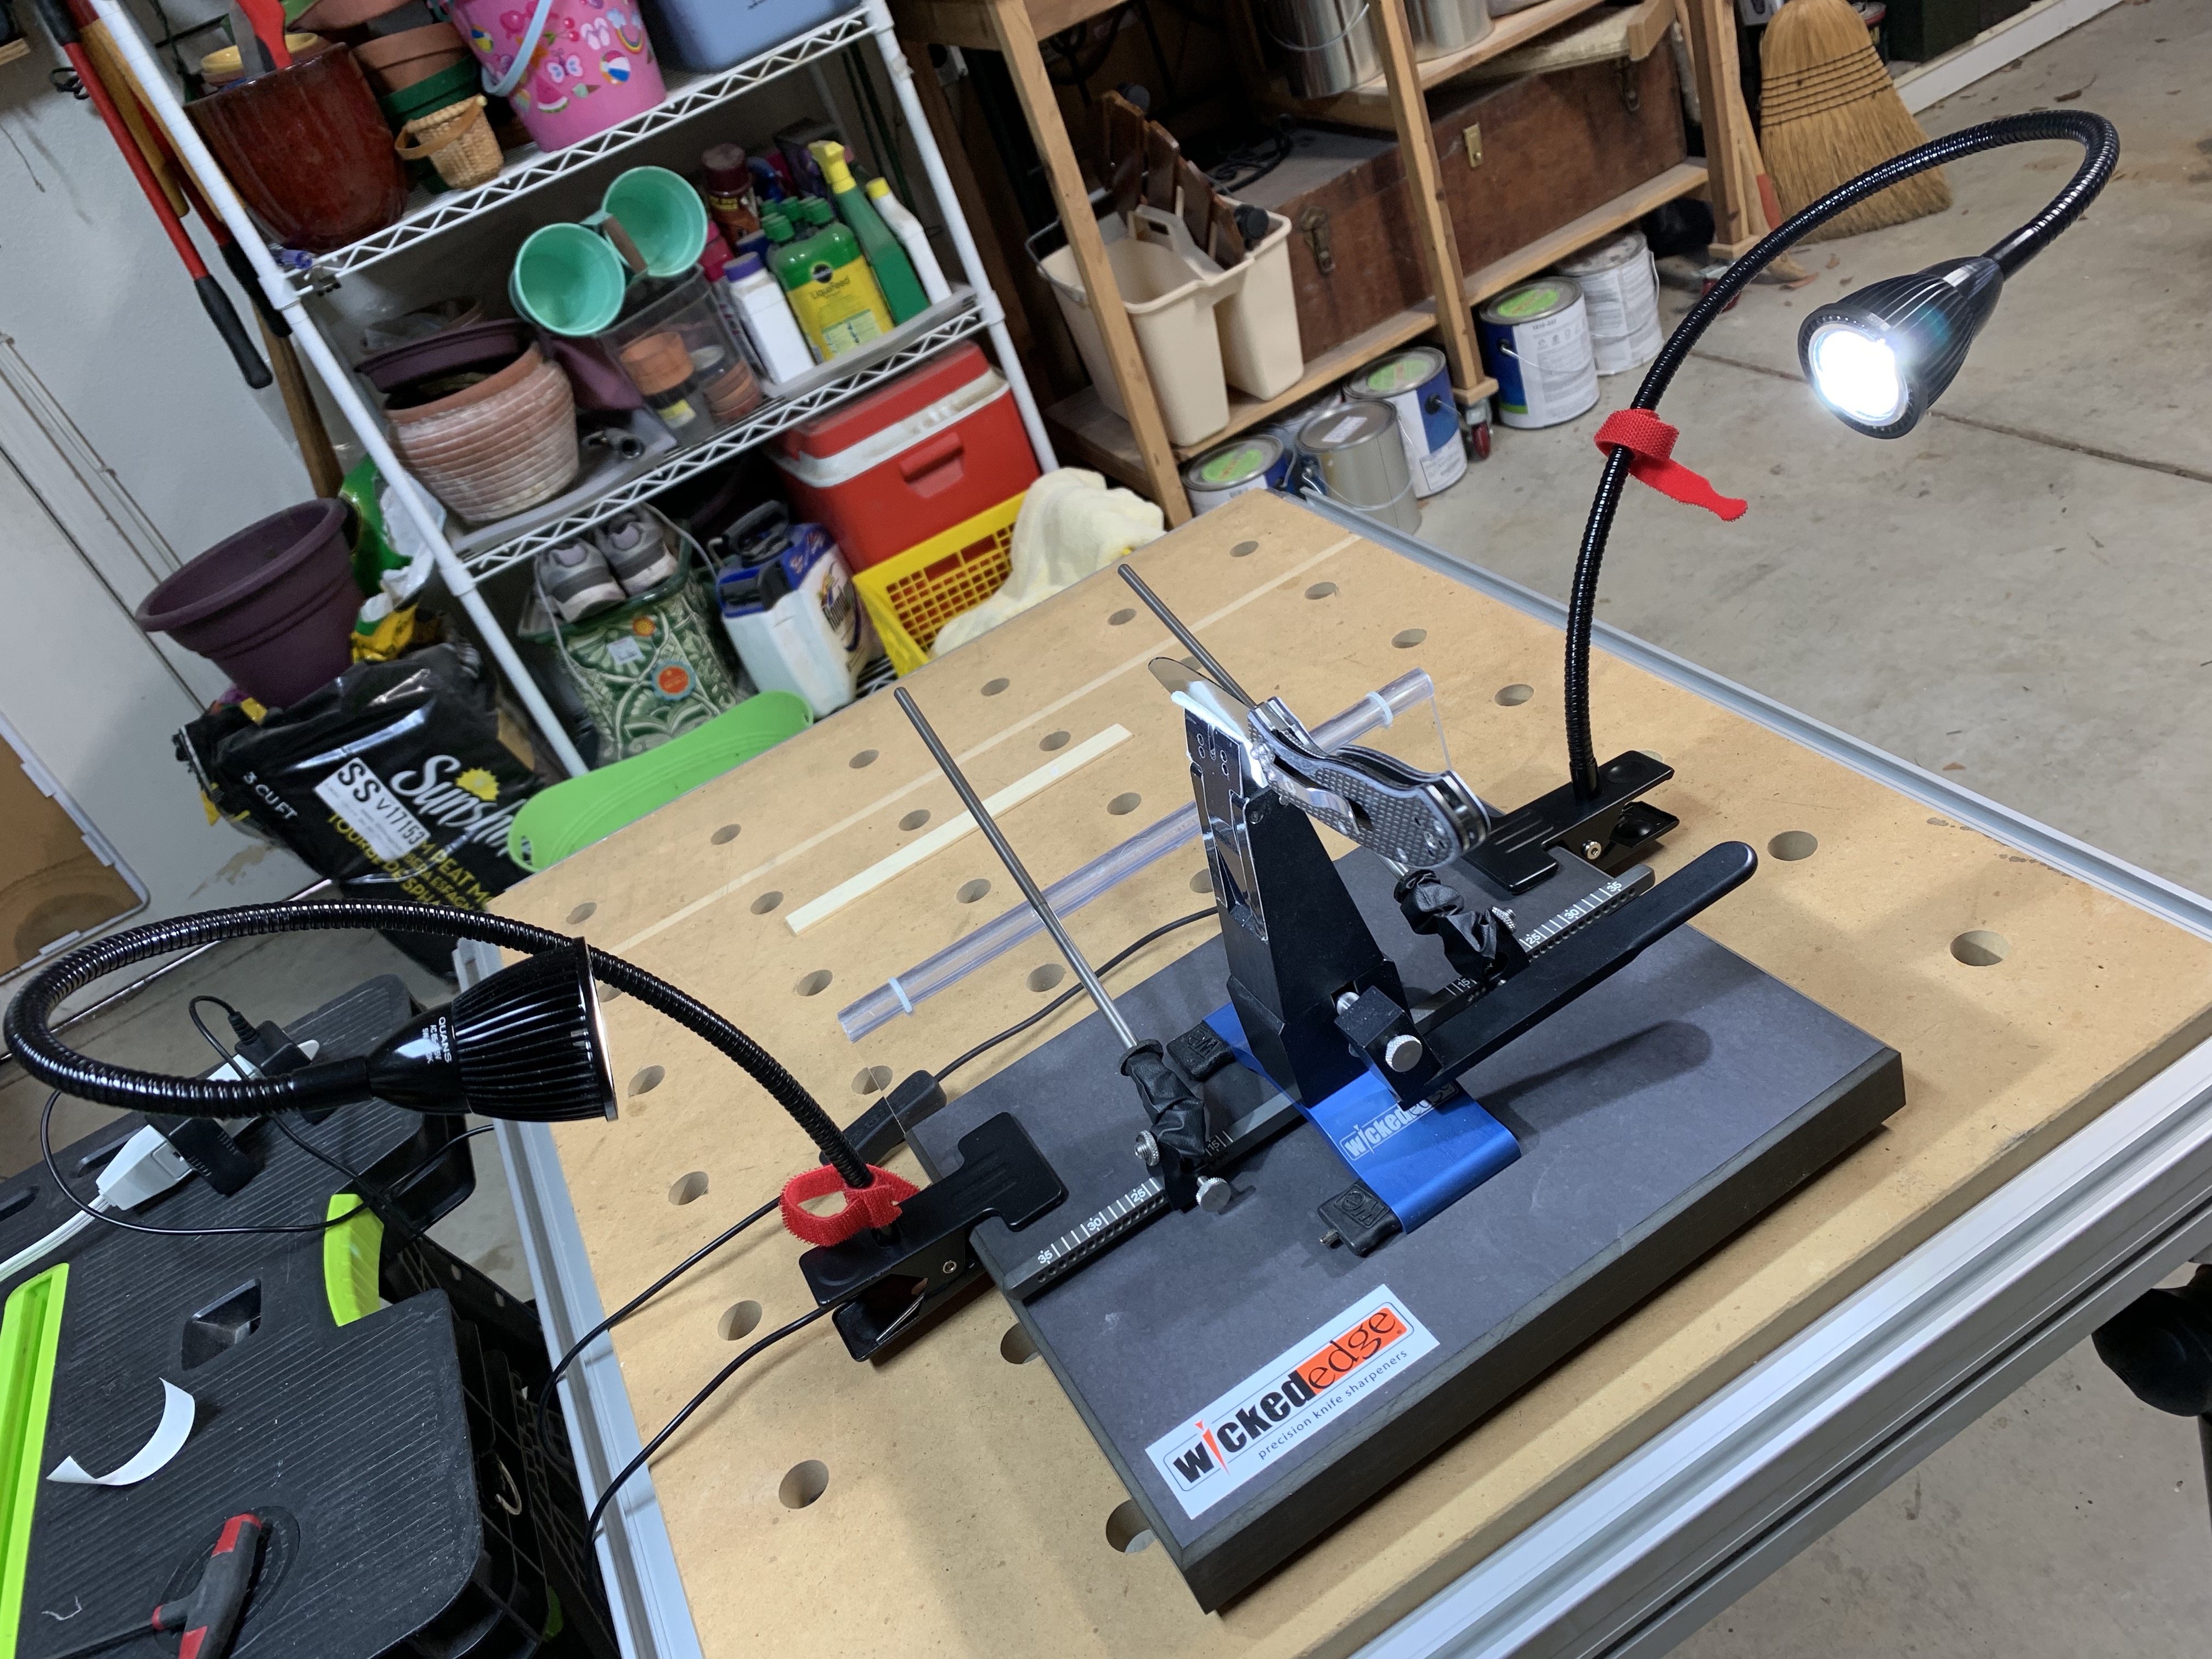
04/24/2019 at 8:19 pm #50298I have modified my base to accept clamp-on lites. These 5W LEDs are very bright and allow me to get a good view of scratch patterns on the bevels. I thought about permanently mounting the lites, however this allows for easier storage.
Attachments:
You must be logged in to access attached files.
04/24/2019 at 8:21 pm #50302I have modified my base to accept clamp-on lites. These 5W LEDs are very bright and allow me to get a good view of scratch patterns on the bevels. I thought about permanently mounting the lites, however this allows for easier storage.
Having a hard time posting pics, so I’ll post them separately…

Attachments:
You must be logged in to access attached files.
1 user thanked author for this post.
04/24/2019 at 8:23 pm #50305Here’s the second pic…
Attachments:
You must be logged in to access attached files.
04/25/2019 at 3:23 am #50313It took me a few seconds to figure out your first photo. For those maybe more confused than me, it’s a bottom view of the paper-stone base, showing the pocket you’ve machined in the edge to accept the clamp securing the lamp to the base. The object to the right is the base of a plunge router, which was used to machine the pocket.
I think I’m right, but if not, set me straight.
I tried several lighting arrangements, but all produced unwanted flare and glare when I use my USB microscope. I now have a LED desk lamp which I occasionally use to inspect edges for obvious damage, especially before actually mounting the blade in the vise . For most instances, I leave it off.
04/25/2019 at 6:47 am #50317Oh…sorry for the confusion. You are right on. Used the router to machine that recess on the underside of the paper stone base, so it wouldn’t show on the top side. The light’s clamp slides right in. At stock thickness, it was too thick for the clamp. Paper stone machine very nicely.
05/03/2019 at 5:07 pm #50364For those of us employing solid “shaft collars” as stone stop collars, that directly tighten the set screws against steel guide rods to fix their position. These have recently come under fire on this forum for the steel set screws gouging or marring the guide rod steel. These shaft collars are available in steel, aluminum and nylon. This fix is easily done with any of these style shaft collars.
This is easily and inexpensively remedied by replacing the steel hex head set screws with 8/32 size nylon slotted head screws available at the local “Ace Store”. The 8/32 are a direct replace replacement. I also have on hand nylon knurled knob hex head 10/32 screws, from another W.E. mod I employ. I drilled and tapped my nylon shaft collars to accept these larger thread size 10/32 screws.
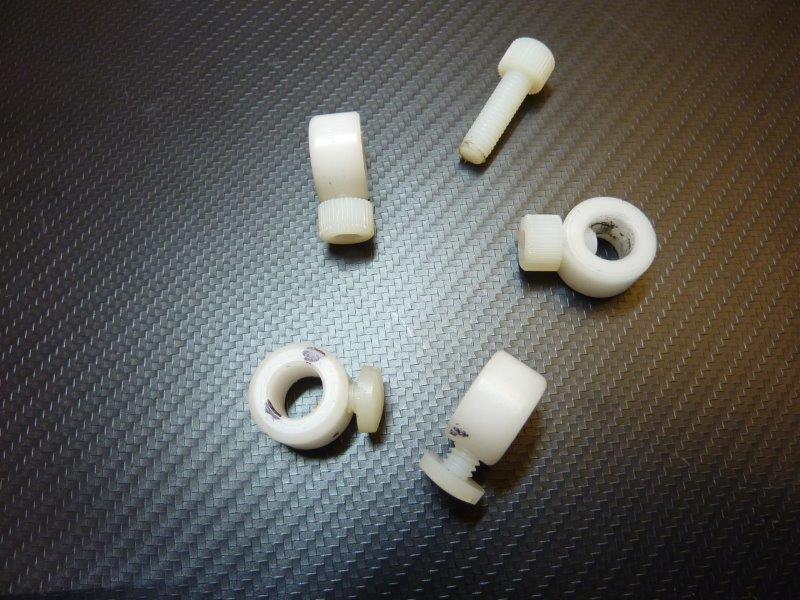

Both screws I cut shorter with a sharp snap-off blade razor knife, lightly tapped on in between the screw threads. In most instances the nylon screws snap in half cleanly. Once in a while I have to take some sandpaper to the cut end if the threads were buggered or cross cut.This little fix has allowed me to use these solid shaft collars for stone stops with out fear of damaging my guide rods.
Be Aware: these are 1/4″ nylon shaft collars I resized with a bronze gun barrel bore brush spun through the collar bore with a drill. This allowed me to widen these 1/4″ collars to work with the newest slightly larger diameter W. E. guide rods. The 1/4″ aluminum and steel solid shaft collars will need to be enlarged by drilling them out.
Marc
(MarcH's Rack-Its)Attachments:
You must be logged in to access attached files.
4 users thanked author for this post.
06/06/2019 at 6:31 am #50612Thanks for posting this. Can I ask how you attached the supplemental piece? Further, what is the material? Are you happy with it still?
06/06/2019 at 6:37 am #50613Very nice. can you share where you purchased the lights? A link and/or name of the OEM would help. Further, what is the rod rest? Did you buy or make it?
-
AuthorPosts
- You must be logged in to reply to this topic.