Kershaw "Lifter" 1302BW Recurve/Tanto
Recent › Forums › Main Forum › Techniques and Sharpening Strategies › Tips for Specific Knife Grinds and Styles › Kershaw "Lifter" 1302BW Recurve/Tanto
- This topic has 7 replies, 4 voices, and was last updated 01/21/2018 at 2:36 pm by
sksharp.
-
AuthorPosts
-
01/17/2018 at 12:12 pm #44627
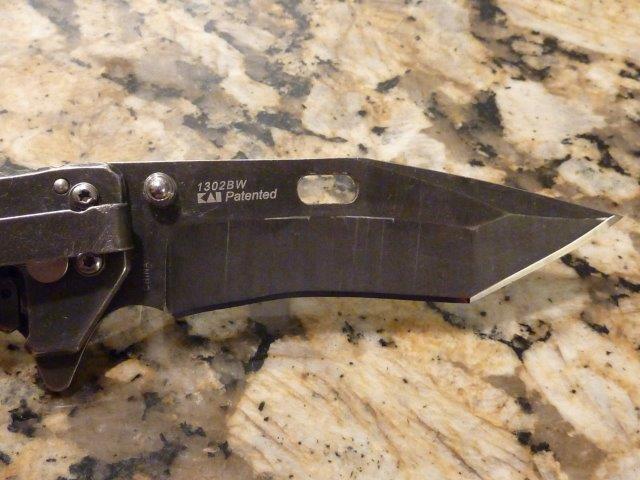
This Kershaw “Lifter” #1302BW, a 3.5″ Tactical Modified Tanto is my first attempt to sharpen a “Recurve” grind and also my first attempt at a “Tanto” tip, all wrapped up in one. 20º is my plan on the bevel angle. Any suggestion on how to attack this hybrid? Do I set the rod angle with the stone resting in the belly of the recurve? For you experienced guys that may have tackled a similar style/shape knife, how would you mount this in the jaws. Is it best to just do it in two stages, sharpen the belly, then the Tanto tip and just plan on going at it that direction?
Marc
(MarcH's Rack-Its)01/17/2018 at 12:48 pm #44628Interesting knife… I know you understand most of this, but for the benefit of those newer users, here’s my approach:
I’d work the concave area like I would any other blade, but as you come off the “toe” (the point at which the two edges meet) with your stones, you’ll want treat it as you would when you come off the tip. That is, try not to roll the stone around the corner. Keep the face of the stone parallel to the edge you are sharpening, and follow through as though the edge continues past this point.
After doing the concave edge section, I’d turn the blade in the vise so that the forward edge is more parallel to the horizontal, then sharpen it as you do any other blade, except that you again avoid rolling the stone around the corner as explained above. Don’t forget to re-set your angles for this stage.
For most concave edges, the standard stones will work just fine. Keep in mind that the edges of the stone will be doing the work. This means that the pressure applied will be concentrated at the edges of the stone, producing a much higher pressure per square inch. Therefore, you’ll want to avoid applying too much pressure as it will tend to break away more diamonds (and blade steel) at the corners of the stones.
5 users thanked author for this post.
01/17/2018 at 12:50 pm #44629I think you’ll get the best results by treating the tanto and the part with the belly as two separate blades. If you try to do them both in one go you risk rounding the point where they intersect. The recurve on this is not very dramatic so it should be no problem. I have dealt successfully with similar amounts of recurve.
5 users thanked author for this post.
01/17/2018 at 7:12 pm #44631Interesting knife. I’ve done a couple recurve blade and a few tanto’s but not together. I like to do the tanto’s long edge first all the way but I don’t strop right away. After I get the long edge where I want, like Tom I re-clamp and do the tip. It’s easier for me to blend the short edge to the long edge rather than the other way around. After I’ve hones both edge’s I then strop the small edge re-clamp and do the long edge. It’s really all about blending the two edges together and match the angle of the bevel where the edges meet to the grind of the knife as much as possible.
That is a very good tip on the pressure for a recurve, the first one I did didn’t go well on the first attempt and that was exactly why. Light pressure on those and don’t try to hurry.
01/21/2018 at 10:30 am #44739I sharpened the Kershaw. I clamped it and sharpened it like two separate knives. I centered the recurve in the jaws and set my rod angle at 20 degrees in the belly. I did my full profile through 1500 diamond grit. Then I re-clamped the knife with the flat portion level and parallel to the jaw ‘s top as best centered as I could. I used the same 20 dps angle for the flat tip portion.
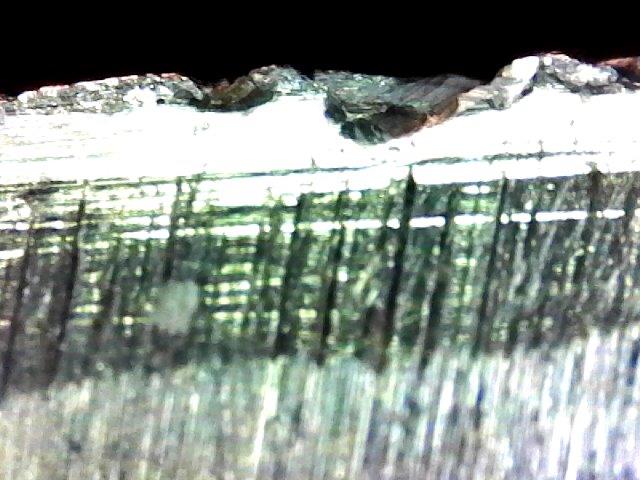
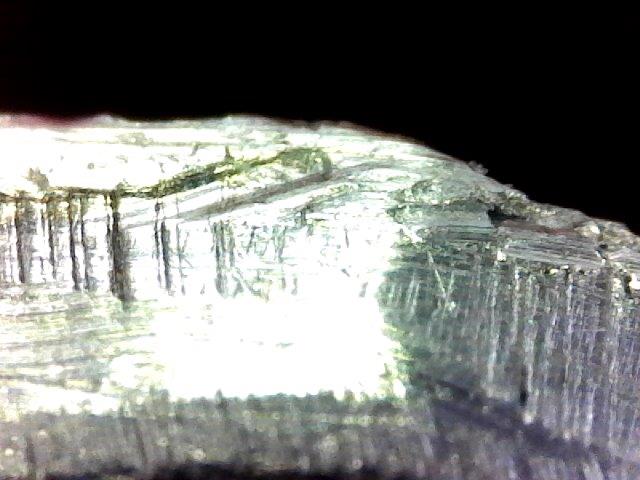
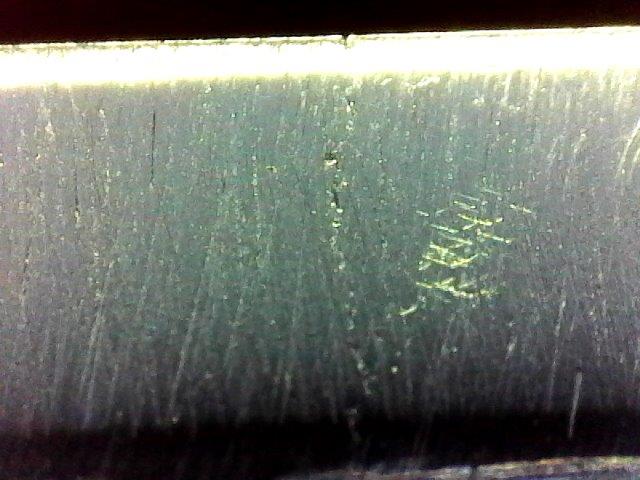
I always try to inspect the bevel with a USB Microscope at 250X before sharpening to see what I’m up against. Here are those bevel shots:
Recurve Bevel before sharpening

This is the flat potion bevel before sharpening
This is the confluence of the two bevel portions
This was my first opportunity to employed the 400 grit/600 grit ceramic curved stone set I purchased from Wicked Edge. I found these stones to be very effective used without any break-in period. They gave the kind of results that are very similar to those I experienced with other ceramic stones or similar grit whetstones. The grind pattern was very even and consistent. The curve stones allow you to rotate them from side margin to the other side margin as you work the stone across the recurve belly from the bevel heel portion to the bevel peak point where the recurve meets the flat portion. This allowed me to grind right up to the edge of both of these portions. I did not use the curved stones on the flat portion of the knife.
Edited: I just wanted to add, I did try to spritz the curved ceramic stones with water to see if that provided lubrication or improved results. The water was immediately absorbed in to the stone like it was a sponge. I quit the misting as I didn’t see the need to saturate the ceramic, just to see if it would make a difference.
While using the flat diamond stones in the recurve section of the blade, only the side edges or the side corners of the stone make contact with the curved knife edge. I applied very minimal pressure, as suggested by Forum members who I asked for guidance on sharpening this knife before I tackled it. I worked the stones up and down across the length of the curve avoiding working any area for too long, constantly moving back and forth along the curve. I paid particular attention to the blade edge parts at the recaro and convergence point of the two bevel portions.
I did each of the knife portions separately to completion with the 1500 grit diamond. The flat portion was straight forward like any other relatively flat knife. Care was exercised at the tip, as always, so not to round it off. I paid particular attention to the convergence point where the recurve and flat bevels meet. I did with the intention to bring it to a crisp peak and it worked out quit well. There is a distinct visible break where the two bevel shapes meet.
I finished the process with leather strops,(4µ, then 2µ) done at 18.5º for both sections.I’ll add another post following this one to show the finished edge.
Marc
(MarcH's Rack-Its)Attachments:
You must be logged in to access attached files.
01/21/2018 at 10:48 am #44745Here is a photo of the flat portion of the bevel
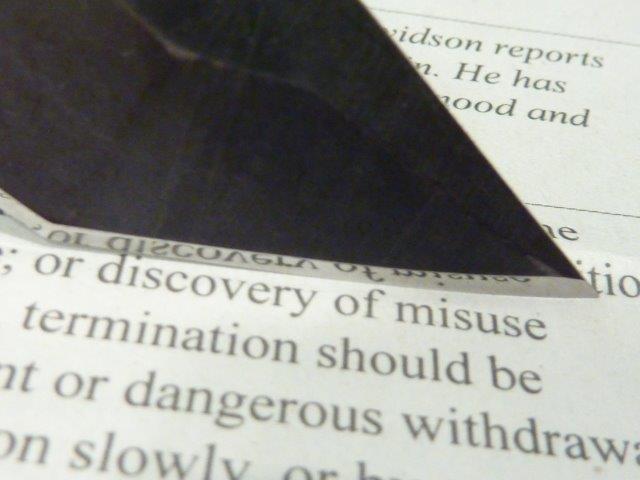
This shows that just using the basic diamond stone progression to 1500 grit and finishing with basic leather strops, (4µ and 2µ) that a mirrored beveled edge is possible, if enough time, effort, patience and technique are applied.This knife I sharpened for a friend, an EDC. It is sharpened to a practical working edge. I did discover bevel fractures in both portions of the knife during the sharpening and polishing processes. I will bring that to the owners attention. I did not want to remove metal attempting to remove the fracture portions since it may have just destroyed the knife. After-all it’s only a $20 knife. It’s not worth putting that time and effort in it. As sharp as the edge is, now, it may work fine and continue to be useful for years to come.
This discovery is additional proof of the value of using a visual aid tool , the USB Microscope. Without it I’m certain I would never have known this defect was present. Now I can, in good conscience, share this information with the knife’s users with out fear of him getting hurt or blaming me if the knife should fail.
Marc
(MarcH's Rack-Its)Attachments:
You must be logged in to access attached files.
01/21/2018 at 11:13 am #4474801/21/2018 at 2:36 pm #44756 -
AuthorPosts
- You must be logged in to reply to this topic.