Comparison of Digital Imaging w/ Microscope
Recent › Forums › Main Forum › Off Topic › Comparison of Digital Imaging w/ Microscope
- This topic has 28 replies, 4 voices, and was last updated 05/24/2016 at 12:29 am by
CliffCurry.
-
AuthorPosts
-
05/22/2016 at 6:12 am #34171
Good Idea on the Tomek Jig Cliff. I am still using play dough to adjust the angle, however, with the blade handle extended out, I am limited to a small section of the blade for now. I am thinking about and saving for Clay’s jig or something like it. Like your scope, I need to be cognizant of the room available under the objective lens. My “Helping Hands” set up is pretty effective when needed (Here).
Eddie Kinlen
M1rror Edge Sharpening Service, LLC
+1(682)777-162205/22/2016 at 6:19 am #34172<span style=”line-height: 1.5;”> “Normal” biological microscopes usually shine light from under the stage through the subject that is normally translucent to transparent. This allows operators to see the details in living multi cellular organisms like plants and other biological subjects. As our objects are opaque and can’t pass visible light through them, we must illuminate the subject from above or below to produce a reflection clear enough to view through the objective lenses.</span><span style=”line-height: 1.5;”>
</span>
Thanks. This sounds very logical, I could have thought of this myself
 .
.And if I may give one advice for your excellent videos: I’d choose a different color for the overlay text. I find the blue-ish color a bit hard to read sometimes.
Molecule Polishing: my blog about sharpening with the Wicked Edge
1 user thanked author for this post.
05/22/2016 at 6:28 am #34173Cliff, you asked for feedback on your pics. Well, they’re all great
 . At 2MP I see very little difference between the eyepiece and the smartphone pics. At a higher resolution, the smartphone clearly wins. But it also depends on the purpose of the pics. The highest magnification smartphone pics give so much detail that the overview if sometimes lost (for example, when you want to “count scratches”).
And it would be nice if you could somehow indicate the size of the objects (e.g., by superimposing a line of a particular length).
Molecule Polishing: my blog about sharpening with the Wicked Edge
05/22/2016 at 7:17 am #34179Funny you say that about the color of the text Mark… I intentionally did it so the observer wasn’t distracted by the text but could still see it. I bet I could find a better solution. Maybe if I bring it closer to the edge and use white fill with a black line or something like it. Thanks for the input. I never mind feedback it only makes things better.

Eddie Kinlen
M1rror Edge Sharpening Service, LLC
+1(682)777-162205/22/2016 at 7:35 am #34180Cliff, my observations on your photos and video are this…. They are perfect, “get to work man”(on your experiments)… In fact, because you are posting “edge porn”, I have intentionally been looking for other things and images to post (Diamonds). My edges are looking just like yours on camera, but if I may say, I think yours are even better (At 16 MP). My Carson Universal Camera eye piece mount is not here with me in the desert and I don’t need two, so I will have to wait to experiment with high resolution images until after I return from my leave in July.
I have also found that the standard camera apps on our phones are lacking in capability. So, I found an advanced application for my Iphone called 645 Pro. It allows me to adjust the aperture of the Iphone camera and automatically conduct (+2/-2) photo bracketing used in High Dynamic Range (HDR) Photography. Mark keeps asking about HDR .
The problem I have been having is reproducing true photo bracketing on the cameras I have available at the moment. This will be a new topic post soon, I am still trying to get all the tools together to explore this photo enhancement on a microscope. I think this will bring a new dimension to our photos not presently being seen. What I am seeing in your images is the loss of data in the shadows of the grooves and edges. HDR will bring the light out of the deepest parts of the scratches and edges and will tame down the highly reflective ridges. Now that you got the Extended Depth of Field (EDOF) (Focus Stacking) down, It looks like we are ready to experiment with HDR. More to come soon.

Eddie Kinlen
M1rror Edge Sharpening Service, LLC
+1(682)777-162205/22/2016 at 9:45 am #34185It sounds like an April Fool’s Joke or some twisted intelligence test and I don’t know if I passed or failed!!
Somebody posts a 6 minute 27 second video of sharpening dust with beautiful music and I watched the whole thing — fascinated!!
I love this forum….. you all are so weird…..and I mean that in the best possible way.
~~~~
For Now,Gib
Φ
"Everyday edge for the bevel headed"
"Things work out best for those who make the best out of the way things work out."
1 user thanked author for this post.
05/22/2016 at 10:13 am #34187Actually, Gib you asked, I was interested too, so I did it. Glad you watched the whole thing
 . I think many others have been cleaning their workstation after sharpening and asked the same thing and many others are reading this and will never respond one way or the other. The question; What does this “stuff” look like up close? Now we know. I could see it sparkling under my office light, but was surprised by all the diamond dust in the mix. I think others will be too. I am hoping slowly it will get less and less as my new stones break in. The only way to know anything for sure is to observe it and document it along the way. I have just chosen to share my madness LOL. Thanks for the Idea!
Eddie Kinlen
M1rror Edge Sharpening Service, LLC
+1(682)777-162205/22/2016 at 3:24 pm #34192And it would be nice if you could somehow indicate the size of the objects (e.g., by superimposing a line of a particular length).
Agreed Mark, the lack of imaging software and not being able superimpose a micron scale is a negative. I can see my next camera attempts down the road being with a Nikkon SLR, hopefully using software.
HDR will bring the light out of the deepest parts of the scratches and edges and will tame down the highly reflective ridges. Now that you got the Extended Depth of Field (EDOF) (Focus Stacking) down, It looks like we are ready to experiment with HDR. More to come soon.
I emailed one of the clearer images stacks to a photography buddy and he tweaked it and sent it back. He mentioned F stops and bracketing I think. More things to research and experiment with!
On a more serious note I loved the video of the dust and diamond particles. But it scared me a bit and may highlight something the casual sharpener doesnt worry about but is a serious health concern. My shop is area is tiny and enclosed and it get covered in very fine metal dust particles. I wear a mask when using a belt sander but even after use the dust is everywhere. This is also true when using the WEPS just not so much dispersal.
Seriously after watching your video I dont need even one single particle of that getting stuck in my lungs!
 05/22/2016 at 6:04 pm #34195
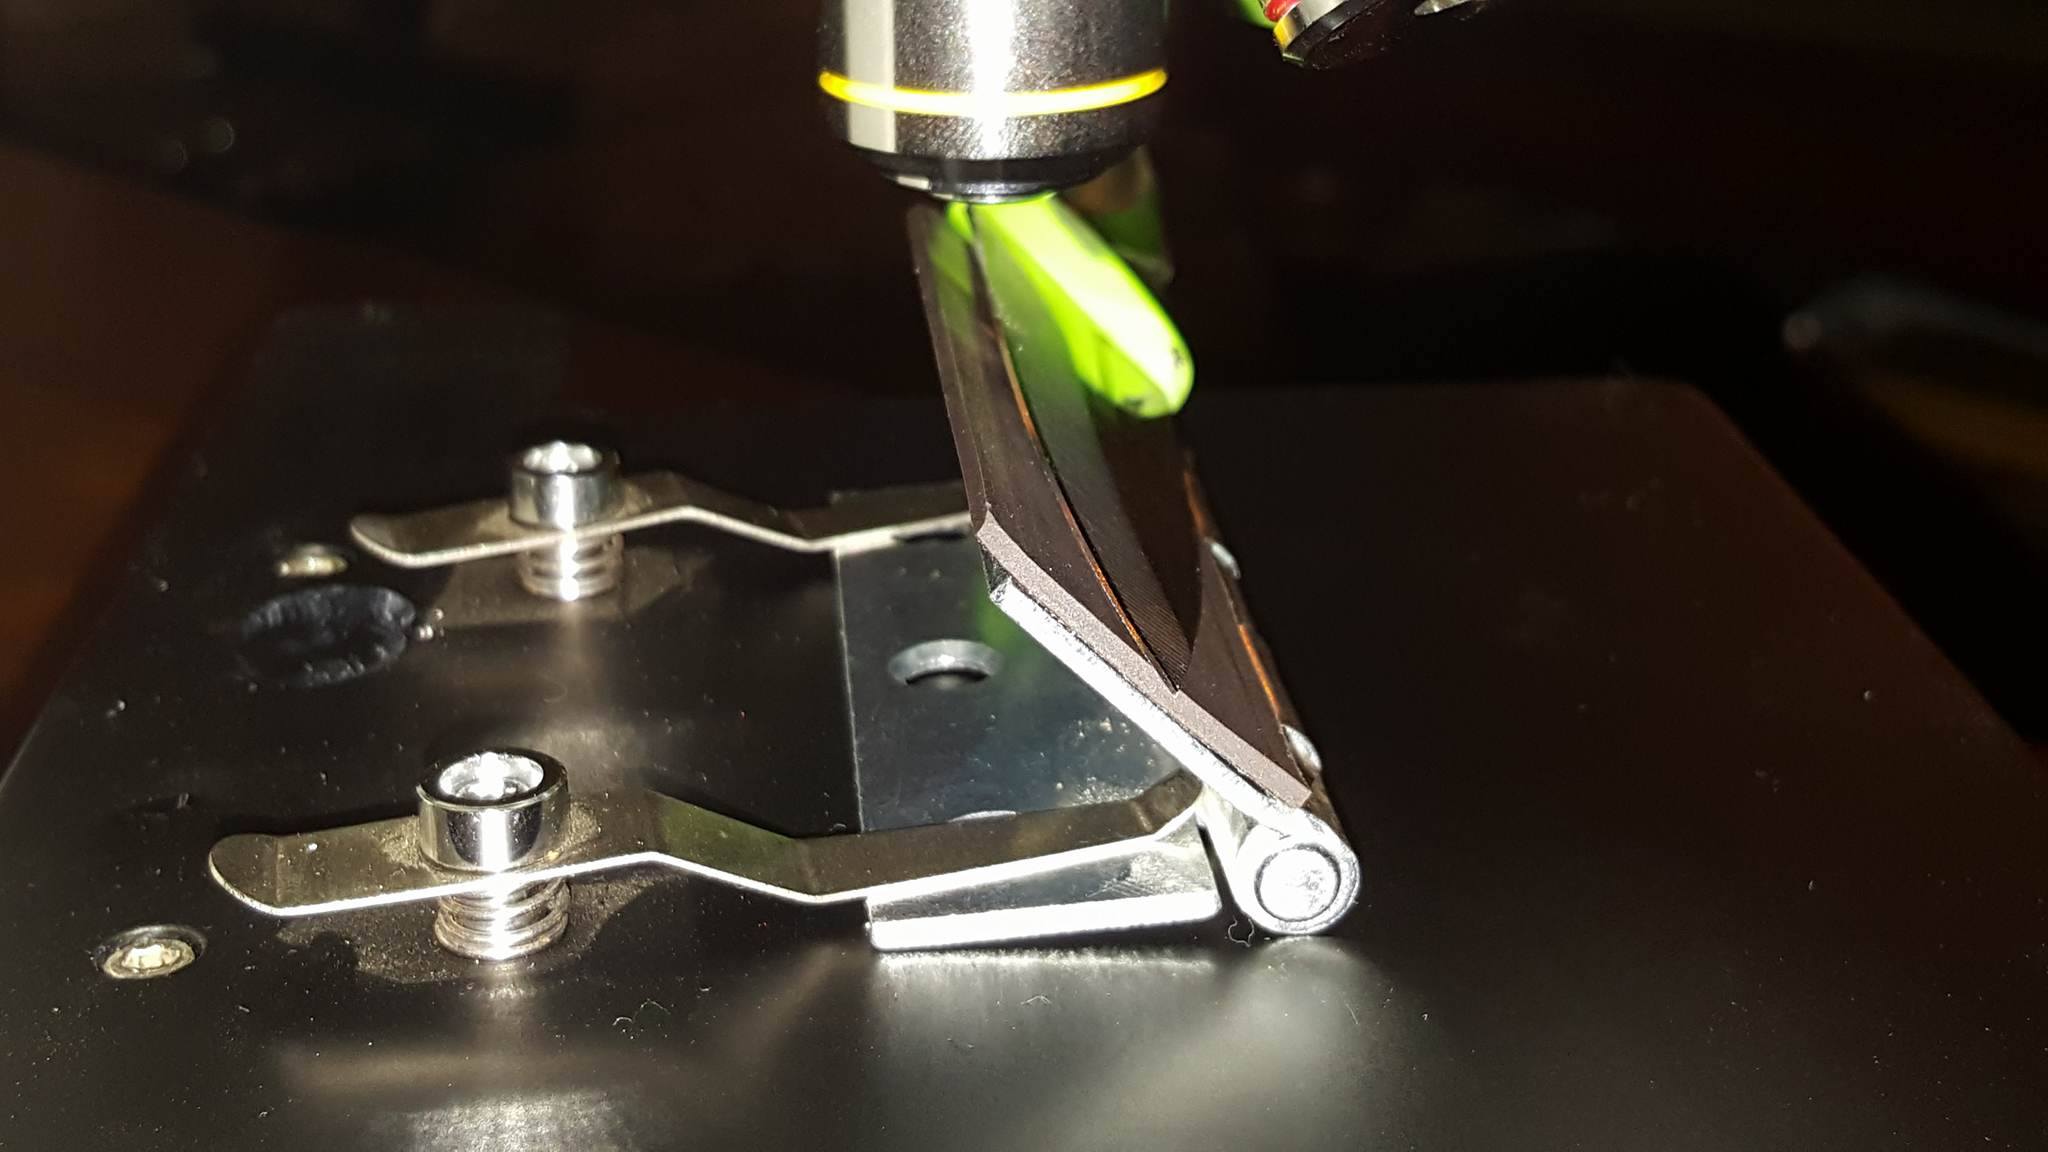
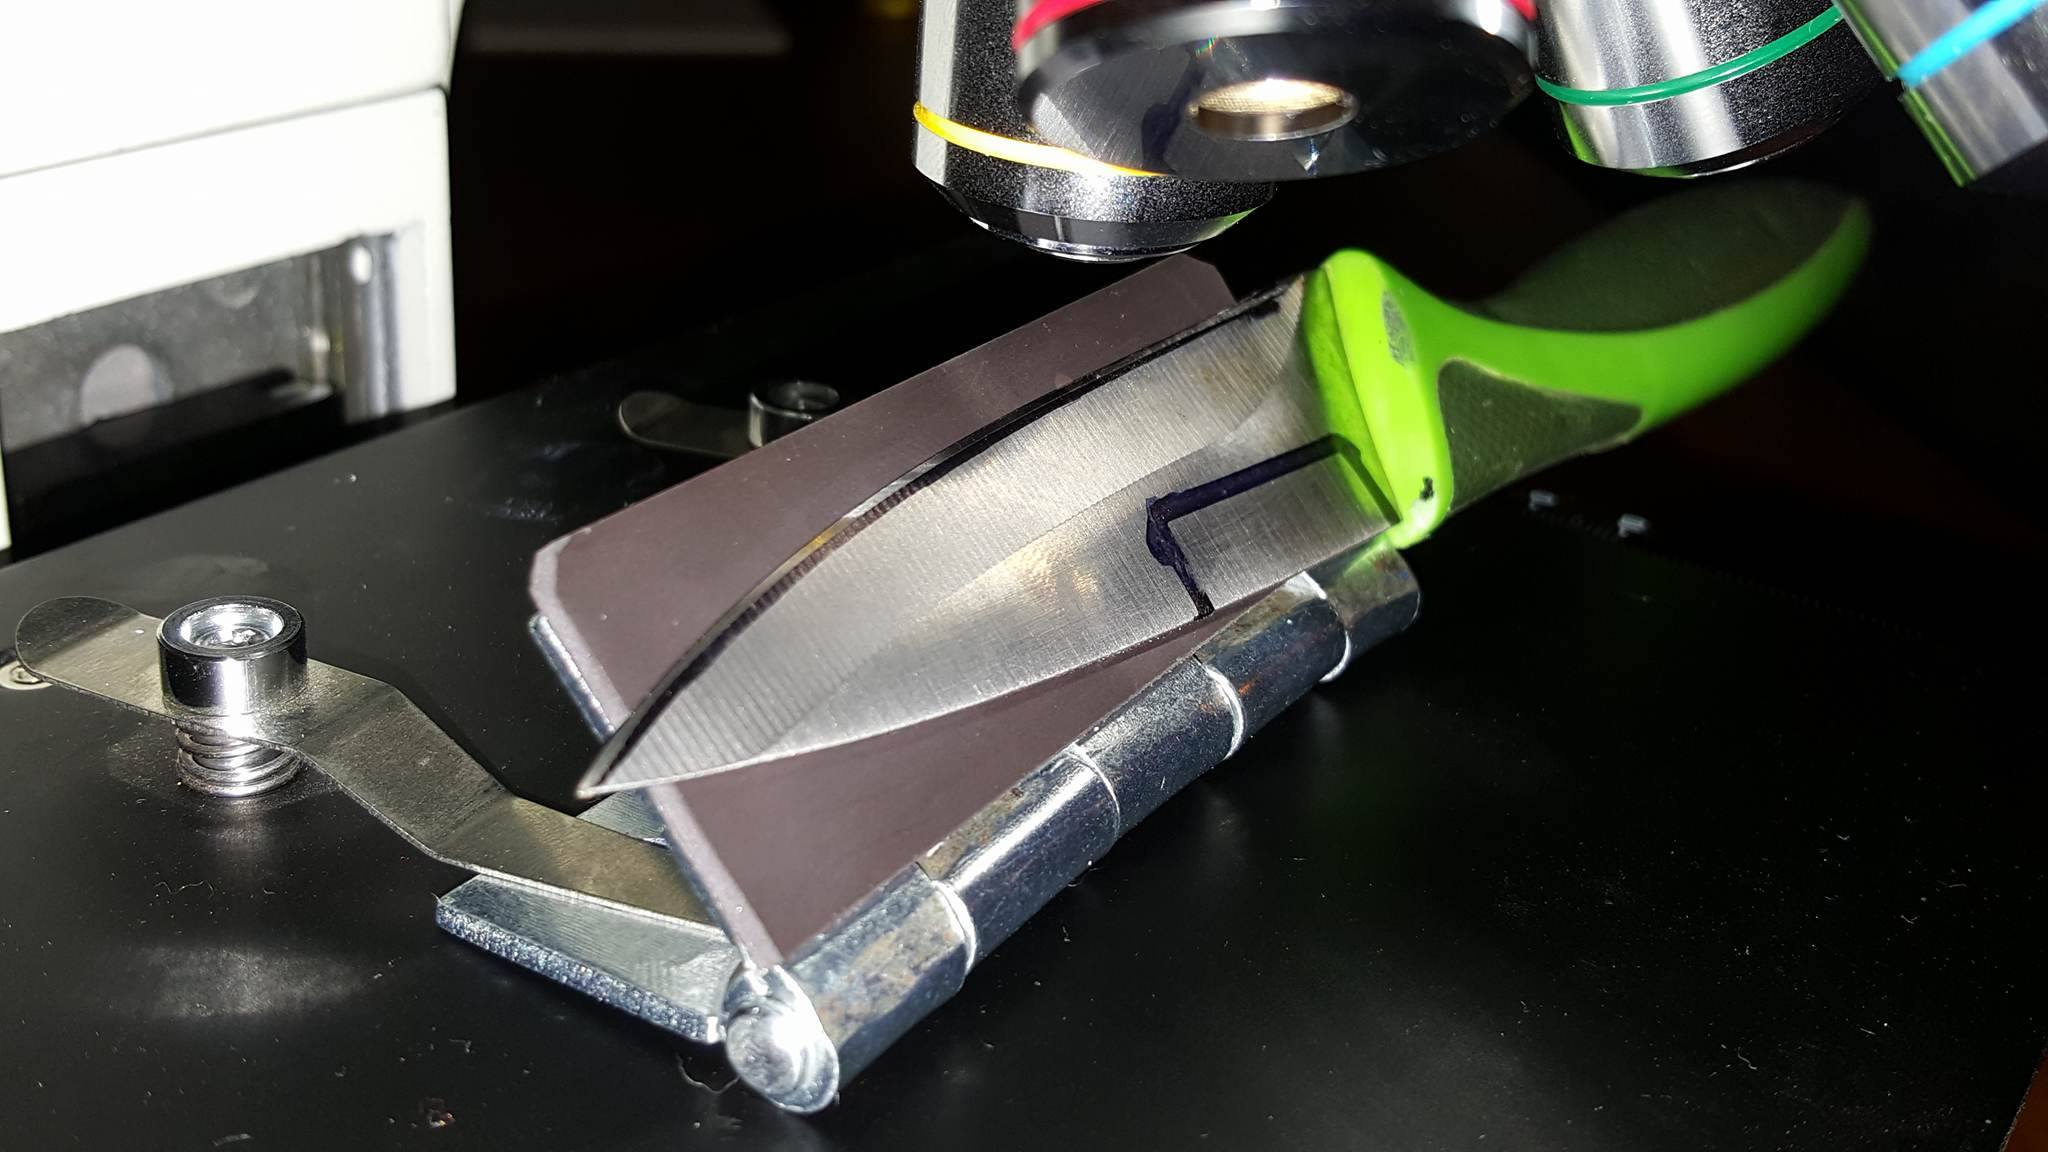
New knife holding bracket prototype completed. Total cost $10, time 10 minutes. took a door hinge and hammer pinched the pivot until very snug. Applied peel n stick magnetic strip. Done!
This should reduce micro vibrations and increase high magnification image clarity…well a whole bunch! Also will allow for much easier sharpening and examinations with similar image quality since placement is repeatable and angle is now fixed.
Capt. Low Tech strikes again!!!
Attachments:
You must be logged in to access attached files.
1 user thanked author for this post.
05/22/2016 at 11:33 pm #34198O.K., now I’m convinced…I’ll get the door hinge.

Eddie Kinlen
M1rror Edge Sharpening Service, LLC
+1(682)777-162205/23/2016 at 12:23 am #34199On a more serious note I loved the video of the dust and diamond particles. But it scared me a bit and may highlight something the casual sharpener doesn’t worry about but is a serious health concern. My shop is area is tiny and enclosed and it get covered in very fine metal dust particles. I wear a mask when using a belt sander but even after use the dust is everywhere. This is also true when using the WEPS just not so much dispersal.
Very good point Cliff, thanks for pointing that out!
Eddie Kinlen
M1rror Edge Sharpening Service, LLC
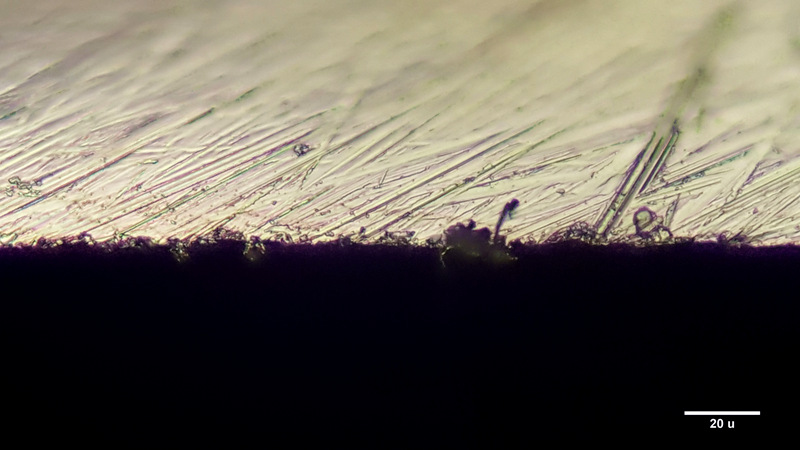
+1(682)777-162205/23/2016 at 7:45 pm #34211Ahhh the learning curve…it might be time to take a break for few days and get some work done in the “real world”. Spent most of yesterday attempting to add a calibration scale to my images.
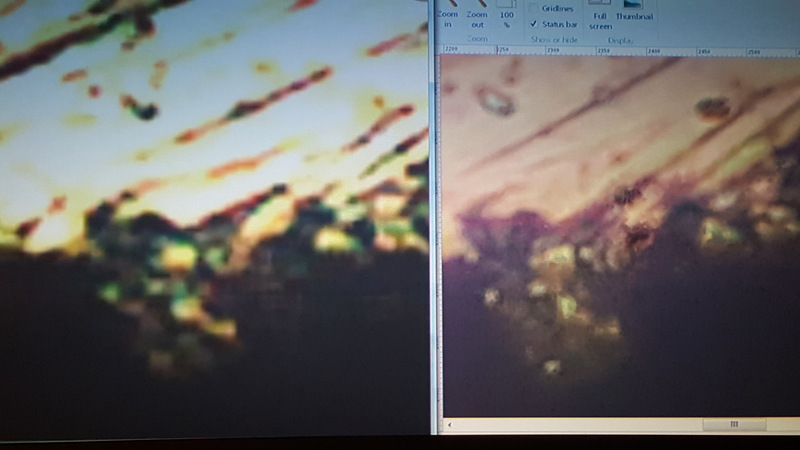
The Moticam makes it easy since its going straight into software that has built in calibration, but the images are just less then perfect. The cell phone is still outshining for image quality and with some outside thinking I can now calibrate zoomed cell phone images.
Stacked image, 800x optical, 2x digital zoom:
Stacked image, 800x optical, 8x digital zoom:
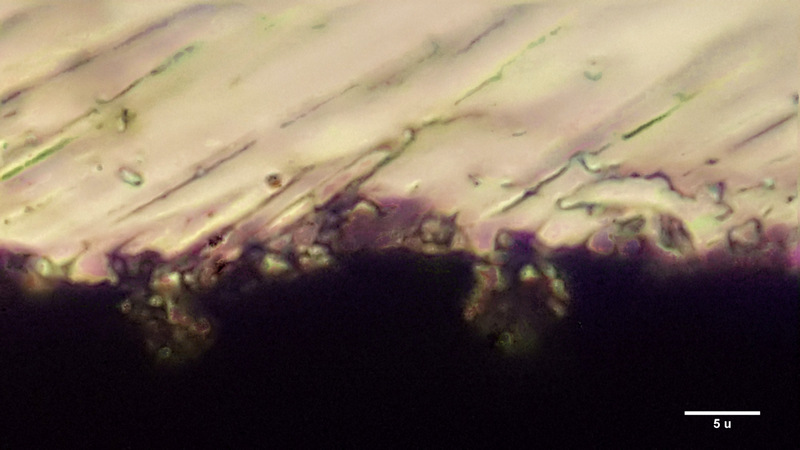
Finally just for comparison Ive taken my image stacks from both cameras and placed side by side at a high zoom level. Left is Moticam & right is Cell Phone:
Attachments:
You must be logged in to access attached files.
1 user thanked author for this post.
05/24/2016 at 12:17 am #34215You can’t leave us “hanging” like that Cliff
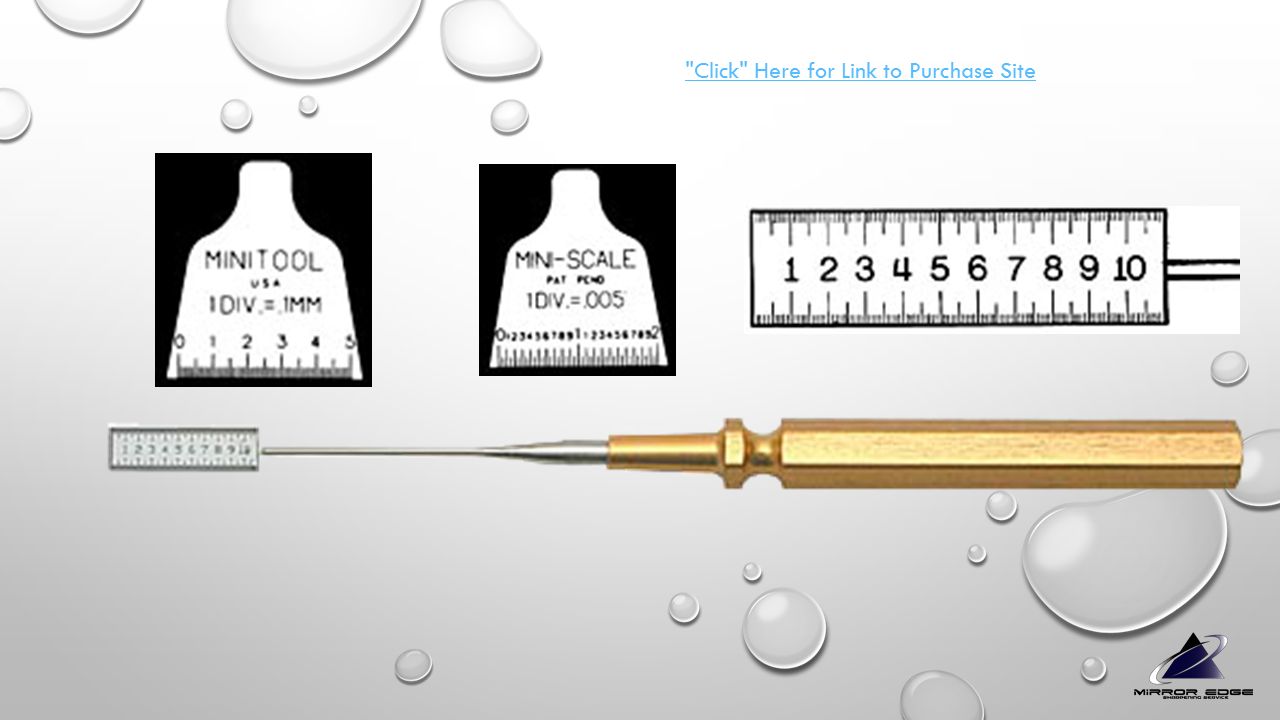
 , how are you calibrating the images on the cell phone without posting a ruler in the image? I am guessing it in the photo but has been “cropped” out. I found these rulers online which may help with the application called ImageJ (Here). They are solid and can be placed next to the objects being viewed or just in the image on a flat plane with the objects being viewed. Example of how these can be used is in this post (Here)
Eddie Kinlen
M1rror Edge Sharpening Service, LLC
+1(682)777-1622Attachments:
You must be logged in to access attached files.
05/24/2016 at 12:29 am #34217You can’t leave us “hanging” like that Cliff
 , how are you calibrating the images on the cell phone without posting a ruler in the image?
 You are correct, I used ImageJ software. First I took photos of the calibration slide at x100, x200, x400 and then repeated w/ camera digitally zoomed x2, x4, and x8. Then in ImageJ I calibrated a measurment off those pics and used that to add a scale bar in the corner of my knife pics shot at same magnification. Its also tedious and needs to be manually reentered every time the photo changes magnification. Sucks but gets it done.
With the moticam software you just calibrate once for each magnification, then when snapping images you just add the appropriate scale and its a one click deal. If the camera didnt suck soooo bad. Maybe I can talk Moticam into an upgrade? haha
-
AuthorPosts
- You must be logged in to reply to this topic.


