Belt sander/grinder/sharpener
Recent › Forums › Main Forum › Off Topic › Belt sander/grinder/sharpener
- This topic has 37 replies, 1 voice, and was last updated 12/24/2019 at 4:45 pm by
airscapes.
-
AuthorPosts
-
08/04/2019 at 6:09 am #51338
Keep it all in one thread! Please share!
I will be posting some pics of the finished belt sander when I finish it later this morning 🙂
08/04/2019 at 10:58 am #51349Ramblings of a mad man!
Finally got all the parts fabricated and took time to make a new mounting platform that was a little nicer than the 1/2 exterior plywood I had initially used. The MDF is from one of the treadmills and has a nice gloss coating that the belt ran against.
The motor I ended up using was the one I got out of the first treadmill I acquired. Redheads had give me an extra motor he had but it was the same size so I figured I had 2 chances to screw it up and started with the one I had. The first problem was the bearing cap (nose) was too big to fit through the case. I had hopped that the motor Redheads was giving me was smaller but it was not. I was going to create an adapter, but then the shaft would be too short. Eventually I realized that case of the sander was Aluminum not steel, so much less work to resize the hole. I measured the nose and the opening and fabricated a template that would fit into the hole and allow me to mark the new hole size with a scribe. I then used an air die grinder (carbide bit) to remove most of the aluminum stock. Then a reciprocating drum sander to sneak up on the line I had scribed. This work really well and did not take long at all.
Next I had to fit the plate to the case but needed a couple more times on the drum sander to allow it to lay flush on the case. I clamped the plate to the case and drilled the 4 1/4 inch mounting holes.
Next I marked the top and bottom of the plate and cut it with a cutoff wheel on and angle grinder so it would be flush with the top and bottom of the case.
I removed the armature and back plate of the motor, taped the ends closed (motor contains large permanent magnets) and cut/ground off the mounting bracket. That thing was really welded on to never come off, very well made treadmill from the 1990’s
Once the motor was back together and mounted I wired it on the bench to test and all seemed well. I order the 10K pot, NC momentary switch, rubber mounting feet and found a rocker switch I had in stock.
The Drive wheel had taken some trial and error, but as I think I already posted, I ended up cutting the pulley off the treadmill flywheel which treads on the motor shaft (left hand threads) and placed the needed width spacer on the shaft behind the drive wheel. Snugged the pulley then tightening the set screw to keep the wheel from spinning on the shaft. The pulley/spacer sandwich of the wheel really squared it up so it runs true.
When I had some time I designed and fabricated the electronics cover out of ABS and once the board and box was mounted placed the large Choke where i wanted it and made a cover for that.
I designed a temporary rear wheel for the back shaft that contained a slot to install a magnet from the end of a sonicare tooth brush. Then a mount for the magnetic pickup that drove the digital speed display. Once hooked up and the LCD panel powered, it read MPH,but unsure if the firmware was just calculating cycles per second to MPH or if there was other math going on due to the treadmill belt length etc. I was able to connect my digital meter to the pickup connector on the LCD board and read the frequency directly, which when multiplied by 60 give RPM. Half staff on the dial is 2400 rpm with it topping out at about 56oo rpm.
Sorry for the rambling and I am sure I missed a few steps as this has been an on again off again project over the past few weeks.
Rather than attaching all the images here, I dumped them on my website in an indexed album. They are kind of in chronological order.
Picutures https://misc.airscapesart.com/hfsander/
And a couple short youtube videos
Vertical https://youtu.be/-GtExN9AFfQ
Horizontal https://youtu.be/nrn4zZoXVIc
08/04/2019 at 4:40 pm #51351Looks great
08/05/2019 at 8:33 am #51354Looks great
Thanks, and thanks for your help and encouragement to follow this path! I did not add the buffer wheel like you had done, have another Treadmill and plan to build a free standing buffing station with the steel from the 2 treadmills. Was thinking I would use both motors mounted on the same stand with a single speed control and switch left right switch… something to do once the fall arrives! Probably should start looking for a 3rd Treadmill .. Drill press could stand a variable speed update!
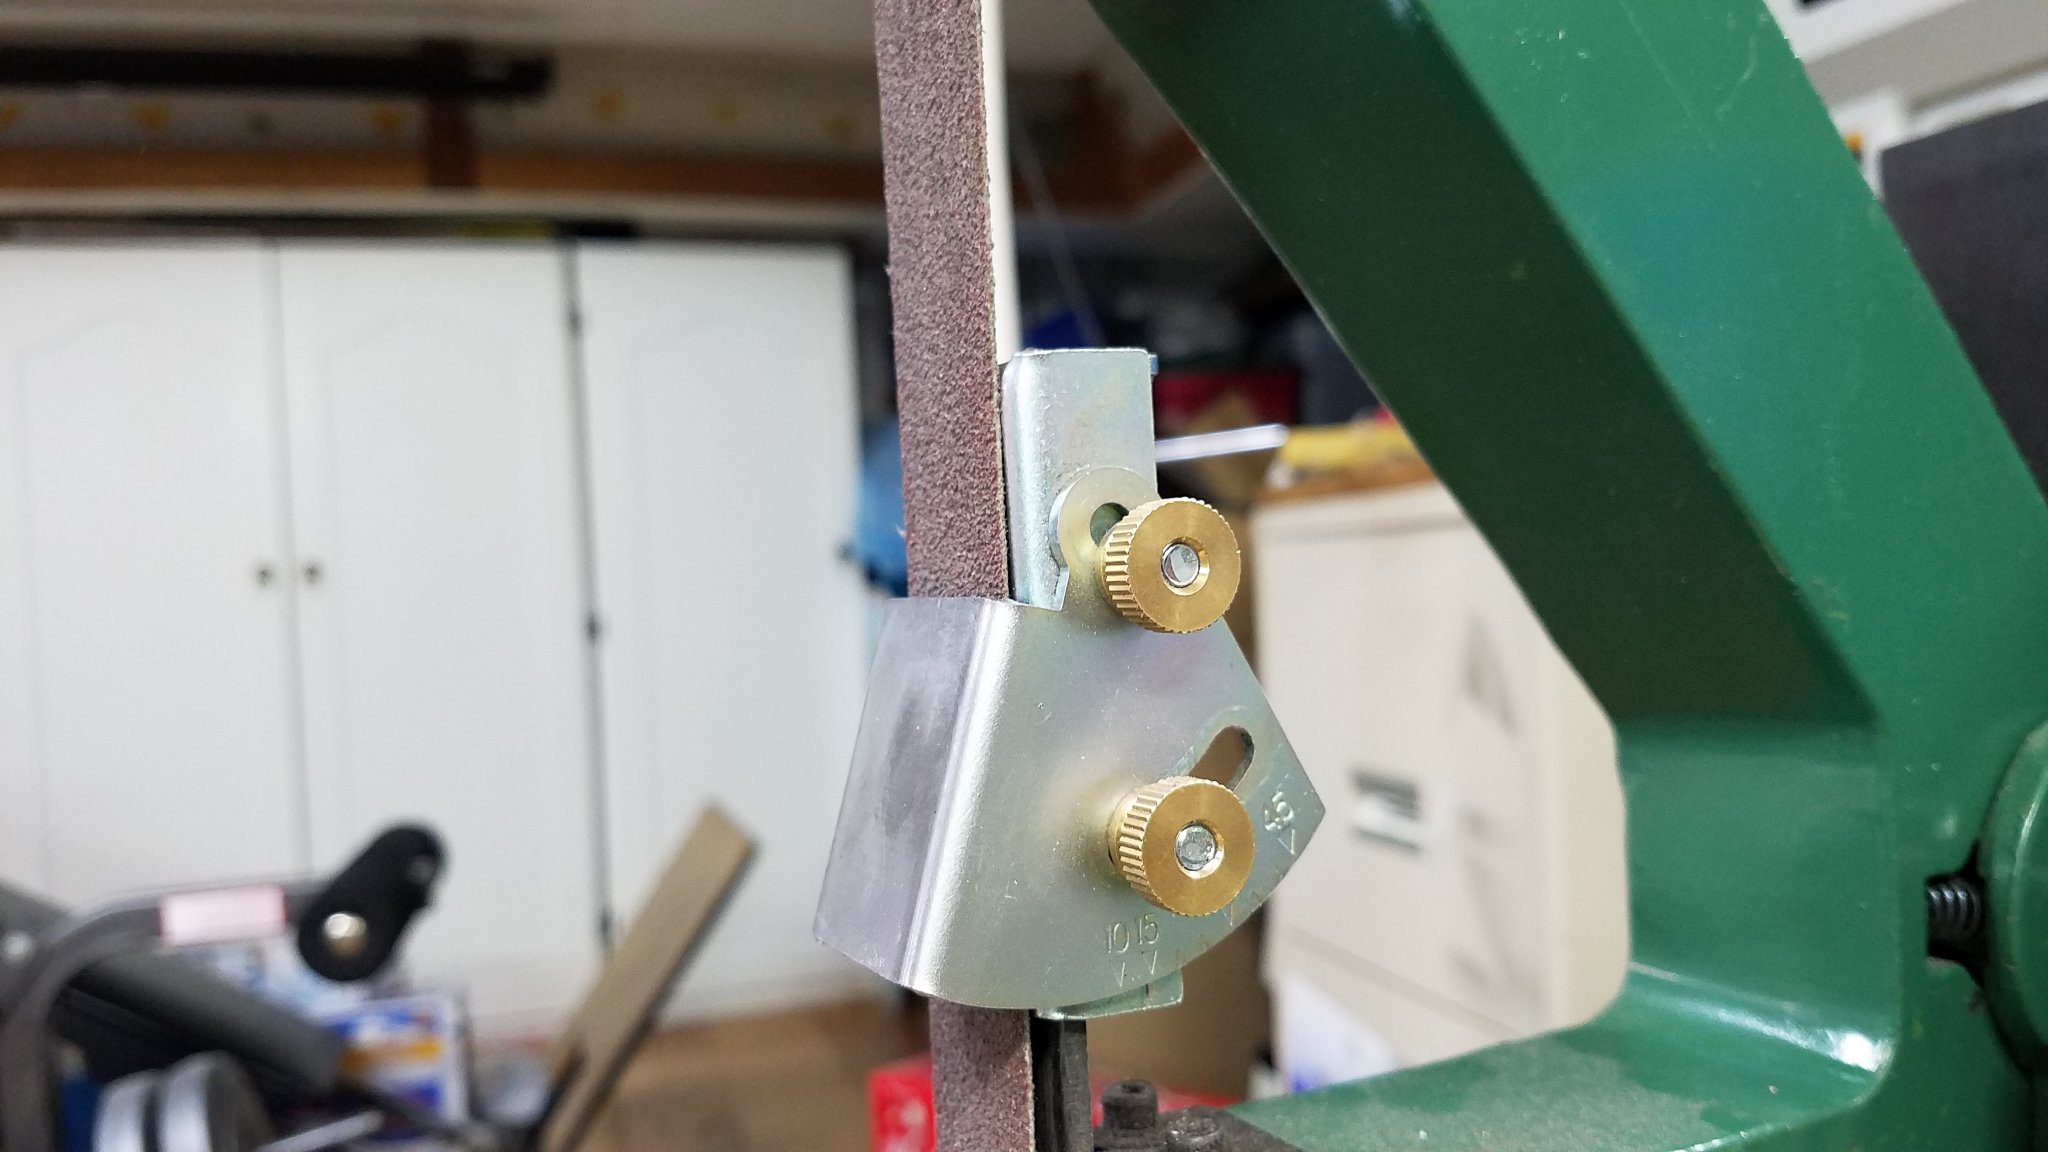
08/07/2019 at 12:22 pm #5143308/08/2019 at 3:07 am #51444I don’t remember what if any mod I made to the adjuster, but I don’t use a tool to change belts. I pinch the adjustment bracket, with my thumb at the front-facing part of the frame and the back of the adjuster, This moves the rear pulley forward, letting me slip the belt over the top pulley.
08/08/2019 at 9:22 am #51448I don’t remember what if any mod I made to the adjuster, but I don’t use a tool to change belts. I pinch the adjustment bracket, with my thumb at the front-facing part of the frame and the back of the adjuster, This moves the rear pulley forward, letting me slip the belt over the top pulley.
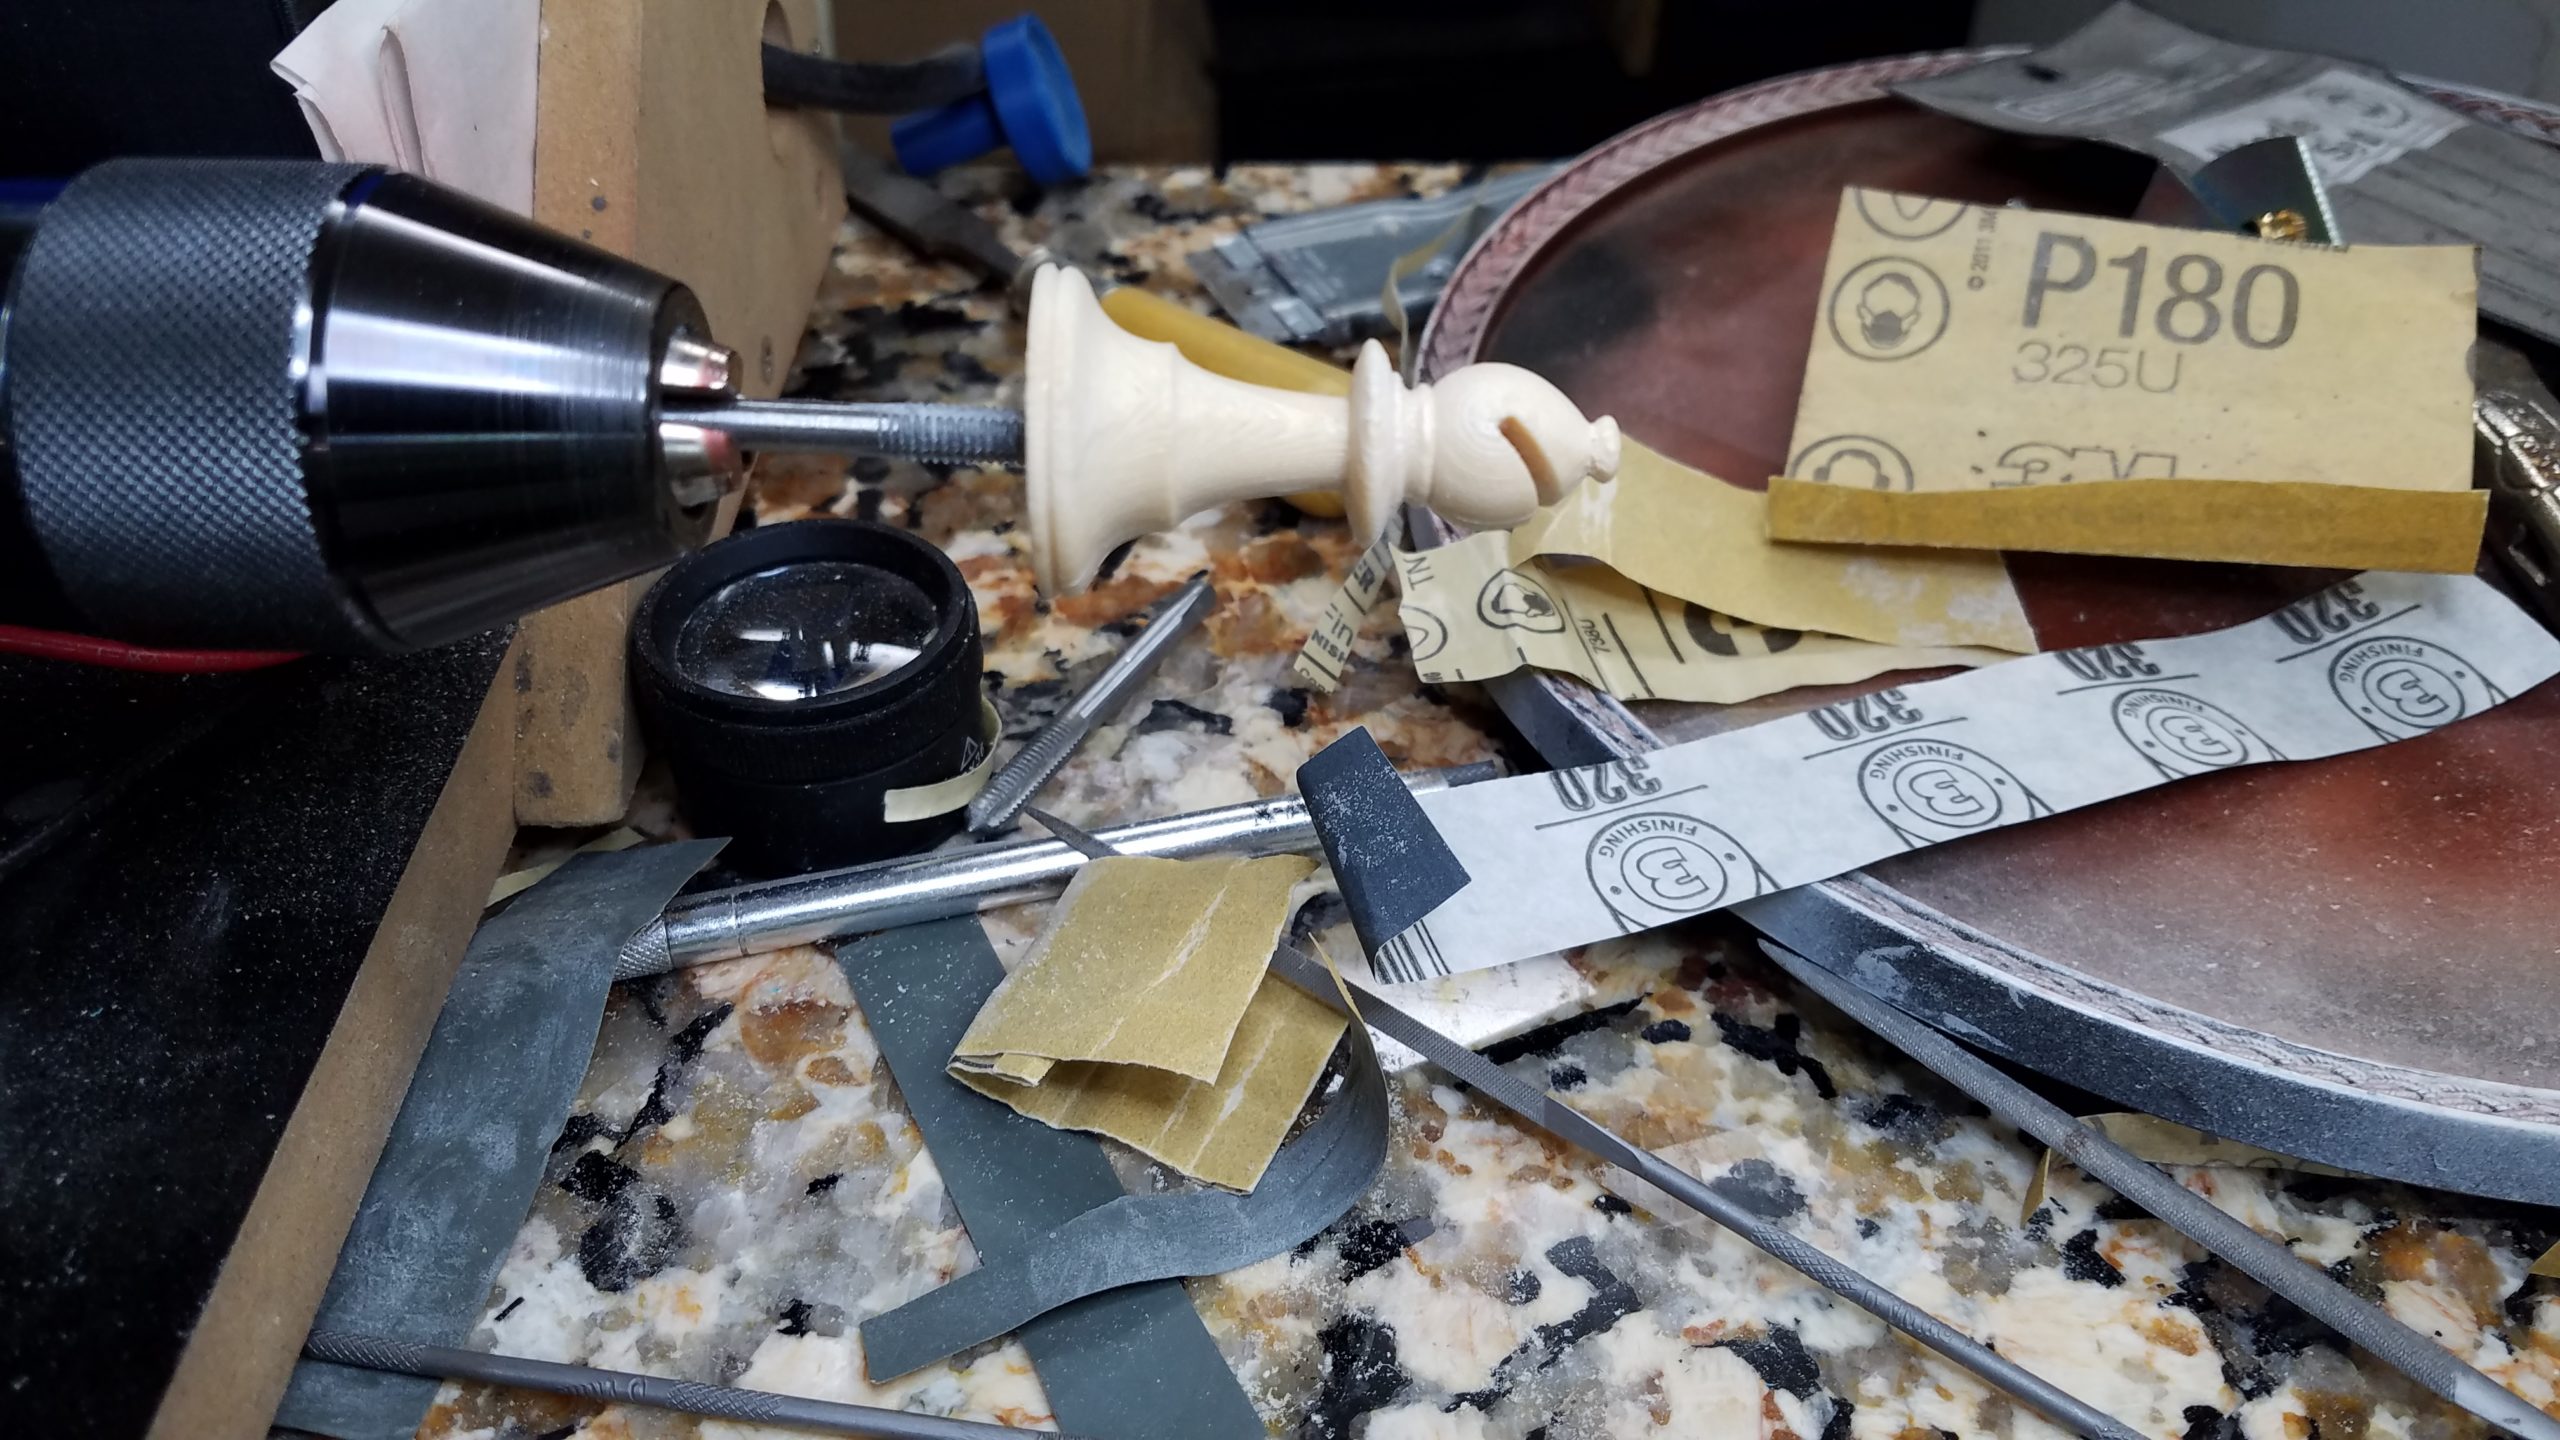
I think with a heavier spring it would not need to be tightened as I am doing. The other thing that is different about mine is the Drive wheel is ABS 3d Printed so less friction to grip the belt. I should probably find a semi soft filament and spin up another that is not so slippery. Doesn’t help I sanded the wheel with it running to get it as true as possible. Just used this last night to take a buster down on a knife that probably should be tossed out and it turned out very nice using the 800 grit belt .. Took a while but looks really good considering it was a 1/4 long or more. I took it down a bit father after this photo was taken but kept hitting the handle with the belt so stopped.. After I touched up the edge on the WE I presented it my wife with some Game of Thrones humor..
“Here you go Arya, Needle is ready for use again, stickem with the pointy end!” 🙂
-
This reply was modified 4 years, 8 months ago by
Attachments:
You must be logged in to access attached files.
12/24/2019 at 4:45 pm #52794This thread may be of interest to some newer folks so posting this to bump it to the top of Recent Threads.
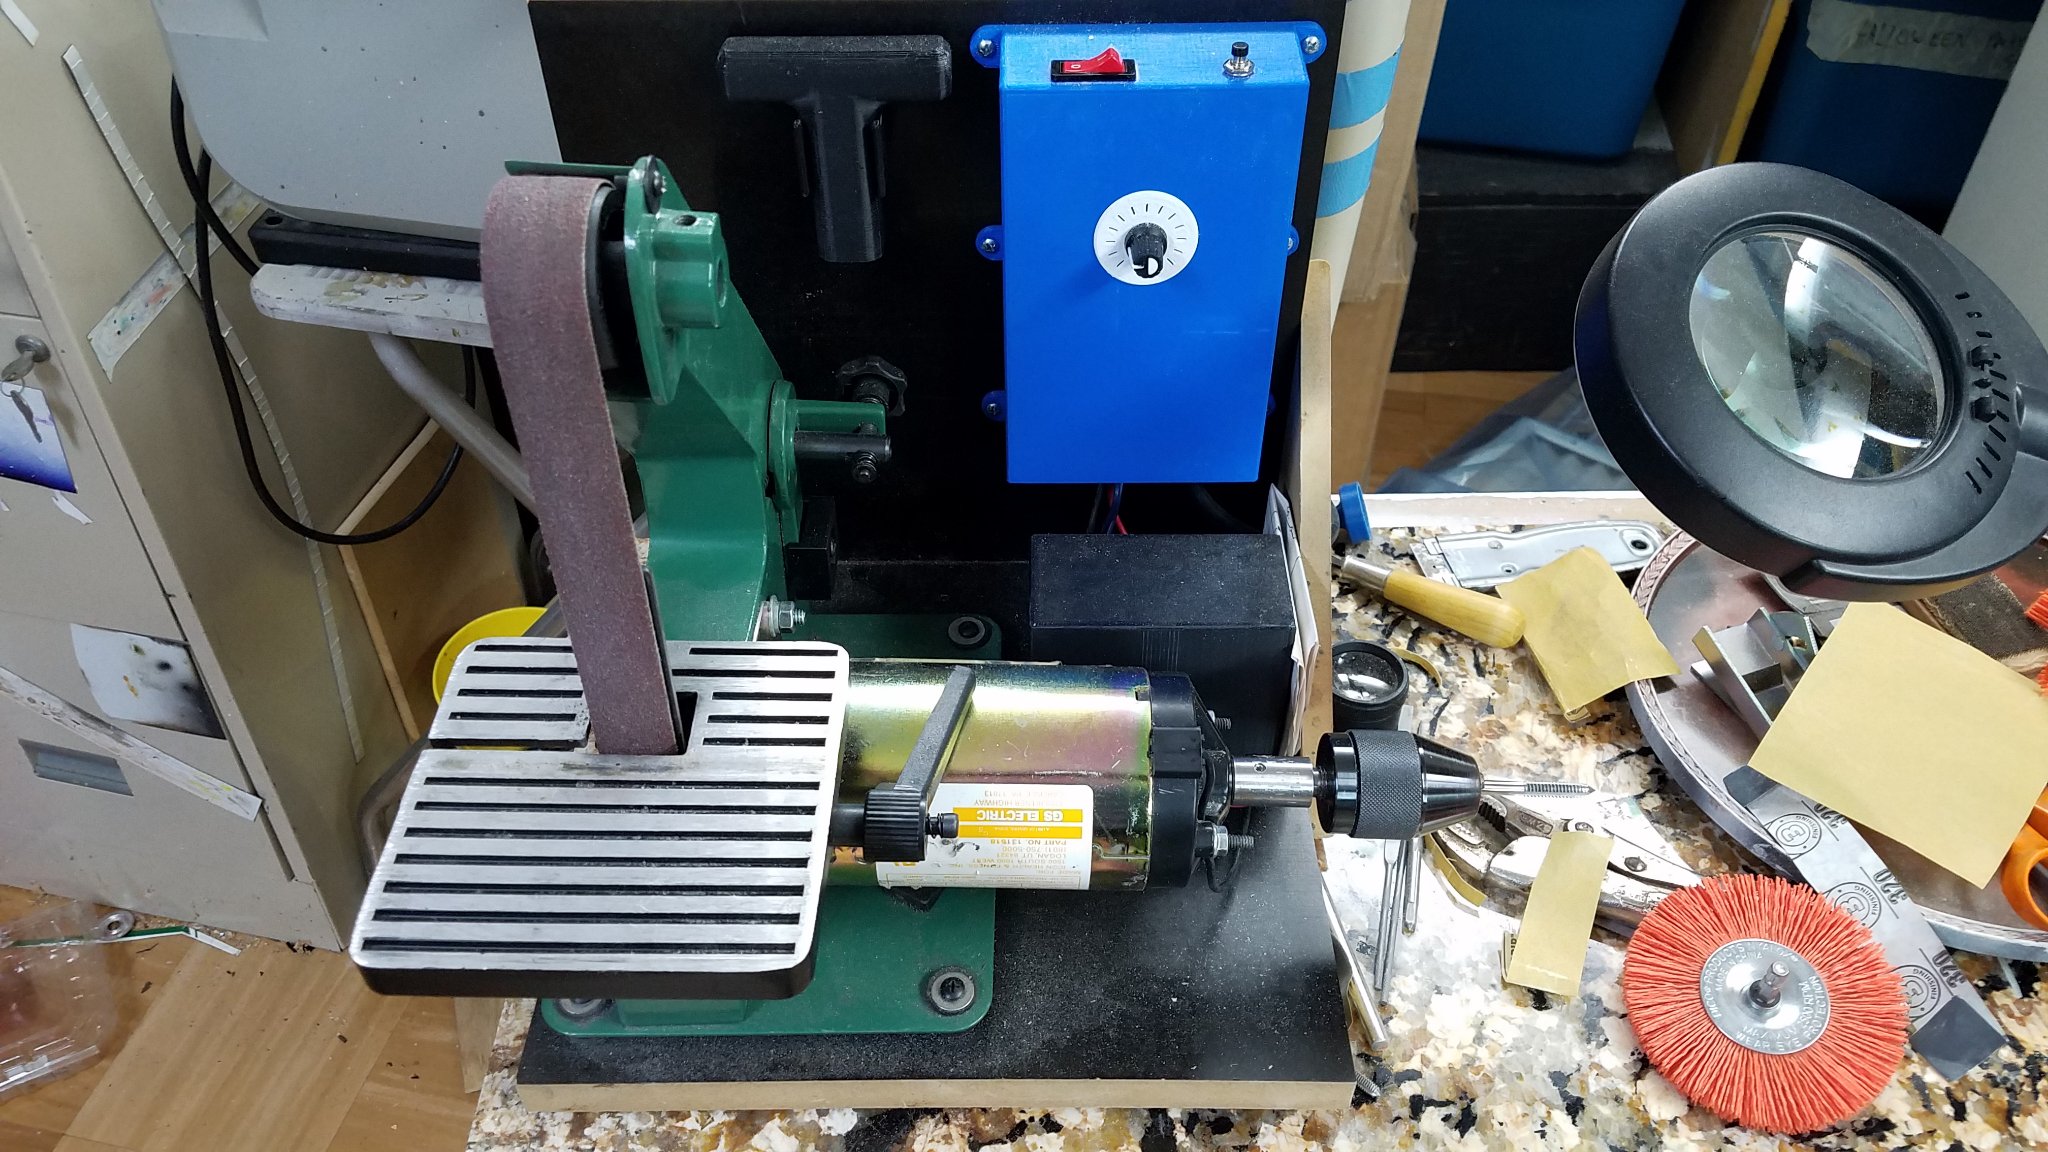
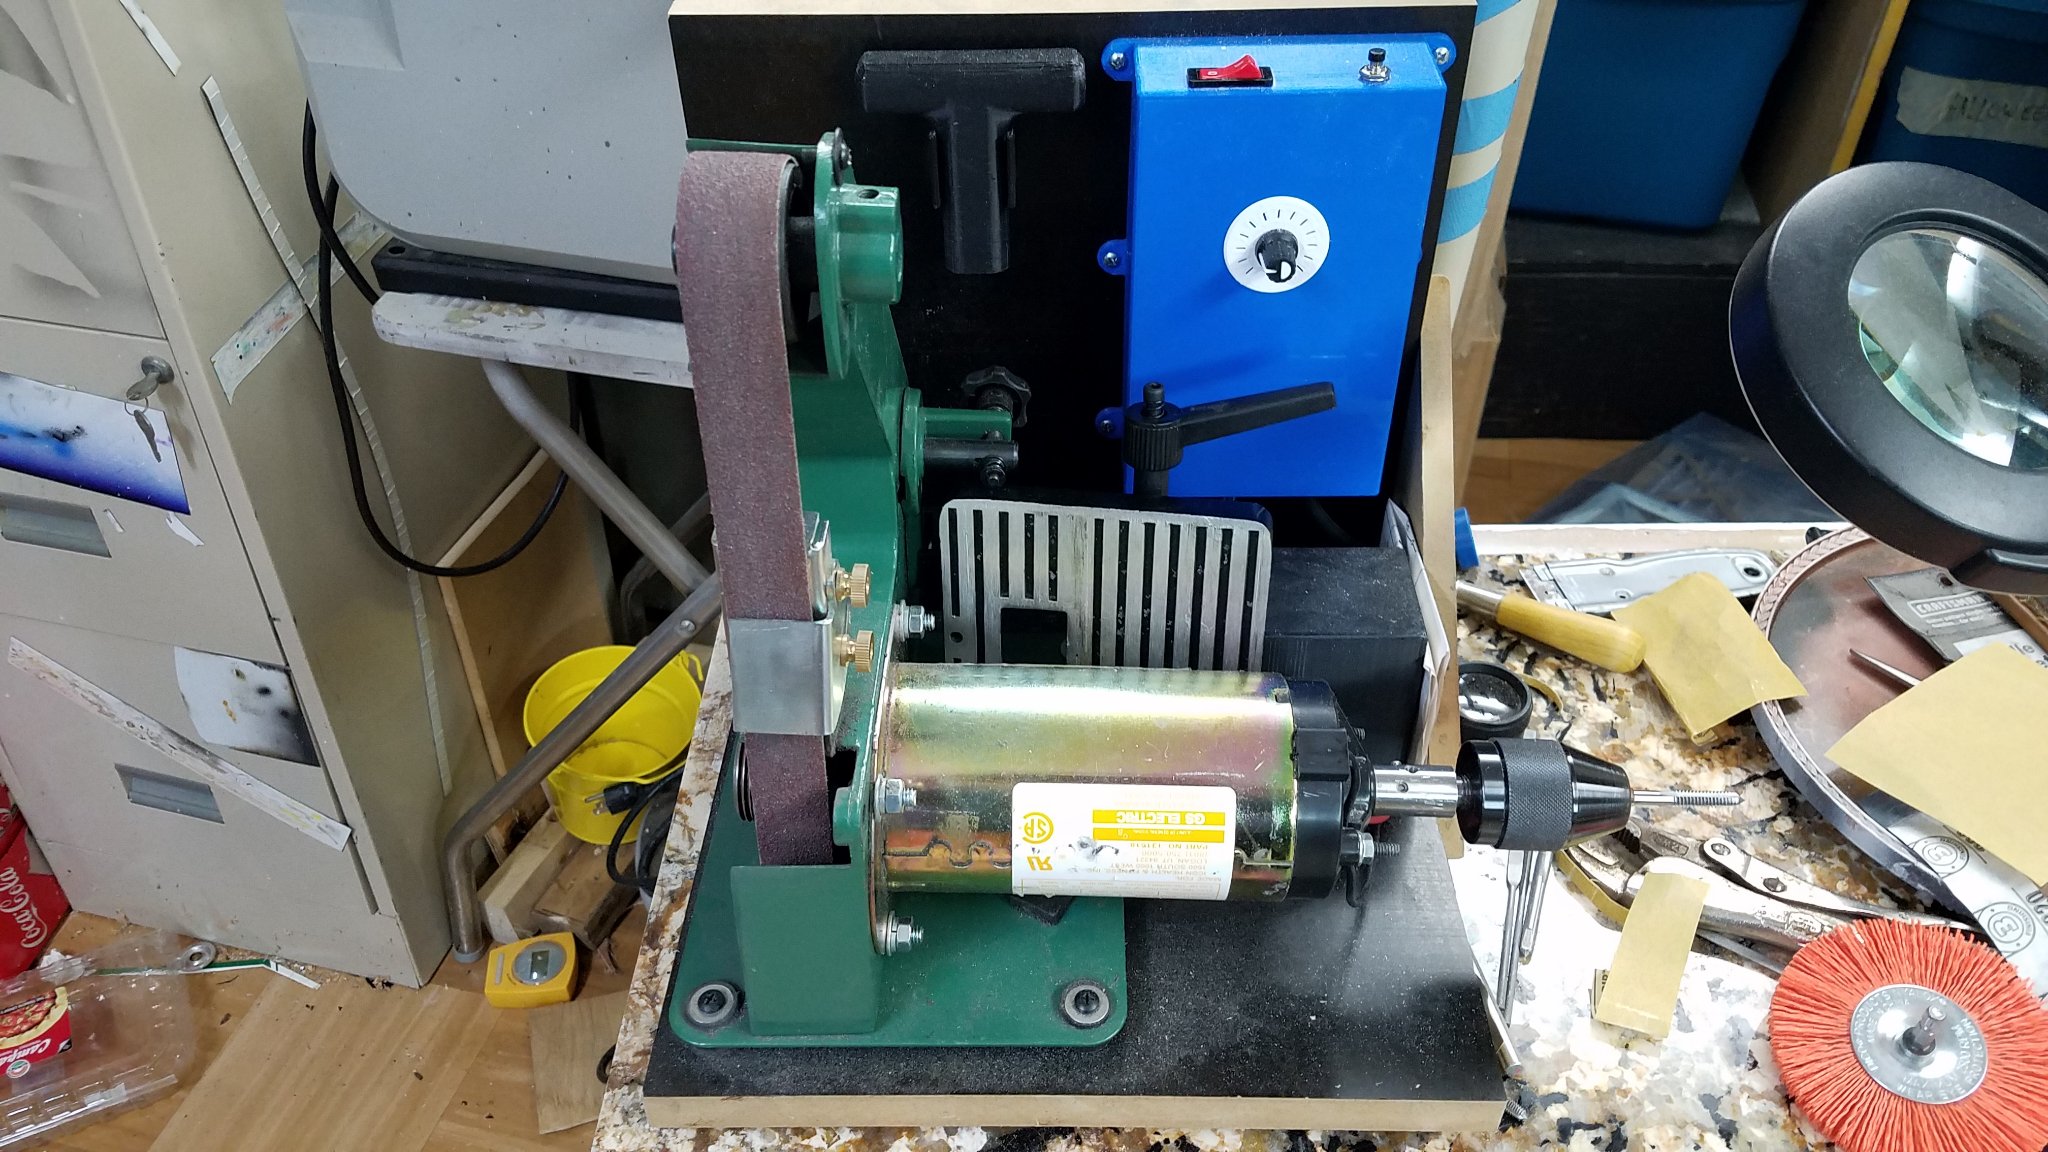
There has been a few threads lately where users are looking to reduce the time to re-profile badly damaged knives and or change a bevel angle considerably. This too bothered me so I build this custom variable speed harbor freight 1×30″ belt sander, and I am using it for all sorts of things including a horizontal sander (see attached), wire wheel and any other tool I can jam in a chuck. It also makes remove a lot of damaged metal fast and safe (variable speed) at the exact angle you want the bevel (using the guild and an angle cube) If you are DIY guy, this is a great project to make, and will be used for a lifetime sharpening and sanding only taking up 15×15″ of bench top and is portable. Thanks Redheads for suggesting I do this, is my most favorite utility tool yet! Or you can buy a variable speed sander already built, this was just too much fun and cost is under $100. Anyway, head back to page 1 and take a look.
Attachments:
You must be logged in to access attached files.
-
This reply was modified 4 years, 8 months ago by
-
AuthorPosts
- You must be logged in to reply to this topic.