Belt sander/grinder/sharpener
Recent › Forums › Main Forum › Off Topic › Belt sander/grinder/sharpener
- This topic has 37 replies, 1 voice, and was last updated 12/24/2019 at 4:45 pm by
airscapes.
-
AuthorPosts
-
07/15/2019 at 2:41 am #51081
I don’t see that sharpening guide in any of the literature, is that an after market part or something custom?
I think this is what you’re looking for: https://www.amazon.com/gp/product/B01HVXFP80/ref=ppx_yo_dt_b_search_asin_title?ie=UTF8&psc=1
1 user thanked author for this post.
07/15/2019 at 7:32 am #51088I think this is what you’re looking for: https://www.amazon.com/gp/product/B01HVXFP80/ref=ppx_yo_dt_b_search_asin_title?ie=UTF8&psc=1
HA! Almost as much as the machine! 🙂 But probably the most important part for me to have! No way in this old green earth I can hold something at the same angle for more than 2 seconds when using a belt or wheel..
Thanks for the link!
07/15/2019 at 3:11 pm #51092I have one of the guides, but to tell the truth, I think I could do as well with a small wedge of wood to give me an idea of what the right angle to start with looks like.
Another note: If the knife has angles ground onto the sides, you should take these into account when choosing the angle for your guide. For instance, if there’s a 6 degree displacement from one side of the knife to the other, deduct three degrees from the angle guide setting. This is especially important if you are grinding a new bevel profile on a damaged knife to prep it for finishing on your WEPS. If you’re planning to finish the edge on the belt sander, 3 degrees probably won’t matter.
07/16/2019 at 2:49 pm #51095Well got my threadmill and have it apart enough to see I have what I need. Once I get the motor and electronics ripped out and functional on the bench I guess it will be time go buy a HF belt sander. Felt bad ripping apart a functional treadmill but it was not being used so at least part of it will be used! Scrap guys will get something for the rest of it..
Must be older than RedHeads as everything seems bigger in the electronics end.. but beggars can’t be choosers..
-
This reply was modified 4 years, 9 months ago by
Attachments:
You must be logged in to access attached files.
07/19/2019 at 6:56 am #51119Back to the motor search, this one was just a bit too big for the HF. In the mean time I 3d Modeled the drive wheel of the HF since the original was molded and not very well round. Not sure how it will hold up as it is ABS and more slippery than the molded wheel. Could not stall it with 1″ bar stock and a good bit of pressure, so should be great for what I want to do. There is still some runout will put a DI on the shaft to see if it is shaft or wheel. At least if I do find a TM motor, it will be very simple to change the shaft size in the model and reprint. If anyone needs a rounder wheel for their machine let me know.
-
This reply was modified 4 years, 9 months ago by
Attachments:
You must be logged in to access attached files.
07/19/2019 at 10:47 am #51123I’m enjoying seeing the process of the conversion, but that looks like tons of work.
For the amount of effort it takes to modify a Harbor Freight belt sander into a suitable sharpening platform I’d gladly just pay more for one of the name brand setups that’s ready to go out of the box. I’m lazy.
4 users thanked author for this post.
07/19/2019 at 1:07 pm #5112407/19/2019 at 1:49 pm #51125Yup, I have no knives sitting in need of sharpening, so leaning how to model this wheel was useful to me. Learning about the motor in a treadmill and how it is controlled and wired is interesting to me. My first career from 1984-95 was an automotive repair tech (mechanic) so I like to rip apart things, fix things and fabricate things.. Personally prefer modification and improvement of things most of all. Yes, I almost just bought the quality machine but needed something to occupy my mind and hands, so went for the Frankenstein method. 🙂
07/20/2019 at 9:40 pm #51126I happen to be in @Organic‘s camp due to lack of time and an acute lack of mechanical talent. I do have a Work Sharp Ken Onion contraption and plan on using it for re-configuring edges/profiles, that is if I ever find the blasted thing after the move.
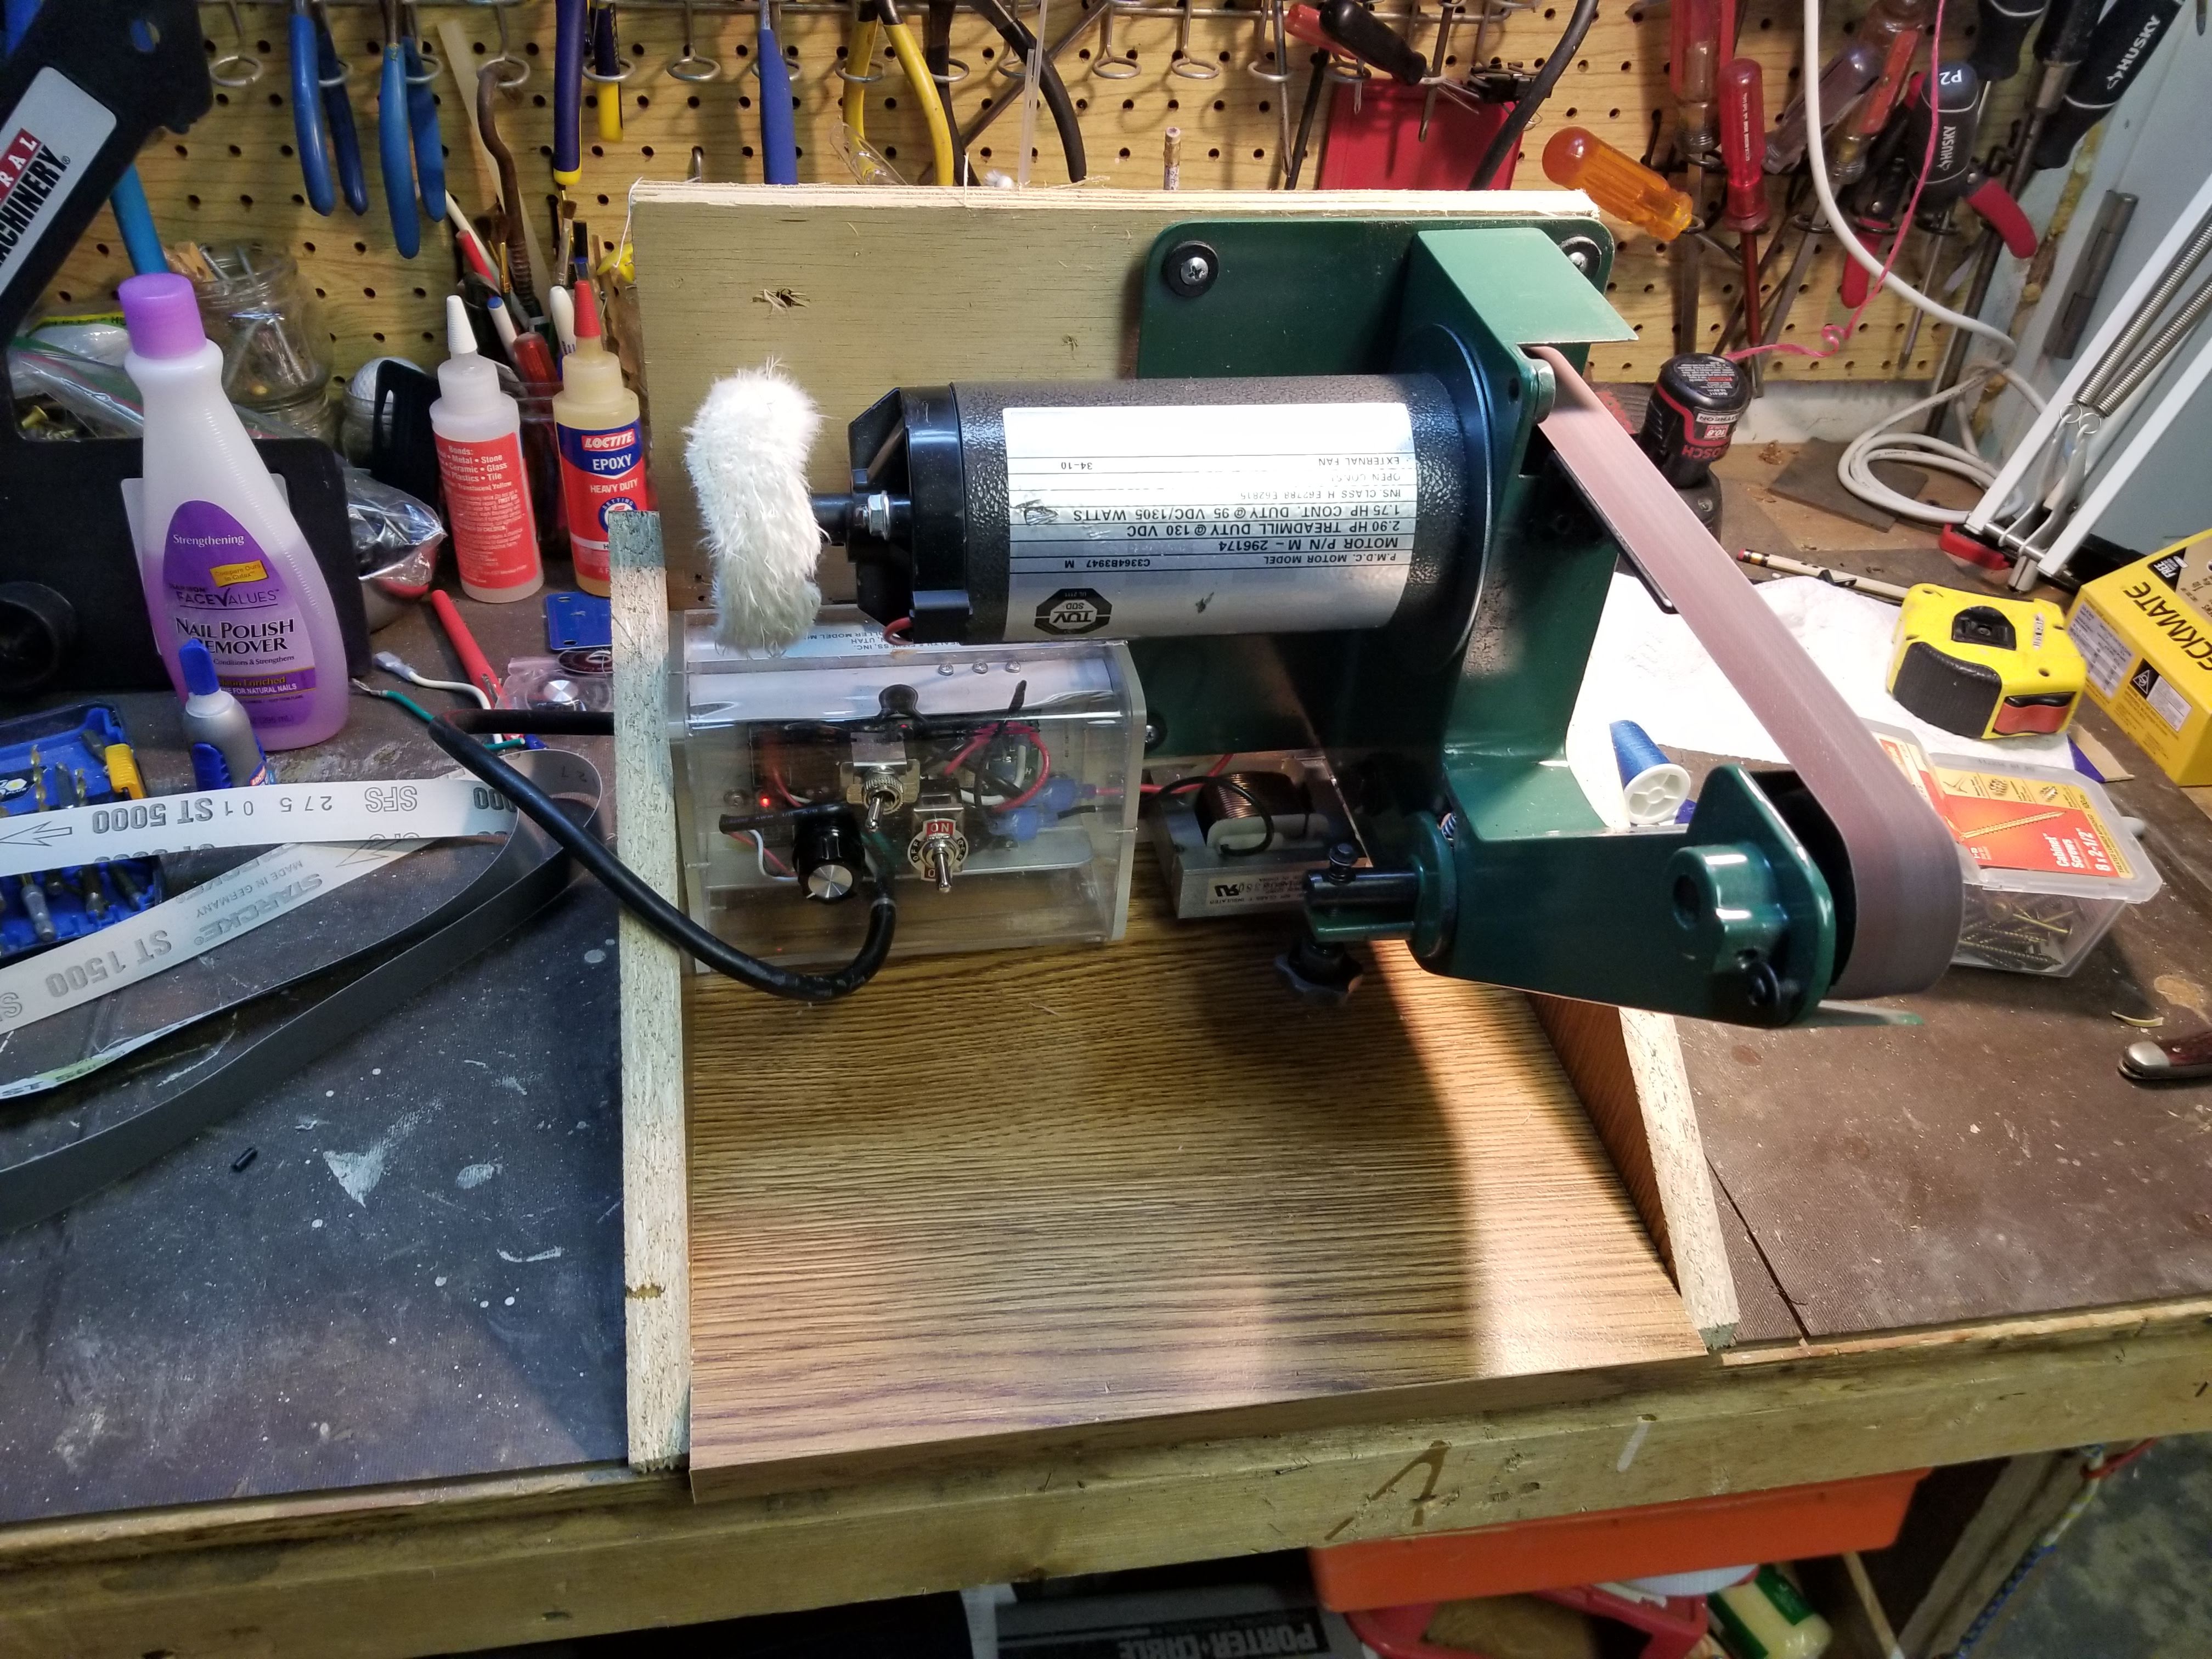
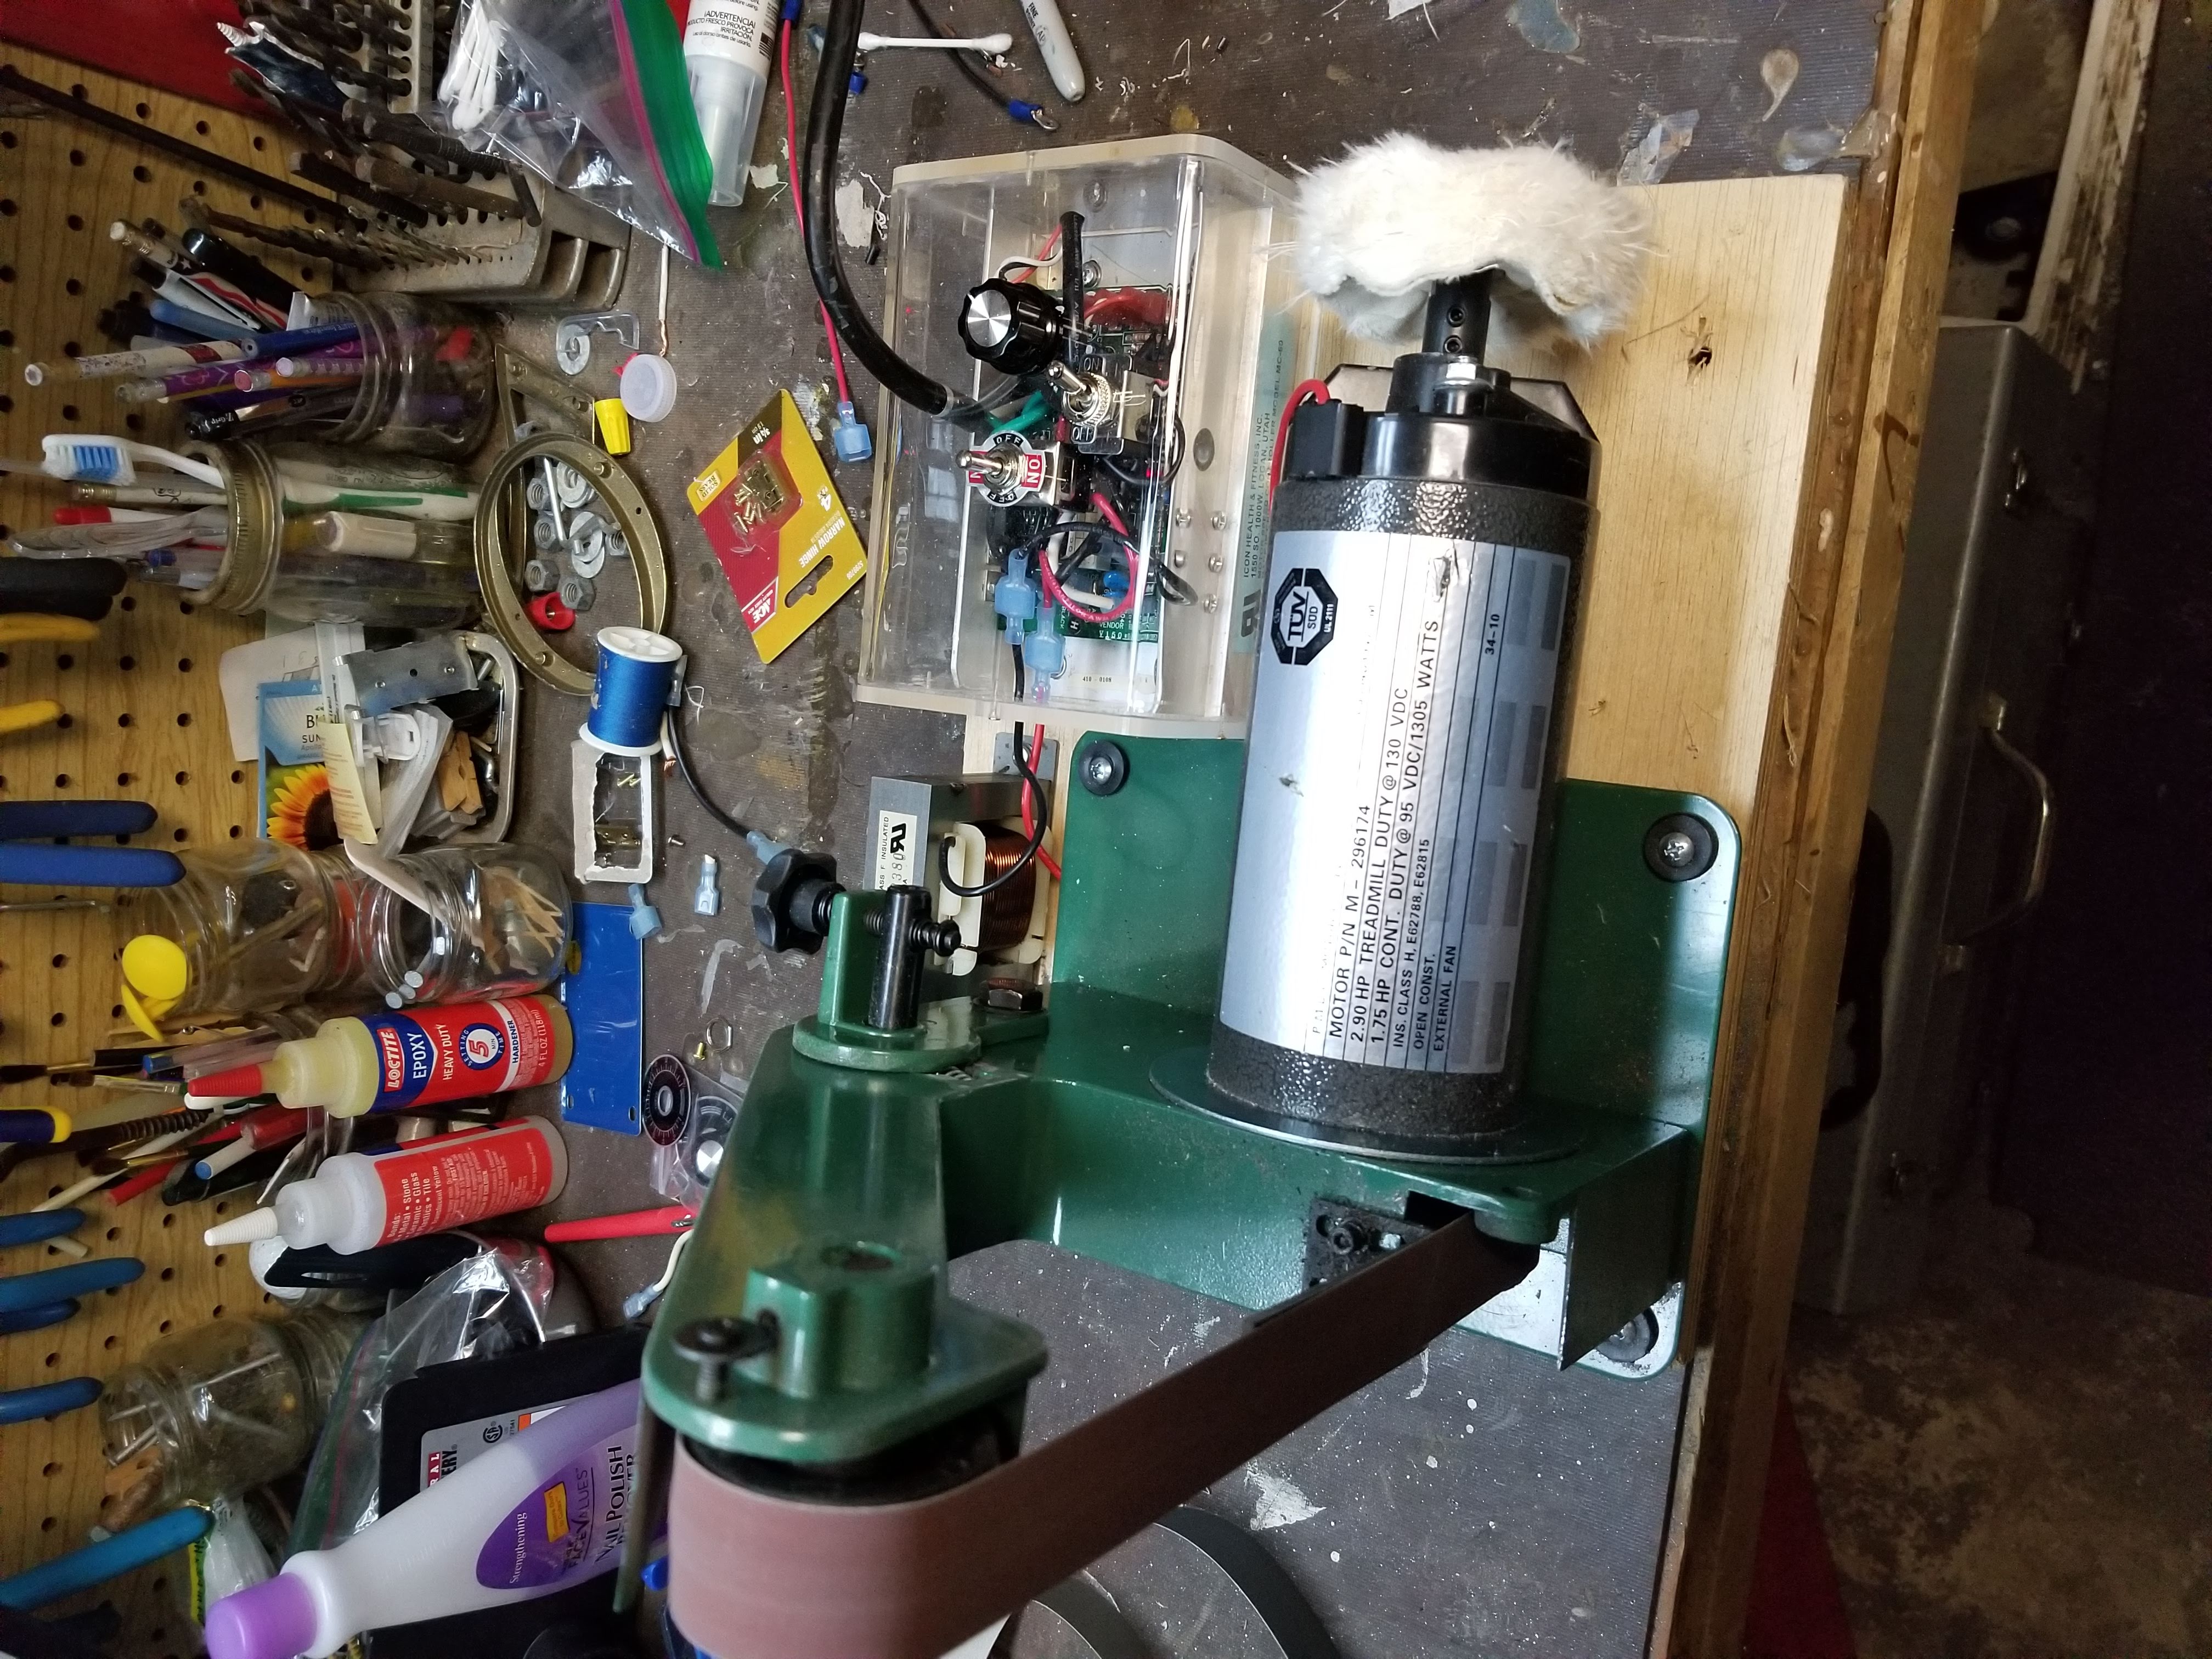
07/20/2019 at 10:20 pm #5112907/22/2019 at 6:23 pm #51148Making good progress, went with the original motor I had and opened up the hole in the case. Cut the left hand threaded pulley off the flywheel to snug the 3d printed drive wheel prior to tightening the set screw. The set screw alone was causing the drive wheel to cock even though it was a light press fit on the shaft. The pulley keeps it square. Still have to make the electronics cover and mount everything. This video shows the lack of run out and the crazy slow to high speed it is capable. Way too fast as the motor is just shy of 6000 rpm wide open.. Obviously the point of this mod is to run it slower than the stock speed motor which was over 3000 rpm. More later.
-
This reply was modified 4 years, 9 months ago by
-
This reply was modified 4 years, 9 months ago by
2 users thanked author for this post.
07/22/2019 at 7:47 pm #51151Nice work!
07/26/2019 at 9:18 am #51164Still waiting for the potentiometer so have not done any of the finish wiring or fabricated the control board cover but did receive the angle guide. I am not very good at holding tools on a tiny angle guide, especially at the tip when it leave the sharpening surface. I know this will be a problem even thought I have only played with this using a piece of bar stock. This mod is still in progress but close. Will need to test it to see if it is actually as helpful as I hope.
I wanted to extend the work surface on both sides of the belt and not require any alteration of the $30 angle guide. So I have come up with this slide on table. Once I am happy with it, I will reprint in black ABS
-
This reply was modified 4 years, 9 months ago by
-
This reply was modified 4 years, 9 months ago by
Attachments:
You must be logged in to access attached files.
3 users thanked author for this post.
08/03/2019 at 6:39 am #51309I had the same need for a reasonably cheap grinder to fix chips, tips, bolsters, thinning, polishing, etc before going to WEPS for fine tune edging. I wanted flexibility and variable speed. Viel and the like started at $300 & up (way up). That wasn’t for me as a garage once in a while sharpener. If I was trying to make $$, then I understand investment. So after a bunch of Google help, I found a $75 solution, it takes a HF 1×30, throw out the motor and get yourself a treadmill motor (DC, variable speed, reversible, high torque/low speed). Pretty much every other house in America has one and most are not used. Plenty of people give them away and the motor +electronics (important) are easy to rip out. It takes some reasonably straight forward wiring, mounting, redrilling, etc but is very doable. You end up with a 1×30, DC, variable speed, reversible, vertical or horizontal setup for $75. I’ve even used it to remove serrations. As a bonus, there is a second output shaft for a buffer. I am not the first and definitely not the last.
Nice cheap setup Reedheads. I wish I had this setup when I converted an old serrated bread knife to a smooth edged utility knife. Took me many hours and wasted stone wear so much so I just had to re-order the 100/200 stone set. Next time I pull out my 75 year old bench grinder for projects where I have to remove a lot of steel or repair a chip by re-profiling.
08/04/2019 at 2:25 am #51335I’ll go a little bit off the belt sander path to announce that I’ve just purchased a low-speed (1800 rpm) bench grinder, as I had a need to grind wood plane irons and chisels more accurately in prep for sharpening on my WEPS w/ chisel adapter.
I chose 1800 rpm so as to reduce the chance of over-heating edges. I got the RIKON rig on sale at Woodcraft for $110. They had been on sale at Rockler the previous week for $100, but I failed to pull the trigger in time. With either supplier, I qualified for free shipping. The Rikon comes with white wheels; one fine, one coarser.
Holding chisels and plane irons for straight, cross-direction grinding requires some sort of rig. I bought a blade holder made by Veritas – an excellent woodworking tool maker, but tried to get by with a home made jig, but wasn’t happy with it. Then I found a complete rig for $33 on Amazon. Made in China, of course. I was quite pleased with it, but still decided to make a few mods to increase its robustness, which worked out very well. Then I made a maple version of the mounting base, so I can switch from side to side. Am considering a second rig so I don’t have to make adjustments with the switch. For $33??
If there’s interest, I’ll be glad to share details.
-
This reply was modified 4 years, 9 months ago by
-
AuthorPosts
- You must be logged in to reply to this topic.