Ascending Stone Progression at 800x
Recent › Forums › Main Forum › Techniques and Sharpening Strategies › Abrasives › Ascending Stone Progression at 800x
- This topic has 30 replies, 9 voices, and was last updated 03/30/2013 at 12:49 am by
 cbwx34.
-
AuthorPosts
-
08/18/2012 at 2:46 am #4702
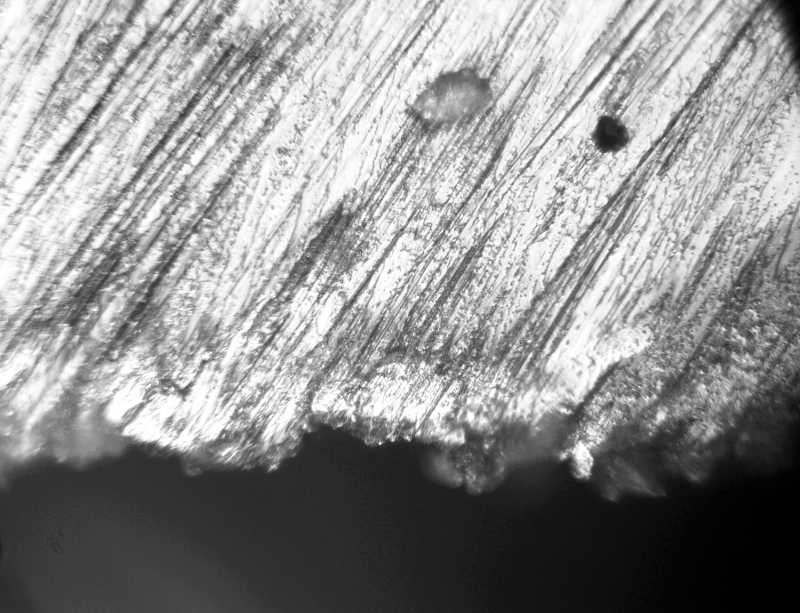
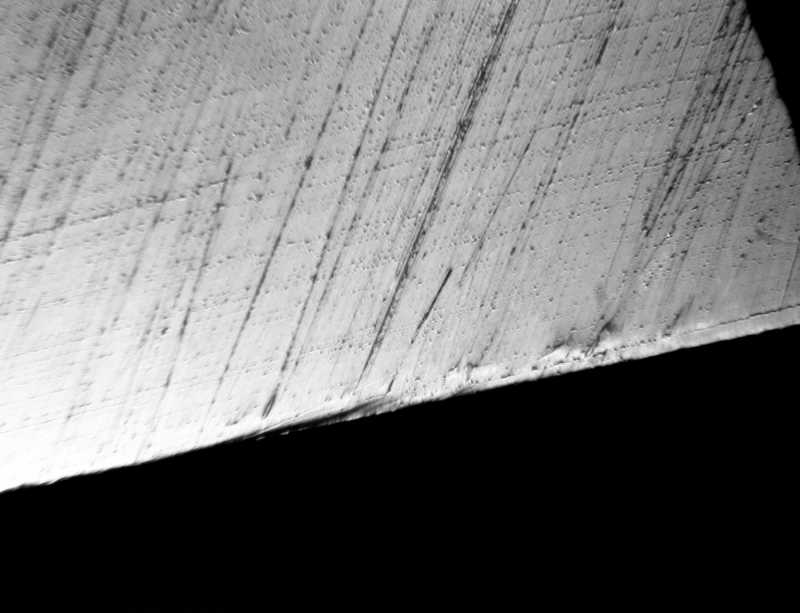
Here is a fun study I started this morning – I’m taking a series of identical blades through the different stones I have. I started with the 50# diamonds and so far have progressed up through the 1um strops. So, without further hesitation, here are the images:
50# Diamond Stone
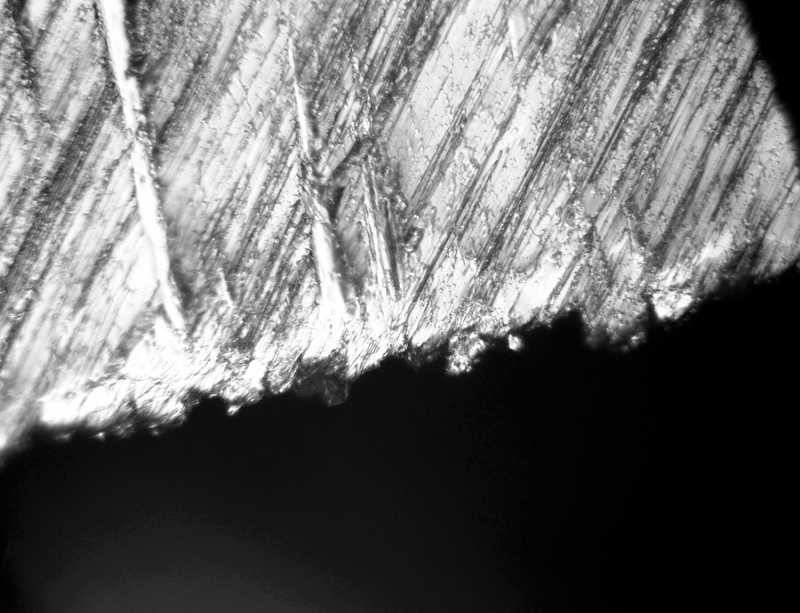
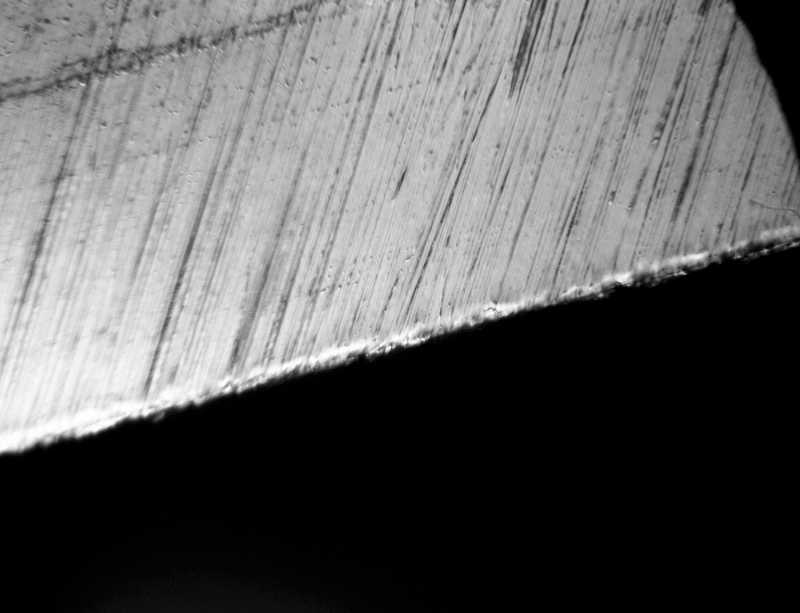
80# Diamond Stone
It’s difficult to clean the edge of the blade since it’s so toothy and snags just about everything it touches. There is some residue on the edge, especially in the 50# image.
-Clay
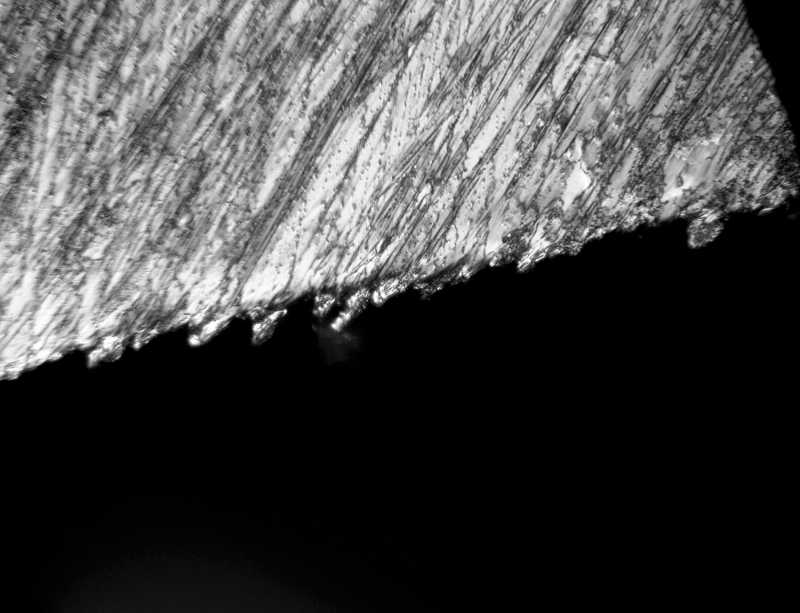
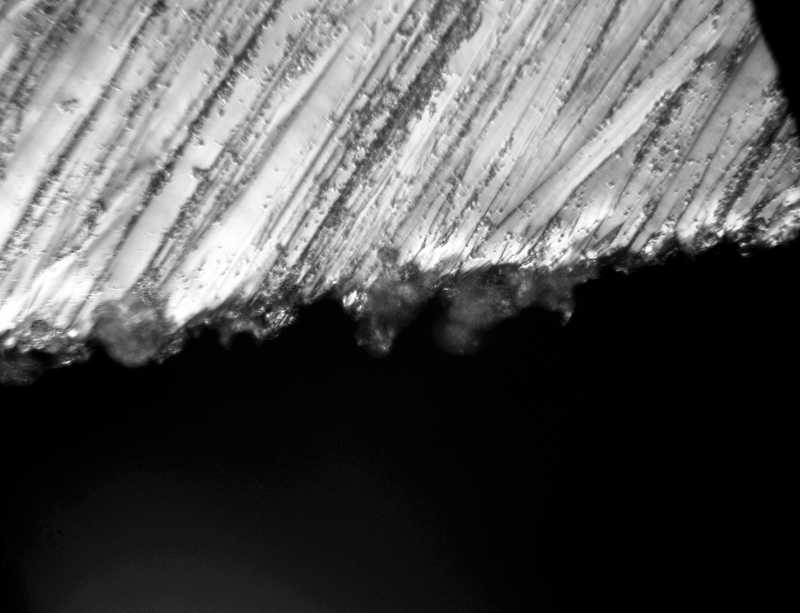
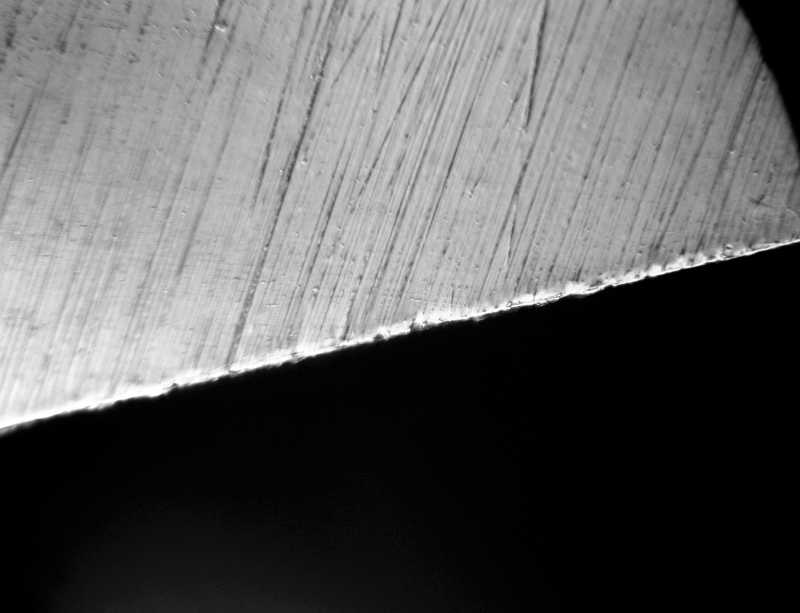
08/18/2012 at 3:14 am #4705Next step were the 100# and 200# diamond stones. It’s worth noting a couple of things:
1) All of my stones are very well worn in after many hundreds of sharpenings, so they’re not nearly as aggressive as they were when new. I’ll do another progression soon with brand new stones for comparison.
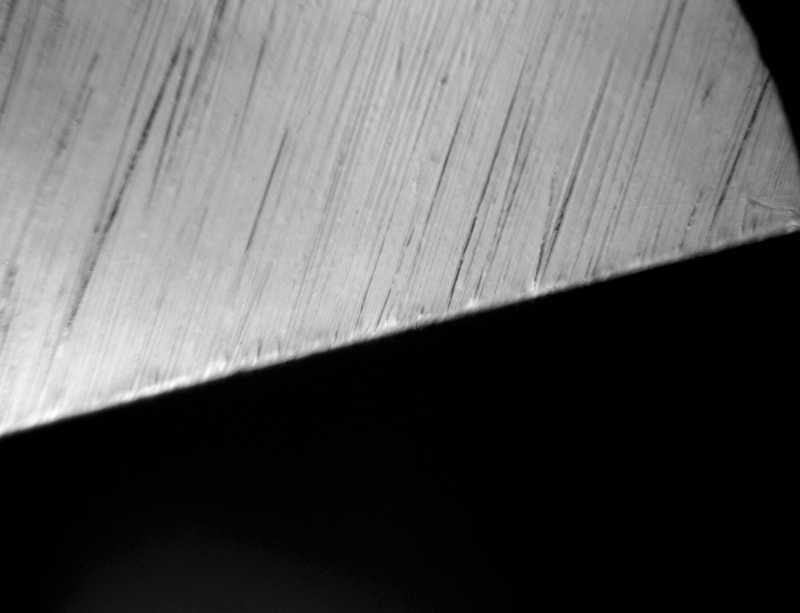
2) My 200# stones are more aggressive than my 100# stones because of the two, the 100# stones have gotten much more wear since I generally use them to take off the bulk of metal when I’m cutting the bevels in. By the time I switch to the 200# stones, I’m already in refining mode and so they don’t get much work, especially since I tend to spend more time with the 400# and 600# stones for refining the edge. In the future, I might switch back and forth between the 100# and 200# stones for re-profiling before moving on to the higher grit stones.
100# Diamond Stone
100# Diamond Stone
-Clay
08/18/2012 at 3:20 am #4708Onward to the 400# and 600# stones:
400# Diamond Stone
600# Diamond Stone
My 400# and 600# stones are so well worn in now that they give nearly a mirror edge to the naked eye at a casual glance. You can’t read fine print in the reflection, but you can make out your surroundings and easily see whose sneaking up on you.
-Clay
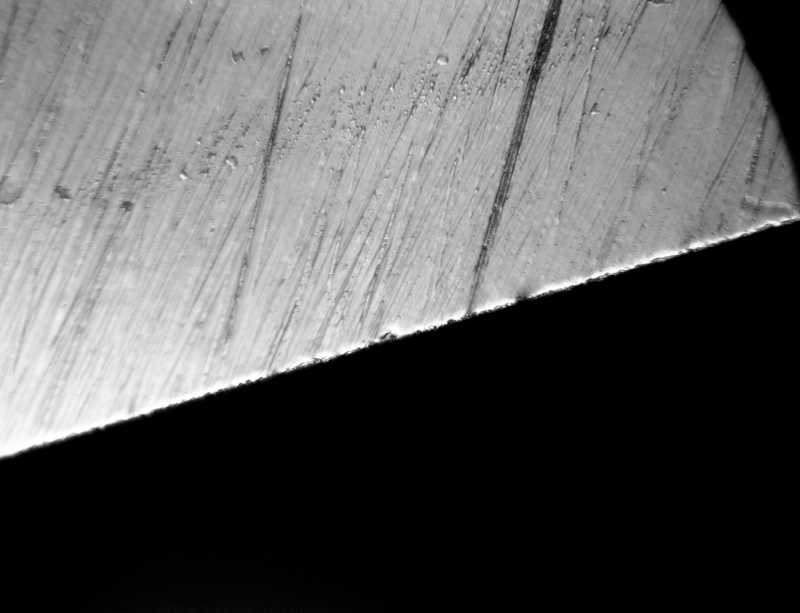
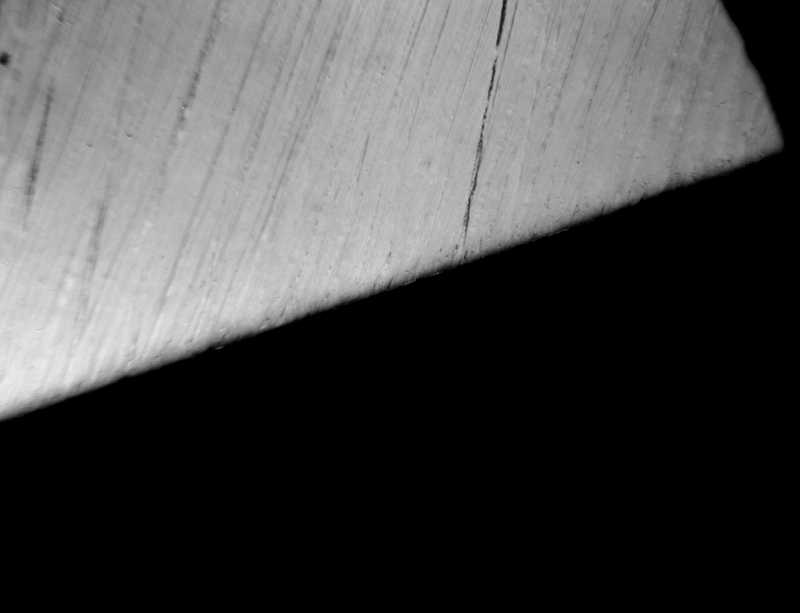
08/18/2012 at 3:25 am #4711Next came the 800# and 1000# diamond stones. These stones have seen less use than my 600# stones since I often play around with jumping straight from the 600# stones to strops, ceramics or waterstones. I need to spend more time getting these stones properly broken in:
800# Diamond Stone
1000# Diamond Stone
-Clay
08/18/2012 at 3:29 am #471408/18/2012 at 3:41 am #4718Now the Micro-Fine Stones:
Micro-Fine (Coarse)
Micro-Fine (Fine)
I’ve been intrigued by the small burr continuing along throughout the progression. I’ve been using edge trailing strokes which suggests another study to come. I’ve been especially conscious of stroke pressure, using a whisper-lite tough to finish each stone. Even so, I’m still seeing a tiny burr. From here, I moved onto some strops…
Attachments:-Clay
08/18/2012 at 3:47 am #4721For this portion, I lowered the angle by 2 degrees per side to try and limit the amount of rounding that would occur. I used 1um Diamond on Cow Leather Strops. The first go round was just ten very light strokes per side:
I did another 50 strokes per side with the 1um strops, this time with more pressure and was a little surprised to see some rounding considering I was working a full two degrees lower per side:
-Clay
08/18/2012 at 3:50 am #4722The next phase will be to continue on through the strops at least as far as .25um on kangaroo and get a perfect edge (I hope.) From there, I’ll probably do a descending progression so that we’re looking at the grits from a clean slate and aren’t seeing scratches left over from coarser stones.
-Clay
08/18/2012 at 4:02 am #4723You can’t read fine print in the reflection, but you can make out your surroundings and easily see whose sneaking up on you.
That’s funny. :cheer:
For this portion, I lowered the angle by 2 degrees per side to try and limit the amount of rounding that would occur. I used 1um Diamond on Cow Leather Strops. The first go round was just ten very light strokes per side:
I did another 50 strokes per side with the 1um strops, this time with more pressure and was a little surprised to see some rounding considering I was working a full two degrees lower per ]
At some point, I’d like to see an edge stropped at a higher angle (4-5 degrees like in Verhoeven’s sharpening study) after the stones or ceramics, to see what it looks like. One theory is that it doesn’t actually round over the edge, because the way the leather contacts the edge changes. Maybe? :whistle:
08/18/2012 at 7:32 am #4725At some point, I’d like to see an edge stropped at a higher angle (4-5 degrees like in Verhoeven’s sharpening study) after the stones or ceramics, to see what it looks like. One theory is that it doesn’t actually round over the edge, because the way the leather contacts the edge changes. Maybe? :whistle:
Sure, I’ll flatten the bevels back out and give it a go.
-Clay
08/18/2012 at 8:13 am #4728I did a quick job of re-flattening the bevels with the 800# and 1000# Diamond Stones and the the Micro-Fine Ceramics:
Then I widened the angle by 4 degrees per side and stropped it with the 1um Diamond and Leather Strops with 10 very light strokes per side:
Attachments:-Clay
08/18/2012 at 8:36 am #4729So much for that theory. :sick: Looks pretty rounded.
Thanks!!
08/18/2012 at 8:41 am #4730So much for that theory. :sick: Looks pretty rounded.
Thanks!!
You bet. I thought the same thing. It was only 10, very light strokes too.
-Clay
08/18/2012 at 11:37 pm #4734This could also be an opportunity to try balsa and see the results. Less give in the material might result in less rounding of the edge. Just a thought.
08/19/2012 at 1:04 am #4736I’d like to see balsa too. Get to work Clay!!! 🙂 🙂
This thread has a ton of interesting info… makes me wonder if I spend too much time with leather. Pretty impressive how clean the edge got with just 10 strokes at a lower angle! I’m also wondering about the burr left with the Micro Fine stones… although I noticed it didn’t seem to be as prevalent the 2nd time around (before you did the higher angle stropping). Wonder if an edge leading stroke with the ceramics would eliminate the burr more effectively.
Man, this is good stuff. I’m glad you’re doing this!!
-
AuthorPosts
- You must be logged in to reply to this topic.