MODS!!! Lets see em!!
Recent › Forums › Main Forum › Sharpener and Accessory Maintenance › MODS › MODS!!! Lets see em!!
- This topic has 290 replies, 53 voices, and was last updated 11/28/2023 at 9:26 am by
Micheal Fuller.
-
AuthorPosts
-
02/23/2016 at 11:30 am #31506
Anonymous
Inactive- Topics: 14
- Replies: 427
ET… can you post the exact part number for your $20 scope ?
there are quite a number of these scopes on the market, they all come from China, and from the same manufacturing facility I would think, that how china works… they do have different degrees of quality.. those at this low end see no quality control at all, The cost of quality is costly to the bottom line.. these scope are found on Amazon for 16 to 25 dollars. They all look the same, or very slightly different.. many of these scope are very specific to their software application. Some work with windows, some do not. Some work with Mac and windows, Some only work with early versions Of windows… very few work with windows ten. I have windows ten and this scope did not work, I used the windows software that came with the cope but it did not work in Win 10. I was about to send it back when I added it as a device to my webcam. as a device, and use it with my win 10 software.
The one I bought is no longer available.. but similar to this one. NOTE: its windows only
04/03/2016 at 11:15 am #32933I am new the forum but wanted to say I like what you did with the paddles standing up like that. I am going to create something like it.
Thanks
Eddie
Eddie Kinlen
M1rror Edge Sharpening Service, LLC
+1(682)777-16221 user thanked author for this post.
12/09/2018 at 12:19 pm #48452Hi All,
So I’m the proud owner of a new WE130 system. I’ve got two knives under my belt, they’re not scary, hair-popping sharp, but they’re a hell of a lot better than with any other system I’ve tried! With practice and using finer grits, I’m very confident I’ll master sharpening using the Wicked Edge.
Before I started sharpening, I wanted to implement a few mods I’ve seen here, as well as one or two of my own. The first are the RC car dust covers. They’re a must in my opinion. I had some trouble in the beginning with them, as they were so stiff – I’ve ended up cutting off the somewhat inflexible base, and just using the flexible top half. It covers joints adequately and doesn’t hinder their movement at all.
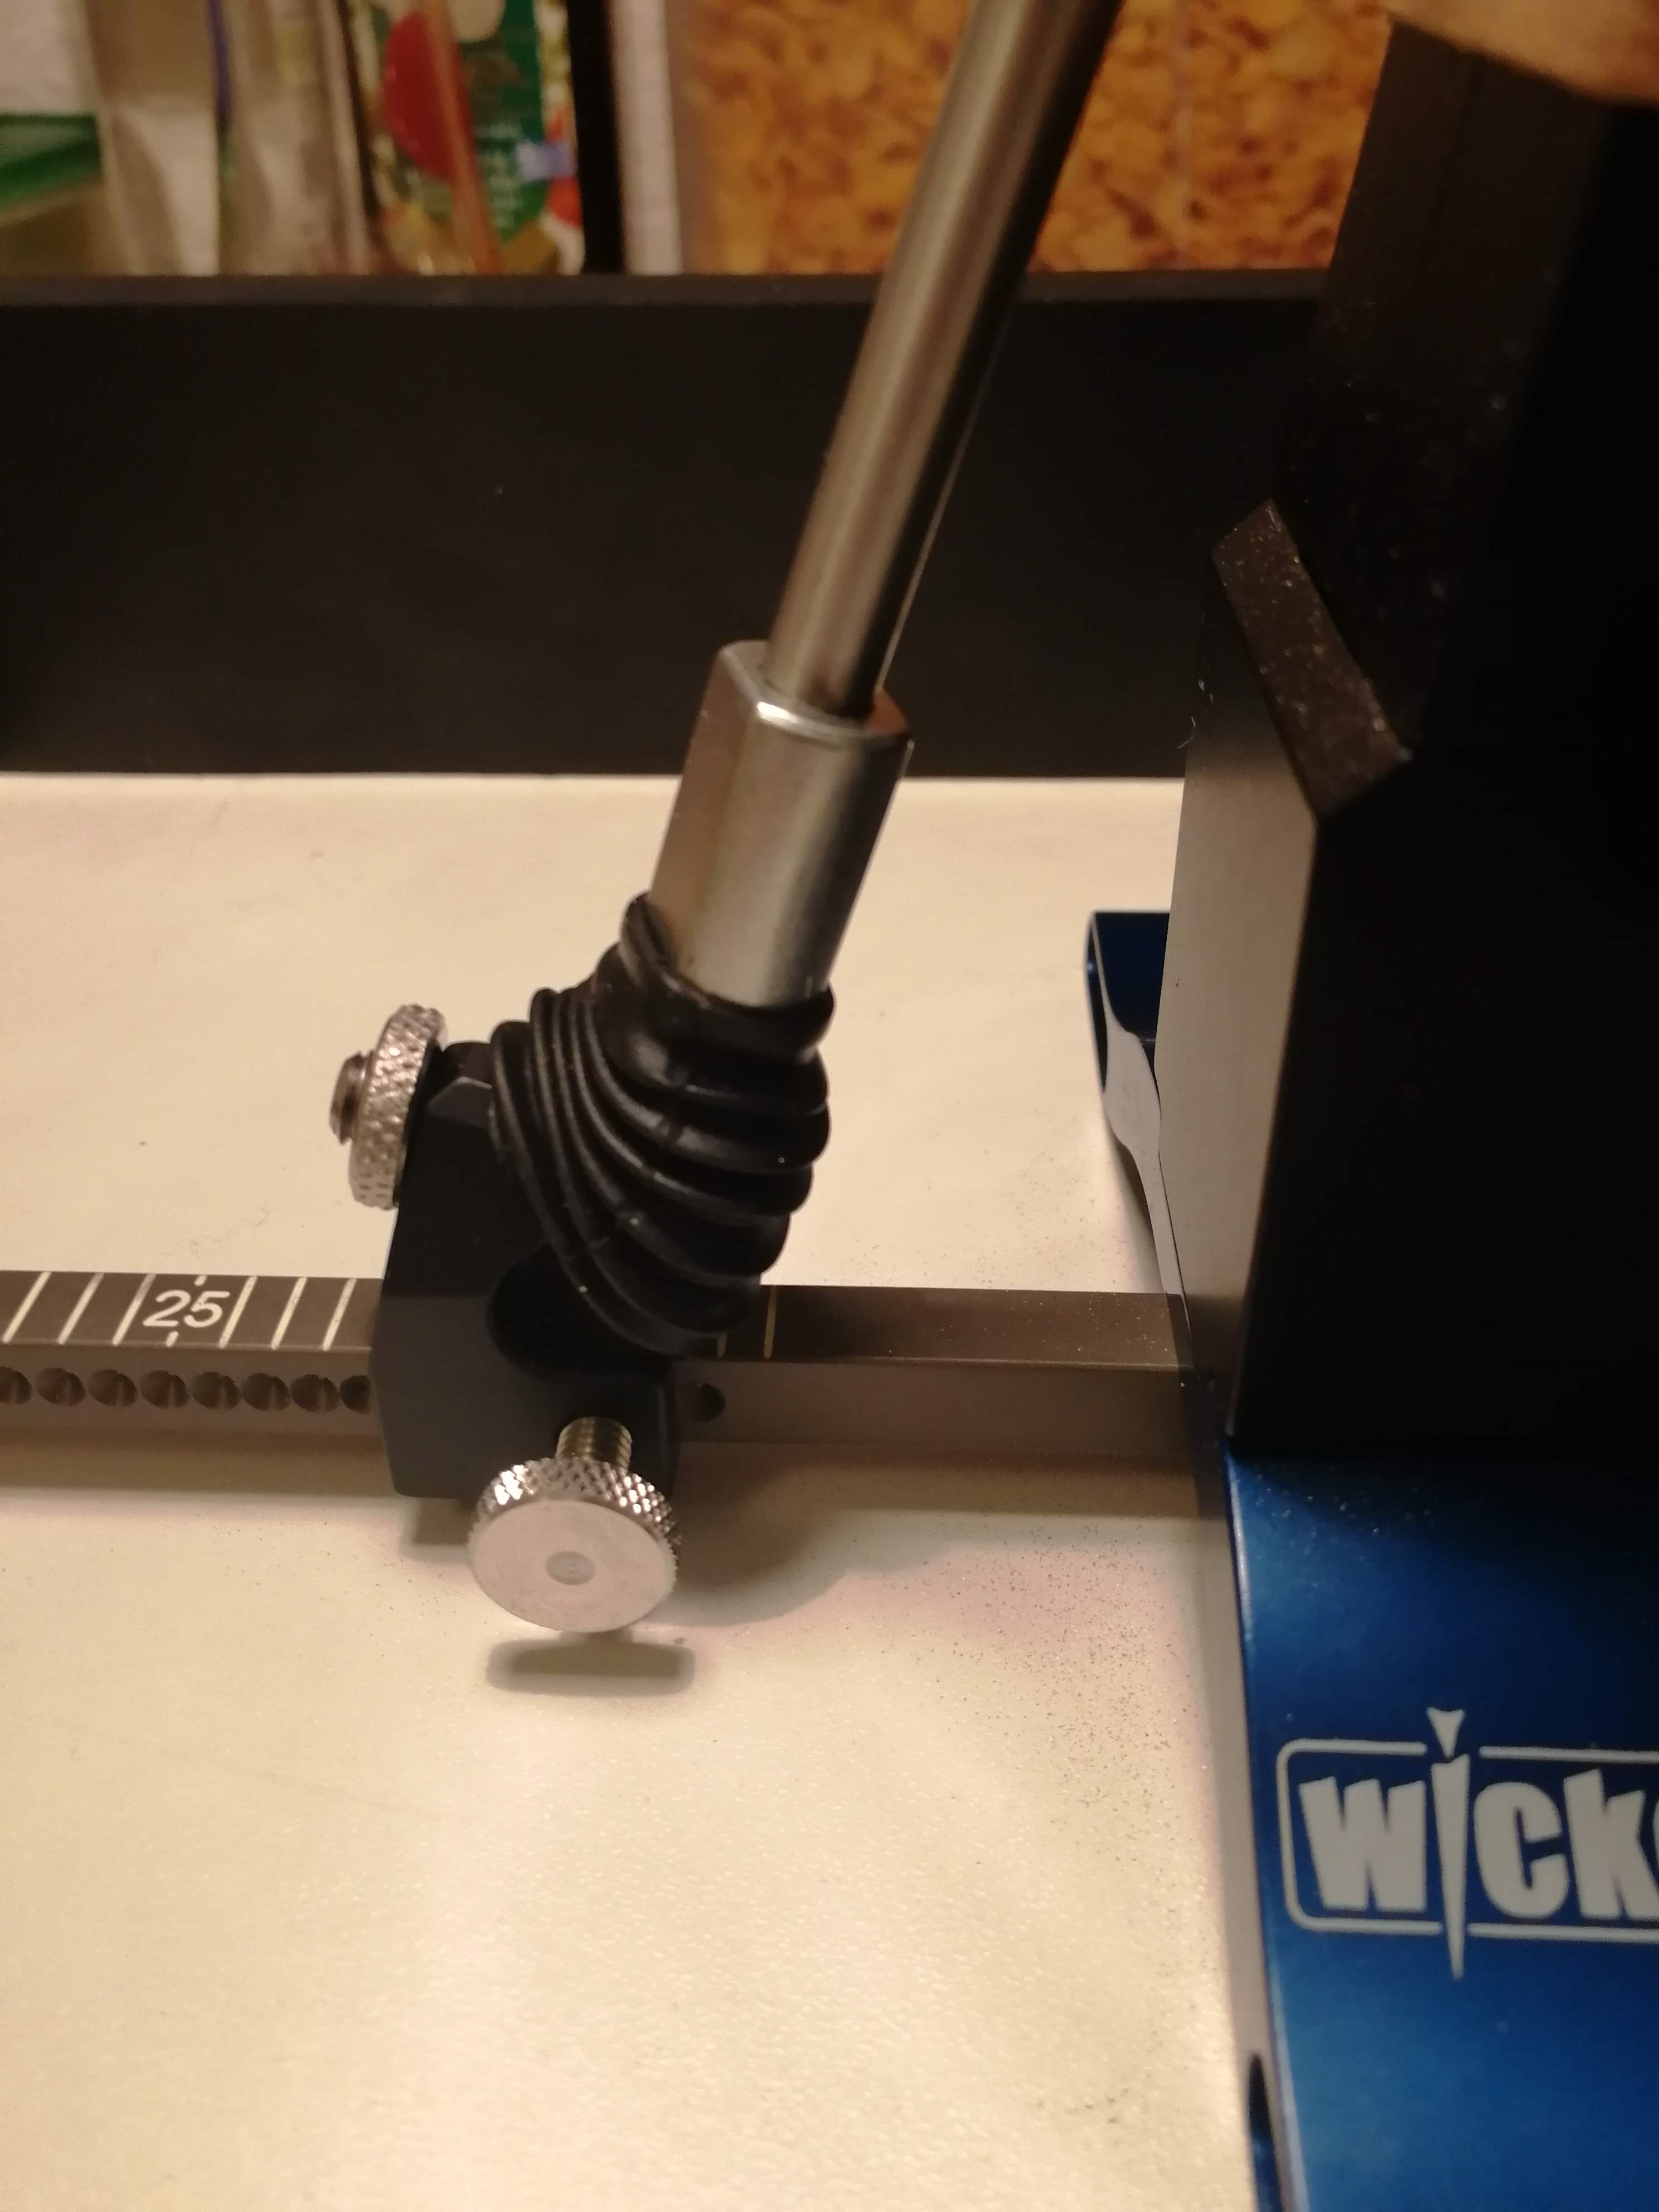
I also put another of the flexible covers over the pivot of the cam mechanism, to prevent dust getting inside. Judging by the amount of diamond dust and metal shavings landing on it, it seems like a good decision!
Another thing which was bothering me, was that the height key and the allen key, which fit into the base, were very loose. To remedy this I placed a small piece of tape inside where the tools sit; this is sufficient to grip the tools enough that they don’t slip out under gravity.

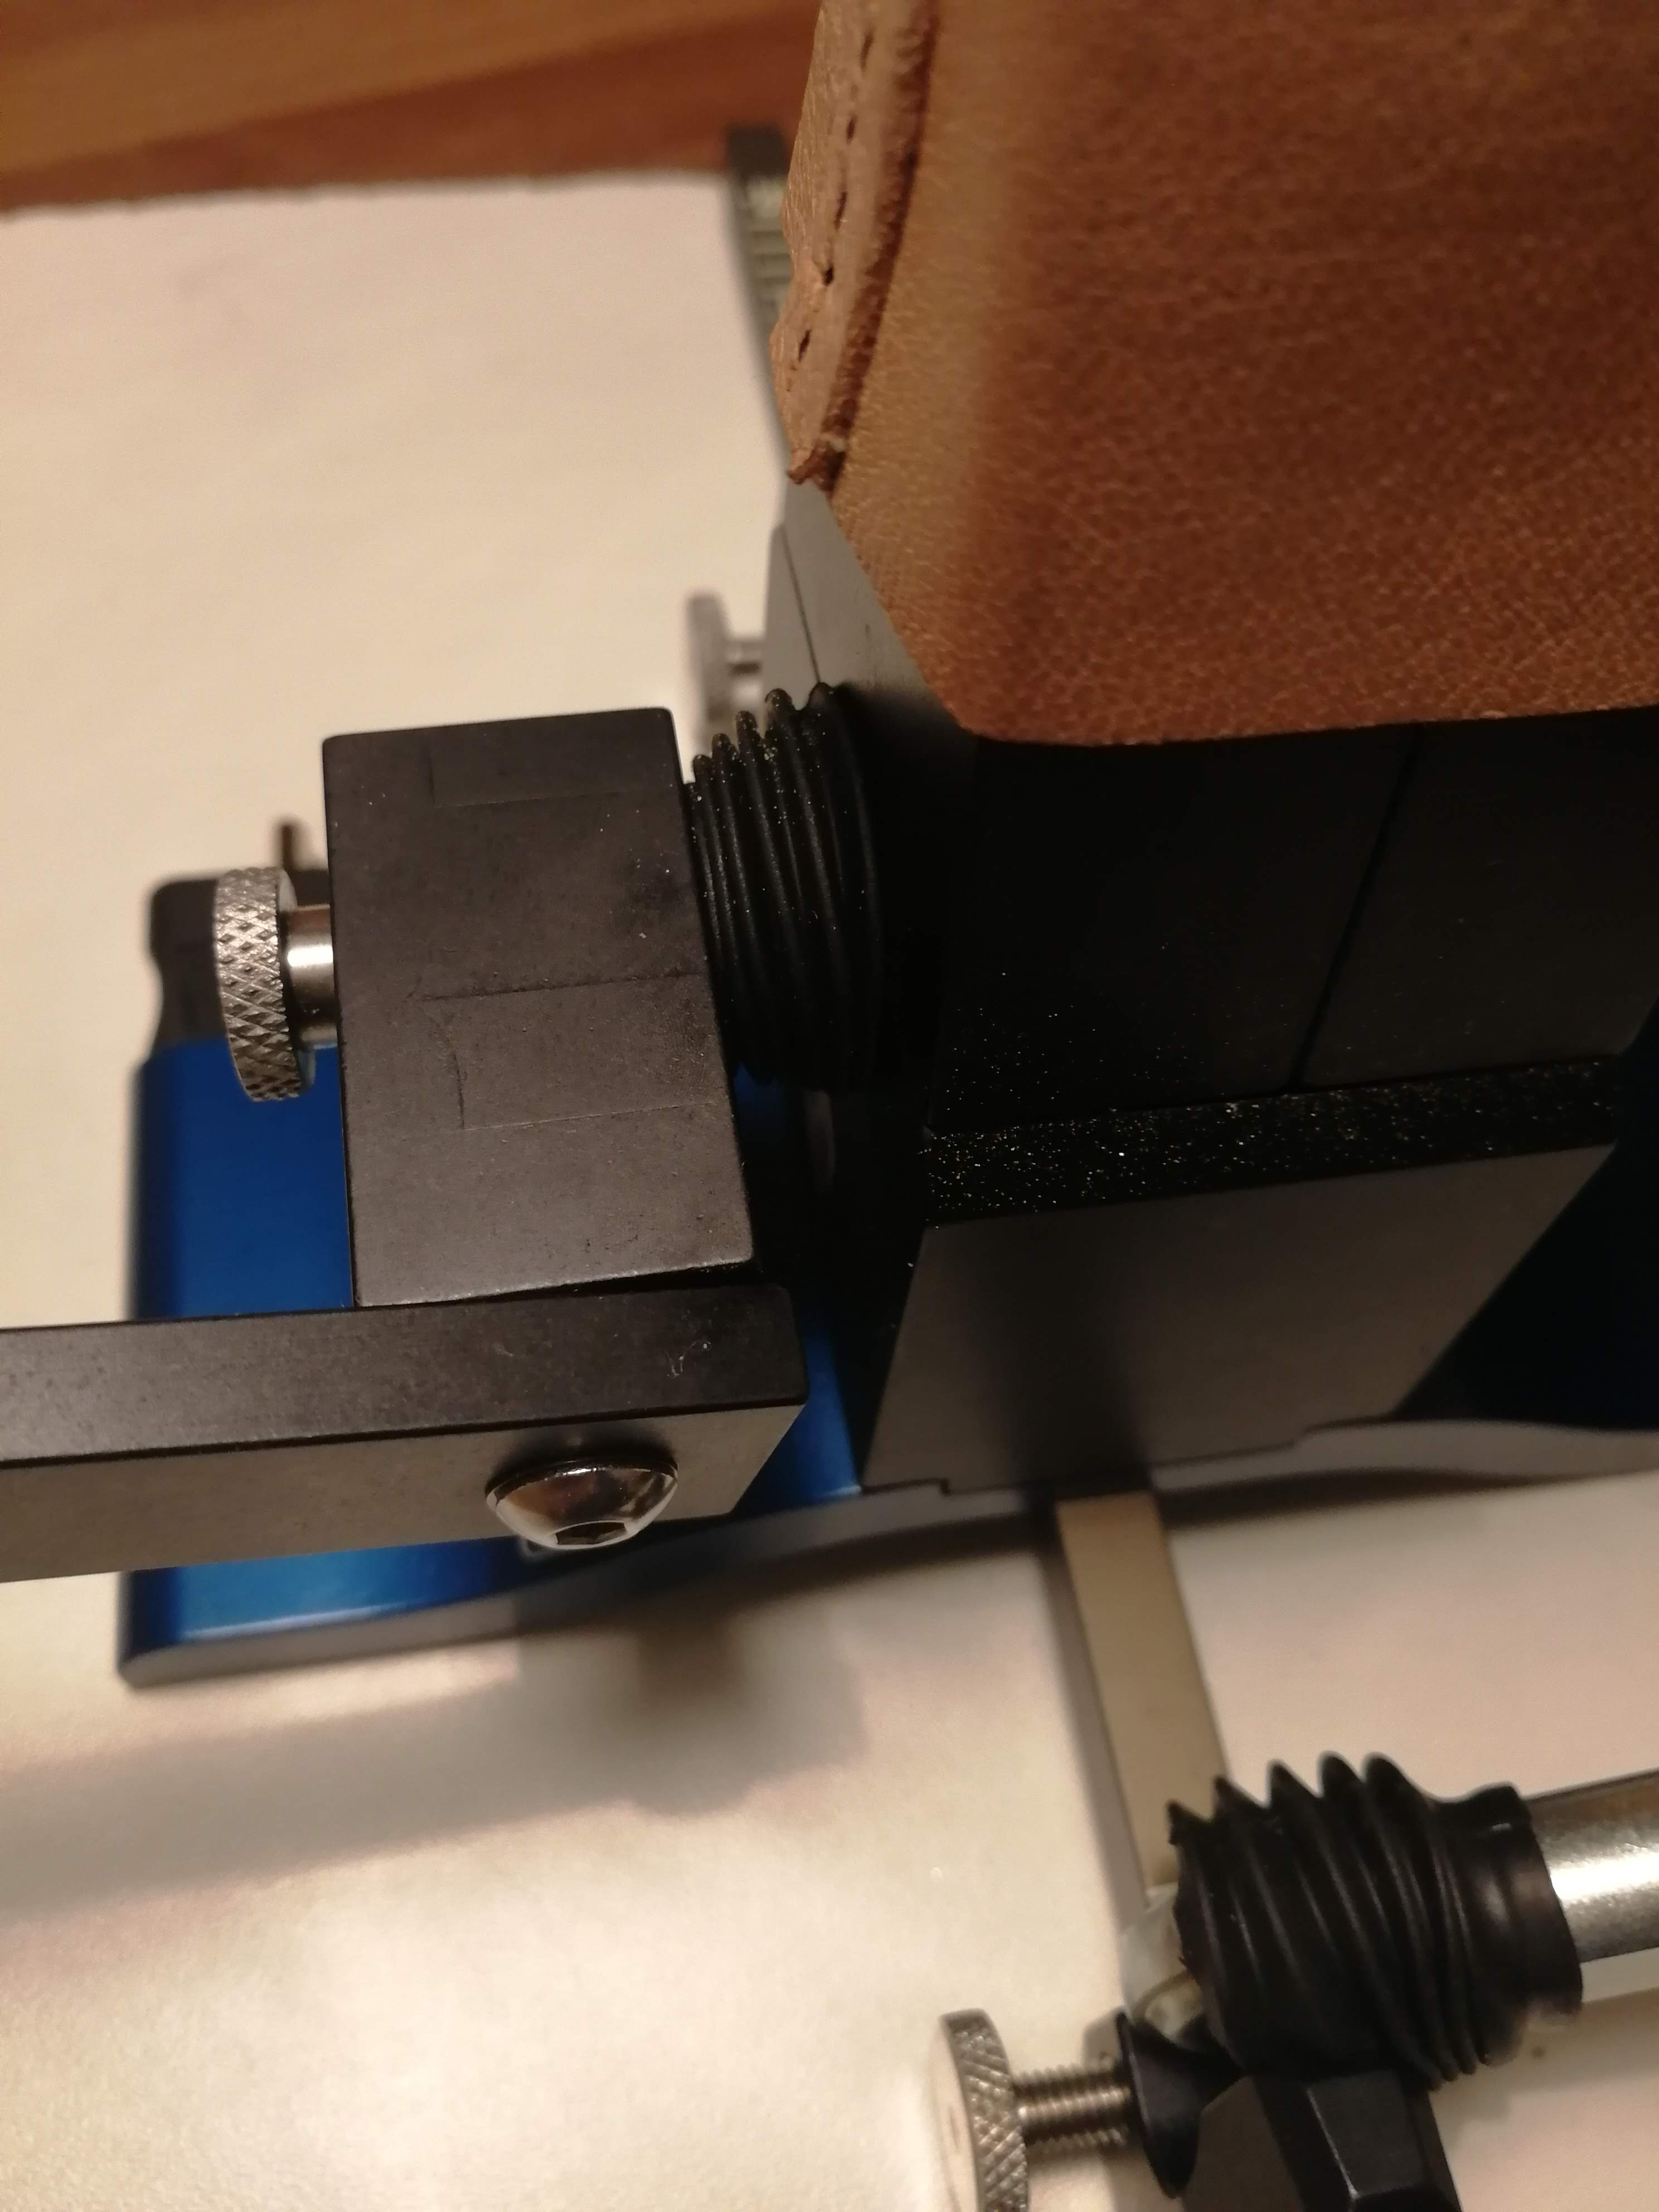
Lastly, I wanted to make a cover, a shroud of sorts, for the jaws and the vice, to help keep then clean and most importantly stop dust from entering the cam mechanism from the sides. I’ve seen a mod here, or somewhere online, where the user created a cover from sheet metal. I’ve made mine from leather, for three reasons:
- As a budding leatherworker I’ve got some material lying around, and thought it a good opportunity to do some leatherwork.
- It might be somewhat easier for certain users and involve less tools to create a cover from leather, than from sheet metal.
- Many people in the forums have mentioned using chamois leather to hold their knives more securely. A shroud made from leather therefore serves this purpose, in addition to keeping the dust out.
I made a mock-up from paper first, to test the measurements, before marking out and cutting up the leather.
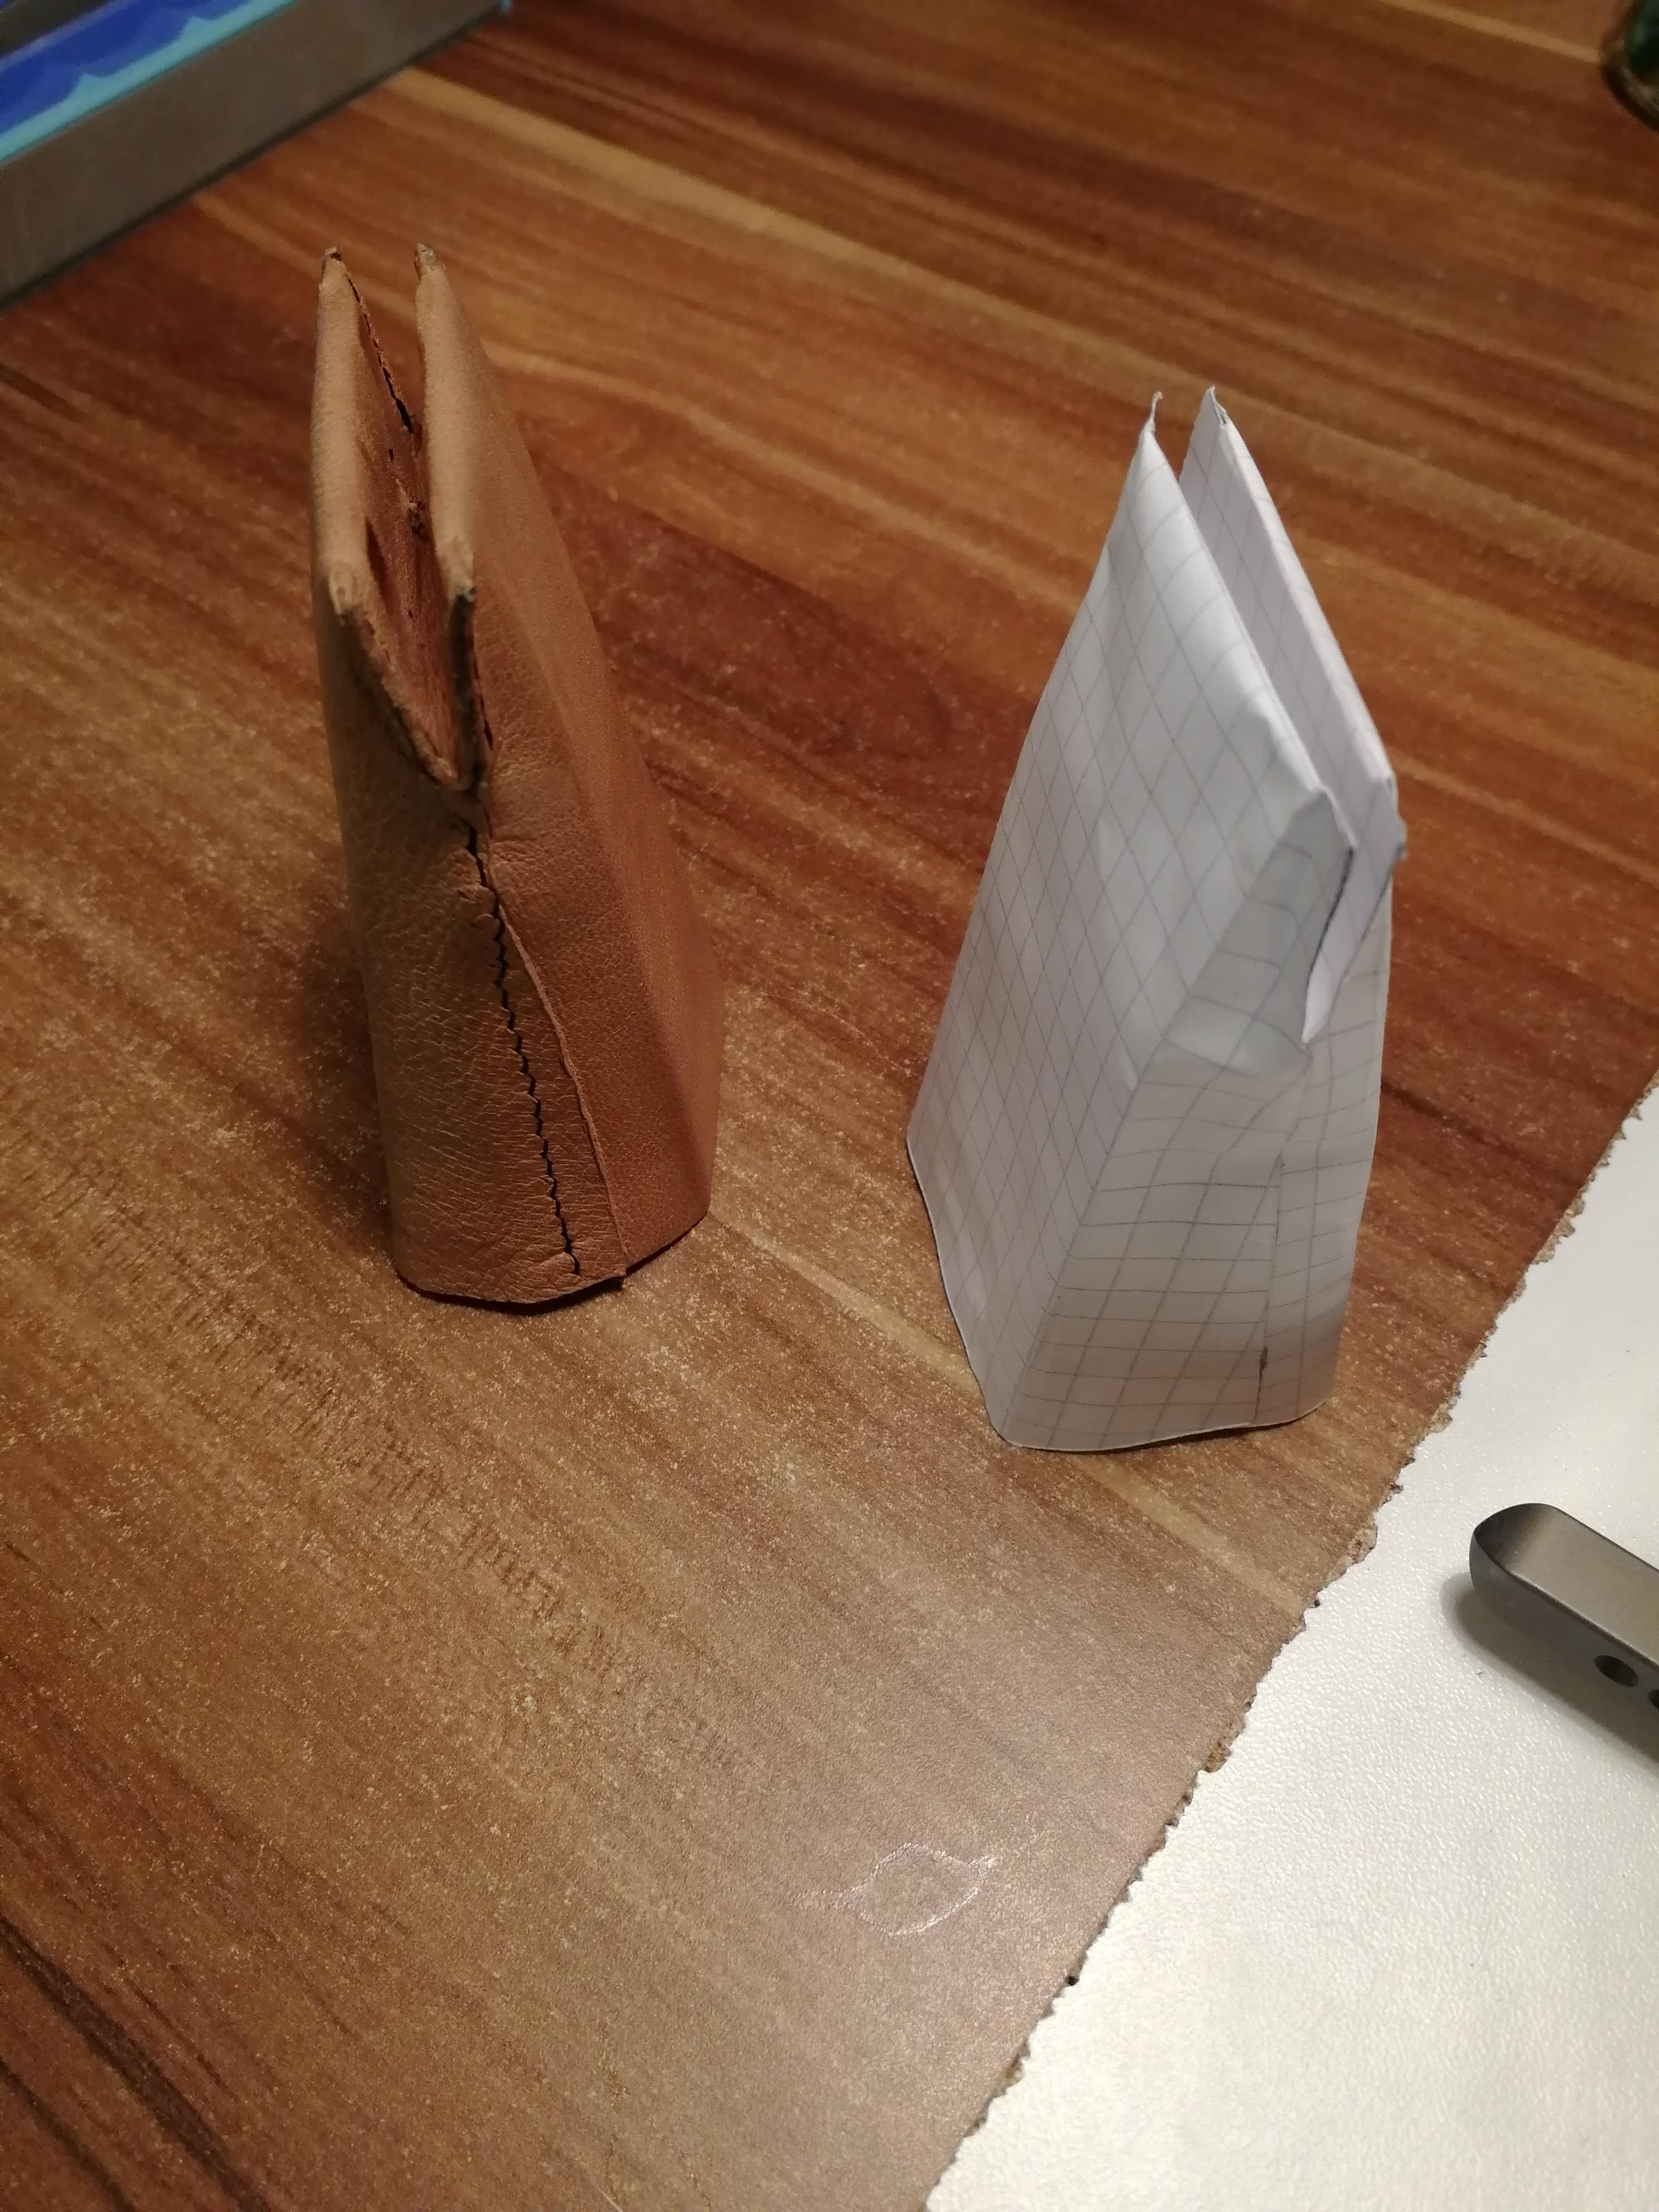
This mod is for the Generation 3 Cam-Lock Split Jaws. I’ve got a template available as a PDF, which I’ll upload in case anyone would like to create their own.
-
This reply was modified 5 years, 4 months ago by
 Alchemist.
-
This reply was modified 5 years, 4 months ago by Alchemist.
Attachments:
You must be logged in to access attached files.
2 users thanked author for this post.
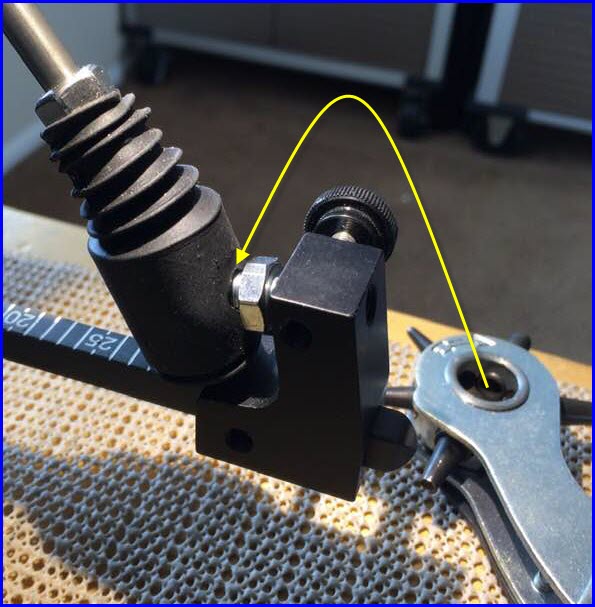
12/09/2018 at 12:51 pm #48458This mod is for the Generation 3 Cam-Lock Split Jaws. Here’s another couple of photos of the finished shroud. I made holes in one side to accommodate the height key – this means some dust could fall into the vice, but it will still be much less than if the vice is fully open.
I’ve attached a PDF file of the shroud (Scale 1:1) which can be printed out and traced around. It’s fairly self-explanatory how to put it together, but here are a few short steps:
- Fold face A to face B along the centreline.
- Fold in the opposite direction to step 1. along B-B and C-C.
- Glue the sections which fit over each of the jaws first (2o mm strips, up and down).
- Fold the triangular pieces on the sides around the front and back of the vice and mark where they meet. Glue.
- For extra strength, sew the pieces where they were glued.
- Locate the hole for the height key. Punch them out using a 3 mm hole punch.
-
This reply was modified 5 years, 4 months ago by Alchemist.
Attachments:
You must be logged in to access attached files.
1 user thanked author for this post.
12/11/2018 at 5:37 am #48485I hope this doesn’t ruffle any feathers but I purchased another companies product. I was trying to rig up a way to wicked edge my axes and I saw this company had an ax sharpening system. It was mode expensive than I was willing to spend, but after looking into it they sell just the magnetic jig for just about 50 bucks. I was going to spend 50 at home depot to try and build something so I picked it up. I got a 3′ piece of no. 10 all thread and cut it to the length I needed and used the belt sander to take the threads off the top end so it would slide through the jig easily. I had to use some aluminum duct tape to build up the rod a bit where the wicked edge stone goes so it would fit snug. A jam nut set up on both sides holds it in place and it seems to work great. I spent a bit of time list night trying to re profile this ax to 25 degrees, I am almost to the apex. This ax was a rusty piece of crap and it went over night in evapo rust and then I sanded it up to 3000 grit. It was pretty polished when done so Im looking to see just how polished a edge I can put on it. Im thinking 25 degrees with a 28 degree MB.
Attachments:
You must be logged in to access attached files.
12/25/2018 at 5:37 pm #48705Here’s a new one. I decided I didn’t like the detent on my Gen 3 Pro and wanted to come up with something.
What? I adjusted the ball detent out to where it no longer touched the plate. I drilled a hole through the pointer end of the detent arm, centered on the pointer tip. I also installed a series of holes in the edge, coinciding with the detent points. This allows me to make position changes without the mechanical interference of the detent ball, using a pin similar to an Allen wrench. The video clearly shows what I’m talking about, but here’s a closer image:

How? I had an extra degree plate from a beta unit, so I rigged up a fixture to index the plate to the pointer arm on my bench top drill press. First, I drilled a hole through the pointer. I carefully laid out and then drilled a hole (the same diameter as the one in the arm) through the plate. I clamped the arm to the drill press (base rotated to vertical), leveled everything and then drilled a hole through the arm into the drill press base, which is MDF. I located the plate to the arm with a 0.250″ dowel pin and indexed and clamped the plate to the arm, just as they were on the rig, but rotated to vertical. Then I drilled through the pointer into the edge of the base for about a quarter inch. For each position, I’d remove the clamp, rotate the plate to the next detent, reclamp and drill the next hole, etc. If it’s not clear, the dowel was inserted through the plate and the arm and into the drill press base. This held my vertical reference for the entire procedure.
12/25/2018 at 6:10 pm #48706Tom, what did you accomplish with this modification? I understand you’re in control of your positions, and they’re no longer dictated by the detent balls. Are your positions different from where the detents positioned you, or closer? How has it changed?
Marc
(MarcH's Rack-Its)1 user thanked author for this post.
12/26/2018 at 2:30 am #48714The objective had nothing to do with variation. I was simply replacing the ball detent with a pin detent, to make the operation easier. And it is much easier and smoother to operate. I can move the arm with one finger, if I so wish, and the pin is every bit as positive as the ball.
Actually, I took great pains to align the pin detent with the ball detent, so the “degree” graduations would remain the same.
I struggled with how I might include a spring to keep the pin engaged with the plate, but after just a few seconds of use, it was obvious that it wasn’t necessary. I’d need to machine a pin with a flange and a retainer bushing, and the pin isn’t going to fall out in normal use. For those times where I put the Gen 3 Pro in storage (while I use one of my older rigs), I stuck a small magnet to one of the bolts mounting the base to the sub-base. I’ll just pull the pin and touch it to the magnet.
2 users thanked author for this post.
12/26/2018 at 11:44 am #4872212/27/2018 at 2:11 am #48749Thanks, Clay. You’ll note that I didn’t drill holes all the way out to the ends, because my pin of choice was too big. The drill was 0.154″, I think, and a 0.063″ (1/16″) would probably have worked, but would have been too small for my fat fingers.
BTW, I placed 0.007″ shims under the plate so that the arm would rotate more freely.
1 user thanked author for this post.
12/28/2018 at 11:36 am #48769I really liked the idea of the RC axel dust covers, I decided to use the entire cover by using a leather punch tool and punching out a cloverleaf pattern on the bottom section of the boot (stiffer section). It fit over the nut just fine and keeps that area clean; I also took the initial punched cut out and used it within the locking screw housing to help protect the threads a bit.
4 users thanked author for this post.
12/28/2018 at 12:27 pm #48775Nice job on the dust cover boots.
I use nylon knurled knob thumb screws 3/8″ X 10-32 I sourced from Grainger to lock my micro-angle adjustments in an opposing clamping fashion. The nylon holds tight and doesn’t bugger the threads. This locking method applies to the older, pre-2017 versions of the WE 120 & WE130. Now the new versions, 2017 and later, WE 120 & WE130, utilizes a different mini “L” bracket and micro-angle locking mechanism.

Marc
(MarcH's Rack-Its)Attachments:
You must be logged in to access attached files.
2 users thanked author for this post.
04/18/2019 at 9:56 pm #50241I remember seeing a mod on this thread, it was late last night and I might’ve been dreaming, something to stabilize longer blades. I was reminded of it while watching one of Clay’s videos sharpening what looked like a kitchen knife with a 70/30 angle and the handle end was vibrating quite a bit. Could someone here point me in the right direction please. I would like to incorporate that in my set up but can’t find it again. Many thanks.
Ted
04/19/2019 at 3:54 am #50242Brewbear: My first WE (2011) came with a pin that would be inserted in a hole drilled in the back foot of the blue base. The tip of the pin was notched to steady the tip end of a flexible blade. Unfortunately, it was not adjustable.
A number of users have made attachments to clamp the blades on one end or the other. others of us have gone to the RAM group of accessories to accommodate the varied shapes of knives. Having three rigs, I have copied the method devised by another of our forum members. We use the RAM “Tough Claw” to clamp the handle. This allows you to mount the blade with the tip much closer to the vise. The two paper stone bases I have now have RAM’s 1″ ball mounts on the near side of the bases. The first was screwed to the base, but that was a problem in itself. Screws twisted off even with pilot holes drilled. The second base’s ball was mounted with the VHB tape. That works great. The photo below shows the two bases, but only the first has a ball installed. Today, the second base has a duplicate. I use a 3″ double-socket arm with the claw.

Gen 3 Pro rigs have no place to mount a ball, so I bought a “Twist-Lock suction cup mount.” I use a 6″ double-socket arm because the vise is a bit higher. I took the shelf section off, so the suction cup base mount is offset to one side. Also works great. Very steady.

With either rig, I can mount filet knives with the tip close enough to the vise to be workable, although the Gen 3 vise jaws are thicker. Very narrow (edge-to-spine) blades can force you to mount the blade as high as possible in the jaws – as opposed to using the height key.
Hope this helps…
04/19/2019 at 10:39 am #50247watching one of Clay’s videos sharpening what looked like a kitchen knife with a 70/30 angle
Ted, I’ve watched many of Clay’s videos. I don’t think I’ve ever seen one with sharpening 70/30 bevels. Would you please post the link to that video. I’d be interested in viewing it. Thanks
Marc
(MarcH's Rack-Its) -
AuthorPosts
- You must be logged in to reply to this topic.