A Closer Look at the Burr
Recent › Forums › Main Forum › Techniques and Sharpening Strategies › Thoughts/Theories/Science Related to Sharpening › A Closer Look at the Burr
- This topic has 5 replies, 5 voices, and was last updated 06/02/2016 at 12:12 pm by
 tcmeyer.
-
AuthorPosts
-
05/31/2016 at 2:32 am #34275
So Im still getting used to the scope for testing and want to bring interesting information back to the forum while at the same time trying to limit the length(good luck with that Cliff
 ) and number of posts so as not to blast everyone out.
Last time I tried showing edge leading vs trailing strokes on the WEPS. This time I did a few things with my belt system for ease of testing and I wouldnt be posting it here if I didnt think it could be of use in a larger sense for understanding the nature of steel and sharpening and so we can compare and contrast the differences.
The results are going to possibly be different but similar to what I hope to show in the upcoming posts on this same topic suing the WEPS, as there has been length thread discussions in the past on this “wirey” topic and the removal and prevention.
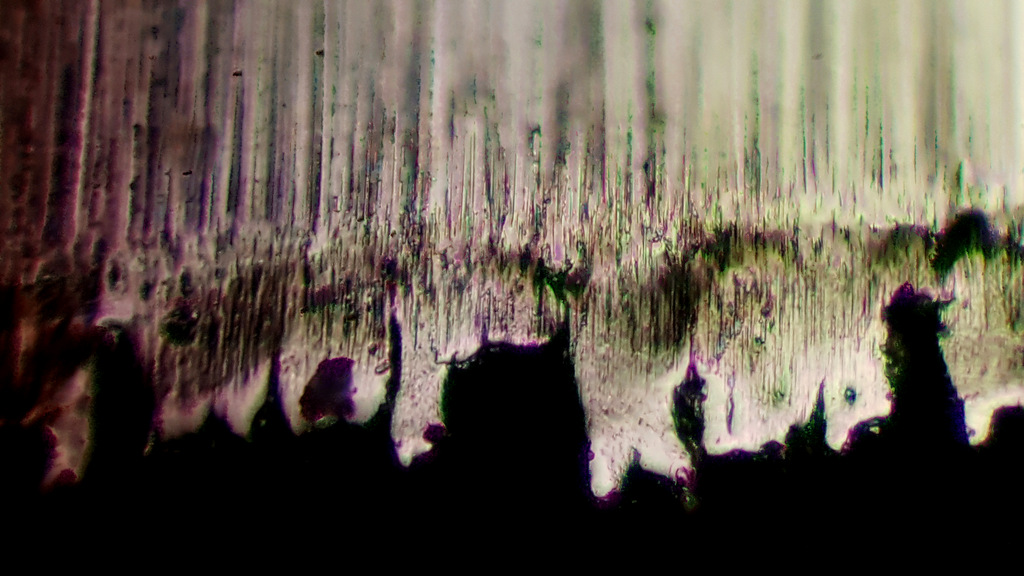
Heres the first image, a super ugly long thin foil burr. This was done holding the knife edge trailing to the belt.
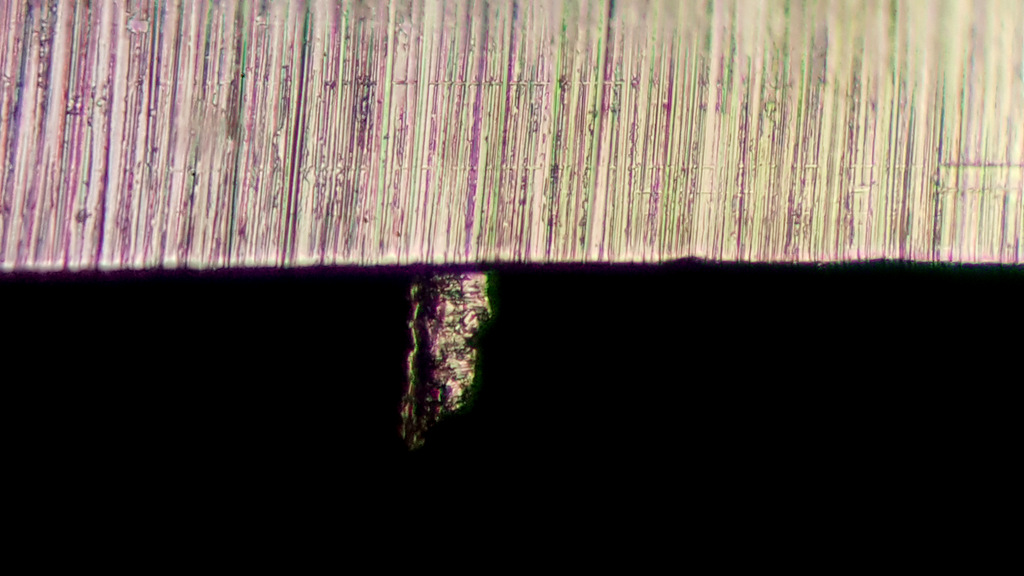
I then unceremoniously scraped it off on the end grain of a 2×4 scrap pine board…and you can see the apex is revealed under the “tinfoil”. One small scrap remains but the apex doesnt have huge chunks tore out either. Interesting.
I repeated the formation of an oversized foil burr. For reference this was a 600 grit, edge trailing again, and image was taken at 400x.
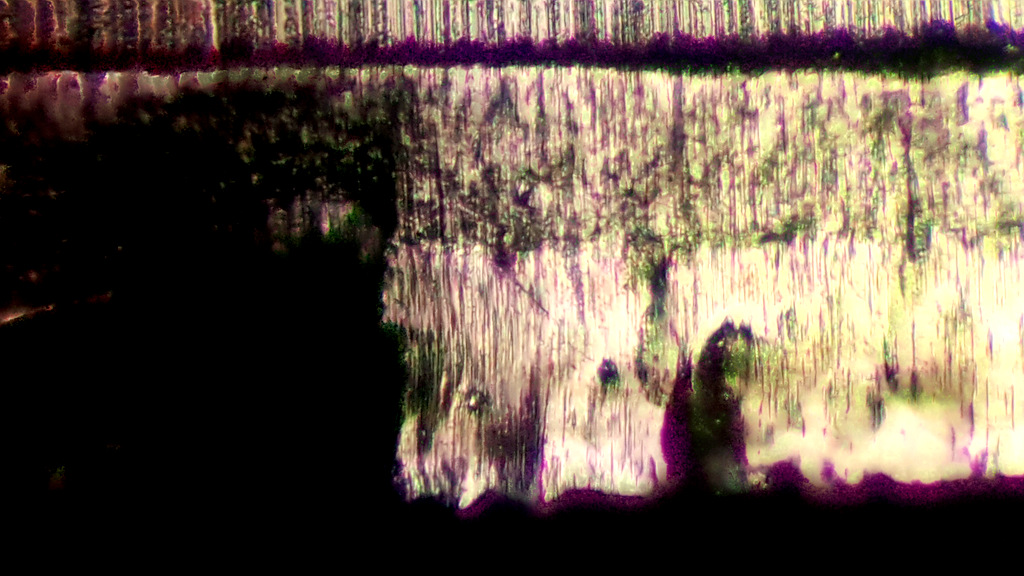
This time to remove the burr I used a leather belt impregnated with green compound. You can see the burr is gone…but it also looks like the apex has fractured or blown out somehow? Could this be from the burr itself going back n forth weakening the steel?
As a possible teaser and to open a thinking dialog here what Ive observed with my naked eye in the past using the WEPS, and hope to document under magnification next….
That if a burr is formed, especially at 100/200 or 400/600, it will be of a thicker stumpier variety. And if removed with blunt force can possibly tear out the apex(I think Ive witnessed this once under the scope).And finally, if the burr is left alone and if the sharpening progression is taken far enough, eventually a wire edge will sometimes pop right off, often as an intact larger wire strip. Ive seen this several times myself when using lapping films at higher grit levels and its pretty cool.
More to follow next week…
Attachments:
You must be logged in to access attached files.
05/31/2016 at 10:45 am #34285This is a great topic. I look forward to seeing / reading about your findings. Also, those images are very nice.
3 users thanked author for this post.
05/31/2016 at 11:01 am #34287Good topic… just outta curiosity, are all the pictures the same magnification? The bottom one looks like a higher magnification. (It also kinda looks like it still has a burr that’s just folded over?)
Interesting stuff, regardless!


1 user thanked author for this post.
05/31/2016 at 7:17 pm #34298Good topic… just outta curiosity, are all the pictures the same magnification? The bottom one looks like a higher magnification. (It also kinda looks like it still has a burr that’s just folded over?) Interesting stuff, regardless!


I thought all the images were at about the same magnification and now have calibrated scale for future shots.
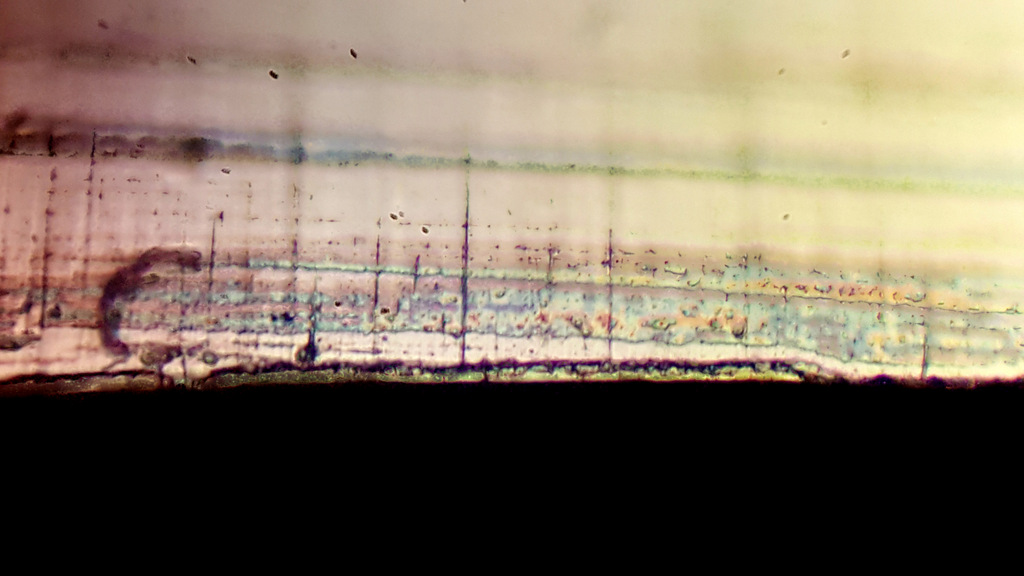
I think the final image may be zoomed in or cropped but should be in the same range. The difference is all the 600 grit lines are almost all buffed out. Also was surprised to notice faint tints of color appearing. Not a good sign.
I also was wondering if the burr had folded, cracked, or was then torn off in a manner that left it like that.
Future experiments will focus exclusively on the WEPS. I had hope to speed up the testing process and get quicker repeatable results but I fear the methods are to dissimilar. More of an apples to oranges thing but still interesting to observe as a starting point.
1 user thanked author for this post.
06/02/2016 at 7:34 am #34307The thought keeps rolling around the brain so I’ll just post it…. I’ve been imagining what differences might be visible in different steels.
What would edge leading and edge trailing and stropping etc look like in a damascus blade? Or a CPM blade?
Would the steel “sluff” off differently? Would the foil edge or wire edge form and look different? And what would <span style=”text-decoration: underline;”>that</span> mean for sharpening techniques.
Have a good day, everyone.
~~~~
For Now,Gib
Φ
"Everyday edge for the bevel headed"
"Things work out best for those who make the best out of the way things work out."
1 user thanked author for this post.
06/02/2016 at 12:12 pm #34311The wide purple shadow along the edge shown in picture number three leads me to suspect that the unusual colors are a result the of the light source and possibly diffraction, where certain surface textures match certain color wavelengths – like what happens in some feathers.
-
AuthorPosts
- You must be logged in to reply to this topic.